Table of Contents
Advertisement
Quick Links
Advertisement
Table of Contents

Related Manuals for Advantech FPM-700 Series


Summary of Contents for Advantech FPM-700 Series
- Page 1 User Manual FPM-700/700W Series 15" XGA/17" SXGA/19" SXGA Industrial Monitors with Resistive Touch, Direct HDMI, DP, and VGA Ports 15.6" Full HD Industrial Monitor with PCAP Touch, Direct HDMI, DP, and VGA Ports 液晶顯示器 申請商:研華股份有限公司 地址:台北市內湖區瑞光路 26 巷 20 弄 1 號 電話:02-27927818...
- Page 2 限用物質含有情況標示聲明書 Declaration of the Presence Condition of the Restricted Substances Marking FPM-715-R9AE, FPM-715W- 設備名稱: 液晶顯示器 型號 (型式) : P9AE, Equipment name Type designation (Type) FPM-717-R9AE, FPM-719-R9AE 限用物質及其化學符號 Restricted substances and its chemical symbols 六價鉻 多溴聯苯 多溴二苯醚 單元 Unit 汞 鎘 Hexavalent Polybrominated Polybrominated...
- Page 3 No part of this manual may be reproduced, copied, translated or transmitted in any form or by any means without the prior written permission of Advantech Co., Ltd. Information provided in this manual is intended to be accurate and reliable. How- ever, Advantech Co., Ltd.
- Page 4 FPM717R9A2704-T, FPM717R9A2705-T, FPM717R9A2706-T, FPM-719-R9AE FPM719R9A2201-T, FPM719R9A2202-T, FPM719R9A2203-T, FPM719R9A2204-T, FPM719R9A2205-T, FPM719R9A2206-T, FPM719R9A2301-T, FPM719R9A2302-T, FPM719R9A2303-T, FPM719R9A2304-T, FPM719R9A2305-T, FPM719R9A2306-T, FPM719R9A2401-T, FPM719R9A2402-T, FPM719R9A2403-T, FPM719R9A2404-T, FPM719R9A2405-T, FPM719R9A2406-T, FPM719R9A2501-T, FPM719R9A2502-T, FPM719R9A2503-T, FPM719R9A2504-T, FPM719R9A2505-T, FPM719R9A2506-T, FPM719R9A2601-T, FPM719R9A2602-T, FPM719R9A2603-T, FPM719R9A2604-T, FPM719R9A2605-T, FPM719R9A2606-T, FPM719R9A2701-T, FPM719R9A2702-T, FPM719R9A2703-T, FPM719R9A2704-T, FPM719R9A2705-T, FPM719R9A2706-T, FPM-715W-P9AE FPM715WP9A2201-T, FPM715WP9A2202-T, FPM715WP9A2203-T, FPM715WP9A2204-T, FPM715WP9A2205-T, FPM715WP9A2206-T,...
- Page 5 Because of Advantech’s high quality-control standards and rigorous testing, most of our customers never need to use our repair service. If an Advantech product is defec- tive, it will be repaired or replaced at no charge during the warranty period. For out- of-warranty repairs, you will be billed according to the cost of replacement materials, service time and freight.
- Page 6 Technical Support and Assistance Visit the Advantech web site at www.advantech.com/support where you can find the latest information about the product. Contact your distributor, sales representative, or Advantech's customer service center for technical support if you need additional assistance.
- Page 7 The sound pressure level at the operator's position according to IEC 704-1:1982 is no more than 70 dB (A). DISCLAIMER: This set of instructions is given according to IEC 704-1. Advantech disclaims all responsibility for the accuracy of any statements contained herein.
- Page 8 FPM-715xxxxxxxxxxxxxxxx, FPM-717xxxxxxxxxxxxxxxx, FPM-719xxxxxxxxxxxxxxxx, FPM-715Wxxxxxxxxxxxxxxx, If need further assistance, please contact Advantech for further informa- tion. Warning! This product may cause radio interference if the customer uses DC power. Please be prepared for this. Warning! The customer should use one of the power adapters listed on the prod- uct datasheet.
- Page 9 ÉQUIVALENT RECOMMANDÉ PAR LE FABRICANT, JETER LES BATTERIES USÉES SELON LES INSTRUCTIONS DU FABRICANT. VEUILLEZ CON- TACTER LE FABRICANT, ADVANTECH, POUR LE REMPLACER. Le personnel concerné doit savoir qu'il ne faut pas heurter la section d'angle de l'appareil afin d'éviter tout risque de blessure.
- Page 10 Remarque! Ce produit est destiné à être alimenté par une alimentation homologuée UL adaptée à une utilisation à Tma 60 degrés C min., fonctionnement en altitude jusqu'à 2000 m, dont la sortie est conforme à PS2 (ou LPS), ES1 (ou SELV) et la sortie est nominale: 24Vdc,2.5A pour les modèles FPM-715xxxxxxxxxxxxxxxx, FPM-717xxxxxxxxxxxxxxxx, FPM-719xxxxxxxxxxxxxxxx, FPM-715Wxxxxxxxxxxxxxxxx, FPM715xxxxxxxxxxxxxxxx,...
- Page 11 安全指示 1. 請仔細閱讀此安全操作說明。 2. 請妥善保存此用戶手冊供日後參考。 3. 用濕抹布清洗設備前,請確認拔除電源線。請勿使用液體或去污噴霧劑清洗設備。 4. 對於使用電源線的設備,設備周圍必須有容易接觸到的電源插座。 5. 請勿在潮濕環境中試用設備。 6. 請在安裝前確保設備放置在可靠的平面上,意外摔落可能會導致設備損壞。 7. 設備機殼的開孔適用於空氣對,從而防止設備過熱。請勿覆蓋開孔。 8. 當您連接設備到電源插座前,請確認電源插座的電壓符合要求。 9. 請將電源線佈置在人們不易絆倒的位置,請勿在電源線上覆蓋任何雜物。 10. 請注意設備上所有的警告標示。 11. 如果長時間不使用設備,請拔除與電源插座的連結,避免設備被超標的電壓波動損 壞。 12. 請勿讓任何液體流入通風口,以免引起火灾或短路。 13. 請勿自行打開設備。為了確保您的安全,請透過經認證的工程師來打開設備。 14. 如遇下列情况,請由專業人員維修: 電源線或插頭損壞; 設備內部有液體流入; 設備曾暴露在過度潮濕環境中使用; 設備無法正常工作,或您無法透過用戶手冊來正常工作; 設備摔落或損壞; 設備有明顯外觀損; 請勿將設備放置在超出建議溫度範圍的環境,即不要低於 0 ℃ (32 ℉)或高於 50 否則可能會造成設備損壞。...
- Page 12 警告使用者: 使用過度恐傷害視力 使用 30 分鐘請休息 10 分鐘 未滿 2 歲幼兒不看螢幕,2 歲以上每天看螢幕不要超過 1 小時 [ 甲類警語 ] 警告使用者:為避免電磁干擾,本產品不應安裝或使用於住宅環境。 警告! 如果客戶自行為本產品用戶直流電源可能會造成無線電干擾,在這種情 況下,客戶必須採取適當的措施 警告! 如果客戶需要使用電源適配器,請使用產品數據表中列出的電源適配 器。 如果客戶使用產品數據表中未列出的電源適配器,可能會造成無線 電干擾,在這種情況下,客戶必須採取適當的措施 警告! 請避免將 FPM-700 長時間暴露在直射陽光下。 直射陽光照射到 LCD 屏幕 上會導致 LCD 變得非常熱並對 LCD 造成物理損壞,因為這些組件的設計 不能承受高溫,從而縮短了 LCD 的使用壽命 FPM-700/700W Series User Manual...
-
Page 13: Table Of Contents
Contents Chapter General Information ......1 Introduction ....................2 Specifications .................... 2 1.2.1 General ..................2 1.2.2 Touchscreens (Optional)............... 2 LCD Specifications..................3 Connectors....................3 Interfaces ....................4 Figure 1.1 FPM-715/717/719 - I/O Port Arrangement ....4 Figure 1.2 FPM-715W - I/O Port Arrangement ......4 Dimensions .................... - Page 14 B.2.7 ERP Control................22 B.2.8 All Reset ..................24 B.2.9 Exit....................24 FPM-700/700W Series User Manual...
-
Page 15: Chapter 1 General Information
Chapter General Information Sections include: Introduction Specifications LCD Specifications Connectors Dimensions... -
Page 16: Introduction
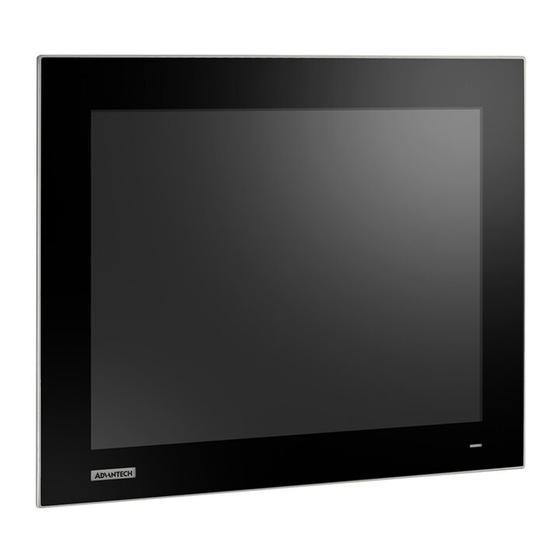
Introduction The Advantech FPM-700 series comprises 15", 17" ,19" and 15.6" industrial-grade monitors with sleek, simple lines and a druable true-flat touchscreen. The FPM-700 series features an IP66-rated front bezel. It supports wide operating temperatures (- 20 ~ 60 °C) and diverse mounting options. -
Page 17: Lcd Specifications
LCD Specifications 15” LCD 17” LCD 19” LCD 15.6” LCD Specifications (LED Backlight) (LED Backlight) (LED Backlight) (LED Backlight) Full HD TFT LED Display Type XGA TFT LCD SXGA TFT LCD SXGA TFT LCD Display Size 15” 17” 19” 15.6" Max. -
Page 18: Interfaces
Interfaces Figure 1.1 shows the I/O arrangement Figure 1.1 FPM-715/717/719 - I/O Port Arrangement Figure 1.2 FPM-715W - I/O Port Arrangement FPM-700/700W Series User Manual... -
Page 19: Dimensions
Dimensions Figure 1.3 FPM-715/717/719 Dimensions Figure 1.4 FPM-715W Dimensions FPM-700/700W Series User Manual... - Page 20 FPM-700/700W Series User Manual...
-
Page 21: Chapter 2 Mounting Methods
Chapter Mounting Methods Sections include: Panel Mounting Wall Mounting Desktop Stand Mounting VESA Mounting Power Adapter Bracket Mount- ing (Optional) -
Page 22: Mounting The Monitor / Monter Le Moniteur
FPM-700 lui permet d’être monté sur votre bureau ou ailleurs. 2.1.1 Panel Mounting / Montage Sur Panneau FPM-700 series can be mounted directly on a panel with additional mounting brack- ets (provided in the accessory box). Please refer to Figure 2.1 and follow the following steps: Secure the 10 x panel brackets around the industrial monitor. -
Page 23: Wall Mounting / Montage Mural
FPM-719 12PCS 12 clampers with M4 * 25mm screws. Diameter of screw = M4 min. Length of screw = 25.0 min. Montage sur panneau 10 pinces avec vis M4 * 25 mm. Diamètre de la vis = M4 min. Longueur de la vis = 25.0 min. 2.1.2 Wall Mounting / Montage mural If you need to install the FPM-715/717/719/715W on a wall, you can use FPM-1000T... -
Page 24: Desktop Stand Mounting / Montage Du Support De Bureau
Wall Mounting Screw to fix mounting kit Diameter of screw = M4. Length of screw = 6-10 mm Montage mural Vis pour fixer le kit de montage Diamètre de vis = M4. Longueur de vis = 6-10 mm 2.1.3 Desktop Stand Mounting / Montage du support de bureau If you have to opted for the desk mount stand, you can use the FPM-1000T mounting kit and secure the stand with 2 x M4 screws to the desk for attachment of the FPM- 715/717/719/715W mount. -
Page 25: Vesa Mounting / Montage Vesa
2.1.4 VESA Mounting / Montage VESA If you use VESA mounting the FPM-715/717/719/715W is a VESA MIS-D, 75, C compliant display equipped with a 75 x 75 mm square-hole pattern. Use M4 screws to attach the mount to the FPM-715/717/719/715W. Si le montage VESA est préférable, le FPM-715/717/719/715W est un écran con- forme à... -
Page 26: Power Adapter Bracket Mounting (Optional)
2.1.5 Power Adapter Bracket Mounting (Optional) A metal bracket is offered as an optional accessory for FPM-717/719/715W.(P/N : FPM-7000G-ADKE). This helps avoid hanging/loose power adapters. This metal bracket can be mounted on the back of the monitor in 2 x simple steps: Figure 2.5 Power Adapter Bracket Mounting Place the metal bracket on top of the power adapter and position it against the dedicated holes... - Page 27 Appendix Touchscreen...
-
Page 28: Appendix A Touchscreen
The touchscreen has drivers for Windows 7/8/10 and ADV Linux users. The FPM- 715/717/719 series need to install Penmount 6000 driver. Please go to below website to download the Penmount 6000 driver then install the driver onto your system. https://support.advantech.com/support/new_default.aspx LED Functions Table A.1: LED Function... -
Page 29: Appendix Bosd Operation Keypad
Appendix OSD Operation Keypad... -
Page 30: Osd Board Overview
OSD Board Overview The OSD keypad, including 6 x keys and a 2 x color indicators, is designed as the OSD operation interface. Note! This sheet is only for reference, different models will have different styles, but the functionality is the same. B.1.1 OSD Button Descriptions Table B.1: OSD Button Descriptions... -
Page 31: Osd Key Functions
OSD Key Functions Each selected value is stored into LCD memory after SEL signal input or time out. The stored values are not affected if the power is turned off. But the selected value is not available in case a selected mode is changed before time out or power is turned off before time out. -
Page 32: Picture
B.2.2 Picture Generate Main Menu Select using the up and down button, then press menu button for confirmation. Main Menu -- Displayed On Screen Sub-Menu – Displayed On Screen Available Key Functions Select to exit the menu ·Confirm or wait for time-out ·Enter the selected option. -
Page 33: Color Temperature Menu
Select using the up and down button, then press menu button for confirmation. Main Menu -- Displayed On Screen Sub-Menu – Displayed On Screen Available Key Functions Return to the previous Select to confirm menu Select to move up Select to move down B.2.4 Color Temperature Menu... -
Page 34: Osd Manager
Main Menu -- Displayed On Screen Sub-Menu – Displayed On Screen Available Key Functions Return to the previous Select to confirm menu Select to move up Select to move down B.2.5 OSD Manager Generate Main Menu Select using the up and down button, then press menu button for confirmation. -
Page 35: Touch Control
Sub-Menu – Displayed On Screen Available Key Functions Return to the previous Select to confirm menu Select to move up Select to move down B.2.6 Touch Control Generate Main Menu Select using the up and down button, then press menu button for confirmation. Main Menu -- Displayed On Screen ... - Page 36 Sub-Menu – Displayed On Screen Available Key Functions Return to the previous Select to confirm menu Select to move up Select to move down Table B.2: Touch Control Light Signal States Blue/Orange flashing Off/No Signal Orange flashing No Signal Orange stays on On/No Signal B.2.7...
- Page 37 Sub-Menu – Displayed On Screen If you select ERP mode off, the system will pop up the following warning which means the system will exceeding ERP power consumption requirement but it still workable. Available Key Functions Return to the previous Select to confirm menu Select to move up...
- Page 38 B.2.8 All Reset Generate Main Menu Select using the up and down button, then press menu button for confirmation. Main Menu -- Displayed On Screen Available Key Functions Return to the previous Select to confirm menu Select to move up Detect video source Select to move down B.2.9...
- Page 39 FPM-700/700W Series User Manual...
- Page 40 No part of this publication may be reproduced in any form or by any means, electronic, photocopying, recording or otherwise, without prior written permis- sion from the publisher. All brand and product names are trademarks or registered trademarks of their respective companies. © Advantech Co., Ltd. 2023...
Need help?
Do you have a question about the FPM-700 Series and is the answer not in the manual?
Questions and answers