Table of Contents
Advertisement
Quick Links
Advertisement
Table of Contents

Related Manuals for Vissani QR046


Summary of Contents for Vissani QR046
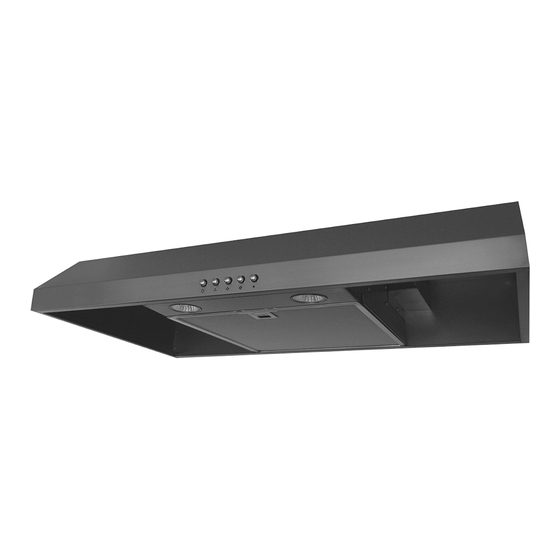
- Page 1 Under Cabinet Range Hood Model No. QR046 Owner’s Manual...
-
Page 2: Table Of Contents
Table of Contents Table of Contents . . . . . . . . . . . . . . . . . . . . . . . . . . . . 2 Maintenance Safety Information . - Page 3 Safety Information (continued) COOKING SAFETY INFORMATION To reduce the risk of fire, use only metal duct WARNING: work . Never use plastic duct work . 1 . Never leave the range hood unattended when in use . 2 . Never cook over open flames under the range hood. To reduce the risk of fire or electric shock, do WARNING: 3 .
-
Page 4: Warranty
Warranty ONE YEAR LIMITED WARRANTY A thorough inspection must be made before installation and any damage must be promptly reported . We will not be liable for failures or damage that could have been discovered or avoided by proper inspection and testing prior to installation . We warrant this product to be free from defects in materials or workmanship for one (1) year from the date of purchase . -
Page 5: Pre-Installation
Pre-Installation TOOLS/MATERIALS REQUIRED (NOT SUPPLIED) Measuring tape Level Utility knife Adjustable Pencil Tape wrench Flathead Needle nose Phillips screwdriver screwdriver pliers Hammer Electric drill Safety goggles Safety gloves HOMEDEPOT .COM Please contact 1-800-514-6729 for further assistance. -
Page 6: Package Contents
Pre-Installation (continued) PACKAGE CONTENTS Part Description Quantity Range hood Charcoal filter (located inside the hood) Damper (located on the hood) HARDWARE INCLUDED NOTE: Parts not shown to actual size. Part Description Quantity Long tapping screw - (M5 mm x 12 mm) Short tapping screw - (M4 mm x 8 mm) -
Page 7: Planning Installation
Pre-Installation (continued) PLANNING INSTALLATION Number of people required: 2 or more WARNING: Always wear safety goggles and gloves during Carefully check the range hood for damage and for missing parts installation . prior to installation . If there is any damage or if you are missing parts, do not proceed with the installation . - Page 8 Pre-Installation (continued) FOLLOW THESE GUIDELINES WHEN INSTALLING DUCT WORK: - Your venting system must vent to the outdoors either horizontally through the back wall (13) or vertically through the roof (14) (refer to Fig . 5/Fig . 6/Fig . 7) . - Use round metal duct work with a uniform diameter of 152 mm (6 in) .
- Page 9 Pre-Installation (continued) WIRING CONNECTION REQUIREMENTS DANGER: Risk of electrical shock . This range hood must Installation work and electrical wiring must be done by a qualified be properly grounded . person(s) in accordance with all applicable codes and standards, including fire-rated construction. DANGER: Turn off the power circuit breaker or the power switch on the junction box before installing this...
-
Page 10: Installation
Installation REMOVING THE ELECTRICAL KNOCK-OUT HOLE REMOVING THE VENTING HOLE - Choose the venting hole to remove for your installation WARNING: Always wear safety goggles and gloves during type . Use the top hole (3) for a top venting installation installation . - Page 11 Installation Installation (continued) INSTALLING THE CHARCOAL FILTER (SKIP THIS STEP IF YOU ARE USING EXTERIOR VENTING) NOTE: The charcoal filter should only be installed if you are not using an external venting system. - Turn over the range hood (A) and place its top on a protective surface . - Unhook the charcoal filter support (9) from the support hook (10) and pull the charcoal filter support up.
- Page 12 Installation (continued) INSTALLING THE RANGE HOOD DANGER: Turn off the power circuit breaker or the power switch on the junction box before installing this unit . Touching circuitry inside the range hood while it is energized will result in death or serious injury . DANGER: If installing this unit over a gas range, turn off the gas at the source before installing or servicing this unit .
-
Page 13: Operation
Operation NOTE: The fan and lights operate independently of each other. TURNING ON/OFF THE UNIT TURNING ON/OFF THE LIGHTS - To turn on the fan, press the appropriate speed control - Press the light switch (5) to turn on and off the lights . switch [Low Speed (2), Medium Speed (3), High Speed (4)] to select the desired level of power . -
Page 14: Replacing Filters
Maintenance REPLACING FILTERS DANGER: Turn off the power circuit breaker or the power switch on the junction box before performing maintenance . When filters need replacing, exchange with similar. Also replace Touching circuitry inside the range hood while it is energized will result in death or serious injury . -
Page 15: Care And Cleaning
Care and Cleaning RANGE HOOD Failure to maintain basic standards of care and cleaning of the range hood will increase the risk of fire. WARNING: The range hood should be cleaned (regularly internally and externally) to preserve its appearance and performance . Do Not: - Always clean in the direction of the grain (original - Do not use corrosive or abrasive detergents, steel... -
Page 16: Troubleshooting
Troubleshooting DANGER: Turn off the power circuit breaker or the power switch on the junction box before performing maintenance . Touching circuitry inside the range hood while it is energized may result in serious injury or death . Problem Solution - Check that the power supply cable and all electrical wiring are properly The range hood will not operate . -
Page 17: Specifications
757 mm (29.8 in) W High 2 x 4.5W/300 Lumen Top venting 120~60Hz 300 ± LED or 25W-Max.35W Back venting QR046 458 mm (18 in) D Medium Push Button JDR 16, GU10 twist and 1 .6A Recirculating/ 127 mm (5 in) H... -
Page 18: External Range Hood Diagram
Specifications (continued) EXTERNAL DIAGRAM OF RANGE HOOD 705 mm (27.75 in) 250 mm (9.81 in) 22 mm 28 mm (0.88 in) D (1.1 in) 38 mm 80 mm (1.5 in) (3.13 in) 193.5 mm (7.62 in) 18 mm (0.69 in) 280 mm (11 in) 50 mm 35 mm... -
Page 19: Service Parts
Service Parts If you are missing parts or if you require replacement parts, please contact our customer service team at 1-800-514-6729 (8 am – 6 pm, EST, Monday–Friday) . Identify the required part(s) and have the part number(s) ready . Part Description Code Quantity... - Page 20 Questions, problems, missing pieces? Before returning to the store, please contact Customer Service 1-800-514-6729 from 8 am - 6 pm, EST, Monday - Friday HOMEDEPOT.COM Retain this manual for future use. Made in China...
Need help?
Do you have a question about the QR046 and is the answer not in the manual?
Questions and answers