Table of Contents
Advertisement
Quick Links
Advertisement
Table of Contents

Related Manuals for DSC MAXSYS PC4020


Summary of Contents for DSC MAXSYS PC4020
- Page 1 ® PC4020 v3.5 • Instruction Manual WARNING: This manual contains information on limitations regarding product use and function and information on the limitations as to liability of the manufacturer. The entire manual should be carefully read.
- Page 2 WARNING Please Read Carefully follow. The smoke detectors may have been improperly installed or positioned. Smoke may not be able to reach the smoke de- Note Installers tectors, such as when the fire is in a chimney, walls or roofs, or This warning contains vital information.
-
Page 3: Table Of Contents
Table of Contents Introduction Section 1: General System Operation Getting to Know Your System ..........4 Arming Your System ............5 Alternate Arming Methods ..........6 Disarming Your System ............7 Alarm Memory ..............9 What to Do If An Alarm Sounds ........9 Bypassing Zones or Groups of Zones ...... - Page 4 Table of Contents Section 5: Testing and Maintenance Performing a Walk Test ............. 29 Performing a System Test ..........30 Performing a Lamp Test (PC4216) ........30 System Maintenance ............30 Section 6: Fire Safety Fire Alarm Operation ............31 Guidelines for Locating Smoke Detectors ......
-
Page 5: Introduction
Introduction About Your Security System Your DSC security equipment has been designed to give you the greatest possible flexibility and convenience. The LCD keypad will guide you through each operation with English language prompts. The keypad provides audible feedback each time a key is pressed; with unique audible sequences, it will also signal system troubles and other indications of system status. -
Page 6: Section 1: General System Operation
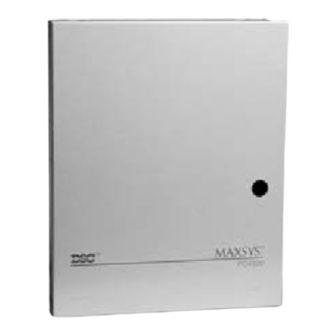
Section 1: General System Operation 1.1 Getting to Know Your System Your security system is made up of a control panel, one or more keypads and various detectors and sensors. The control panel will be mounted out of the way in a utility room or basement. The metal control cabinet contains the system’s electronics and stand-by battery. -
Page 7: Arming Your System
S e c t i o n G e n e r a l S y s t e m O p e r a t i o n Keypads Several LCD keypads will be installed throughout the protected premises, usually one at each entry/exit door. -
Page 8: Alternate Arming Methods
For Multi-Partition Access Codes When a multi-partition access code is entered, you must tell the system which partition(s) you wish to arm. The system will only offer to arm the partitions for which your code is programmed. Once you have entered your code, the display will read: (0) TO ARM <... -
Page 9: Disarming Your System
S e c t i o n G e n e r a l S y s t e m O p e r a t i o n Stay Arming This feature, if enabled, will allow you to arm the perimeter zones while leaving some interior zones inactive so that you can remain on the premises while the system is armed. - Page 10 Disarming Another Partition If you have a multi-partition access code, you can disarm other partitions before entering them. To disarm another partition, enter your access code. The keypad display will read: (0) TO ARM < > (Partition Label) R Use the arrow (< >) keys to scroll to the partition you wish to disarm. Remember that only partitions to which your access code is assigned will be displayed.
-
Page 11: Alarm Memory
S e c t i o n G e n e r a l S y s t e m O p e r a t i o n Once you find the Group you wish to bypass by pressing the < > keys, press the [✱] key to select the group. -
Page 12: Bypassing Zones Or Groups Of Zones
1.7 Bypassing Zones or Groups of Zones You can use zone bypassing or group bypassing when access is needed to part of the protected area while the system is armed. Zones which are temporarily out of service due to damaged wiring or contacts may be bypassed to allow system arming until repairs can be made. -
Page 13: Viewing Trouble Conditions
S e c t i o n G e n e r a l S y s t e m O p e r a t i o n 1.8 Viewing Trouble Conditions The alarm control panel continuously monitors a number of possible trouble conditions. -
Page 14: Section 2: Access Codes
Section 2: Access Codes Access codes are used to arm and disarm the system as well as to access system functions. There are many different codes available on the system. The Grand System Master Code will be able to perform all system functions. - Page 15 S e c t i o n A c c e s s C o d e s Program Code You will need to program a four-digit code for each user. Six-digit access codes are also available. Talk to your installer if you require six- digit access codes on your system.
-
Page 16: Modifying An Existing Code
NOTE: If a user does not want their name listed on the PC4850 display, but does want to have an access code, you can put a “!” at the ✱ beginning of the user name. To enter a “!”, press [ ], then scroll to ✱... -
Page 17: Changing User Code Options
S e c t i o n A c c e s s C o d e s Select (1) for User Name Search ✱ Press [1] or [ 3. The first letter of the access code name using the corresponding number key. - Page 18 Default Settings* Access Code User Options GM 2M SM System Master System Master System Master System Master Select this option to program a Grand System Master Code Supervisor Supervisor Supervisor Supervisor Y es Select this option to program a Supervisor code. You must also program the partition mask for this code.
-
Page 19: Deleting An Existing Code
S e c t i o n A c c e s s C o d e s The available options are: • Clear Display: Selecting this option will clear the entire code label. • Clear to End: This will clear the display from the character where the cursor was located to the end of the display. -
Page 20: Installer Programmed Codes
Supervisor Codes The supervisor code can be used to program other access codes that are only to be active on the supervisor’s partition. Users with Supervisor codes cannot program other Supervisor codes, or System Master codes. For a list of the other user options that are enabled for this code, see Table 2-1. Duress Codes If the “Duress”... -
Page 21: Section 3: System Administration
Section 3: System Administration ✱ NOTE: To enter the [ ][6] menu, you may need to enter an access code that has the “System Master” or “Supervisor” option enabled. 3.1 Turning on Quick Arm ✱ Keypad Command: [ ][6][Access or Master Code][0][0] This option will allow users to arm the system by entering [✱] [0] at any keypad, instead of entering an access code. -
Page 22: Setting The Time And Date
4. To exit the menu, press [#]. 5. Use the arrow keys (<>) to scroll to the “Auto Arm Time” display. ✱ Press [2] or [ ]. This is the time at which the partition will automatically arm itself every day. 6. -
Page 23: Activating Door Chime
S e c t i o n S y s t e m A d m i n i s t r a t i o n 4. Next, use the keypad arrow keys to scroll to the display “Set System ✱... -
Page 24: Changing Keypad Settings
3.8 Changing Keypad Settings ✱ Keypad Command: [ ][6][Master Code][3] The brightness of the keypad backlighting and the contrast of the keypad display can be adjusted. To alter the brightness and contrast from their default settings, perform the following: ✱ 1. -
Page 25: Pc-Link Enable Option
3.10 PC-LINK Enable Option Keypad Command: [Master Code][9] If you are using the DLS-3 software with your system, your computer will be connected to the system with a PC-LINK module. If the module is disconnected from your system for any reason, after it is reconnected, you must select the PC-LINK enable option. -
Page 26: Section 4: Access Control
Section 4: Access Control NOTE: This section only applies to systems that have PC4820 Access Control modules, or PC4850 Telephone Entry modules installed. Talk to your installer for information regarding the access control capabilities of your system. 4.1 About Access Card Readers (PC4820 Modules) To gain access to an area via a door with an access card reader, present your access card through the reader. -
Page 27: Programming Access Cards (Pc4820 Modules)
S e c t i o n A c c e s s C o n t r o l 4.2 Programming Access Cards (PC4820 Modules) Access card programming is a part of access code programming. An access card is assigned to a single user of the system. A user can have both an access code and an access card to provide two different means of accessing the system. - Page 28 Your installer will customize access levels 02-63 to suit your purposes. Assigning access level 00 means that the user will never have access to a given area. Assigning access level 01 means that the user will always have access to a given area. To program access level, perform the following.
-
Page 29: Searching Using Access Card Numbers (Pc4820 Modules)
S e c t i o n A c c e s s C o n t r o l 4.3 Searching Using Access Card Numbers (PC4820 Modules) In Section 2.2 “Modify an Existing Code,” two methods were outlined for searching for existing users: by access code number and by user name. -
Page 30: Adding Tenant Codes For Users (Pc4850 Modules)
4.5 Adding Tenant Codes for Users (PC4850 Modules) You can give visitors the option of entering a 1-4 digit code on the keypad to call a user. To do this, enter the 1-4 digit code for the apartment. If a user knows a visitor is coming, they can give them the tenant code as a faster way to call them. -
Page 31: Section 5: Testing And Maintenance
Section 5: Testing and Maintenance IMPORTANT NOTE: Test your system on a weekly basis and have any system trouble conditions corrected by your installer or service technician. 5.1 Performing a Walk Test ✱ Keypad Command: [ ][6][Walk Test Code] The Walk Test feature allows you to test if the detectors on a partition are in proper working order. -
Page 32: Performing A System Test
Disable Walk Test To end every walk tests—except the “AML Smoke Test”—this option must ✱ be selected. Once you have completed your test, enter [ ] [6] [Walk Test ✱ Code]. Use the arrow keys to scroll to this option and press [ ]. -
Page 33: Section 6: Fire Safety
Section 6: Fire Safety 6.1 Fire Alarm Operation The following explains the fire alarm function of this system. 1. Fire Bells Sound Upon a fire alarm, the bells or sirens will sound. They will pulse on and off in a programmed pattern. The keypad will display the following: First Fire Alarm [Zone Label] The display will indicate the first fire zone in alarm, followed by any... - Page 34 Do not locate smoke detectors at the top of peaked or gabled ceilings; the dead air space in these locations may prevent the unit from detecting smoke. Avoid areas with turbulent air flow, such as near doors, fans or windows. Rapid air movement around the detector may prevent smoke from entering the unit.
-
Page 35: Household Fire Safety Audit
6.3 Household Fire Safety Audit Most fires occur in the home. To minimize this danger, a household fire safety audit should be conducted and a fire escape plan should be developed and practised. 1. Are all electrical appliances and outlets in a safe condition? Check for frayed cords, overloaded lighting circuits, etc. - Page 36 • A good plan emphasizes quick escape. Do not investigate or attempt to fight the fire, and do not gather belongings or pets as this wastes valuable time. Once outside, do not re-enter the house. Wait for the fire department. •...
-
Page 37: Appendix A - Special Characters
Appendix A – Special Characters Below is a chart indicating the available ASCII characters and the 3-digit number required for each character. Instructions on programming ASCII characters is outlined in Section 2 “Access Codes.”... - Page 38 If the laws of such a jurisdiction warranted to the extent that they do not function upon delivery. apply to any claim by or against DSC, the limitations and In such cases, DSC can replace or credit at its option.
- Page 39 FCC COMPLIANCE STATEMENT CAUTION: Changes or modifications not expressly approved by Digital Security Controls Ltd. could void your authority to use this equipment. This equipment has been tested and found to comply with the limits for a Class B digital device, pursuant to Part 15 of the FCC Rules.
- Page 40 ©2003 Digital Security Controls Ltd. Toronto, Canada • www.dsc.com Printed in Canada 2 9 0 0 7 0 1 4 R0 0 1 AVIS : L’étiquette de l’Industrie Canada identifie le matériel NOTICE: The Industry Canada label identifies certified homologué. Cette étiquette certifie que le matériel est equipment.
Need help?
Do you have a question about the MAXSYS PC4020 and is the answer not in the manual?
Questions and answers