
Related Manuals for GAOMON PD1220


Summary of Contents for GAOMON PD1220
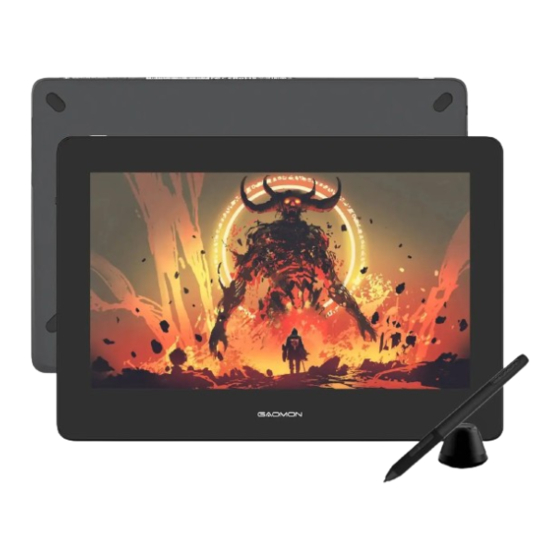
- Page 1 Pen Display PD1220 / PD1320 User Manual Windows 7 or later, macOS 10.12 or later, Android (USB3.0 DP1.2)
- Page 2 PD1220 / PD1320 Precautions 1. Please read this manual carefully before using, and keep it well for future reference. 2. Before cleaning the pen display please unplug the power cord and wipe with a soft damp cloth, do not use any kind of detergents.
-
Page 3: Table Of Contents
PD1220 / PD1320 Content 1.Product Overview ......................4 ......................1.1 Product Introduction ....................... 1.2 Product and Accessories ..........................1.3 Connection ........................1.4 Driver Installation ......................1.5 Pen Nib Replacement 2. OSD Menu ........................11 3. Function Settings ......................12 .................... -
Page 4: Product Overview
1. Product Overview 1.1 Product Introduction Thanks for buying GAOMON PD1220/PD1320 Pen Display. This is a new generation of professional battery-free pen display, which can greatly improve your work efficiency of painting and creation, and full of fun. You can freely painting and writing, depicting different lines and colors, just as the pen writes on the paper, which brings you a real shock experience. - Page 5 PD1220 / PD1320 1.2.2 Digital Pen The digital pen is battery-free and boasts 8192levels of pressure sensitivity. Upper button:Right mouse key function(default) Lower button: Eraser function(default) Pen nib: Left mouse key function 1.2.3 Accessories Spare Nibs 5V/2A Adapter Pen AP50...
- Page 6 PD1220 / PD1320 1.2.4 Power Adapter Please select the appropriate plug according to your country or region, and assemble it to the power adapter (the plug that comes with the product will be different depends on countries and regions). UK Standard...
-
Page 7: Connection
PD1220 / PD1320 1.3 Connection Scenario 1 Step 1: Connect the pen display to PC with the HDMI cable; Step 2: Connect the pen display to PC with the Type-C male plug inserted into the pen display, and the USB-A male plug inserted into the computer. (The red USB-A male plug is for power supply) - Page 8 For phone charging, charger that supports PD protocol is suggested. Type-C Type-C Type-C USB-A USB-A Note: Please make sure your Android phone supports'Dex','Desktop', or 'TNT' mode. Visit GAOMON website for compatible phone models: https://gaomon.net/Pen_Display/PD1220&PD1320.html www.gaomon.net...
-
Page 9: Driver Installation
PD1220 / PD1320 1.4 Driver Installation 1.4.1 OS Support Windows 7 or later, macOS 10.12 or later. 1.4.2 Install Driver Please download the driver from our website: www.gaomon.net/download After finishing installation, you can find the grey driver icon in the system tray area, which means the driver was installed successfully;... -
Page 10: Pen Nib Replacement
PD1220 / PD1320 1.5 Pen Nib Replacement 1. The nib will wear off after using for a long time, then you need to replace a new nib. 2. Unscrew the pen holder and take out a new nib. 3. Insert the old pen nib into the hole at the bottom of the pen holder and tilt the pen to pull out the nib. -
Page 11: Osd Menu
PD1220 / PD1320 2.0 OSD Menu OSD Settings 1. When the headphone jack is not connected, the thumbwheel switch can be used to wheel up/ down to increase/decrease the display brightness; 2. When the headphone jack is connected, the thumbwheel switch can be used to wheel up/down the volume;... -
Page 12: Function Settings
PD1220 / PD1320 3.0 Function Settings 3.1 Device Connection Prompt 1. No Device Detected: The computer does not recognize the tablet. 2. Device connected: The computer has recognized the pen display. www.gaomon.net... -
Page 13: Working Area Setting
PD1220 / PD1320 3.2 Working Area Setting 3.2.1 Using Multiple Monitors The location of cursor depends on the screen mode you chose when connected the pen display to an external display (such as laptop or all-in-one PC), for instance: In Duplicate Mode, the pen display and the external display will show the same picture, and the cursor will be displayed on each monitor simultaneously. - Page 14 PD1220 / PD1320 3.2.2 Working Area Setting Define the tablet area that will be mapped to the screen area. 1. Full Area: The entire active area of the tablet. This is the default setting. 2. Custom Area: Drag the corners of the foreground graphic to select the screen area.
- Page 15 PD1220 / PD1320 3.2.3 Rotate Working Area By changing the direction of the pen display to provide more choices for users. Four directions are available. www.gaomon.net...
-
Page 16: Pen Buttons Function Setting
PD1220 / PD1320 3.3 Pen Buttons Function Setting Customized Setting: Selec t the function to be achieved on the pop-up dialog box, and it will be saved automatically. www.gaomon.net... - Page 17 PD1220 / PD1320 www.gaomon.net...
-
Page 18: Pressure Sensitivity Setting
PD1220 / PD1320 3.4 Pressure Sensitivity Setting The pressure sensitivity will be changed by dragging the points of the pressure curve. Drag the points to the upper left for higher sensitivity. Drag the points to the lower right for lower sensitivity. -
Page 19: Pen Pressure Testing
PD1220 / PD1320 3.5 Pen Pressure Testing You can gradually apply pressure to the stylus on the screen to test the pressure level. www.gaomon.net... -
Page 20: Calibration
PD1220 / PD1320 3.6 Calibration Screen Calibration: Click the red cross on the screen to complete calibration. Factory Reset: Click ‘Factory Reset’ to reset the pen display. Cancel Calibration: Click ‘Cancel Calibration’ or press ‘ESC’ to stop the calibration. www.gaomon.net... -
Page 21: Enable The Windows Ink Feature
PD1220 / PD1320 3.7 Enable the Windows Ink Feature The function is for software that supports Windows Ink, such as Microsoft Office, Windows Journal, Adobe Photoshop CC, SketchBook 6 and so on. www.gaomon.net... -
Page 22: Mouse Mode (Only For Specific Models)
PD1220 / PD1320 3.8 Mouse Mode (Only for specific models) As shown below, check the checkbox in front of the mouse mode to open the mouse mode. Under mouse mode, when you move the pen, the cursor moves following the relative coordinate principle, similar to moving the cursor with the mouse. -
Page 23: Customize Press Keys And Pressure Curve
PD1220 / PD1320 3.9 Customize Press Keys and Pressure Curve You can customize the function of press keys and pressure curve for different program. Select a program, customize the function of press keys, and adjust the pressure curve, the settings will be automatically saved. -
Page 24: Data Export And Import
PD1220 / PD1320 3.10 Data Export and Import The driver supports exporting and importing your custom configuration data of the product, which is convenient for you to use different software and avoid the trouble of repeated settings. www.gaomon.net... -
Page 25: Specifications
PD1220 / PD1320 4. Specifications 4.1 PD1220 Specifications Model PD1220 Panel Size 11.6inch Resolution 1920 x 1080(16:9) LCD Type Active Area 256.3 x 144.2mm Contrast Ratio 1000:1 Screen Brightness 220cd/m Response Time 25ms 89° /89° (H)/89° /89° (V) Viewing Angle (Typ,)(CR >... -
Page 26: Pd1320 Specifications
PD1220 / PD1320 4.2 PD1320 Specifications Model PD1320 Panel Size 13.3inch Resolution 1920 x 1080(16:9) LCD Type Active Area 293.8x 165.2mm Contrast Ratio 1000:1 Screen Brightness 220cd/m Response Time 25ms 89° /89° (H)/89° /89° (V) Viewing Angle (Typ,)(CR > 10) -
Page 27: Trouble Shooting
PD1220 / PD1320 5.0 Trouble Shooting 5.1 Breakdowns Related to Display Malfunctions Suggested Solutions *Make sure the power is on *Make sure the power cable is connected Power indicator doesn't work *Check the power socket *Try a new power cable 1. -
Page 28: Breakdowns Related To Functions
PD1220 / PD1320 5.2 Breakdowns Related to Functions Malfunctions Suggested Solutions 1. If the driver is damaged or not properly installed, please uninstall it first and then install it again (please close all graphics software when installing). Digital pen doesn’t work and no pressure in the graphics software 2. -
Page 29: Contact Us For After-Sales Service
PD1220 / PD1320 6.0 Contact Us for After-sales Service GAOMON TECHNOLOGY CORPORATION www.facebook.com/Gaomonpentablet twitter.com/Gaomonpentablet service@gaomon.net https://www.gaomon.net www.gaomon.net... - Page 30 Pen Display PD1220 / PD1320 User Manual Windows 7 or later, macOS 10.12 or later, Android (USB3.0 DP1.2)
- Page 31 PD1220 / PD1320 Précautions 1. Lisez attentivement ce manuel avant utilisation et conserver le pour toute référence ultérieure. 2. Avant de nettoyer la tablette graphique avec écran, veuillez débrancher le cordon d'alimentation et l'essuyer avec un chiffon doux et humide, n'utilisez aucun type de détergent.
- Page 32 3.9 Personnalisation des touches de pression et de la courbe de pression ................136 3.10 Exportation et importation de données ......................137 ....................137 4.1 Spécifications du PD1220 ....................138 4.2 Spécifications du PD1320 5. Dépannage .........................139 ..................139 5.2. Problèmes relatifs aux fonctions ..................140 6.
-
Page 33: Introduction Au Produit
1. Aperçu du produit 1.1 Introduction du produit Merci d'avoir acheté la tablette graphique avec écran GAOMON PD1220/PD1320. C'est une nouvelle génération de tablettes graphiques professionnelles sans pile, qui peut grandement améliorer l'efficacité de votre travail de peinture et de création, et vous apporter du plaisir. Vous pouvez peindre et écrire librement, en représentant différentes lignes et couleurs, tout comme le stylo écrit sur le... - Page 34 PD1220 / PD1320 1.2.2 Stylo numérique Le stylo numérique fonctionne sans pile et offre 8192 niveaux de sensibilité à la pression. Bouton supérieur : Fonction de la touche droite de la souris (par défaut) Bouton inférieur : Fonction de gomme (par défaut) Pointe de stylo : Fonction de la touche gauche de la souris 1.2.3 Accessoires...
- Page 35 PD1220 / PD1320 1.2.4 Adaptateur Veuillez sélectionner la prise qui convient en fonction de votre pays ou de votre région, et la connecter à l'adaptateur (la prise fournie avec le produit sera différente en fonction des pays et les régions).
-
Page 36: Connexion
PD1220 / PD1320 Connexion Méthode 1 Étape 1: Connectez la tablette graphique avec écran au PC avec le câble HDMI; Étape 2: Connectez la tablette graphique avec écran au PC avec la prise mâle de Type-C insérée dans la tablette et la prise USB-A mâle insérée dans l'ordinateur, et au cas où il n'y aurait pas de réponse de la tablette ou un écran clignotant , l'autre prise mâle USB-A gauche... - Page 37 à court de batterie en quelques minutes. Type-C Type-C Type-C USB-A USB-A Remarque Veuillez-vous assurer que votre téléphone Android supporte le mode "Dex", "Desktop" ou "TNT". Visitez le site web GAOMON pour obtenir la liste des modèles de téléphones compatibles : https://gaomon.net/Pen_Display/PD1220&PD1320.html www.gaomon.net...
-
Page 38: Installation Du Pilote
PD1220 / PD1320 1.4 Installation du pilote 1.4.1 Support OS Windows 7 ou plus récent, macOS 10.12 ou plus récent. 1.4.2 Installation du pilote Veuillez télécharger le pilote sur notre site web: www.gaomon.net/download Lorsque l'installation sera terminée, vous trouverez l'icône grise du pilote dans la zone d'état... - Page 39 PD1220 / PD1320 1.5 Remplacement de la pointe 1. La pointe s'use après été utilisée longtemps, il faut alors la remplacer par une nouvelle. 2. Dévissez le porte-stylo et sortez une nouvelle pointe. 3. Insérez l'ancienne pointe dans le trou situé au bas du stylo et inclinez le stylo pour retirer la pointe.
-
Page 40: Menu Osd
PD1220 / PD1320 Menu OSD Paramètres OSD 1. Lorsque la prise casque n'est pas connectée, l'interrupteur à molette peut être utilisé pour monter/descendre pour augmenter/diminuer la luminosité de l’écran; 2. Lorsque la prise casque est connectée, l'interrupteur à molette peut être utilisé pour monter/ baisser le volume;... -
Page 41: Invite De Connexion De L'appareil
PD1220 / PD1320 3.0 Réglages des fonctions 3.1 Invite de connexion de l'appareil 1. Aucun appareil detécté : l'ordinateur ne reconnaît pas la tablette graphique. 2. Dispositif connecté : L'ordinateur a reconnu la tablette graphique. www.gaomon.net... - Page 42 PD1220 / PD1320 3.2 Réglage de la zone de travail 3.2.1 Utilisation de Plusieurs Moniteurs La position du curseur dépend du mode d'écran que vous avez défini lorsque vous avez connecté la tablette graphique à un écran externe (comme à un ordinateur portable ou un PC), par exemple : En mode miroir, la tablette graphique et l'écran externe afficheront la même image, et le curseur...
- Page 43 PD1220 / PD1320 3.2.2 Réglage de la Zone de Travail Définir la zone de tablette qui sera considérée comme étant la zone d'écran. 1. Zone Pleine: toute la zone active de la tablette. C'est le réglage par défaut. 2. Zone personnalisée : Faire glisser les coins au premier plan pour sélectionner la zone de l'écran.
- Page 44 PD1220 / PD1320 3.2.3 Rotation de la zone de travail En changeant la direction de la tablette graphique pour offrir plus de choix aux utilisateurs. Quatre directions sont disponibles. www.gaomon.net...
-
Page 45: Réglage De La Fonction Des Boutons Du Stylo
PD1220 / PD1320 3.3 Réglage de la fonction des boutons du stylo www.gaomon.net... - Page 46 PD1220 / PD1320 www.gaomon.net...
-
Page 47: Réglage De La Sensibilité À La Pression
PD1220 / PD1320 3.4 Réglage de la sensibilité à la pression La sensibilité à la pression sera modifiée en tirant les points de la courbe de pression. Tirez les points vers le haut à gauche pour une sensibilité plus élevée. -
Page 48: Test De Pression Du Stylo
PD1220 / PD1320 3.5 Test de pression du stylo Vous pouvez appliquer une pression progressive sur le stylo à l'écran afin de tester le niveau de pression. www.gaomon.net... -
Page 49: Calibration
PD1220 / PD1320 3.6 Calibration Calibration de l'écran : Cliquez sur la croix rouge à l'écran pour terminer la calibration. Réinitialisation des paramètres usine : Cliquez sur "Réinitialisation usine" pour réinitialiser la tablette graphique avec écran. Annulez la calibration : Cliquez sur "Annuler la calibration" ou appuyez sur "ESC" pour arrêter la calibration. - Page 50 PD1220 / PD1320 3.7 Activer la fonction Windows Ink Cette fonction est pour les logiciels qui prennent en charge Encre Windows, tels que Microsoft Office, Windows Journal, Adobe Photoshop CC, SketchBook 6, etc. www.gaomon.net...
-
Page 51: Mode Souris(Uniquement Pour Certains Modèles)
PD1220 / PD1320 3.8 Mode souris(uniquement pour certains modèles) Comme indiqué ci-dessous, cochez la case en face du mode souris pour activer le mode souris. En mode souris, lorsque vous déplacez le stylet, le curseur se déplace sen suivant les coordonnées relatives, de la même façon que vous déplacez le curseur en utilisant la souris. - Page 52 PD1220 / PD1320 3.9 Personnalisation des touches et de la courbe de pression Vous pouvez personnaliser la fonction des touches et la courbe de pression pour différents programmes. Sélectionnez un programme, personnalisez la fonction des touches et ajustez la courbe de pression, les réglages seront automatiquement enregistrés.
-
Page 53: Exportation Et Importation De Données
PD1220 / PD1320 3.10 Exportation et importation de données Le pilote prend en charge l’exportation et l’importation de vos données de configurations personnalisées du produit, ce qui vous permet d’utiliser différents logiciels et d’éviter ainsi les problèmes liés aux réglages répétés. - Page 54 PD1220 / PD1320 4.1 PD1220 Specifications Model PD1220 Taille du paneau 11,6 pouces Résolution 1920 x 1080(16:9) Type LCD Zone active Ratio de contraste 1.000: 1 Écran Luminosité 220cd/m2 Temps de réponse 25ms 89°/89°(H) /89°/89°(V) Angle de vue (Typ.) (CR > 10)
- Page 55 PD1220 / PD1320 4.2 PD1320 Specifications Model PD1320 Taille du paneau 13,3 pouces Résolution 1920 x 1080(16:9) Type LCD Zone active 293,8x 165,2mm Ratio de contraste 1.000: 1 Écran Luminosité 220cd/m2 Temps de réponse 25ms 89°/89°(H) /89°/89°(V) Angle de vue (Typ.) (CR >...
-
Page 56: Dépannage
PD1220 / PD1320 5.0 Dépannage 5.1 Problèmes relatifs à l'affichage Mauvais Solutions suggérées fonctionnements *Assurez-vous que l’alimentation est branchée L'indicateur de puissance ne fonctionne pas *Essayez un nouveau câble d’alimentation 1. Assurez-vous que la tablette graphique est allumée. 2. Assurez-vous que le câble vidéo est correctement branché. -
Page 57: Problèmes Relatifs Aux Fonctions
PD1220 / PD1320 5.2 Problèmes relatifs aux fonctions Mauvais Solutions suggérées fonctionnements 1. Si le pilote est endommagé ou mal installé, veuillez le désinstaller d’abord et le réinstaller ensuite (veuillez fermer tous les logiciels graphiques lors de l’installation). Le stylo numérique ne fonctionne pas et il n'y a pas de pression 2. -
Page 58: Contactez Notre Service Après-Vente
PD1220 / PD1320 6.0 Contactez notre service après-vente GAOMON TECHNOLOGY CORPORATION www.facebook.com/Gaomonpentablet twitter.com/Gaomonpentablet service@gaomon.net https://www.gaomon.net www.gaomon.net... - Page 59 Pen Display PD1220 / PD1320 User Manual Windows 7 or later, macOS 10.12 or later, Android (USB3.0 DP1.2)
- Page 60 PD1220 / PD1320 Voorzorgsmaatregelen 1. Lees deze handleiding voor gebruik zorgvuldig door en bewaar ze goed voor toekomstig gebruik. 2. Trek de stekker uit het stopcontact voordat u het pen display reinigt en veeg het af met een zachte, vochtige doek, gebruik geen reinigingsmiddelen.
- Page 61 PD1220 / PD1320 Inhoudsopgave 1. Productoverzicht ......................200 1.1 Product Inleiding ........................200 1.2 Product en Accessoires.......................200 1.3 Verbinding...........................203 1.4 Driver Installatie ........................205 1.5 Penpunt Vervanging......................206 2. OSD-menu ......................... 207 3. Functie-instellingen ....................208 ....................208 3.1 Apparaatverbinding Prompt ......................209 3.2 Werkgebied Instelling ..................212...
- Page 62 1. Productoverzicht 1.1 Product Inleiding Bedankt voor het aankopen van de GAOMON PD1220/PD1320 pen display. Dit is een nieuwe generatie professionele batterijloze pen displays, die uw werkefficiëntie van schilderen en creatie aanzienlijk kan verbeteren, en vol plezier. Je kunt vrij schilderen en schrijven, waarbij u verschillende lijnen en kleuren weergeeft, net zoals de pen op het papier schrijft, wat u een echte schokervaring bezorgt.
- Page 63 PD1220 / PD1320 1.2.2 Digitale pen De digitale pen is batterijloos en heeft een drukgevoeligheid van 8192 niveaus. Bovenste knop:functie rechter muistoets (standaard) Onderste knop: Eraser functie (standaard) Penpunt: Functie linker muistoets 1.2.3 Accessiores Pen AP50 Reserve punten (in 5 V/2 A adapter...
- Page 64 PD1220 / PD1320 1.2.4 Voedingsadapter Selecteer de juiste stekker voor uw land of regio en monteer deze op de voedingsadapter (de stekker die bij het product wordt geleverd, verschilt per land en regio). VK-standaard EU-standaard VS-standaard AU-standaard Monteren Demonteren www.gaomon.net...
- Page 65 PD1220 / PD1320 Verbinding Methode 1 Stap 1: sluit de pendisplay aan op de pc met de HDMI-kabel; Stap 2: Sluit de pendisplay aan op de pc met de mannelijke uitgang van de Type-C in de pendisplay en de mannelijke USB-A-uitgang in de computer, en voor het geval er geen reactie op de pendisplay komt of een knipperend scherm optreedt , moet de andere mannelijke USB-A-uitgang ook in de pc of de voedingsadapter worden gestoken.
- Page 66 Zonder extra voeding is de aangesloten telefoon binnen enkele minuten leeg. Type-C Type-C Type-C USB-A USB-A Opmerking: Zorg ervoor dat uw Android-telefoon de modus "Dex", "Desktop" of "TNT" ondersteunt. Bezoek de GAOMON-website voor compatibele telefoonmodellen: https://gaomon.net/Pen_Display/PD1220&PD1320.html www.gaomon.net...
- Page 67 PD1220 / PD1320 1.4 Driver Installatie 1.4.1 OS-ondersteuning Windows 7 of hoger,macOS 10.12 of hoge. 1.4.2 Driver installeren Download de driver van onze website: www.gaomon.net/download Nadat de installatie is voltooid, kunt u het grijze pictogram van het stuurprogramma in het systeemvak vinden, wat betekent dat het stuurprogramma met succes is geïnstalleerd;...
- Page 68 PD1220 / PD1320 1.5 Penpunt Vervanging 1. De punt zal na langdurig gebruik verslijten, dan moet u hem door een nieuwe punt vervangen. 2. Schroef de penhouder los en neem er een nieuwe punt uit. 3. Steek de oude penpunt in het gat aan de onderkant van de penhouder en kantel de pen om de penpunt eruit te trekken.
- Page 69 PD1220 / PD1320 OSD-menu OSD-instellingen 1. Als de hoofdtelefoonaansluiting niet is aangesloten, kan de duimwielschakelaar worden gebruikt om omhoog/omlaag te draaien om de helderheid van het display te verhogen/verlagen; 2. Wanneer de hoofdtelefoonaansluiting is aangesloten, kan de duimwielschakelaar worden gebruikt om het volume hoger/lager te zetten;...
- Page 70 PD1220 / PD1320 3.0 Functie-instellings 3.1 Apparaatverbinding Prompt 1. Geen apparaat gevonden: De computer herkent de tablet niet. 2. Apparaat verbonden: De computer heeft het pen display herkent. www.gaomon.net...
- Page 71 PD1220 / PD1320 3.2 Werkgebied Instelling 3.2.1 Instelling Werkgebied De locatie van de cursor is afhankelijk van de schermmodus die u hebt gekozen toen u het pen display op een extern display (zoals een laptop of all-in-one pc) hebt verbonden, bijvoorbeeld: In de modus Dupliceren geven het pen display en het externe display dezelfde afbeelding weer en wordt de cursor tegelijkertijd op elke monitor weergegeven.
- Page 72 PD1220 / PD1320 3.2.2 Instelling Werkgebied Definieer het tabletgebied dat aan het schermgebied wordt toegewezen. 1. Volledig gebied: het gehele actieve gebied van de tablet. Dit is de standaardinstelling. 2. Aangepast Gebied: Sleep de hoeken van de voorgrondafbeelding om het schermgeb ied te selecteren.
- Page 73 PD1220 / PD1320 3.2.3 Werkgebied draaien Door de richting van het pen display te veranderen om gebruikers meer keuzes te bieden. Er zijn vier richtingen beschikbaar. www.gaomon.net...
- Page 74 PD1220 / PD1320 3.3 Pen Knoppen Functie-instelling Aangepaste instelling Selecteer de functie die moet worden uitgevoerd in het pop-upvenster, dan wordt deze automatisch opgeslagen. www.gaomon.net...
- Page 75 PD1220 / PD1320 www.gaomon.net...
- Page 76 PD1220 / PD1320 3.4 Drukgevoeligheid Instelling The pressure sensitivity will be changed by dragging the points of the pressure curve. Drag the points to the upper left for higher sensitivity. Drag the points to the lower right for lower sensitivity.
- Page 77 PD1220 / PD1320 3.5 Pen Druk Testen U kunt geleidelijk druk uitoefenen op de stylus op het scherm om de drukniveau te testen. www.gaomon.net...
- Page 78 PD1220 / PD1320 3.6 Kalibratie Schermkalibratie: Klik op het rode kruis op het scherm om de kalibratie te voltooien. Resetten naar fabrieksinstellingen: Klik op "Resetten naar fabrieksinstellingen" om het pen display te resetten. Kalibratie annuleren: Klik op "Kalibratie annuleren" of druk op "ESC" om de kalibratie te stoppen.
- Page 79 PD1220 / PD1320 3.7 de Windows Ink-functie inschakelen De functie is voor software die Windows Ink ondersteunt, zoals Microsoft Office, Windows Journal, Adobe Photoshop CC, SketchBook 6 enzovoort. www.gaomon.net...
- Page 80 PD1220 / PD1320 Zoals hieronder weergegeven, vink het selectievakje voor de muismodus aan om de muismodus te openen. In de muismodus, als u de pen beweegt, beweegt de cursor volgens het relatieve coördinatenprincipe, vergelijkbaar met het verplaatsen van de cursor met de muis.
- Page 81 PD1220 / PD1320 3.9 Druktoetsen en drukcurve aanpassen U kunt de functie van druktoetsen en drukcurve voor verschillende programma's aanpassen. Selecteer een programma, pas de functie van druktoetsen en de drukcurve aan, de instellingen worden automatisch opgeslagen. www.gaomon.net...
- Page 82 PD1220 / PD1320 3.10 Gegevens Exporteren en Importeren De driver ondersteunt het exporteren en importeren van uw aangepaste configuratiegegevens van het product, wat handig is om andere software te gebruiken en het probleem van herhaalde instellingen te vermijden. www.gaomon.net...
- Page 83 PD1220 / PD1320 4.1 PD1220 Specificaties Model PD1220 Paneelgrootte 11,6 inch Resolutie 1.920 x 1.080 (16:9) LCD-type Actief gebied 256,3 x 144,2mm Contrast ratio 1.000:1 Scherm Helderheid 220 cd/m2 Reactietijd 25 msec 89°/89°(H)/89°/89°(V) Kijkhoek (Typ.)(CR > 10) Gamma 86% Ntsc Kleur display 16.7M...
- Page 84 PD1220 / PD1320 4.2 PD1320 Specificaties Model PD1320 Paneelgrootte 13,3inch Resolutie 1.920 x 1.080 (16:9) LCD-type Actief gebied 293,8x 165,2 mm Contrast ratio 1.000:1 Scherm Helderheid 220 cd/m2 Reactietijd 25 msec 89°/89°(H)/89°/89°(V) Kijkhoek (Typ.)(CR > 10) Gamma 86% Ntsc Kleur display 16.7M...
- Page 85 PD1220 / PD1320 5.0 Probleemoplossing 5.1 Storingen gerelateerd aan het display Defecten Voorgestelde oplossing *Zorg ervoor dat de voeding is ingeschakeld *Zorg ervoor dat de voedingskabel is verbonden Stroomindicator werkt niet *SControleer het stopcontact *Probeer een nieuwe voedingskabel 1. Zorg ervoor dat het pen display is ingeschakeld.
- Page 86 PD1220 / PD1320 5.2 Storingen gerelateerd aan de functies Defecten Voorgestelde oplossing 1. Als de driver beschadigd of niet juist is geïnstalleerd, verwijder hem dan eerst en De digitale pen werkt niet en installeren). 2. Probeer het met een nieuwe penpunt software 3.
- Page 87 PD1220 / PD1320 6.0 Neem contact met ons op voor After-sales Service GAOMON TECHNOLOGY CORPORATION www.facebook.com/Gaomonpentablet twitter.com/Gaomonpentablet service@gaomon.net https://www.gaomon.net www.gaomon.net...
Need help?
Do you have a question about the PD1220 and is the answer not in the manual?
Questions and answers
I can't seem to make my pen work at all, I've tried to follow all of the above things as well as advice from reddit. I can get the PD1220 screen to connect but my pen won't interact with the tablet at all.
If the digital pen is not working with the GAOMON PD1220 tablet, try these steps:
1. Reinstall the Driver – Uninstall the current driver, restart your computer, and install the driver again. Ensure all graphics software is closed during installation.
2. Replace the Pen Nib – Try using a new pen nib.
3. Restart the PC – Restart your computer to refresh the connection.
4. Try a Different USB Port – Connect the tablet to another USB port.
5. Check the Side Button – Ensure the pen nib is not touching the tablet surface and is within 10mm when pressing the side button.
6. Calibrate the Pen – If there is a deviation between the nib and the cursor, perform a calibration.
If the issue persists, refer to the GAOMON support website or contact their support team.
This answer is automatically generated