
Related Manuals for GAOMON PD1610


Summary of Contents for GAOMON PD1610
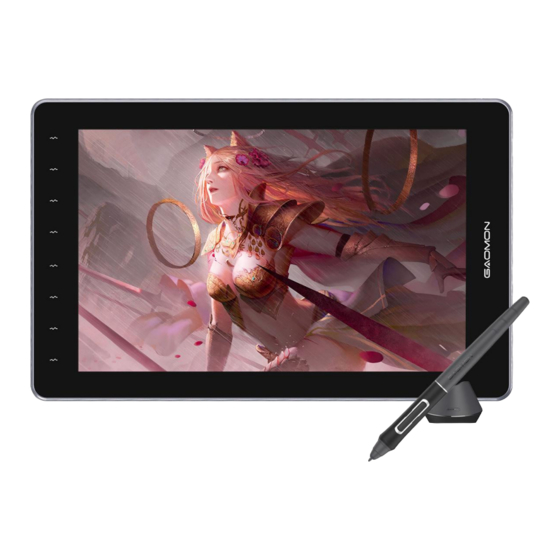
- Page 1 Graphics Pen Display PD1610 Windows 7 or later, macOS 10.12 or later, Android(USB3.0 DP1.2)
- Page 2 PD1610 Precautions 1. Please read this manual carefully before using, and keep it well for future reference. 2. Before cleaning the pen display please unplug the power cord and wipe with a soft damp cloth, do not use any kind of detergents.
-
Page 3: Table Of Contents
PD1610 Content Product Overview........................4 1.1 Product Introduction........................... 4 1.2 Product and Accessories........................4 1.3 Connection............................6 1.4 Driver Installation..........................8 1.5 Pen Nib Replacement......................... 9 OSD Settings..........................10 Function Settings........................11 3.1 Device Connection Prompt......................11 3.2 Working Area Setting........................12 3.3 Pen Buttons Function Setting...................... -
Page 4: Product Overview
1. Product Overview 1.1 Product Introduction Thanks for buying GAOMON PD1610 Pen Display. This is a new generation of professional battery- free pen display, which can greatly improve your work efficiency of painting and creation, and full of fun. You can freely painting and writing, depicting different lines and colors, just as the pen writes on the paper, which brings you a real shock experience. - Page 5 PD1610 1.2.2 Digital Pen The digital pen is battery-free and boasts 8192levels of pressure sensitivity. Upper button:Right mouse key function(default) Lower button: Eraser function(default) Pen nib: Left mouse key function 1.2.3 Accessories www.gaomon.net...
-
Page 6: Connection
PD1610 1.3 Connection Method 1: Connection with PC that has HDMI port Step 1: Connect the pen display to PC with the HDMI cable; Step 2: Connect the pen display to PC with the Type-C male plug inserted into the pen display, the black USB-A male plug inserted into the computer, and the red male plug inserted into the adapter. - Page 7 FIRSTLY. Use the full functional Type-C cable to connect the phone in LASTLY. The order is very important. Otherwise the power indicator light will flash slowly and the monitor cannot display normally. Note: Please make sure your Android phone supports'Dex','Desktop', or 'TNT' mode. Visit GAOMON website for compatible phone models: https://gaomon.net/Pen_Display/PD1610.html www.gaomon.net...
-
Page 8: Driver Installation
PD1610 1.4 Driver Installation 1.4.1 OS Support Windows 7 or later, macOS 10.12 or later, Android(USB3.0 DP1.2) 1.4.2 Install Driver Please download the driver from our website: www.gaomon.net/download After finishing installation, you can find the grey driver icon in the system tray area, which means the driver was installed successfully;... -
Page 9: Pen Nib Replacement
PD1610 1.5 Pen Nib Replacement 1. The nib will wear off after using for a long time, then you need to replace a new nib. 2. Unscrew the pen holder and take out a new nib. 3. Insert the old pen nib into the hole at the bottom of the pen holder and tilt the pen to pull out the nib. -
Page 10: Osd Settings
PD1610 2. OSD Settings Enter OSD menu: Press ① for 3Sec to start OSD menu. Press ① for 3Sec to exit OSD menu. www.gaomon.net... -
Page 11: Function Settings
PD1610 3. Function Settings 3.1 Device Connection Prompt 1. No Device Detected: The computer does not recognize the tablet. 2. Device connected: The computer has recognized the pen display. www.gaomon.net... -
Page 12: Working Area Setting
PD1610 3.2 Working Area Setting 3.2.1 Using Multiple Monitors The location of cursor depends on the screen mode you chose when connected the pen display to an external display (such as laptop or all-in-one PC), for instance: In Duplicate Mode, the pen display and the external display will show the same picture, and the cursor will be displayed on each monitor simultaneously. - Page 13 PD1610 3.2.2 Working Area Setting Define the tablet area that will be mapped to the screen area. 1. Full Area: The entire active area of the tablet. This is the default setting. 2. Custom Area: Drag the corners of the foreground graphic to select the screen area.
- Page 14 PD1610 3.2.3 Rotate Working Area By changing the direction of the pen display to provide more choices for users. Four directions are available. www.gaomon.net...
-
Page 15: Pen Buttons Function Setting
PD1610 3.3 Pen Buttons Function Setting Customized Setting Selec t the function to be achieved on the pop-up dialog box, and it will be saved automatically. www.gaomon.net... -
Page 16: Pressure Sensitivity Setting
PD1610 3.4 Pressure Sensitivity Setting The pressure sensitivity will be changed by dragging the points of the pressure curve. Drag the points to the upper left for higher sensitivity. Drag the points to the lower right for lower sensitivity. www.gaomon.net... -
Page 17: Pen Pressure Testing
PD1610 3.5 Pen Pressure Testing You can gradually apply pressure to the stylus on the screen to test the pressure level. www.gaomon.net... -
Page 18: Calibration
PD1610 3.6 Calibration Screen Calibration: Click the red cross on the screen to complete calibration. Factory Reset: Click ‘Factory Reset’ to reset the pendisplay. Cancel Calibration: Click ‘Cancel Calibration’ or press ‘ESC’ to stop the calibration. www.gaomon.net... -
Page 19: Enable The Windows Ink Feature
PD1610 3.7 Enable the Windows Ink Feature The function is for software that supports Windows Ink, such as Microsoft Office, Windows Journal, Adobe Photoshop CC, SketchBook 6 and so on. www.gaomon.net... -
Page 20: Customize Express Keys And Pressure Curve
PD1610 3.8 Customize Press Keys and Pressure Curve You can customize the function of press keys and pressure curve for different program. Select a program, customize the function of press keys, and adjust the pressure curve, the settings will be automatically saved. -
Page 21: Data Export And Import
PD1610 3.9 Data Export and Import The driver supports exporting and importing your custom configuration data of the product, which is convenient for you to use different software and avoid the trouble of repeated settings. www.gaomon.net... -
Page 22: Specifications
PD1610 4. Specifications Model PD1610 Panel Size 16inch Resolution 2560 x 1600 LCD Type Active Area 344.8 × 215.5mm Contrast Ratio 1000:1 Brightness 220cd/m Screen Response Time 26ms 89° /89° (H)/89° /89° (V) Viewing Angle (Typ,)(CR > 10) Gamut 88% Ntsc... -
Page 23: Trouble Shooting
PD1610 5. Trouble Shooting 5.1 Breakdowns Related to Display Malfunctions Suggested Solutions *Make sure the power is on *Make sure the power cable is connected Power indicator doesn't work *Check the power socket *Try a new power cable 1. Make sure the pen display is power on. -
Page 24: Breakdowns Related To Functions
Deviation between the nib and the Try calibration. (About calibration, please refer to 3.6) cursor Note: For more information, please contact us with our email: service@gaomon.net find answer here https://blog.gaomon.net/faq-list/ 6. Contact Us for After-sales Service GAOMON TECHNOLOGY CORPORATION www.facebook.com/Gaomonpentablet twitter.com/Gaomonpentablet service@gaomon.net https://www.gaomon.net...
Need help?
Do you have a question about the PD1610 and is the answer not in the manual?
Questions and answers