Table of Contents
Advertisement
Available languages
Available languages
Advertisement
Chapters
Table of Contents

Subscribe to Our Youtube Channel
Related Manuals for GAOMON PD2200


Summary of Contents for GAOMON PD2200
- Page 1 Graphics Pen Display PD2200 User Manual Windows 7 or later, macOS 10.12 or later...
-
Page 2: Precautions
PD2200 Precautions 1. Please read this manual carefully before using, and keep it well for future reference. 2. Before cleaning the pen display please unplug the power cord and wipe with a soft damp cloth, do not use any kind of detergents. -
Page 3: Table Of Contents
PD2200 Content Precautions ........................2 1.Product Overview ......................4 ......................1.1 Product Introduction ....................... 1.2 Product and Accessories ........................ 1.3 Display Connection ........................1.4 Driver Installation ......................1.5 Pen Nib Replacement 2. OSD Setting ........................9 3. Function Settings ......................10 .................... -
Page 4: Product Overview
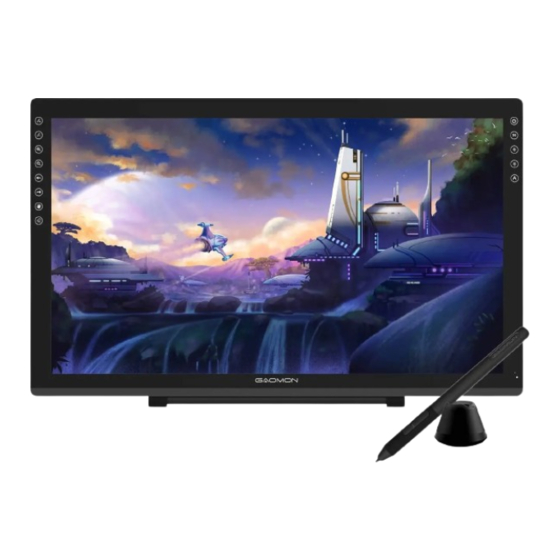
1. Product Overview 1.1 Product Introduction Thanks for choosing GAOMON PD2200 Pen Display. This is a new generation of 21.5'' large size professional drawing display, which can greatly improve your work efficiency of painting and creation, and full of fun. You can freely painting and writing, depicting different lines and colors, just as the pen writes on the paper, which brings you a real shock experience. - Page 5 PD2200 1.2.2 Digital Pen The digital pen is battery-free and boasts 8192levels of pressure sensitivity. Upper button:Right mouse key function(default) Lower button: Eraser function(default) Pen nib: Left mouse key function 1.2.3 Adjustable Stand We designed this ergonomic adjustable stand specially for your pen display. You can adjust the angle of the display according to your usage habit, and it makes you feel more comfortable when painting and creating.
-
Page 6: Display Connection
PD2200 1.2.4 Accessories Quick Start Guide Pen AP32 Pen Holder Replacement Nibs Quick Start Guide (Inside the pen holder) USB Cable HDMI Cable Power Cable Power Adapter 1.3 Display Connection 1. As shown on the below, connect the pen display to your computer with attached power adapter, HDMI cable and USB Cable. -
Page 7: Driver Installation
PD2200 1.4 Driver Installation 1.4.1 OS Support Windows 7 or later, macOS 10.12 or later. 1.4.2 Install Driver Please download the driver from our website: www.gaomon.net/download After finishing installation, you can find the grey driver icon in the system tray area, which means the driver was installed successfully;... -
Page 8: Pen Nib Replacement
PD2200 1.5 Pen Nib Replacement 1. The nib will wear off after using for a long time, then you need to replace a new nib. 2. Unscrew the pen holder and take out a new nib. 3. Insert the old pen nib into the hole at the bottom of the pen holder and tilt the pen to pull out the nib. -
Page 9: Osd Setting
PD2200 2. OSD Setting Turn off/on the display: Long press the power key for 3 seconds. Unlock OSD keys: Long press any of ①②③④ for 6 seconds. OSD keys automatically get locked: the OSD panel will be hidden without movement for more than 15 seconds after exiting the menu. -
Page 10: Function Settings
PD2200 3. Function Settings 3.1 Device Connection Prompt 1. No Device Detected: The computer does not recognize the tablet. 2. Device connected: The computer has recognized the pen display. www.gaomon.net... -
Page 11: Working Area Setting
PD2200 3.2 Working Area Setting 3.2.1 Using Multiple Monitors The location of cursor depends on the screen mode you chose when connected the pen display to an external display (such as laptop or all-in-one PC), for instance: In Duplicate Mode, the pen display and the external display will show the same picture, and the cursor will be displayed on each monitor simultaneously. - Page 12 PD2200 3.2.2 Working Area Setting Define the tablet area that will be mapped to the screen area. 1. Full Area: the entire active area of the tablet. This is the default setting. 2. Custom Area: Drag the corners of the foreground graphic to select the screen area.
- Page 13 PD2200 3.2.3 Rotate Working Area By changing the direction of the pen display to provide more choices for users. Four directions are available. 3.2.4 Shortcut Keys Function Setting Default Setting:Place the cursor on the shortcut key or click the express key to find the default values.
- Page 14 PD2200 www.gaomon.net...
-
Page 15: Pen Buttons Function Setting
PD2200 3.3 Pen Buttons Function Setting Customized Setting: Select the function to be achieved on the pop-up dialog box, and it will be saved automatically. www.gaomon.net... -
Page 16: Pressure Sensitivity Setting
PD2200 3.4 Pressure Sensitivity Setting The pressure sensitivity will be changed by dragging the points of the pressure curve. Drag the points to the upper left for higher sensitivity. Drag the points to the lower right for lower sensitivity. www.gaomon.net... -
Page 17: Pen Pressure Testing
PD2200 3.5 Pen Pressure Testing You can gradually apply pressure to the stylus on the screen to test the pressure level. www.gaomon.net... -
Page 18: Calibration
PD2200 3.6 Calibration Screen Calibration: Click the red cross on the screen to complete calibration. Factory Reset: Click ‘Factory Reset’ to reset the pen display. Cancel Calibration: Click ‘Cancel Calibration’ or press ‘ESC’ to stop the calibration. www.gaomon.net... -
Page 19: Enable The Windows Ink Feature
PD2200 3.7 Enable the Windows Ink Feature The function is for software that supports Windows Ink, such as Microsoft Office, Windows Journal, Adobe Photoshop CC, SketchBook 6 and so on. www.gaomon.net... -
Page 20: Mouse Mode
PD2200 3.8 Mouse Mode As shown below, check the checkbox in front of the mouse mode to open the mouse mode. Under mouse mode, when you move the pen, the cursor moves following the relative coordinate principle, similar to moving the cursor with the mouse. This means you can click icons or select options at the edge of the screen without moving the pen to the edge of the working area. -
Page 21: Customize Express Keys And Pressure Curve
PD2200 3.9 Customize Express Keys and Pressure Curve You can customize the function of express keys and pressure curve for different program. Select a program, customize the function of express keys, and adjust the pressure curve, the settings will be automatically saved. -
Page 22: Data Export And Import
PD2200 3.10 Data Export and Import The driver supports exporting and importing your custom configuration data of the product, which is convenient for you to use different software and avoid the trouble of repeated settings. www.gaomon.net... -
Page 23: Specifications
PD2200 4. Specifications Model PD2200 Panel Size 21.5inch Resolution 1920 x 1080(16:9) LCD Type Active Area 476.64 x 268.11mm Contrast Ratio 1000:1 Screen Brightness 220cd/m Response Time 14ms 89°/89°(H)/89°/89°(V) Viewing Angle (Typ.)(CR > 10) Gamut 92%(NTSC) Touch Type Battery-free Electromagnetic Resonance... -
Page 24: Trouble Shooting
Mac OS: System Preference---Displays--- Arrangement--- Check "Mirror Displays" 3. If you decide to use in Extended mode. Make sure to choose pen display as Work Area in GAOMON Driver. It is usually ''Display 2''. Images are blurred Please set the display resolution with 1920 x 1080. -
Page 25: Possible Breakdowns Related To Functions
10 mm There is a deviation between the Try calibration tip and the cursor GAOMON driver indicates ''device connected'', but the pen doesn’t respond in Mac OS 10.14 or above versions. Find answer here: https://www.gaomon.net/question/macos_mojave_catalina_solution.html... - Page 26 Graphics Pen Display PD2200 User Manual Windows 7 or later, macOS 10.12 or later...
- Page 27 PD2200 Précautions 1. Lisez attentivement ce manuel avant utilisation et le conservez pour toute référence ultérieure. 2. Avant de nettoyer la tablette graphique avec écran, veuillez débrancher le cordon d'alimentation et l'essuyer avec un chiffon doux et humide, n'utilisez aucun type de détergent.
- Page 28 PD2200 Contenu ........................98 Précautions 1. Aperçu du produit ..................... 100 ..................... 1.1 Introduction au produit ....................1.2 Produits et accessoires ....................1.3 Connexions d'Affichage ......................1.4 Installation du pilote ................. 1.5 Remplacement de la pointe du stylo 2. Réglages OSD ......................105 3.
-
Page 29: Aperçu Du Produit
1. Aperçu du produit 1.1 Introduction du produit Merci d'avoir choisi la tablette graphique avec écran GAOMON PD2200. Il s'agit d'une nouvelle génération d'affichage de dessin professionnel de grande taille de 21,5 '', ce qui peut grandement améliorer l'efficacité de votre travail de peinture et de création, et pleine de plaisir. Vous pouvez librement peindre et écrire, représentant différentes lignes et couleurs, tout comme les écritures de stylo sur le... - Page 30 PD2200 1.2.2 Stylo numérique Le stylo numérique fonctionne sans pile et offre 8192 niveaux de sensibilité à la pression. Bouton supérieur : Fonction de la touche droite de la souris (par défaut) Bouton inférieur : Fonction de gomme (par défaut)
-
Page 31: Connexions D'affichage
PD2200 1.2.4 Accessoires Quick Start Guide Pointes de Remplacement Support pour stylet Stylo AP32 Guide de (à l'intérieur du démarrage support pour stylet) rapide Câble USB Câble HDMI Câble d'Alimentation Adaptateur Secteur 1.3 Connexions d'Affichage 1. Comme indiqué ci-dessous, connectez la tablette graphique avec écran à votre ordinateur avec l'adaptateur secteur, le câble HDMI et le câble USB connectés. -
Page 32: Installation Du Pilote
PD2200 1.4 Installation du pilote 1.4.1 Support OS Windows 7 ou plus récent et macOS 10.12 ou plus récent. 1.4.2 Installation du pilote Veuillez télécharger le pilote sur notre site web: www.gaomon.net/download Lorsque l'installation sera terminée, vous trouverez l'icône grise du pilote dans la zone d'état... -
Page 33: Remplacement De La Pointe Du Stylo
PD2200 1.5 Remplacement de la pointe 1. La pointe s'use après été utilisée longtemps, il faut alors la remplacer par une nouvelle. 2. Dévissez le porte-stylo et sortez une nouvelle pointe. 3. Insérez l'ancienne pointe dans le trou situé au bas du stylo et inclinez le stylo pour retirer la pointe. -
Page 34: Réglages Osd
PD2200 2. Réglages OSD Éteindre / allumer l’écran Appuyez longuement sur la touche marche / arrêt pendant 3 secondes. Déverrouiller les clés OSD : Appuyez longuement sur l'un des pendant 6 secondes. Les touches OSD se verrouillent automatiquement : le panneau OSD sera masqué sans mouvement pendant plus de 15 secondes après avoir quitté... -
Page 35: Réglages Des Fonctions
PD2200 3. Réglages des fonctions 3.1 Invite de connexion de l'appareil 1. Aucun appareil détecte : l'ordinateur ne reconnaît pas la tablette. 2. Dispositif connecté : L'ordinateur a reconnu la tablette graphique. www.gaomon.net... -
Page 36: Réglage De La Zone De Travail
PD2200 3.2 Réglage de la zone de travail 3.2.1 Utilisation de Plusieurs Moniteurs La position du curseur dépend du mode d'écran que vous avez défini lorsque vous avez connecté la tablette graphique avec écran à un écran externe (comme à un ordinateur portable ou un PC), par exemple : En mode miroir, la tablette graphique avec écran et l'écran externe afficheront la même image, et le... - Page 37 PD2200 3.2.2 Réglage de la Zone de Travail Définir la zone de tablette qui sera considérée comme étant la zone d'écran. 1. Zone Pleine: toute la zone active de la tablette. C'est le réglage par défaut. 2. Zone personnalisée : Faire glisser les coins au premier plan pour sélectionner la zone de l'écran.
- Page 38 PD2200 3.2.3 Rotation de la zone de travail En changeant la direction de la tablette graphique pour offrir plus de choix aux utilisateurs. Quatre directions sont disponibles. Réglage des Fonctions des Touches de Raccourcis 3.2.4 Paramètre par défaut: Placez le curseur sur la touche de raccourci ou cliquez sur la touche sensitive pour définir les valeurs par défaut.
- Page 39 PD2200 www.gaomon.net...
-
Page 40: Réglage De La Fonction Des Boutons Du Stylo
PD2200 3.3 Réglage de la fonction des boutons du stylo Paramètre personnalisé : Sélectionnez la fonction à appliquer en utilisant la boîte de dialogue contextuelle, et elle sera sauvegardée automatiquement. www.gaomon.net... -
Page 41: Réglage De La Sensibilité À La Pression
PD2200 3.4 Réglage de la sensibilité à la pression La sensibilité à la pression sera modifiée en tirant les points de la courbe de pression. Tirez les points vers le haut à gauche pour une sensibilité plus élevée. Tirez les points vers le bas à droite pour une sensibilité plus faible. -
Page 42: Test De Pression Du Stylo
PD2200 3.5 Test de pression du stylo Vous pouvez appliquer une pression progressive sur le stylo à l'écran afin de tester le niveau de pression. www.gaomon.net... -
Page 43: Calibration
PD2200 3.6 Calibration Calibration de l'écran : Cliquez sur la croix rouge à l'écran pour terminer la calibration. Réinitialisation des paramètres usine : Cliquez sur "Réinitialisation usine" pour réinitialiser la tablette graphique avec écran. Annulez la calibration : Cliquez sur "Annuler la calibration" ou appuyez sur "ESC" pour arrêter la calibration. -
Page 44: Activer De La Fonction Windows Ink
PD2200 3.7 Activer la fonction Windows Ink Cette fonction est pour les logiciels qui prennent en charge Windows Ink, tels que Microsoft Office, Windows Journal, Adobe Photoshop CC, SketchBook 6, etc. www.gaomon.net... -
Page 45: Mode Souris
PD2200 3.8 Mode souris Comme indiqué ci-dessous, cochez la case en face du mode souris pour activer le mode souris. En mode souris, lorsque vous déplacez le stylet, le curseur se déplace sen suivant les coordonnées relatives, de la même façon que vous déplacez le curseur en utilisant la souris. -
Page 46: Personnalisation Des Touches De Pression Et De La Courbe De Pression
PD2200 3.9 Personnalisation des touches et de la courbe de pression Vous pouvez personnaliser la fonction des touches et la courbe de pression pour différents programmes. Sélectionnez un programme, personnalisez la fonction des touches et ajustez la courbe de pression, les réglages seront automatiquement enregistrés. -
Page 47: Exportation Et Importation De Données
PD2200 3.10 Exportation et importation de données Le pilote prend en charge l’exportation et l’importation de vos données de configurations personnalisées du produit, ce qui vous permet d’utiliser différents logiciels et d’éviter ainsi les problèmes liés aux réglages répétés. www.gaomon.net... - Page 48 PD2200 Modèle PD2200 Taille du panneau 21.5 pouces Résolution 1920 x 1080(16:9) Type LCD Zone active 476.64 x 268.11mm Ratio de contraste 1.000: 1 Écran Luminosité 220cd/m2 Temps de réponse 14ms 89°/89°(H) /89°/89°(V) Angle de vue (Typ.) (CR > 10)
-
Page 49: Dépannage
3. Si vous décidez d'utiliser le mode étendu. Assurez-vous de choisir la tablette à stylo numérique comme zone de travail dans le pilote GAOMON. Il s'agit généralement de «Display 2». Manque de couleurs Comme la température de couleur locale est différente, une aberration chromatique... -
Page 50: Pannes Possibles Liées Aux Fonctions
Il y a un décalage entre la pointe Essayez de calibrer et le curseur Le pilote GAOMON indique « dispositif connecté », mais le stylo ne répond pas sous Mac OS 10.14 ou versions supérieures. Trouvez la réponse ici : https://www.gaomon.net/question/macos_mojave_catalina_solution.html... - Page 51 Graphics Pen Display PD2200 User Manual Windows 7 or later, macOS 10.12 or later...
- Page 52 PD2200 Voorzorgsmaatregelen 1. Lees deze handleiding voor gebruik zorgvuldig door en bewaar ze goed voor toekomstig gebruik. 2. Trek de stekker uit het stopcontact voordat u het pen display reinigt en veeg het af met een zachte, vochtige doek, gebruik geen reinigingsmiddelen.
- Page 53 PD2200 Inhoudsopgave ....................170 Voorzorgsmaatregelen 1.Productoverzicht ....................... 172 ........................ 1.1 Product Inleiding ....................1.2 Product en Accessoires ....................... 1.3 Het scherm aansluiten ......................... 1.4 Driver Installatie ......................1.5 Penpunt Vervanging 2. OSD-Instelling ......................177 3. Functie-instellingen ....................178 ....................3.1 Apparaatverbinding Prompt ......................
- Page 54 1. Productoverzicht 1.1 Product Inleiding Bedankt voor het kiezen van GAOMON PD2200 Penweergave. Dit is een nieuwe generatie van 21,5'' groot formaat professionele tekenweergave, die uw werkefficiëntie van schilderen en creëren aanzienlijk kan verbeteren, met heel veel plezier. U kunt vrij schilderen en schrijven, waarbij u verschillende lijnen en kleuren weergeeft, net zoals de pen op het papier schrijft, wat u een echte schokervaring bezorgt.
- Page 55 PD2200 1.2.2 Digitale pen De digitale pen is batterijloos en heeft een drukgevoeligheid van 8192 niveaus. Bovenste knop:functie rechter muistoets (standaard) Onderste knop: Eraser functie (standaard) Penpunt: Functie linker muistoets 1.2.3 Verstelbare standaard We hebben deze ergonomische verstelbare standaard speciaal ontworpen voor uw penweergave, u kunt de hoek van de weergave aanpassen aan uw gebruiksgewoonte, zodat u zich comfortabeler voelt tijdens het schilderen en creëren.
- Page 56 PD2200 1.2.4 Accessiores Quick Start Guide Reserve punten Snelstartgids Pen AP32 Penhouder (inde penhouder) USB-kabel HDMI-kabel Voedingskabel Voedingsadapter 1.3 Het scherm aansluiten 1. Sluit, zoals hieronder weergegeven, de penweergave aan op uw computer met de bijbehorende voedingsadapter, HDMI-kabel en USB-kabel.
- Page 57 PD2200 1.4 Driver Installatie 1.4.1 OS-ondersteuning Windows 7 of hoger,macOS 10.12 of hoge. 1.4.2 Driver installeren Download de driver van onze website: www.gaomon.net/download Nadat de installatie is voltooid, kunt u het grijze pictogram van het stuurprogramma in het systeemvak vinden, wat betekent dat het stuurprogramma met succes is geïnstalleerd; wanneer...
- Page 58 PD2200 1.5 Penpunt Vervanging 1. De punt zal na langdurig gebruik verslijten, dan moet u hem door een nieuwe punt vervangen. 2. Schroef de penhouder los en neem er een nieuwe punt uit. 3. Steek de oude penpunt in het gat aan de onderkant van de penhouder en kantel de pen om de penpunt eruit te trekken.
- Page 59 PD2200 2. OSD-Instelling De weergave inschakelen/uitschakelen: Houd de aan/-uittoets 3 seconden lang ingedrukt. OSD-toetsen ontgrendelen: OSD-toetsen worden automatisch vergrendeld: Het MENU handmatig verlaten: Het MENU automatisch verlaten: Het OSD-menu openen: www.gaomon.net...
- Page 60 PD2200 3. Functie-instellings 3.1 Apparaatverbinding Prompt 1. Geen apparaat gevonden: De computer herkent de tablet niet. 2. Apparaat verbonden: De computer heeft het pen display herkent. www.gaomon.net...
- Page 61 PD2200 3.2 Werkgebied Instelling 3.2.1 Instelling Werkgebied De locatie van de cursor is afhankelijk van de schermmodus die u hebt gekozen toen u het pen display op een extern display (zoals een laptop of all-in-one pc) hebt verbonden, bijvoorbeeld: In de modus Dupliceren geven het pen display en het externe display dezelfde afbeelding weer en wordt de cursor tegelijkertijd op elke monitor weergegeven.
- Page 62 PD2200 3.2.2 Instelling Werkgebied Definieer het tabletgebied dat aan het schermgebied wordt toegewezen. 1. Volledig gebied: het gehele actieve gebied van de tablet. Dit is de standaardinstelling. 2. Aangepast Gebied: Sleep de hoeken van de voorgrondafbeelding om het schermgeb ied te selecteren.
- Page 63 PD2200 3.2.3 Werkgebied draaien Door de richting van het pen display te veranderen om gebruikers meer keuzes te bieden. Er zijn vier richtingen beschikbaar. Snelkoppelingen Toetsen Functie-instelling 3.2.4 Standaardinstelling: Plaats de cursor op de sneltoets of klik op de druktoets om de standaardwaarden te zoeken.
- Page 64 PD2200 www.gaomon.net...
- Page 65 PD2200 3.3 Pen Knoppen Functie-instelling Aangepaste instelling: Selecteer de functie die moet worden uitgevoerd in het pop-upvenster, dan wordt deze automatisch opgeslagen. www.gaomon.net...
- Page 66 PD2200 3.4 Drukgevoeligheid Instelling The pressure sensitivity will be changed by dragging the points of the pressure curve. Drag the points to the upper left for higher sensitivity. Drag the points to the lower right for lower sensitivity. www.gaomon.net...
- Page 67 PD2200 3.5 Pen Druk Testen U kunt geleidelijk druk uitoefenen op de stylus op het scherm om de drukniveau te testen. www.gaomon.net...
- Page 68 PD2200 3.6 Kalibratie Schermkalibratie: Klik op het rode kruis op het scherm om de kalibratie te voltooien. Resetten naar fabrieksinstellingen: Klik op "Resetten naar fabrieksinstellingen" om het pen display te resetten. Kalibratie annuleren: Klik op "Kalibratie annuleren" of druk op "ESC" om de kalibratie te stoppen.
- Page 69 PD2200 3.7 de Windows Ink-functie inschakelen De functie is voor software die Windows Ink ondersteunt, zoals Microsoft Office, Windows Journal, Adobe Photoshop CC, SketchBook 6 enzovoort. www.gaomon.net...
- Page 70 PD2200 3.8 Muismodus Zoals hieronder weergegeven, vink het selectievakje voor de muismodus aan om de muismodus te openen. In de muismodus, als u de pen beweegt, beweegt de cursor volgens het relatieve coördinatenprincipe, vergelijkbaar met het verplaatsen van de cursor met de muis.
- Page 71 PD2200 3.9 Druktoetsen en drukcurve aanpassen U kunt de functie van druktoetsen en drukcurve voor verschillende programma's aanpassen. Selecteer een programma, pas de functie van druktoetsen en de drukcurve aan, de instellingen worden automatisch opgeslagen. www.gaomon.net...
- Page 72 PD2200 3.10 Gegevens Exporteren en Importeren De driver ondersteunt het exporteren en importeren van uw aangepaste configuratiegegevens van het product, wat handig is om andere software te gebruiken en het probleem van herhaalde instellingen te vermijden. www.gaomon.net...
- Page 73 PD2200 Model PD2200 Paneelgrootte 21,5 inch Resolutie 1.920 x 1.080 (16:9) LCD-type Actief gebied 476.64 x 268,11mm Contrast ratio 1.000:1 Scherm Helderheid 220 cd/m2 Reactietijd 14 msec 89°/89°(H)/89°/89°(V) Kijkhoek (Typ.)(CR > 10) Gamma 92%(NTSC) Touch-technologie Batterijloze elektromagnetische resonantie Touch-resolutie 5080LPI...
- Page 74 Weergaven” 3. Als u besluit om de uitgebreide modus te gebruiken, zorg ervoor dat u de pen weergave kiest als werkgebied in de GAOMON Driver. Dit is meestal “Weergave 2”. Afbeeldingen zijn wazig Zet de schermresolutie op 1920 x 1080.
- Page 75 10 mm bedraagt. Er is een afwijking tussen de punt Probeer kalibratie. en de cursor GAOMON driver geeft aan ''apparaat aangesloten'', maar de pen regeert niet in Mac OS 10.14 of hogere versies. VInd hier het antwoord: https://www.gaomon.net/question/macos_mojave_catalina_solution.html Opmerking: Neem voor meer informatie contact met ons op via onze e-mail: service@gaomon.net...
Need help?
Do you have a question about the PD2200 and is the answer not in the manual?
Questions and answers