Table of Contents
Advertisement
Quick Links
Installation & Operation Manual
9-11 EER Vertical Wall-Mount Air Conditioners
AVPA 12-20-24-30-36-42-48-60-72
HVEA 24-30-36-42-49-60
AVHA 12-20-24-30-36-42-48-60
HVESA 36-42-49-60
This manual may include information for options and features which may not be
included on the unit being installed. Refer to the unit data label or Model Identification
to determine which features and options this unit is equipped with.
INSTALLER: Affix the instructions on the inside of the building adjacent to the thermostat.
END USER: Retain this manual for future reference.
A Division of the AIRXCEL
P.O. Box 400 • Cordele, Georgia 31010 • 156 Seedling Drive • Cordele, Georgia 31015
E-mail: marvairsales@airxcel.com • Internet: www.Marvair.com
The most current version of this manual can be found at www.Marvair.com.
MODELS:
AVHSA72
IMPORTANT
Manufactured By:
(229) 273-3636 • Fax (229) 273-5154
Air Conditioner Product Manual
Vertical Wall-Mount Air Conditioners
with Front Control Box Panel
Commercial Group
®
Marvair ComPac Installation & Operation Manual 08/2018 Rev.19
Part #01655
Advertisement
Table of Contents
Troubleshooting

Related Manuals for Airxcel Marvair ComPac I


Summary of Contents for Airxcel Marvair ComPac I
- Page 1 INSTALLER: Affix the instructions on the inside of the building adjacent to the thermostat. END USER: Retain this manual for future reference. Manufactured By: A Division of the AIRXCEL Commercial Group ® P.O. Box 400 • Cordele, Georgia 31010 • 156 Seedling Drive • Cordele, Georgia 31015 (229) 273-3636 •...
- Page 2 Used to point out helpful suggestions that will result in improved installation, reliability or IMPORTANT operation. AS PART OF THE MARVAIR CONTINUOUS IMPROVEMENT PROGRAM, SPECIFICATIONS ARE SUBJECT TO CHANGE WITHOUT NOTICE. © 08/2018 Marvair, Division of Airxcel, Inc. Marvair ComPac Installation & Operation Manual 08/2018 Rev.19...
-
Page 3: Table Of Contents
WARNING • If the information in these instructions are not followed exactly, a fire may result causing property damage, personal injury or loss of life. • Read all instructions carefully prior to beginning the installation. Do not begin installation if you do not understand any of the instructions. •... - Page 4 Table of Contents Chapter 5 Maintenance Scheduled Maintenance .........................40 Chapter 6 Warranty Airxcel Commercial Group Limited Product Warranty .................41 Parts List and Exploded Views ........................42 Appendix A Installation Instructions for Field Installed Electric Heaters ................43 Illustrations Figure 1a. Typical Electrical Schematic - Model AVPA & AVHA ..............12 Figure 1b.
-
Page 5: Chapter 1 Compac Description & Specifications
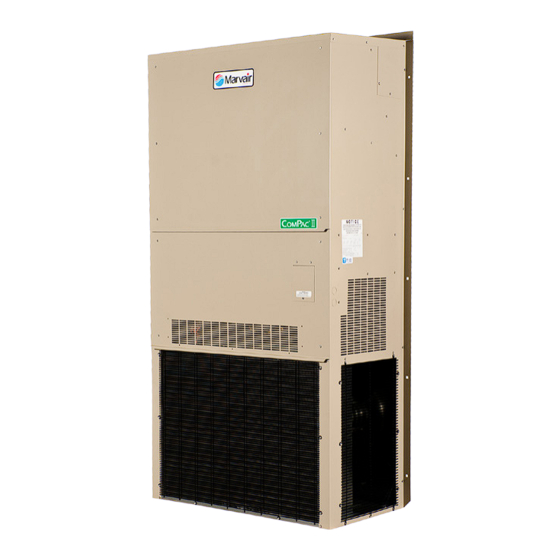
Chapter 1 Description & Specifications General Description The Marvair ComPac is a series of vertical wall-mounted air conditioning systems that provide heating, ® cooling, and ventilation for electronic equipment shelters, process control centers, and other applications with high internal heat gains. The series includes multiple sizes and nominal cooling capacities from 11,000 to 72,000 BTUH. -
Page 6: Air Flow, Weights And Filter Sizes
Air Flow, Weights and Filter Sizes Complete electrical and performance specifications and dimensional drawings are in the Marvair ComPac Product Data Sheets. MODEL 0.10 0.15 0.20 0.25 0.30 0.40 0.50 AVPA/AVHA12 AVPA24/AVHA20/24 AVPA/AVHA30 1100 1050 1000 AVPA/AVHA36 1310 1265 1220 1185 1150 1060... -
Page 7: General Operation
General Operation Refrigerant Cycle (Cooling Mode) Marvair ComPac air conditioners use R-410A refrigerant in a conventional vapor-compression refrig- eration cycle to transfer heat from air in an enclosed space to the outside. A double blower assembly blows indoor air across the evaporator. Cold liquid refrigerant passing through the evaporator is boiled into gas by heat removed from the air. - Page 8 Delay on Break If the compressor is de-energized due to a loss of a cooling “Y” call or the first fault, the unit re-start will be delayed 3 minutes from the time the contactor is de-energized. (Note: There is no delay on break if the lockout condition is reset.) Delay on Make On initial power up only, the unit will wait 0.03 to 10 minutes from the cooling “Y”...
-
Page 9: Optional Controls And Packages
LEDs Post Purge Wheel Delay on Make (Compressor Time Delay) Wheel Optional Controls & Packages Hard Start Kit Used on single phase equipment to give the compressor higher starting torque under low voltage condi- tions. Generally not recommended on units with scroll compressors. Extreme Duty Package (not available on AVPA12) The Extreme Duty Package allows selected Marvair ComPac air conditioners to operate in extremely... - Page 10 Hot Gas Bypass (Non-Economizer Models Only) Not available on the AVPA12/24 Used in specialty applications; i.e., Magnetic Resonance Imaging (MRI) buildings, to prevent magnetic voltage disturbance caused by compressor cycling. Two hot gas bypass option packages are available to allow operation to 20°F (-7°C) or minus 20°F (-29°C). Please refer to Hot Gas Bypass Application Bulletin for details.
-
Page 11: Electrical Operation
Thermal Expansion Valve Available on all ComPac air conditioners. Improves performance in hot ambient temperatures. ® High Filtration (Not Available on the AVPA12) Selected units are built with larger blowers/motors for use with higher efficiency filters with MERV ratings of 11, 13 and 14 when tested to ASHRAE 52.2. Units with economizers have a pre-filter on the outside air. -
Page 12: Figure 1A. Typical Electrical Schematic - Model Avpa & Avha
Figure 1a. Typical Electrical Schematic - ComPac (Non-Economizer), Model AVPA/AVHA ® Marvair ComPac Installation & Operation Manual 08/2018 Rev.19... -
Page 13: Figure 1B. Typical Electrical Schematic - Model Avpa & Avha
Figure 1b. Typical Electrical Schematic - ComPac (Economizer), Model AVPA/AVHA ® Marvair ComPac Installation & Operation Manual 08/2018 Rev.19... -
Page 14: Figure 1C. Typical Electrical Schematic - Model Hvea
Figure 1c. Typical Electrical Schematic - ComPac (Non-Economizer), Model HVEA ® Marvair ComPac Installation & Operation Manual 08/2018 Rev.19... -
Page 15: Figure 1D. Typical Electrical Schematic - Model Hvea
Figure 1d. Typical Electrical Schematic - ComPac (Economizer), Model HVEA ® Marvair ComPac Installation & Operation Manual 08/2018 Rev.19... -
Page 16: Figure 1E. Typical Electrical Schematic - Model Hvesa (Alternate Construction)
Figure 1e. Typical Electrical Schematic - ComPac (Economizer), Model HVESA (Alternate Construction) ® Marvair ComPac Installation & Operation Manual 08/2018 Rev.19... -
Page 17: Figure 1F. Typical Electrical Schematic - Model Hvesa (Alternate Construction)
Figure 1f. Typical Electrical Schematic - ComPac (Economizer), Model HVESA (Alternate Construction) ® Marvair ComPac Installation & Operation Manual 08/2018 Rev.19... -
Page 18: Figure 1G. Typical Electrical Schematic - Model Avhsa (Alternate Construction)
Figure 1g. Typical Electrical Schematic - ComPac (Economizer), Model AVHSA (Alternate Construction) ® Marvair ComPac Installation & Operation Manual 08/2018 Rev.19... -
Page 19: Economizer Components
Economizer Components (Economizer Equipped ComPac Models Only) Damper Actuator: The damper actuator is a 24V motor that modulates the position of the damper blade. It is capable of driving a full 90 degrees within 90 seconds. The assembly has a spring return to close the damper during power outage. -
Page 20: Figure 2. Dry Bulb Sensor
Economizer changeover control – Dry Bulb Sensor The dry bulb sensor only responds to the dry bulb temperature of the outside air and ignores the humidity. The sensor has eight set points. The factory setting is 58°F (14.5°C). These set points can be changed by moving the dip switches on the top of the dry bulb sensor. -
Page 21: Figure 3. Enthalpy Sensor Temperature Control Points
If the potentiometer is enabled, the next step is to select how much outside air should be brought into the building. The potentiometer is adjustable from 0% to 100%. Setting the potentiometer to MIN means that the damper will close completely and NO outside air will be brought into the building. Setting the potentiometer to MAX means that the damper stays in the full OPEN position at all times. -
Page 22: Figure 5. Economizer Control Board
1. W1 Economizer Sensor Selector 4. W3 Sensor Brand Selector 7. Minimum Position Potentiometer Jumper Pins 1 & 2 for enthalpy sensor Jumper Pins 1 & 2 for Honeywell sensor 0% to 100%. Factory setting is 50%. Jumper Pins 2 & 3 for dry bulb sensor Jumper Pins 2 &... -
Page 23: Chapter 2 Installation
Chapter 2 Installation WARNING Failure to observe and follow Warnings and Cautions and these Instructions could result in death, bodily injury or property damage. Read this manual and follow its instructions and adhere to all Cautions and Warnings in the manual and on the unit. -
Page 24: Table 4 Minimum Clearances
Protection Association Standards 90A and 90B before designing and installing duct work. The duct system must be engineered to insure sufficient air flow through the unit to prevent over-heating of the heater element. This includes proper supply duct sizing, sufficient quantity of supply registers, and adequate return and filter areas. -
Page 25: Installation Materials
Electrical Rating Designations* Nominal Voltage 208/230 208/230 Phase Minimum Voltage Maximum Voltage * Letters refer to model number code designations. Refer to page 5. Table 5. Voltage Limitations Installation Materials Installation Kits Marvair ComPac units are shipped with one 12 Ga. "L" shaped bottom bracket. If you have not yet unpacked the unit, follow the instructions in section 2.1. -
Page 26: Porting And Duct Work
Additional Items Needed: Additional hardware and miscellaneous supplies (not furnished by Marvair ) are needed for installation. ® For example, the list below contains approximate quantities of items typically needed for mounting a unit on a wood frame wall structure. Concrete or fiberglass structures have different requirements. (10) 3/8"... -
Page 27: Figure 6. Back Panel Configuration For Avpa/Avha12 Air Conditioners
Wall Openings (AVPA12 ComPac II air conditoners with the factory installed economizer) The back panel of the one ton ComPac air conditioner with the factory installed economizer is designed to have a single opening for the supply and return air. From the factory, the back panel is configured for a 19”... -
Page 28: Table 6 Maximum Static Pressure
For all air conditioners with electric heat, the wall sleeve MUST have 1” (25.4 mm) clearance around all four sides of the opening. Attach the perimeter flange of the wall sleeve to the framed opening with appropriately sized screws. Since electric heat can be added after the unit has been installed, Marvair recommends that all installations have the 1”... -
Page 29: Fresh Air Hood Installation
Fresh Air Hood (non-economozer air conditioners only) The fresh air hood is located on the inside, behind the slots on the bottom front panel. To access the hood, remove the screws that hold the front panel. The air flow can be adjusted from no (0%) fresh air to approximately 15% of rated air flow of fresh air, in 5% increments. -
Page 30: Figure 8A. Wall Mounting Detail
For units with electric heat, a one inch clearance is required around the duct extensions. The duct extensions must be constructed of galvanized steel with a minimum thickness of .019” as per the NFPA standards 90A & 90B. Figure 8a. ComPac A/C+ Wall Mount Detail ®... -
Page 31: Vertical Economizer And Gravity Dampers (Hvesa 36 & 60 Models Only)
Vertical Economizer and Gravity Dampers (HVESA36/60 & AVHSA72 Models Only) Gravity Dampers: There is a gravity-operated economizer exhaust outlet damper located on each side of the HVESA unit. The dampers are covered by a hood to exhaust the air in upward direction, away from the economizer inlet. -
Page 32: Electrical Connections
Electrical Connections WARNING ELECTRICAL SHOCK HAZARD Failure to follow safety warnings exactly could result in serious injury, death, and/or property damage. Turn off electrical power at fuse box or service panel BEFORE making any electrical connections and ensure a proper ground connection is made before connecting line voltage. - Page 33 2. Connect the wires to the input side of the internal breaker or terminal block (L1 & L2 for single- phase units; L1, L2, & L3 for three-phase models). 3. Install the ground wire on the ground lug. 4. For units designed for operation on 208/230V, 60Hz power supply, the transformer is factory wired for a 230V power supply.
-
Page 34: Figure 9A. Humidistat Wiring Details
CommStat Touch Lead /Lag Controller (See Figure 9c) Please refer to the Product Data sheet for the Commstat Touch controller for complete instructions on installing and programming this controller. CommStat 4 Lead /Lag Controller Please refer to the Product Data sheet for the Commstat 4 controller for complete instructions on installing and programming this controller. -
Page 35: Figure 9C. Commstat™ Touch Hvac Controller Wiring Detail
Figure 9c. CommStat Touch Wiring Diagram Figure 9d. CommStat 3 Wiring Diagram Marvair ComPac Installation & Operation Manual 08/2018 Rev.19... -
Page 36: Chapter 3 Start-Up
Chapter 3 Start-Up Check-Out of Cooling Cycle Important: Be sure that the crankcase heater (if used) has been energized for at least 24 hours before starting the unit(s). Double-check all electrical connections before applying power. ComPac air conditioners with scroll compressors running on 3Ø power must be checked for ®... -
Page 37: Chapter 4 Troubleshooting
Chapter 4 Troubleshooting Overview A comprehensive understanding of the operation of the ComPac is a prerequisite to troubleshooting. ® Please read the Chapter 1 for basic information about the unit. ComPac air conditioners are thoroughly tested before they are shipped from the factory. Although unlikely, it is possible that a defect may escape undetected, or damage may have occurred during transportation. -
Page 38: Compressor Troubleshooting
PROBLEM/SYMPTOM LIKELY CAUSE(S) CORRECTION C. Unit cycles on high/low pressure 1. Loss or restriction of airflow. 1. Check blower assembly for proper operation. Look limit. for airflow restrictions, e.g.. the air filter. Check blower motor and condenser fan. 2. Restriction in refrigerant circuit. 2. -
Page 39: Control Board Diagnosis
3. Motor Winding Resistances: Using a digital volt-ohm meter (VOM), measure the resistance across the compressor windings as shown below. SINGLE THREE PHASE PHASE > R > R Resistance can be measured as shown above. Any deviation from above values could indicate a defective compressor. -
Page 40: Chapter 5 Maintenance
Chapter 5 Maintenance Scheduled Maintenance Airxcel Commercial Group strongly recommends that the air conditioner be serviced a minimum of twice a year – once prior to the heating season and once prior to the cooling season. At this time the filters, evaporator coil, condenser coil, the cabinet, and condensate drains should be serviced as described below. -
Page 41: Chapter 6 Warranty
Airxcel Commercial Group Limited Product Warranty Airxcel Commercial Group (ACG) warrants its products to be free from defects in materials and workmanship under normal use to the original purchaser when installed within the contiguous United States, the District of Columbia, and Canada for the period of time in the table below. For units installed in Alaska and Hawaii, flat labor rates apply. -
Page 42: Parts List And Exploded Views
EXPLODED VIEWS AND PARTS LISTS Current parts lists and exploded views of the unit can be found on our web site at www.Marvair.com. Click on the Service and Parts in the menu on the left hand side of the Home page. From the drop down menu, select Exploded Views. - Page 43 Note: The following instructions are for general guidance only. Due to the wide variety of installation possibilities, specific instructions will not be given. When in doubt, follow standard and accepted installation practices, or contact Airxcel Commercial Group for additional assistance. Wall Openings Measure the dimensions of the supply and return ports on the unit.
- Page 44 WARNING ELECTRICAL SHOCK HAZARD Failure to follow safety warnings exactly could result in serious injury, death, and/or property damage. Turn off electrical power at fuse box or service panel BEFORE making any electrical connections and ensure a proper ground connection is made before connecting line voltage.
- Page 45 Marvair ComPac Installation & Operation Manual 08/2018 Rev.19...
Need help?
Do you have a question about the Marvair ComPac I and is the answer not in the manual?
Questions and answers