Table of Contents
Advertisement
Quick Links
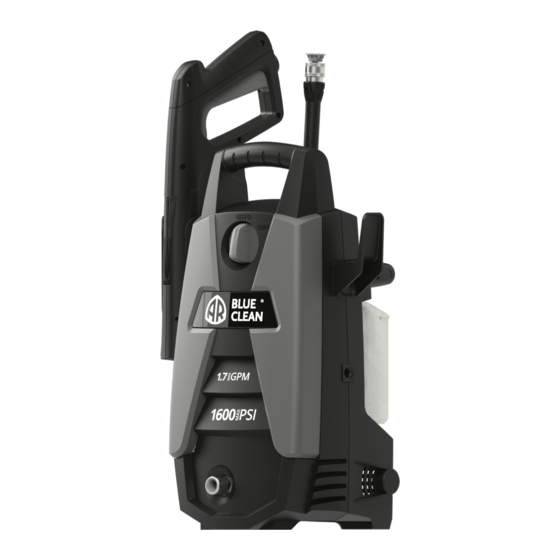
1600 PSI
Electric Pressure Washer
95497-DK
95497_IM_BC 111 HS_ENG-FR-SP.indd 1
ASSEMBLY, CARE AND
USE INSTRUCTIONS
Model BC111HS
READ CAREFULLY
IMPORTANT:
RETAIN THESE INSTRUCTIONS
AND
ATTACH RECEIPT TO MANUAL FOR FUTURE
REFERENCE.
WARNING:
This product can expose you to
chemicals including lead, DEHP, DINP, which is
known to the State of California to cause cancer
and or lead to birth defects. For more information
go to www.P65Warnings.ca.gov
Questions, problems, missing parts?
Before returning to your retailer, call (1-866-235-5112)
or email (info@arnorthamerica.com) our customer
service department. They are available from 8:00 a.m. -
5:00 p.m., CST, Monday - Friday. www.arblueclean.com
2020/5/22 下午2:48
Advertisement
Table of Contents

Related Manuals for Blue Clean BC111HS


Summary of Contents for Blue Clean BC111HS
- Page 1 1600 PSI Electric Pressure Washer ASSEMBLY, CARE AND USE INSTRUCTIONS Model BC111HS READ CAREFULLY IMPORTANT: RETAIN THESE INSTRUCTIONS ATTACH RECEIPT TO MANUAL FOR FUTURE REFERENCE. WARNING: This product can expose you to chemicals including lead, DEHP, DINP, which is known to the State of California to cause cancer and or lead to birth defects.
- Page 2 THANK YOU LETTER Dear Valued Customer, My name is Michael Schaller and I wanted to thank you on behalf of AR Blue Clean for purchasing this AR Blue Clean electric pressure washer. We created this pressure washer from listening to our customers for the past 10 years on how they use their pressure washer for all kinds of cleaning projects.
-
Page 3: Table Of Contents
Replacement Parts List ....................17 PRODUCT SPECIFICATIONS SPECIFICATIONS Max PSI Rated PSI Max GPM Rated GPM Cold Volts Frequency Amps Weight Model Water (lbs/sq. in.) (lbs/sq. in.) (Gal/per min) (Gal/per min) (Hz) (lbs.) BC111HS 1600 1160 12.5 14.6 95497_IM_BC 111 HS_ENG-FR-SP.indd 3 2020/5/22 下午2:48... -
Page 4: Package Contents
PACKAGE CONTENTS OFF/O ON/I PW95824 15° – Yellow 750ml 600ml 450ml 300ml 150ml PART DESCRIPTION QUANTITY PART DESCRIPTION QUANTITY Spray Gun Holster Foam Cannon Handle Extension Lance Power Washer Unit 15° Quick Connect Nozzle Cord Hook O-Ring Kit Super Soft High Pressure Hose Nozzle Cleaning Wire Screws Spray Gun... -
Page 5: Safety Information
SAFETY INFORMATION SAFETY INFORMATION Please read and understand this entire manual before 9. DO NOT use your power washer when you are under attempting to assemble and operate the product. carefully and only when you are alert. This manual contains information that relates to 10. - Page 6 SAFETY INFORMATION SAFETY INFORMATION 25. Protect eyes, lungs, and skin from exposure to 30. NEVER use a water supply to your power washer detergent. that exceeds 150 PSI maximum. 26. Warning-If connection is made to a potable water 31. NEVER disconnect the high pressure hose from the system, the system Should be protected against power washer while the system is pressurized.
-
Page 7: Assembly Instructions
PREPARATION PREPARATION Before beginning assembly of product, make sure all Tools Required for Assembly (not included): Phillips parts are present. Compare parts with package contents screwdriver. list and hardware contents list. If any part is missing or damaged, DO NOT attempt to assemble the product. Please call customer service at 1-866-235-5112. - Page 8 ASSEMBLY INSTRUCTIONS ASSEMBLY INSTRUCTIONS OFF/O ON/I Slide cord hook holster (D) onto right side, when facing Super Soft High Pressure Hose Assembly the power washer unit (C) as shown. Screw Super Soft high pressure hose (E) clockwise onto bottom front of power washer unit (C). Pull back collar Note: This step does not require any screws.
- Page 9 ASSEMBLY INSTRUCTIONS Extension Lance Installation Unlocked Locked With spray gun (F) in locked position, attach extension lance (I) directly to spray gun. Insert lance extension Locking Spray Gun (Before Lance Installation) into gun, pushing together and turning clockwise To lock trigger of spray gun (F), point gun away simultaneously.
- Page 10 ASSEMBLY INSTRUCTIONS ASSEMBLY INSTRUCTIONS 750ml 600ml 450ml 300ml 150ml Foam Cannon Installation Insert foam cannon (H) into spray gun (F), push in and into high pressure top. If you do not see the straw, turn clockwise. look inside the foam cannon and attach it to the high Note: Always lock spray gun when changing the foam properly formulated detergent or cleaner with a water cannon to ensure it does not eject with force.
-
Page 11: Operating Instructions
OPERATING INSTRUCTIONS • Turn the power switch to the “ON” (|) position. The unit will turn on for 1 - 2 seconds and shut off. This is a normal function of the auto start feature. • Begin power washing by squeezing the trigger on the spray gun all the way into the handle. - Page 12 OPERATING INSTRUCTIONS OPERATING INSTRUCTIONS Operation Tips • Note: Test the GFCI before each use: 1. Plug GFCI into power outlet. Indicator should turn green to show that cord has power. 2. Press test button, green indicator should turn off to verify that GFCI cut off power to the cord. 3.
-
Page 13: Care And Maintenance
CARE AND MAINTENANCE • Using the nozzle cleaner wire provided (or an unfolded paper clip), insert the wire into the nozzle hole and move back and forth until debris is dislodged. • Tap quick connect end of lance on hard surface several times. -
Page 14: Pump Saver
5) Turn power off when pump saver exits the machine’s while being stored in ALL climates. It also assists with water outlet. protection from internal corrosion. The AR Blue Clean part #is: PW64511(16oz. bottle). Order online at Note: Instructions on Pump Saver Bottle are generic and www.arblueclean.com... -
Page 15: Troubleshooting
TROUBLESHOOTING If you have any questions regarding the product, please call customer service at 1-866-235-5112. PROBLEM CORRECTIVE ACTION Unit will not turn on. 1. The GFCI module on the end of the power cord must be plugged directly into an outlet. 2. -
Page 16: Limited Warranty
TROUBLESHOOTING PROBLEM CORRECTIVE ACTION The power washer turns on for the accessories are assembled properly, and the power switch is turned on, the power 2 seconds, shuts washer may turn on for 1 - 2 seconds to prime the pump. It automatically shuts off and off, and will not turn waits for the spray gun trigger to be pressed. -
Page 17: Replacement Parts List
REPLACEMENT PARTS LIST For replacement parts, call our customer service department at 1-866-235-5112, 8 a.m. - 5:00 p.m., CST, Monday - Friday or order online at www.arblueclean.com 750ml 600ml 450ml 300ml 150ml 15° – Yellow PW95824 PART DESCRIPTION PART # PART DESCRIPTION PART #...
Need help?
Do you have a question about the BC111HS and is the answer not in the manual?
Questions and answers