Table of Contents
Advertisement
Available languages
Available languages
Quick Links
Carl Zeiss
Sports Optics
Victory
8 x 45 T* RF / 10 x 45 T* RF
8 x 56 T* RF / 10 x 56 T* RF
Gebrauchshinweise
Instructions for use
Mode d'emploi
Istruzioni d'impiego
Mode de empleo
Bruksanvisning
Informacje dotyczące użytkowania
Инструкция по применению
Használati utasítás
We make it visible.
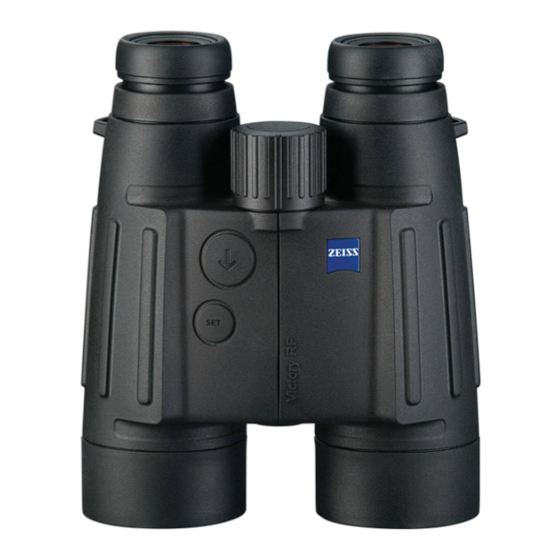
Bezeichnung der Bauteile / Part description
Advertisement
Chapters
Table of Contents

Related Manuals for Zeiss Victory 10 x 45 T RF Series


Summary of Contents for Zeiss Victory 10 x 45 T RF Series
- Page 1 Carl Zeiss Sports Optics Victory 8 x 45 T* RF / 10 x 45 T* RF 8 x 56 T* RF / 10 x 56 T* RF Gebrauchshinweise Instructions for use Mode d’emploi Istruzioni d‘impiego Mode de empleo Bruksanvisning Informacje dotyczące użytkowania Инструкция...
- Page 3 Bezeichnung der Bauteile / Part description Fig. 1 Fig. 2 Fig. 3 Fig. 4...
- Page 4 Wir gratulieren Ihnen zu Ihrem neuen Fernglas mit eingebautem Laser- Entfernungsmesser. Die Produkte der Marke Carl Zeiss sind geprägt durch hervorragende optische Leistungen, präzise Verarbeitung und eine lange Lebensdauer. Bitte beachten Sie folgende Gebrauchshinweise, damit Sie Ihr Produkt optimal nutzen können und es Ihnen über viele Jahre ein zuverlässiger Begleiter wird.
- Page 5 Victory RF Achtung Verwenden Sie nur vom Hersteller empfohlene Batterietypen. Behandeln Sie gebrauchte Batterien nach den Anweisungen des Herstellers. Batterien dürfen keinesfalls ins Feuer geworfen, erhitzt, wieder aufgeladen, zerlegt oder aufgebrochen werden. Benutzerinformationen zur Entsorgung von elektrischen und elektronischen Geräten (private Haushalte) Dieses Symbol auf Produkten und/oder begleitenden Dokumenten bedeutet, dass verbrauchte elektrische und elektronische Produkte nicht mit gewöhn- lichem Haushaltsabfall vermischt werden sollen.
-
Page 6: Table Of Contents
Gebrauchshinweise Inhaltsverzeichnis Bezeichnung der Bauteile ........4 Lieferumfang . -
Page 7: Lieferumfang
Victory RF Lieferumfang Fernglas mit Laser-Entfernungsmesser Okular-Schutzdeckel 2 Objektivschutzdeckel Bereitschaftstasche Trageriemen Lithium-Batterie 3V Typ CR 2 Optik Reinigungstuch Anleitung, Garantiekarte Vorbereitung Einlegen/Entfernen der Batterie Die Energieversorgung des Laser-Entfernungsmessers erfolgt über eine Lithiumbatterie vom Typ CR 2. Zum Einsetzen und Wechseln der Batterie wird der Batteriedeckel (Fig. 2/8) – mit einer Münze oder ähnlichem –... -
Page 8: Anbringen Des Trageriemens Und Der Schutzkappen
Gebrauchshinweise Anbringen des Trageriemens und der Schutzkappen Das Trageband und der Okularschutzdeckel werden entsprechend den Darstellungen angebracht. Hinweis: Das Trageband wird nur einfach durch die Öse am Okularschutzdeckel durch- geführt. Nach eigenem Ermessen verbinden Sie den Okularschutzdeckel beidseitig oder nur einseitig mit dem Trageband. Der Okularschutzdeckel wird durch einen Schnappverschluss auf den Augenmuscheln gehalten. -
Page 9: Beobachten Mit Und Ohne Brille
Victory RF Beobachten mit und ohne Brille Beim Beobachten ohne Brille benutzen Sie das Gerät mit ausgezogener Augenmuschel. Hierzu wird die Augenmuschel (Fig. 1/1) mit einer Links- drehung (gegen den Uhrzeigersinn) nach oben bis zur obersten Rastung herausgedreht (Darstellung A). Die Augenmuschel ist in vier Positionen rastbar –... -
Page 10: Scharfeinstellung Der Zielmarke Und Dioptrienausgleich
Gebrauchshinweise Scharfeinstellung der Zielmarke und Dioptrienausgleich Schalten Sie mit der Taste ENTFERNUNGSMESSUNG (Fig. 1/6) die Zielmarke (Fig. 4/9) ein und halten Sie die Taste gedrückt. Die Scharfeinstellung der Zielmarke und der Anzeige (Fig. 4/10) erfolgt durch Drehen des rechten Dioptrienausgleichs (Fig. 1/4) nach links oder rechts. Stellen Sie anschließend mit der Zentralfokussierung (Fig. -
Page 11: Scan-Betrieb
Victory RF Scan-Betrieb Mit dem Gerät kann auch im Dauerbetrieb (Scan-Betrieb) gemessen werden. Wenn die Taste ENTFERNUNGSMESSUNG (Fig. 1/6) länger als ca. 3 Sekunden gedrückt gehalten wird, schaltet das Gerät in den Scan-Betrieb und führt dann kontinuierlich Messungen durch. Sie erkennen dies an der Entfernungs- anzeige, die ca. -
Page 12: Auswahl Des Passenden Ballistikprogramms
Gebrauchshinweise Die Anzeige des Haltepunktes erfolgt ca. 1 Sekunde nach der Entfernungsan- zeige. Ein vorangestelltes „H“ bedeutet, dass höher gehalten werden muss (Fig. 3) und ein vorangestelltes „L“ bedeutet, dass tiefer gehalten werden muss. Für die EU Einstellungen erfolgt die Anzeige in Zentimeter und für die US Einstellungen erfolgt die Anzeige in Inch. -
Page 13: Bestimmung Der Richtigen Geschossflugbahn
Victory RF Beispiel: Beispiel: Programm EU 2 ist ausgewählt, Programm EU 2 ist ausgewählt, Geschossabfall entsprechend Geschossabfall entsprechend Ballistikkurve 2, Ballistikkurve 2, Entfernungsanzeige in Meter, Entfernungsanzeige in Meter, Anzeige Haltepunkt in Zentimeter, Anzeige Haltepunkt in Zentimeter, Fleckschussentfernung 100 Meter. Fleckschussentfernung GEE. Bestimmung der richtigen Geschossflugbahn Das Gerät verfügt über 6 gespeicherte Geschossflugbahnen, die fast alle Kaliber abdecken. - Page 14 Gebrauchshinweise Weitere Informationen und Hilfen zu diesem Thema erhalten Sie auf unserer Webseite http://www.zeiss.de/sportsoptics Wählen Sie zuerst abhängig von der Fleckschussentfernung des Zielfernrohres die für Sie passende Tabelle aus: Fleckschussentfernung Anzuwendende Tabelle 100 Meter Tabelle 1 GEE (entspricht ca. 4 cm Hochschuss auf 100 Meter)
- Page 15 Victory RF Tabelle 2: Auswahl der Geschossflugbahn für Entfernungsangaben in Meter und Fleckschussentfernung GEE. Auswahl Entfernung Kurve in Meter EU 1 0,3 – 7,1 – 19,2 – 36,5 – 59,3 – 126 EU 2 – 2,0 – 12,1 – 27,7 – 49,1 – 78,6 – 164 Geschoss- EU 3 –...
-
Page 16: Pflege Und Wartung
Gebrauchshinweise Pflege und Wartung Der Laser-Entfernungsmesser bedarf keiner besonderen Pflege. Grobe Schmutz- teilchen (z. B. Sand) auf den Linsen nicht abwischen, sondern wegblasen oder mit einem Haarpinsel entfernen. Fingerabdrücke können nach einiger Zeit die Linsenoberflächen angreifen. Anhauchen und mit einem sauberen Optikreinigungstuch nachreiben ist die einfachste Art, Linsenoberflächen zu reinigen. -
Page 17: Technische Daten
Victory RF Technische Daten Victory Victory Victory Victory 8x45T*RF 10x45T*RF 8x56T*RF 10x56T*RF Vergrößerung Objektivdurchmesser 45 mm 45 mm 56 mm 56 mm Austrittspupillen-Durchmesser 5,6 mm 4,5 mm 7 mm 5,6 mm Dämmerungszahl 21,2 21,2 23,7 Sehfeld auf 1000 m/yd 125 m/yd 110 m/yd 115 m/yd 110 m/yd Naheinstellgrenze 5,5 m 5,5 m... - Page 18 Congratulations on the purchase of your new binoculars with integrated laser range finder. Carl Zeiss brand products are characterised by outstanding optical perform- ance, accurate processing and long durability. Please observe the following instructions for use, so that you enjoy optimum use of your product and it can be a faithful companion to you for many years.
- Page 19 Victory RF Caution Use only battery types recommended by the manufacturer. Handle used batteries in accordance with the manufacturer’s instructions. Under no circumstances should batteries be thrown into a fire, heated up, recharged, taken apart or broken open. User information for the disposal of electrical and electronic equipment (private households) This symbol on products and/or accompanying documents indicates that used electrical and electronic products are not to be mixed with ordinary...
-
Page 20: Identification Of The Components
Instructions for use Table of contents Identification of the components ....... . 18 Scope of delivery . -
Page 21: Scope Of Delivery
Victory RF Scope of delivery Binoculars with laser range finder Eyepiece cap 2 protective lens covers Carry case Carrying strap 3V type CR 2 lithium battery Optics cleaning cloth Instructions, guarantee card Preparation Inserting/Removing the battery The laser range finder is powered by a type CR 2 lithium battery. To insert and replace the battery, unscrew the battery cover (Fig. -
Page 22: Attaching The Carrying Strap And The Protective Caps
Instructions for use Attaching the carrying strap and the protective caps The carrying strap and the eyepiece cap are attached as shown in the illustrations. Note: Feed the carrying strap only once through the eyelet on the eyepiece cap. Depending on personal taste, use the carry- ing strap to connect the eyepiece cap either on both sides or on one side only. -
Page 23: Observation With And Without Glasses
Victory RF Observation with and without glasses When observing without glasses, use the equipment with the eye cup extended. To do this, turn the eye cup (Fig. 1/1) upwards and to the left (anticlockwise) until it locks in the highest position (illustration A). The eye cup can be locked in four positions –... -
Page 24: Focusing The Aiming Mark And Diopter Compensation
Instructions for use Focusing the aiming mark and diopter compensation Use the RANGE FINDER button (Fig. 1/6) to switch on the aiming mark (Fig. 4/9) and hold down the button. Focus the aiming mark and the display (Fig. 4/10) by turning the right hand diopter compensation (Fig. 1/4) to the left or the right. -
Page 25: Scan Mode
Victory RF Scan mode The equipment can also be used to measure in constant operation (scan mode). If the range finder button (Fig. 1/6) is pressed for longer than approx. 3 seconds, the equipment switches to scan mode and takes measurements continuously. -
Page 26: Selection Of The Appropriate Ballistic Programme
Instructions for use The correction value for the aiming point is displayed approx. 1 second after the range. A preceding “H” means that higher aiming is required (Fig. 3) and a preceding “L” means that lower aiming is required. The display is given in centimetres for the EU settings and in inches for the US settings. -
Page 27: Determining The Correct Trajectory Path
Victory RF Example: Example: Program EU 2 is selected: Programm EU 2 is selected: Bullet drop according Bullet drop according to ballistic curve 2, to ballistic curve 2, range display in metres, range display in metres, holding point display in centimetres, holding point display in centimetres, target shot range 100 metres. - Page 28 Instructions for use Further information and assistance on this topic can be found on our website http://www.zeiss.de/sportsoptics First select the appropriate table for you, depending on the riflescope target shot range: Target shot range Table to be used 100 metres Table 1 SID/GEE (corresponds to approx.
- Page 29 Victory RF Table 2: Selection of the trajectory path for range specifications in metres and a sighting in at SID/GEE. Curve Range selection in metres EU 1 0.3 – 7.1 – 19.2 – 36.5 – 59.3 – 126 EU 2 –...
-
Page 30: Care And Maintenance
Instructions for use Care and maintenance The laser range finder requires no special care. Do not wipe off coarse dust (e.g. sand) from the lens, but rather blow it off or remove it using a fine animal-hair brush. Fingerprints may affect the lens surfaces after a time. The easiest way to clean lens surfaces is to breathe on them and rub them using a clean optic-cleaning cloth. -
Page 31: Technical Specifications
Victory RF Technical specifications Victory Victory Victory Victory 8x45T*RF 10x45T*RF 8x56T*RF 10x56T*RF Magnification Lens diameter 45 mm 45 mm 56 mm 56 mm Exit pupil diameter 5.6 mm 4.5 mm 7 mm 5.6 mm Twilight number 21.2 21.2 23.7 Field of view at 1000 m/yd 125 m/yd 110 m/yd 115 m/yd 110 m/yd Close-up limit approx. - Page 32 Mode d’emploi Nous vous félicitons de vos nouvelles jumelles à télémètre laser intégré. Les produits de la marque Carl Zeiss se distinguent par d’excellentes performances optiques, une finition précise et une longue durée de vie. Veuillez respecter les instructions d’utilisation suivantes afin de pouvoir utiliser de manière optimale vos jumelles et pour que celles-ci vous...
- Page 33 Victory RF Attention N’utilisez que les types de piles recommandés par le fabricant. Traitez les piles usées selon les indications du fabricant. Les piles ne doivent en aucun cas être jetées au feu, chauffées, rechargées, désassemblées ou ouvertes. Informations destinées aux utilisateurs et relatives à l’évacuation d’appareils électriques et électroniques (foyers privés) Ce symbole qui figure sur des produits et/ou des documents d’accompagn- ement signifie que les produits électriques et électroniques usés ne doivent...
-
Page 34: Désignation Des Composants
Mode d’emploi Sommaire Désignation des composants ........32 Fourniture . -
Page 35: Fourniture
Victory RF Fourniture Jumelles avec télémètre à laser Cache de protection oculaire 2 couvre-objectifs Sacoche Bandoulière Pile au lithium 3V Type CR 2 Chiffon de nettoyage optique Mode d’emploi, carte de garantie Préparatifs Mise en place/Enlèvement de la pile L’alimentation en énergie du télémètre laser s’effectue par une pile au lithium du type CR 2. -
Page 36: Mise En Place De La Bandoulière Et Des Caches De Protection
Mode d’emploi Mise en place de la bandoulière et des caches de protection La bandoulière et les caches de protection oculaires doivent être mis en place conformément aux illustrations. Remarque : Le cordon doit tout simplement être enfilé par l’oeillet sur le cache de protection oculaire. -
Page 37: Observation Avec Et Sans Lunettes
Victory RF Observation avec et sans lunettes Pour observer sans lunettes, utilisez les jumelles en relevant leurs bonnettes. Tournez à cette fin les bonnettes (Fig. 1/1) sur la gauche (dans le sens contraire des aiguilles d’une montre) et tirez-les ainsi vers le haut jusqu’à ce qu’elles s’enclenchent dans le cran supérieur (Représentation A). -
Page 38: Réglage De La Netteté Du Repère Cible Et Correcteur D'amétropie
Mode d’emploi Réglage de la netteté du repère cible et correcteur d’amétropie Avec la touche MESURE DE LA DISTANCE (Fig. 1/6), mettez en service le repère cible (Fig. 4/9) et maintenez la touche enfoncée. Le réglage de la netteté du repère cible et de l’affichage (Fig. -
Page 39: Mode Scan
Victory RF Mode Scan Des mesures peuvent également être effectuées avec les jumelles en mode continu (mode Scan). Si la touche MESURE DE LA DISTANCE (Fig. 1/6) est maintenue enfoncée pendant plus de 3 secondes env., l’appareil passe en mode Scan et effectue des mesures en continu. -
Page 40: Choix Du Programme Balistique Adéquat
Mode d’emploi L’affichage du point d’arrêt a lieu env. 1 seconde après l’affichage de la distance. Un « H » précédant la valeur signifie que l’arme doit être tenue plus haute (Fig. 3) et un « L » que l’arme doit être tenue plus bas. Pour les réglages EU, l’affichage se fait en centimètres alors qu’il a lieu en Inch pour les réglages US. -
Page 41: Détermination De La Trajectoire Correcte Du Projectile
Victory RF Exemple : Exemple : la courbe EU 2 a été choisie. la courbe EU 2 a été choisie. Retombée du projectile selon Retombée du projectile selon la courbe balistique 2, la courbe balistique 2, affichage de la distance en mètres, affichage de la distance en mètres, affichage du point d’arrêt en centimètres, affichage du point d’arrêt en centimètres,... - Page 42 Mode d’emploi Pour d’autres informations et aides sur ce thème, veuillez consulter notre site Internet à l’adresse http://www.zeiss.de/sportsoptics Choisissez tout d’abord le tableau qui vous convient en fonction de la distance de tir réglé à 100 m : Distance de tir réglé à 100 m Tableau à...
- Page 43 Victory RF Tableau 2 : Sélection de trajectoire de projectile pour des indications de distance en mètres et une distance de tir GEE (distance de réglage optimale, DRO). Sélection Distance courbe en mètres EU 1 0,3 – 7,1 – 19,2 – 36,5 – 59,3 – 126 EU 2 –...
-
Page 44: Nettoyage Et Entretien
Mode d’emploi Nettoyage et entretien Le télémètre laser ne nécessite aucun soin particulier. Si de grosses impuretés (grains de sable p.ex.) se déposent sur les lentilles, ne les essuyez pas mais soufflez dessus ou époussetez-les à l’aide d’un pinceau fin. Les traces de doigts risquent d’altérer à... -
Page 45: Caractéristiques Techniques
Victory RF Caractéristiques techniques Victory Victory Victory Victory 8x45T*RF 10x45T*RF 8x56T*RF 10x56T*RF Grossissement Diamètre de l’objectif 45 mm 45 mm 56 mm 56 mm Diamètre pupille de sortie 5,6 mm 4,5 mm 7 mm 5,6 mm Indice crépusculaire 21,2 21,2 23,7 Champ de vision à... - Page 46 Complimenti per l’acquisto del Vostro nuovo binocolo con telemetro laser integrato. Il marchio Carl Zeiss è sinonimo di prestazioni ottiche eccellenti, lavorazioni di precisione e lunga durata. Per poter utilizzare al meglio il binocolo, Vi consigliamo di seguire scrupolosamente le seguenti istruzioni d’uso.
- Page 47 Victory RF Attenzione Utilizzare esclusivamente batterie del tipo consigliato dal produttore smaltendo quelle usate secondo le sue istruzioni. Non gettare mai le batterie nel fuoco né riscaldarle, ricaricarle, aprirle o romperle. Informazioni per il consumatore sullo smaltimento delle apparecchiature elettriche ed elettroniche (per uso domestico) Questo simbolo sui prodotti e/o la documentazione allegata indica che i prodotti elettrici ed elettronici usati non vanno gettati insieme ai normali rifiuti domestici.
-
Page 48: Definizione Dei Componenti
Istruzioni d’impiego Indice Definizione dei componenti ........46 Nella confezione . -
Page 49: Nella Confezione
Victory RF Nella confezione Binocolo con telemetro laser Coprioculare 2 copriobiettivi Custodia protettiva Tracolla Batteria al litio 3V tipo CR 2 Panno per pulizia dell’ottica Istruzioni, cartolina di garanzia Preparazione Inserimento e sostituzione della batteria Per l’alimentazione del telemetro laser è prevista una batteria al litio di Tipo CR 2. -
Page 50: Come Applicare La Tracolla E I Coperchietti Di Protezione
Istruzioni d’impiego Come applicare la tracolla e i coperchietti di protezione La tracolla e il coperchio di protezione dell’oculare vengono fissati come illustrato nelle figure. Avvertenza: far passare la tracolla semplicemente attraverso gli occhielli sul coperchio di protezione dell’oculare. Infilare il coperchio di protezione sui due lati o su di uno solo alla tracolla in base alle proprie necessità. -
Page 51: Osservazione Con E Senza Occhiali
Victory RF Osservazione con e senza occhiali Se si usa il binocolo senza occhiali utilizzare l’oculare in posizione telescopica. In tal caso ruotare gli oculari in senso sinistrorso (Fig. 1/1) o antiorario verso l’alto fino alla posizione d’arresto superiore (figura A). Gli oculari possono essere bloccati in quat- tro posizioni: in posizione superiore, inferiore come pure in due posizioni intermedie... -
Page 52: Regolazione Della Nitidezza Dell'immagine E Della Regolazione Diottrica
Istruzioni d’impiego Regolazione della nitidezza dell’immagine e regolazione diottrica Con il tasto MISURAZIONE DELLA DISTANZA (Fig. 1/6) regolare la nitidezza dell’immagine (Fig. 4/9) e tenere il tasto premuto. La regolazione della niti- dezza dell’immagine e del display (Fig. 4/10) avviene girando la regolazione diottrica destra (Fig. -
Page 53: Funzionamento In Scansione
Victory RF Funzionamento in scansione L’apparecchio consente di effettuare misurazioni anche in funzionamento per- manente (funzionamento in scansione). Tenendo premuto per più di circa tre secondi il tasto MISURAZIONE DELLA DISTANZA (Fig. 1/6) l’apparecchio entra nella modalità di funzionamento in scansione con cui esegue le misurazioni continuamente, come è... -
Page 54: Scelta Del Programma Balistico Adatto
Istruzioni d’impiego Il punto di mira appare sul display dopo circa 1 secondo dalla visualizzazione della distanza. La lettera «H» che lo precede significa che deve essere tenuto più alto (Fig. 3) mentre la lettera «L» indica che deve essere tenuto più basso. Le impostazioni secondo il sistema metrico ad uso in Europa sono indicate in centimetri mentre quelle per gli Stati Uniti sono espresse in pollici. -
Page 55: Definizione Della Corretta Traiettoria Del Proiettile
Victory RF Esempio: Esempio : si è selezionata la curva EU 2: si è selezionata la curva EU 2: caduta del proiettile caduta del proiettile secondo la curva balistica 2, secondo la curva balistica 2, distanza indicata sul display in metri, indicazione della distanza in metri, display del punto di mira in centimetri, display del punto di mira in centimetri,... - Page 56 Istruzioni d’impiego Per ulteriori informazioni e consigli su quest’argomento visitare il nostro sito http://www.zeiss.de/sportsoptics Anzitutto scegliere la tabella adatta in base alla distanza di tiro del cannocchiale da puntamento: Distanza di tiro Tabella da utilizzare 100 metri Tabella 1 GEE (corrispondente a circa 4 cm più in alto su 100 metri)
- Page 57 Victory RF Tabella 2: scelta della traiettoria del proiettile per le indicazioni di distanza in metri e la distanza di tiro GEE. Curva Distanza scelta in metri EU 1 0,3 – 7,1 – 19,2 – 36,5 – 59,3 – 126 EU 2 –...
-
Page 58: Pulizia E Manutenzione
Istruzioni d’impiego Pulizia e manutenzione Il telemetro laser non richiede cure particolari. Soffiare via oppure eliminare con un pennello eventuali particelle grossolane di sporco (p.es. sabbia) sulle lenti. Con il tempo le impronte possono corrodere la superficie. Il modo più semplice per pulire la superficie delle lenti consiste nel soffiare via lo sporco e poi strofinare con una velina pulita. -
Page 59: Charatteristiche Tecniche
Victory RF Charatteristiche tecniche Victory Victory Victory Victory 8x45T*RF 10x45T*RF 8x56T*RF 10x56T*RF Ingrandimento Diametro effettivo obiettivo 45 mm 45 mm 56 mm 56 mm Diametro pupilla d’uscita 5,6 mm 4,5 mm 7 mm 5,6 mm Crepuscolo 21,2 21,2 23,7 Campo visivo su 1000 m/yd 125 m/yd 110 m/yd 115 m/yd 110 m/yd Limite di regolazione primo piano ca. - Page 60 Mode de empleo Le felicitamos por sus nuevos prismáticos con distanciómetro láser. Los productos de la marca Carl Zeiss se caracterizan por unas prestaciones ópticas excelentes, un trabajo preciso y una larga vida útil. Le rogamos siga las siguientes instrucciones de uso para que pueda utilizar su producto de forma óptima y éste se convierta en su fiel acompañante por muchos años.
- Page 61 Victory RF Atención Utilice sólo pilas del tipo recomendado por el fabricante. Manipule las pilas usadas siguiendo las instrucciones del fabricante. Las pilas no se deben, bajo ninguna circunstancia, arrojar al fuego, calentar, recargar, desmontar ni romper. Información para el usuario sobre el desechado de equipos eléctricos y electrónicos (consumidores domésticos privados) Este símbolo en los productos y/o en los documentos que los acompañan, indica que los productos eléctricos y electrónicos utilizados no se deben...
-
Page 62: Descripción De Los Componentes
Mode de empleo Índice Descripción de los componentes ....... . . 60 Accesorios de serie . -
Page 63: Accesorios De Serie
Victory RF Accesorios de serie Prismáticos con distanciómetro láser Tapa protectora de ocular 2 Tapas protectoras para el objetivo Funda de uso inmediato Cordón de transporte Pila de litio 3V tipo CR 2 Paño de limpieza Manual de instrucciones, tarjeta de garantía Preparación Inserción/extracción de la pila La alimentación del distanciómetro láser se realiza por medio de una pila de... -
Page 64: Colocación Del Cordón De Transporte Y Las Tapas Protectoras
Mode de empleo Colocación del cordón de transporte y las tapas protectoras El cordón de transporte y la tapa protectora de ocular se colocan según las ilustraciones. Nota: El cordón de transporte se pasa senci- llamente a través del ojal situado en la tapa protectora de ocular. -
Page 65: Observación Con Y Sin Gafas
Victory RF Observación con y sin gafas Al observar sin gafas, utilice el equipo con la concha ocular extraída. Para ello, saque la concha ocular (Fig. 1/1) con un giro a la izquierda (sentido antihorario) hacia arriba hasta el encaje más alto (ilustración A). Las conchas oculares se pueden encajar en cuatro posiciones –... -
Page 66: Enfoque De La Retícula Y Compensación De Dioptrías
Mode de empleo Enfoque de la retícula y compensación de dioptrías Ajuste la retícula (Fig. 4/9) con el botón MEDIDA DE DISTANCIA (Fig. 1/6) y mantenga pulsado el botón. El enfoque de la retícula y la indicación (Fig. 4/10) se realiza girando el compensador de dioptrías derecho (Fig. 1/4) hacia la izquierda o hacia la derecha. -
Page 67: Modo De Barrido
Victory RF Modo de barrido Con el equipo se puede medir también en modo continuo (modo de barrido). Si se mantiene pulsado el botón MEDIDA DE DISTANCIA (Fig. 1/6) durante más de aprox. 3 segundos, el equipo se pone en modo de barrido y realiza mediciones continuas. -
Page 68: Selección Del Programa Balístico Apropiado
Mode de empleo La visualización del punto de impacto se produce aprox. 1 segundo después de indicarse la distancia. Una «H» precedente significa que se debe apuntar más arriba (Fig. 3) y una «L» precedente significa que se debe apuntar más abajo. Para los ajustes EU, se indica el valor en centímetros, y para los ajustes US se indica el valor en pulgadas. -
Page 69: Determinación De La Trayectoria De Tiro Correcta
Victory RF Ejemplo: Ejemplo: con la curva EU 2 seleccionada: con la curva EU 2 seleccionada: caída según la curva balística 2, caída conforme a la curva balística 2, distancia indicada en metros, distancia indicada en metros, punto de mira indicado en centímetros, punto de mira indicado en centímetros, distancia de impacto en punto distancia de impacto en el punto... - Page 70 Mode de empleo Puede encontrar más información y ayuda en relación a este tema en nuestra página web http://www.zeiss.de/sportsoptics En primer lugar seleccione la tabla que mejor se adapte a usted, dependiendo de la distancia de impacto en el punto apuntado del visor de puntería:...
- Page 71 Victory RF Tabla 2: Selección de la trayectoria de tiro para distancias indicadas en metros y distancia de impacto en el punto apuntado de GEE (distancia óptima de tiro). Selección Distancia de la curva en metros EU 1 0,3 – 7,1 – 19,2 – 36,5 – 59,3 – 126 EU 2 –...
-
Page 72: Cuidado Y Mantenimiento
Mode de empleo Cuidado y mantenimiento El distanciómetro láser no precisa de ningún cuidado especial. No frotar las partículas gruesas de polvo (p. ej. arena) en las lentes, sino retirarlas soplando o con un pincel fino. Las huellas dactilares pueden deteriorar la superficie de las lentes después de un tiempo. -
Page 73: Datos Técnicos
Victory RF Victory Victory Victory Victory Datos técnicos 8x45T*RF 10x45T*RF 8x56T*RF 10x56T*RF Aumento Diámetro de objetivo 45 mm 45 mm 56 mm 56 mm Diámetro de las pupilas de salida 5,6 mm 4,5 mm 7 mm 5,6 mm Potencia crepuscular 21,2 21,2 23,7... - Page 74 Bruksanvisning Vi gratulerar Dig till Din nya kikare med inbyggd laseravståndsmätare. Produkterna från märket Carl Zeiss präglas av extremt goda optiska prestanda, en exakt bearbetning och lång livslängd. Beakta följande bruksanvisning för att få största möjliga nytta av Din produkt under många år framöver.
- Page 75 Victory RF Använd endast de batterityper som tillverkaren rekommenderar. Behandla uttjänta batterier enligt tillverkarens instruktioner. Batterier får aldrig kastas in i eld, hettas upp, återuppladdas, demonteras eller brytas upp. Användarinformation för skrotning av elektriska och elektroniska produkter (privathushåll) Denna symbol på produkter och/eller medföljande dokument betyder att uttjänta elektriska och elektroniska produkter inte får kastas i de vanliga hushållssoporna.
-
Page 76: Beteckning På Komponenterna
Bruksanvisning Innehållsförteckning Beteckning på komponenterna ........74 Leveransomfattning . -
Page 77: Leveransomfattning
Victory RF Leveransomfattning Kikare med laseravståndsmätare Okularskydd 2 objektivskydd Beredskapsväska Bärrem Litiumbatteri 3V typ CR 2 Optikrengöringsduk Bruksanvisning, garantisedel Förberedelser Isättning/urtagning av batteriet Energiförsörjningen av laseravståndsmätaren utgörs av ett litiumbatteri av typ CR 2. Gör så här för att sätta i och byta batteriet: skruva av batterilocket (Fig. 2/8) –... -
Page 78: Fästa Bärremmen Och Skydden
Bruksanvisning Fästa bärremmen och skydden Fäst bärremmen och okularskyddet så som bilderna visar. OBS: träd igenom bärremmen en gång genom fästet på okularskyddet. Ställ in längden och fäst sedan okularskyddet på båda sidor, eller bara ena sidan, i bärremmen. Okularskyddet hålls fast mot ögonmusslorna med ett snäpplås. -
Page 79: Betraktning Med Och Utan Glasögon
Victory RF Betraktning med och utan glasögon Vid betraktning utan glasögon använder Du produkten med utdragen ögonmussla. Du vrider då ögonmusslan (Fig. 1/1) åt vänster (motsols) uppåt till det översta spärrläget (bild A). Du kan spärra ögonmusslan i fyra positioner –... -
Page 80: Skärpeinställning Av Målmarkeringen Och Dioptriutjämningen
Bruksanvisning Skärpeinställning av målmarkeringen och dioptriutjämningen Använd knappen AVSTÅNDSMÄTNING (Fig. 1/6) för att koppla in målmarkeringen (Fig. 4/9) och håll knappen intryckt. Du ställer in skärpan för målmarkeringen och indikeringen (Fig. 4/10) genom att vrida på höger dioptriutjämning (Fig. 1/4) åt vänster eller höger. Använd sedan central- fokuseringen (Fig. -
Page 81: Scan-Läge
Victory RF Scan-läge Du kan också låta enheten mäta permanent (scan-läge). Om knappen AVSTÅNDSMÄTNING (Fig. 1/6) hålls intryckt i mer än ca 3 sekunder, går enheten över i scan-läge och gör därefter löpande mätningar. Du ser det på avståndsindikeringen som visar nya värden ungefär var 1,5 sekund. -
Page 82: Val Av Lämpligt Ballistikprogram
Bruksanvisning Hållpunkten visas ca 1 sekund efter avståndsindikeringen. Ett ”H” framför betyder, att Du måste hålla högre (Fig. 3) och ett ”L” betyder att Du måste hålla lägre. För EU-inställningarna visas värdet i centimeter och för USA- inställningarna i inch. Av säkerhetsskäl anges hållpunkterna endast för avstånd på... -
Page 83: Bestämning Av Rätt Kulbana
Victory RF Exempel: Exempel: kurva EU 2 har valts: kurva EU 2 har valts: banavvikelse motsvarande banavvikelse motsvarande ballistikkurva 2, ballistikkurva 2, avståndsindikering i meter, avståndsindikering i meter, indikering av hållpunkt i centimeter, indikering av hållpunkt i centimeter, fläckskottavstånd 100 meter. fläckskottavstånd GEE. - Page 84 Bruksanvisning Mer information och hjälp hittar Du på vår webbsida http://www.zeiss.de/sportsoptics Välj först lämplig tabell beroende på kikarsiktets fläckskottavstånd: Fläckskottavstånd Använd tabell 100 meter Tabell 1 GEE (motsvarar ca 4 cm överträff på 100 meter) Tabell 2 100 yard Tabell 3...
- Page 85 Victory RF Tabell 2: val av kulbana för avståndsuppgifter i meter och fläckskottavstånd GEE. Val av Avstånd kurva i meter EU 1 0,3 – 7,1 – 19,2 – 36,5 – 59,3 – 126 EU 2 – 2,0 – 12,1 – 27,7 – 49,1 – 78,6 – 164 Banav- EU 3 –...
-
Page 86: Skötsel Och Underhåll
Bruksanvisning Skötsel och underhåll Laseravståndsmätaren behöver inget särskilt underhåll. Grövre smutspartiklar (t.ex. sand) på linserna skall inte torkas av, utan blåsas bort eller avlägsnas med pensel. Fingeravtryck kan angripa linsernas yta efter en tid. Det enklaste sättet att rengöra linsytorna är att andas på dem och sedan torka efter med en ren optikduk. -
Page 87: Tekniska Data
Victory RF Tekniska data Victory Victory Victory Victory 8x45T*RF 10x45T*RF 8x56T*RF 10x56T*RF Förstoring Objektivdiameter 45 mm 45 mm 56 mm 56 mm Utträdesspupilldiameter 5,6 mm 4,5 mm 7 mm 5,6 mm Skymningstal 21,2 21,2 23,7 Synfält på 1000 m/yd 125 m/yd 110 m/yd 115 m/yd 110 m/yd Närinställningsgräns 5,5 m 5,5 m... - Page 88 Informacje dotyczące użytkowania Gratulujemy zakupu nowej lornetki z wbudowanym dalmierzem laserowym. Produkty firmy Carl Zeiss charakteryzuje doskonała sprawność optyczna, dokładne wykończenie i długi okres użytkowania. Proszę przestrzegać następujących wskazówek użytkowania, aby mogli Państwo w optymalny sposób korzystać z produktu i aby stał się na wiele lat niezawodnym towarzyszem.
- Page 89 Victory RF Uwaga Proszę stosować baterie zalecane przez producenta. Z bateriami należy się obchodzić zgodnie z zaleceniami producenta. Baterii nie wolno w żadnym wypadku wrzucać do ognia, podgrzewać, ponownie ładować, rozkładać lub przełamywać. Informacje dla użytkownika odnośnie utylizacji urządzeń elektrycznych lub elektronicznych (prywatne gospodarstwa domowe) Ten symbol znajdujący się...
-
Page 90: Nazwy Części Składowych
Informacje dotyczące użytkowania Spis treści Nazwy części składowych ......... 88 Zakres dostawy . -
Page 91: Zakres Dostawy
Victory RF Zakres dostawy Lornetka z dalmierzem laserowym Pokrywka ochronna okularu 2 pokrywki ochronne obiektywu Futerał typu „pogotowie“ Pasek do noszenia Bateria litowa 3V typu CR 2 Ściereczka do czyszczenia układów optycznych Instrukcja obsługi, karta gwarancyjna Przygotowanie Włożenie/wyjęcie baterii Zasilanie dalmierza laserowego odbywa się za pośrednictwem baterii litowej typu CR 2. -
Page 92: Zamocowanie Paska Do Noszenia I Osłony
Informacje dotyczące użytkowania Zamocowanie paska do noszenia i osłony Pasek do noszenia i osłona chroniąca okular należy założyć zgodnie z ilustracjami. Wskazówka: Pasek do noszenia jest przewlekany jedynie raz przez ucho znajdu- jące się przy pokrywce ochronnej okularu. Proszę zgodnie z własnym uznaniem połączyć... -
Page 93: Obserwacja W Okularach I Bez Okularów
Victory RF Obserwacja w okularach i bez okularów W trakcie obserwacji bez okularów proszę używać urządzenia ze zdjętą muszlą wziernikową. W tym celu należy wykręcić muszlę wziernikową (Fig. 1/1) w lewo (w kierunku przeciwnym do ruchu wskazówek zegara) do góry, aż do najwyższej pozycji zatrzaśnięcia się (ilustracja A). Muszla wziernikowa zatrzaskuje się... -
Page 94: Oznaczenie Ostrości Oznacznika Celu I Kompensatora Dioptrii
Informacje dotyczące użytkowania Oznaczenie ostrości oznacznika celu i kompensatora dioptrii Proszę włączyć przyciskiem POMIAR ODLEGŁOŚCI (Fig. 1/6) oznacznik celu (Fig. 4/9) i przytrzymać przycisk. Ustawienie ostrości oznacznika celu i wyświetlacza (Fig. 4/10) odbywa się poprzez obrót prawego kompensatora dioptrii (Fig. 1/4) w lewo lub w prawo. Proszę następnie starannie ustawić ostrość... -
Page 95: Tryb „Scan
Victory RF Tryb „Scan“ Urządzeniem tym można dokonywać pomiarów również w trybie stałym (trybie „Scan“). Jeżeli przycisk POMIAR ODLEGŁOŚCI (Fig. 1/6) zostanie naciśnięty i przytrzymany dłużej niż przez ok. 3 sekundy, to urządzenie przełącza się automatycznie na tryb „Scan“, a następnie stale wykonuje pomiary. -
Page 96: Wybór Odpowiedniego Programu Balistycznego
Informacje dotyczące użytkowania Punkt celowania zostaje wyświetlony po upływie ok. 1 sekundy po wyświetleniu odległości. Umieszczona z przodu litera „H“ oznacza, że należy celować wyżej (Fig. 3) umieszczona z przodu litera „L“ oznacza konieczność niższego celowania. W przypadku ustawień EU wartości są wyświetlane w centymetrach, a w przypadku ustawień... -
Page 97: Ustalenie Prawidłowego Toru Lotu Pocisku
Victory RF Przykład: Przykład: została wybrana krzywa EU 2: została wybrana krzywa EU 2: Obniżenie toru lotu pocisku zgodnie Obniżenie toru lotu pocisku zgodnie z krzywą balistyczną 2, z krzywą balistyczną 2, wyświetlenie odległości w metrach, wyświetlenie odległości w metrach, wyświetlenie punktu celowania w centymetrach, wyświetlenie punktu celowania w centymetrach, odległość... - Page 98 Informacje dotyczące użytkowania Dalsze informacje i pomoc odnośnie tego tematu otrzymają Państwo na naszej stronie http://www.zeiss.de/sportsoptics Proszę najpierw wybrać odpowiednią tabelę w zależności od odległości wstrzeliwania na plamkę lunetowego celownika optycznego: Odległość wstrzeliwania na plamkę Tabela, którą należy zastosować 100 metrów Tabela 1 GEE (odpowiada ok.
- Page 99 Victory RF Tabela 2: Wybór toru lotu pocisku dla danych odległości w metrach i odległości do wstrzeliwania na plamkę (GEE). Wybór Odległość krzywej w metrach EU 1 – 7,1 – 19,2 – 36,5 – 59,3 – 126 EU 2 Obniżenie –...
-
Page 100: Pielęgnacja I Konserwacja
Informacje dotyczące użytkowania Pielęgnacja i konserwacja Laserowy odległościomierz nie wymaga specjalnej konserwacji. Większych cząsteczek brudu (np. piasku) nie wycierać z soczewki, lecz zdmuchnąć lub usunąć za pomocą pędzla. Odciski palców mogą po pewnym czasie uszkodzić powierzchnię soczewki. Chuchanie i polerowanie czystą szmatką do czyszczenia urządzeń... -
Page 101: Dane Techniczne
Victory RF Dane techniczne Victory Victory Victory Victory 8x45T*RF 10x45T*RF 8x56T*RF 10x56T*RF Powiększenie Średnica obiektywu 45 mm 45 mm 56 mm 56 mm Średnica źrenic wyjściowych 5,6 mm 4,5 mm 7 mm 5,6 mm Współczynnik zmierzchowy 21,2 21,2 23,7 Pole widzenia na 1000 m/jardów 125 m/jard. - Page 102 Инструкция по применению Поздравляем Вас с приобретением нового бинокля со встроенным лазерным измерителем расстояния. Продукция марки Carl Zeiss отличается великолепной оптикой, точностью обработки и длительным сроком службы. Соблюдайте приведенные ниже указания по оптимальному применению продукта, и он станет Вашим надежным спутником на долгие годы.
- Page 103 Victory RF Внимание: Используйте только рекомендованные производителем типы батареек. Обращайтесь с использованными батарейками в соответствии с указаниями производителя. Запрещается бросать батарейки в огонь, нагревать, повторно заряжать, разбирать или вскрывать их. Информация для пользователя по утилизации электрических и электронных приборов (частные лица) Этот...
-
Page 104: Наименование Деталей
Инструкция по применению Содержание Наименование деталей ........102 Комплект... -
Page 105: Комплект Поставки
Victory RF Комплект поставки ● Бинокль с лазерным измерителем расстояния ● Защитная крышка для окуляра ● 2 защитных крышки для объектива ● Защитная сумка ● Ремень для переноски ● Литиевая батарейка 3В типа CR 2 ● Тряпочка для очистки оптики ●... -
Page 106: Закрепление Ремня Для Переноски И Защитных Колпачков
Инструкция по применению ■ Закрепление ремня для переноски и защитных колпачков Ремешок для ношения и защитная крышка для окуляра закрепляются, как показано на фотографиях. Указание: Ремешок для ношения просто пропускается сквозь петлю на защитной крышке для окуляра. По своему усмотрению проденьте ремешок... -
Page 107: Наблюдение С Очками И Без Очков
Victory RF ■ Наблюдение с очками и без очков При наблюдении без очков используйте прибор с выдвинутым окуляром. Для этого окуляр (Fig. 1/1) выкручивается влево (против часовой стрелки) вверх до крайней верхней точки фиксации (рис. A). Окуляр может фиксироваться в четырёх положениях: в... -
Page 108: Настройка Резкости Прицельной Марки И Выравнивание Диоптрий
Инструкция по применению ■ Настройка резкости прицельной марки и выравнивание диоптрий С помощью кнопки ИЗМЕРЕНИЕ РАССТОЯНИЯ (Fig. 1/6) включите прицельную марку (Fig. 4/9) и удерживайте эту кнопку нажатой. Настройка резкости прицельной марки и индикатора (Fig. 4/10) осуществляется путем поворота правого выравнивателя диоптрий (Fig. -
Page 109: Режим Сканирования
Victory RF ■ Режим сканирования С помощью прибора можно выполнять измерения в непрерывном режиме (режим сканирования). Если нажать на кнопку ИЗМЕРЕНИЕ РАССТОЯНИЯ (Fig. 1/6) и удерживать ее нажатой дольше прим. 3 секунд, прибор переключается в режим сканирования и затем непрерывно выполняет измерения. Вы увидите это по индикатору расстояния, на... -
Page 110: Выбор Подходящей Баллистической Программы
Инструкция по применению Точка прицеливания отображается в течение прим. 1 секунды после отображения расстояния. Стоящая впереди буква «H» означает, что необходимо прицеливаться выше (Fig. 3), а стоящая впереди буква «L» означает, что необходимо прицеливаться ниже. Настройки для ЕС отображаются в сантиметрах, настройки для США отображаются в... -
Page 111: Определение Правильной Траектории Полета Пули
Victory RF Пример: Пример: выбрана кривая EU ▫ 2: снижение выбрана кривая EU 2: снижение траектории пули в соответствии траектории пули в соответствии с баллистической кривой 2, с баллистической кривой 2, отображение расстояния в метрах, отображение расстояния в метрах, отображение точки прицеливания отображение... - Page 112 Инструкция по применению Более подробную информацию и помощь по этой теме Вы можете получить на нашем сайте: http://www.zeiss.de/sportsoptics Сначала выберите в зависимости от дистанции выстрела в «яблочко» оптического прицела подходящую для Вас таблицу: Дистанция выстрела в «яблочко» Применимая таблица 100 метров...
- Page 113 Victory RF Таблица 2: Выбор траектории полета пули для расстояния, указываемого в метрах, и дистанции выстрела в «яблочко» GEE (наилучшая дистанция пристрелки). Выбор Расстояние кривой в метрах EU ▫ 1 0,3 – 7,1 – 19,2 – 36,5 – 59,3 – 126 EU ▫...
-
Page 114: Уход И Обслуживание
Если Вам необходимы запчасти для Вашего бинокля, как например, окуляры или защитные крышки для окуляров, обратитесь в специализированный магазин, в представительство Zeiss в Вашей стране или в наш отдел обслуживания клиентов. Наш отдел обслуживания клиентов с радостью примет Ваши запросы по телефону... -
Page 115: Tехнические Данные
Victory RF Технические данные Victory Victory Victory Victory 8 x 45 T* RF 10 x 45 T* RF 8 x 56 T* RF 10 x 56 T* RF Увеличение Диаметр объектива 45 мм 45 мм 56 мм 56 мм Диаметр выходного зрачка 5,6 мм... - Page 116 Használati utasítás Gratulálunk beépített lézeres távolságmérővel felszerelt új távcsövéhez. A Carl Zeiss termékeket ragyogó optikai teljesítmények, precíz kidolgozás és hosszú élettartam jellemzi. Kérjük, tartsa szem előtt az alábbi használati tudnivalókat, hogy a terméket optimálisan használhassa és, hogy az sok éven át az Ön megbízható...
- Page 117 Victory RF Figyelem Csak a gyártó által ajánlott akkumulátortípusokat használjon. A használt akkumulátorok a gyártó utasításainak megfelelően kezelendők. Az akkumulátorokat semmiképpen sem szabad tűzbe dobni, felhevíteni, újra feltölteni, szétszedni vagy feltörni. Az elektromos és elektronikus készülékek ártalmatlanítására vonatkozó felhasználói információk (magán háztartások) Ez termékeken és/vagy kísérő...
-
Page 118: Az Alkatrészek Elnevezése
Használati utasítás Tartalomjegyzék Az alkatrészek elnevezése ........116 Szállítási terjedelem . -
Page 119: Szállítási Terjedelem
Victory RF Szállítási terjedelem Távcső lézeres távolságmérővel Okulárvédő sapka 2 objektívvédő sapka Készenléti táska Hordszíj Lítium akku 3V, CR 2 típus Optika tisztítókendő Útmutató, garanciajegy Előkészítés Az akku behelyezése/eltávolítása A lézeres távolságmérő energiaellátása lítium akkuval történik, típusa CR 2. Az akku behelyezéséhez és cseréjéhez az akkufedelet (Fig. 2/8) – érmével vagy hasonlóval –... -
Page 120: A Hordszíj És A Védősapkák Felhelyezése
Használati utasítás A hordszíj és a védősapkák felhelyezése A hordszalag és az okulárvédő sapka felhelyezése az ábrázolásoknak megfelelően történik. Figyelem: A hordszalagot csak egyszerűen átvezetjük az okulárvédő sapkán lévő fülön. Az okulárvédő sapkát saját megítélése szerint kösse össze a hordszalaggal mindkét oldalon vagy csak az egyik oldalon. -
Page 121: Megfigyelés Szemüveggel És Szemüveg Nélkül
Victory RF Megfigyelés szemüveggel és szemüveg nélkül A szemüveg nélkül történő megfigyelés során használja a készüléket kihúzott szemkagylóval. Ehhez a szemkagylót (Fig. 1/1) balra fordítva (az óramutató járásával ellenkező irányba) fel irányba a legfelső kattanásig kicsavarjuk (Bemutató ábra: A). A szemkagyló négy pozícióban bekattintható... -
Page 122: Az Irányzó Jel Éles Beállítása És Dioptriakiegyenlítés
Használati utasítás Az irányzó jel éles beállítása és dioptriakiegyenlítés Kapcsolja be a TÁVOLSÁGMÉRŐ gombbal (Fig. 1/6) az irányzó jelet (Fig. 4/9) és tartsa lenyomva a gombot. Az irányzó jel és a kijelző éles beállítása (Fig. 4/10) a jobb dioptriakiegyenlítő (Fig. 1/4) balra vagy jobbra fordításával történik. -
Page 123: Scan Üzemmód
Victory RF Scan üzemmód A készülékkel állandó üzemmódban (Scan üzemmód) is végezhetőek méré- sek. Ha a TÁVOLSÁGMÉRÉS gombot (Fig. 1/6) kb. 3 másodpercnél tovább tartjuk nyomva, a készülék Scan üzemmódba kapcsol és folyamatosan végez méréseket. Ez a távolságkijelzőn felismerhető, ami kb. 1,5 másodpercenként új mérési értékeket mutat. -
Page 124: A Megfelelő Ballisztikus Program Kiválasztása
Használati utasítás A célpont kijelzése kb. 1 másodperccel a távolságkijelzés után történik. A „H” jel azt jelenti, hogy magasabbra kell tartani (Fig. 3), az „L” jel pedig azt, hogy alacsonyabbra kell tartani. Az EU beállítások céljára a kijelzés centiméterben történik, az US beállítások céljára pedig inch-ben. Biztonsági okokból a célpontok csak 500 méter távolságokhoz jelennek meg. -
Page 125: A Helyes Lövedék-Röppálya Meghatározása
Victory RF Példa: Példa: EU 2 görbe kiválasztva: EU 2 görbe kiválasztva: Lövedékesés a 2. ballisztikus Lövedékesés a 2. ballisztikus görbének megfelelően, görbének megfelelő, távolságkijelzés méterben, távolságkijelzés méterben, célpont kijelzés centiméterben, célpont kijelzés centiméterben, telitalálat-távolság 100 méter. telitalálat-távolság GEE. A helyes lövedék-röppálya meghatározása A készülék 6 tárolt lövedék-röppályával rendelkezik, melyek csaknem valamennyi kalibert lefednek. - Page 126 Használati utasítás A témával kapcsolatos további információkat és segítséget a http://www.zeiss.de/sportsoptics címen elérhető weboldalunkon kaphat. A céltávcső telitalálat-távolságának függvényében először válassza ki az Önnek megfelelő táblázatot: Telitalálat távolság Alkalmazandó táblázat 100 méter 1. táblázat GEE (kb. 4 cm magaslövésnek felel meg 100 méteren) 2.
- Page 127 Victory RF 2. táblázat: A lövedék-röppálya kiválasztása méterben megadott távolsági adatokhoz és GEE telitalálat távolsághoz. Görbe Távolság kiválasztása méterben EU 1 – 7,1 – 19,2 – 36,5 – 59,3 – 126 EU 2 – 2,0 – 12,1 – 27,7 – 49,1 – 78,6 –...
-
Page 128: Gondozás És Karbantartás
Használati utasítás Gondozás és karbantartás A lézeres távolságmérő különleges ápolást nem igényel. A lencsékről a durva részecskéket (pl. homok) ne próbálja törléssel eltávolítani, hanem fújja le, vagy szőrecsettel tisztogassa le. Az ujjlenyomatok egy idő után megtámadhatják a lencsék felületét. A lencsefelületek tisztításának legegyszerűbb módja, ha rálehelünk és tiszta optikai tisztítókendővel átdörzsöljük. -
Page 129: Műszaki Adatok
Victory RF Műszaki adatok Victory Victory Victory Victory 8x45T*RF 10x45T*RF 8x56T*RF 10x56T*RF Nagyítás Objektív átmérő 45 mm 45 mm 56 mm 56 mm Kilépő pupillák átmérője 5,6 mm 4,5 mm 7 mm 5,6 mm Szürkületi érték 21,2 21,2 23,7 Látómező 1000 m/yardon 125 m/yard. - Page 130 Notizen...
- Page 131 Notizen...
- Page 132 Notizen...
- Page 133 Consult the dealer or an experienced radio/ TV technician for help. Carl Zeiss Sports Optics GmbH is not responsible for any radio or television interference caused by unauthorized modifications of this equipment or the substitution or attachment of connecting cables and equipment other than those specified by Carl Zeiss Sports Optics GmbH.
- Page 134 “This product may be covered by one or more of the following United States patents: US6542302, US6816310, US6906862” Carl Zeiss Sports Optics GmbH Carl Zeiss Group Gloelstrasse 3 – 5 D-35576 Wetzlar www.zeiss.de/sportsoptics We make it visible.
Need help?
Do you have a question about the Victory 10 x 45 T RF Series and is the answer not in the manual?
Questions and answers