Miele PDR 910 G Quick Start Manual
Commercial tumble dryer
Hide thumbs
Also See for PDR 910 G:
- Quick start manual (130 pages) ,
- Operating and installation instructions (92 pages)
Table of Contents

Related Manuals for Miele PDR 910 G


Summary of Contents for Miele PDR 910 G
- Page 1 Quick Start Guide Commercial tumble dryer PDR 910 G Gas-heated To avoid the risk of accidents or damage to the en-GB machine, it is essential to read these instruc- tions before it is installed and used for the first time. M.-Nr. 12 431 150...
-
Page 2: Table Of Contents
Contents Warning and Safety instructions ................... Extended documentation ....................Take these safety precautions if you smell gas..............Installation site........................Appropriate use ......................... Foreseeable misuse......................Technical safety......................... Correct use........................10 Accessories ........................11 Description of the machine .................... 12 Operating the tumble dryer .................... 13 Control panel ........................ - Page 3 Contents “Flatwork” programme package ..................30 “Bedding” programme package..................31 “Buildings maintenance” programme package..............32 “Fire brigade” programme package .................. 33 “WetCare” programme package ..................34 “Equestrian” programme package ..................35 “Special programmes” programme package ..............36 “Individual programmes” programme package..............37 Changing the programme sequence ................
-
Page 4: Warning And Safety Instructions
Miele cannot be held liable for damage caused by non-compliance with these instruc- tions. Keep these operating instructions in a safe place and pass them on to any future owner. -
Page 5: Take These Safety Precautions If You Smell Gas
Warning and Safety instructions Before completing commissioning, maintenance, conversion and repair work, all gas- conducting components – from the manual shut-off valve to the burner jet – must be checked for leaks. Particular attention must be paid to the measurement connections on the gas valve and on the burner. -
Page 6: Appropriate Use
Foreseeable misuse Do not make any alterations to the tumble dryer, unless authorised to do so by Miele. Do not lean on the tumble-dryer door. Otherwise, the tumble dryer may tip over, causing injury to yourself or others. -
Page 7: Technical Safety
Do not make any alterations to the tumble dryer, unless authorised to do so by Miele. Do not connect the tumble dryer to the power supply by an extension lead (fire hazard due to overheating). - Page 8 If the appliance is hard wired, adequate provision must be made on site to switch off all poles to disconnect the tumble dryer from the power supply. If the mains connection cable is faulty it must always be replaced by a Miele authorised technician to protect the user from danger. ...
- Page 9 This special lamp must only be used for the purpose for which it is intended. It is not suitable for room lighting. Replacement lamps may only be fitted by a Miele authorised technician or by the Miele Customer Service Department.
-
Page 10: Correct Use
Warning and Safety instructions Correct use Do not lean on the tumble-dryer door. Otherwise, the tumble dryer may tip over, causing injury to yourself or others. Always close the drum door after each drying cycle. This will prevent: - Children climbing into the tumble dryer or hiding things in it. -
Page 11: Accessories
Make sure that you order the correct plinth for this tumble dryer (available from Miele as an optional accessory). Miele cannot be held liable for damage caused by non-compliance with these Warn- ing and Safety instructions. -
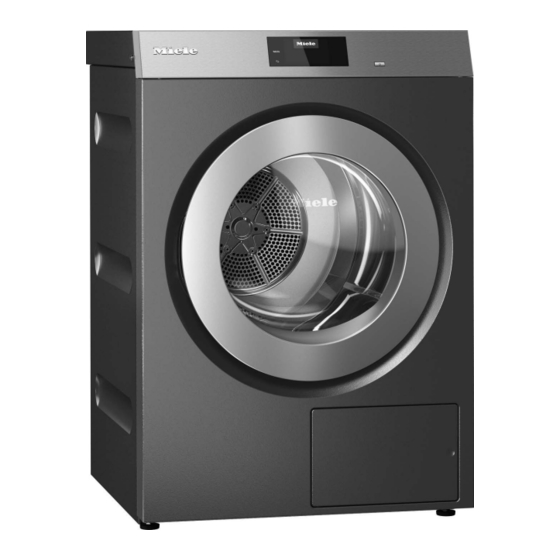
Page 12: Description Of The Machine
Description of the machine PDR 910 (gas-heated) Control panel with touch display Door Fluff filter flap 4 height-adjustable screw feet Electrical connection Communication module slot Intake vents for drying air Gas connection 1/2" acc. to ISO 7-1 Exhaust duct Ø 100 mm Connection for communication box Communication box (optional) For setting up a connection with external systems... -
Page 13: Operating The Tumble Dryer
Operating the tumble dryer Control panel Language sensor control For selecting the current user language At the end of the programme, the language is automatically reset to the language set at the supervisor level. Back sensor control Takes you back one level in a menu. Touch display / sensor control For starting the selected drying programme and cancelling a programme once it has... -
Page 14: Sensor Controls And Touch Display With Sensor Controls
Operating the tumble dryer Sensor controls and touch display with sensor controls The sensor controls , and Start/Stop and the sensor controls in the display re- spond to finger tip contact. Every touch of a sensor control is confirmed with an audible keypad tone. -
Page 15: Setting Numerical Values
Operating the tumble dryer To scroll through the menu, place your finger on the touch display and move it left or right. The orange scroll bar in the bottom display area shows that there are further options to choose from. To select the required drying programme, touch the programme name with your finger. -
Page 16: Pull-Down Menu
Operating the tumble dryer The numeric block will appear. Clock display 12:00 To enter the numerical value, touch the numbers on the right-hand side and then confirm with OK. Pull-down menu The pull-down menu can be used to display information (e.g. about a drying programme). ... -
Page 17: Help Display
Operating the tumble dryer Help display With some menus, Help appears along the bottom line of the display. If you need more information about the current menu, touch the Help sensor control. The additional information is shown in the display. Touch the sensor control to return to the previous screen. -
Page 18: Drying
Drying 1. Notes on correct laundry care Washing before Heavily soiled laundry must be washed particularly thoroughly. Use drying sufficient detergent and select a high wash temperature. If in doubt, wash the items several times. The tumble dryer must not be used for drying items of laundry which have been cleaned using industrial chemicals. -
Page 19: Loading The Tumble Dryer
Drying 2. Loading the tumble dryer Loading laundry Textiles may be damaged. into the tumble Before loading, read chapter “1. Notes on correct laundry care” dryer first. Open the door. Load laundry into the tumble dryer. Risk of damage with laundry getting trapped. Laundry can be damaged by getting trapped when closing the door. -
Page 20: Selecting Programme Settings
Drying With your finger, swipe to the left until you reach the required pro- gramme. Touch the sensor control for that programme. The display will change to the standard menu for that drying pro- gramme. Alternatively, you can select a programme from the Favourites list. The preset programmes under ... - Page 21 Drying Extras 11:02 Gentle tumble Anti-crease Touch the sensor control for the extra you want. Only press when the extra appears on the display. The relevant symbol for the required extra ( or ) lights up. Low temperat- Delicate fabrics (with the symbol on the care label, e.g.
-
Page 22: Starting A Programme
Drying 5. Starting a programme Payment device If your machine is connected to a payment device, the amount of (optional) payment required will appear in the display. Money may be lost if the drum door is opened or the programme is cancelled. -
Page 23: End Of The Programme
Drying vary or “jump”. The tumble dryer’s electronic module adapts during the ongoing drying programme. The displayed programme running time becomes more and more accurate. When using the programmes for the first time, the displayed time sometimes deviates significantly from the real time left. The differ- ence between the estimated and achieved time becomes smaller if the corresponding programme is run more often. -
Page 24: Timer
Drying Timer Prerequisite for The Delay start must be activated in the Supervisor level in the Con- setting the timer trols / Display menu so that the Timer can be selected. Before the programme starts, the Timer can be used to select a programme start time or programme end time. -
Page 25: Programme Overview
Programme overview “Label” programme package Programme name Suitable Selectable Selectable Load size fabrics drying levels extras (residual moisture in %) Cotton items with normal - Machine iron Cottons residual moisture (40 %) - Hand iron (25 %) - Hand iron plus (15 %) - Slightly dry - Anti-crease*... -
Page 26: Standard" Programme Package
Programme overview “Standard” programme package Programme name Suitable Selectable Selectable Load size fabrics drying levels extras (residual moisture in %) Single and multi-layer - Machine iron Cottons cotton/linen items (40 %) - Hand iron (25 %) - Hand iron plus (15 %) - Gentle tumble - Slightly dry 10 kg... - Page 27 Programme overview Programme name Suitable Selectable Selectable Load size fabrics drying levels extras (residual moisture in %) Fabrics that need airing - Anti-crease* Timed drying cool air For drying small loads or - Gentle tumble Timed drying warm air for airing individual items - Anti-crease* ...
- Page 28 Programme overview Programme name Suitable Selectable Selectable Load size fabrics drying levels extras (residual moisture in %) Mixed loads of garments - Machine iron Automatic plus suitable for the “Cottons” (40 %) and “Minimum iron” pro- - Hand iron grammes (25 %) - Hand iron plus (15 %)
-
Page 29: Sport" Programme Package
Programme overview “Sport” programme package Programme name Suitable Selectable Selectable Load size fabrics drying levels extras (residual moisture in %) Polyester or polyamide - Machine iron Sportswear with and without span- (40 %) - Hand iron (20 %) - Hand iron plus (8 %) - Slightly dry - Anti-crease*... -
Page 30: Flatwork" Programme Package
Programme overview “Flatwork” programme package Programme name Suitable Selectable Selectable Load size fabrics drying levels extras (residual moisture in %) Single and multi-layer - Extra dry - Anti-crease* Cottons, dry plus cotton/linen items (-4 %) Single and multi-layer - Normal - Anti-crease* Cottons, dry cotton/linen items... -
Page 31: Bedding" Programme Package
Programme overview “Bedding” programme package Programme name Suitable Selectable Selectable Load size fabrics drying levels extras (residual moisture in %) - Normal - Anti-crease* Down duvets and pillows Down bedding (0 %) Synthetic duvets and pil- - Normal - Anti-crease* Synthetic bedding lows (0 %) -
Page 32: Buildings Maintenance" Programme Package
Programme overview “Buildings maintenance” programme package Programme name Suitable Selectable Selectable Load size fabrics drying levels extras (residual moisture in %) Cotton mops - Machine iron Mops (20 %) - Hand iron (15 %) - Hand iron plus (10 %) - Slightly dry - Anti-crease* (2 %) - Normal... -
Page 33: Fire Brigade" Programme Package
Programme overview “Fire brigade” programme package Programme name Suitable Selectable Selectable Load size fabrics drying levels extras (residual moisture in %) Breathing masks with Face masks head straps Breathing masks may only be tumble dried if 2 pieces they are held in place in the drum by special holders (optional ac- cessories). -
Page 34: Wetcare" Programme Package
Programme overview “WetCare” programme package Programme name Suitable Selectable Selectable extras Load size fabrics drying levels (residual moisture in %) Non-washable outerwear - Anti-crease* WetCare sensitive Non-washable outerwear - Machine iron WetCare silks which creases easily (40 %) - Hand iron (20 %) - Hand iron plus - Anti-crease*... -
Page 35: Equestrian" Programme Package
Metal buckles, hooks and eye fasteners may damage fabrics and the dryer drum. Remove all metal buckles, hooks and eye fasteners before tumble drying. If the metal buckles, hooks and eye fasteners cannot be removed, they must be covered with suitable protective bags (optional Miele accessories). Programme name Suitable... -
Page 36: Special Programmes" Programme Package
Programme overview “Special programmes” programme package You can put together 5 special programmes on the appliance and assign your own pro- gramme names. Enter the programme names in the table. Programme name Suitable Selectable Selectable Load size fabrics drying levels extras (residual moisture in %) ... -
Page 37: Individual Programmes" Programme Package
Programme overview “Individual programmes” programme package You can put together 20 individual programmes in the Miele Benchmark Programming Tool (see “Miele Benchmark Programming Tool Manual”) and assign your own programme names. Enter the programme names in the table. Programme name Suitable... -
Page 38: Changing The Programme Sequence
Changing the programme sequence Changing a programme once it has started You cannot change to another programme once a programme has started (this prevents unintentional alterations). You will need to can- cel the current programme before you can select a new one. ... -
Page 39: Time Left
Changing the programme sequence Adding laundry during ongoing Delay start period You can open the door to add or remove laundry. - All programme settings will be saved. - You can change the drying level, if required. Open the door. ... -
Page 40: Problem Solving Guide
Problem solving guide Fault diagnosis Message Cause and remedy The display remains dark. There is no power to the tumble dryer. Check the mains plug, main switch and fuses (on site). Problem Cause and remedy Condensate is escaping The drain is dirty. from an unexpected loca- Inspect the drain and remove any soiling if necessary. - Page 41 Problem solving guide Problem Cause and remedy You can remove the cover in the loading area to clean the air guide area underneath. The vent ducting or its openings are clogged with hair and fluff, for example. Check and clean all components in the vent ducting (e.g. ...
-
Page 42: Connectivity
Connectivity Pairing instructions Follow the steps below to connect the tumble dryer to your network. Opening the supervisor level Supervisor Select the menu option in the appliance display. Access via code Select the menu option. Enter the 3-digit supervisor code. ... -
Page 43: Technical Data
Connectivity Connect the appliance to your router/switch using the network cable. The router/switch must be connected to the Internet. The appliance is now successfully connected. Technical data System requirements for WiFi - WiFi 802.11b/g/n - 2.4 GHz band - WPA/WPA2 encryption - DHCP activated - Multicast DNS / Bonjour / IGMP snooping activated - Ports 443, 80, 53 and 5353 open... - Page 44 Connectivity - Varying radio signal sources or interference - Other appliances with Bluetooth or WiFi wireless technology...
-
Page 45: Optional Accessories
Optional accessories Accessory parts may only be fitted when expressly approved by Miele. If other parts are used, warranty, performance and product liability claims will be invalidated. Communication box The optional communication box allows external hardware from Miele and other suppliers to be connected to the Miele Professional machine. -
Page 46: Payment Systems
Payment systems This tumble dryer can be fitted with a payment system (optional Miele accessory). In this case, a Miele Customer Service technician must programme the relevant settings in the tumble dryer’s electronics and connect the payment system. -
Page 47: Technical Data
Technical data Height 1020 mm Width 700 mm Depth 763 mm Depth with door open 1248 mm Weight 75 kg Drum volume 180 l Maximum load size 10 kg (weight of dry laundry) Length of supply lead 1600 mm Supply voltage See data plate Rated load See data plate Fuse rating See data plate Lamp wattage... - Page 48 United Kingdom Malaysia Miele Sdn Bhd Miele Co. Ltd., Fairacres, Marcham Road Suite 12-2, Level 12 Abingdon, Oxon, OX14 1TW Menara Sapura Kencana Petroleum Professional Sales, Tel: 0845 365 6608 Solaris Dutamas No. 1, Jalan Dutamas 1 E-mail: professional@miele.co.uk 50480 Kuala Lumpur, Malaysia Internet: www.miele.co.uk/professional...
Need help?
Do you have a question about the PDR 910 G and is the answer not in the manual?
Questions and answers