Table of Contents
Advertisement
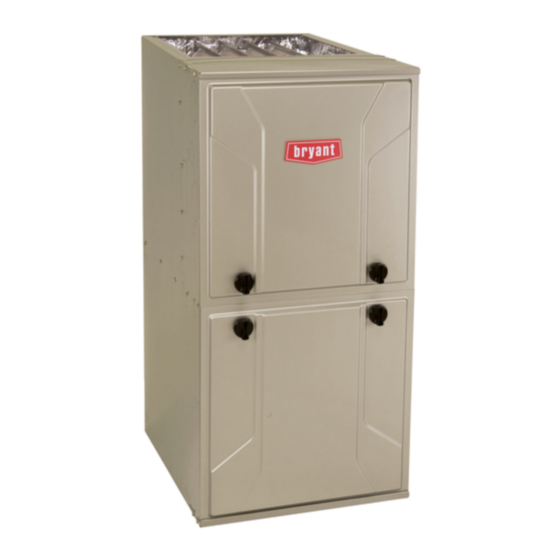
912SE
Single-Stage, 35-in. (889 mm) Tall, 4-Way Multipoise
High Efficiency Condensing Gas Furnace
NOTE: Read the entire instruction manual before starting the
installation.
TABLE OF CONTENTS
IMPORTANT . . . . . . . . . . . . . . . . . . . . . . . . . . . . . . . . . . . . . . . . . . . 2
Table 1 - Dimensions . . . . . . . . . . . . . . . . . . . . . . . . . . . . . . . . . . 3
SAFETY CONSIDERATIONS . . . . . . . . . . . . . . . . . . . . . . . . . . . . . 3
Table 2 - Minimum Clearances to Combustible Materials
for All Units . . . . . . . . . . . . . . . . . . . . . . . . . . . . . . . . . . . . . . . . . . 5
INTRODUCTION . . . . . . . . . . . . . . . . . . . . . . . . . . . . . . . . . . . . . . . 5
Table 3 - Loose Parts Bag . . . . . . . . . . . . . . . . . . . . . . . . . . . . . . . 6
CODES AND STANDARDS. . . . . . . . . . . . . . . . . . . . . . . . . . . . . . . 6
DURE . . . . . . . . . . . . . . . . . . . . . . . . . . . . . . . . . . . . . . . . . . . . . . . . . 7
ACCESSORIES . . . . . . . . . . . . . . . . . . . . . . . . . . . . . . . . . . . . . . . . . 7
LOCATION . . . . . . . . . . . . . . . . . . . . . . . . . . . . . . . . . . . . . . . . . . . . 7
AIR FOR COMBUSTION AND VENTILATION . . . . . . . . . . . . . . 8
Table 4 - Minimum Free Area Required for Each Combustion Air
Opening or Duct to Outdoors. . . . . . . . . . . . . . . . . . . . . . . . . . . . . 9
Table 5 - Minimum Space Volumes for 100% Combustion, Ventila-
tion and Dilution Air from Outdoors . . . . . . . . . . . . . . . . . . . . . . . 9
CONDENSATE TRAP. . . . . . . . . . . . . . . . . . . . . . . . . . . . . . . . . . . 11
CONDENSATE DRAIN CONNECTION . . . . . . . . . . . . . . . . . . . . 13
INSTALLATION . . . . . . . . . . . . . . . . . . . . . . . . . . . . . . . . . . . . . . . 15
Table 6 - Opening Dimensions - In. (mm) . . . . . . . . . . . . . . . . . 18
FILTER ARRANGEMENT . . . . . . . . . . . . . . . . . . . . . . . . . . . . . . . 19
Table 7 - Filter Media Pressure Drop (Clean) Versus Airflow - in. w.c.
(Pa) . . . . . . . . . . . . . . . . . . . . . . . . . . . . . . . . . . . . . . . . . . . . . . . . 19
Table 8 - Filter Media Pressure Drop (Clean) Versus Face Velocity-
in. w.c. (Pa) . . . . . . . . . . . . . . . . . . . . . . . . . . . . . . . . . . . . . . . . . 20
Table 9 - Air Filter Selection and Duct Sizing - In. (mm) . . . . . 20
AIR DUCTS . . . . . . . . . . . . . . . . . . . . . . . . . . . . . . . . . . . . . . . . . . . 22
GAS PIPING. . . . . . . . . . . . . . . . . . . . . . . . . . . . . . . . . . . . . . . . . . . 22
Table 10 - Maximum Capacity of Pipe . . . . . . . . . . . . . . . . . . . . 23
ELECTRICAL CONNECTIONS. . . . . . . . . . . . . . . . . . . . . . . . . . . 24
Table 11 - Electrical Data . . . . . . . . . . . . . . . . . . . . . . . . . . . . . . 25
ACCESS0RIES. . . . . . . . . . . . . . . . . . . . . . . . . . . . . . . . . . . . . . . . . 27
VENTING. . . . . . . . . . . . . . . . . . . . . . . . . . . . . . . . . . . . . . . . . . . . . 28
Table 12 - Vent Termination Kit for Direct Vent (2-pipe) Systems30
Table 13 - Approved Combustion-Air and Vent Pipe, Fitting and Ce-
ment Materials . . . . . . . . . . . . . . . . . . . . . . . . . . . . . . . . . . . . . . . 30
Table 14 - Maximum Equivalent Vent Length . . . . . . . . . . . . . . 39
Table 15 - Deductions from Maximum Equivalent Vent Length - Ft.
(M) . . . . . . . . . . . . . . . . . . . . . . . . . . . . . . . . . . . . . . . . . . . . . . . . 40
Portions of the text and tables are reprinted from NFPA 54/ANSI Z223.1E, with permission of National Fire Protection Association, Quincy, MA
02269 and American Gas Association, Washington DC 20001. This reprinted material is not the complete and official position of the NFPA or ANSI
Installation, Start-up, Operating and
Service and Maintenance Instructions
on the referenced subject, which is represented only by the standard in its entirety.
Table 16 - Maximum Allowable Exposed Vent Lengths in Uncondi-
tioned Space Table - Ft. . . . . . . . . . . . . . . . . . . . . . . . . . . . . . . . . 43
Table 17 - Hanger Spacing . . . . . . . . . . . . . . . . . . . . . . . . . . . . . 45
AIR DELIVERY - CFM. . . . . . . . . . . . . . . . . . . . . . . . . . . . . . . . . . 48
Table 18 - Air Delivery - CFM (with filter) . . . . . . . . . . . . . . . . 48
Table 19 - Airflow Settings. . . . . . . . . . . . . . . . . . . . . . . . . . . . . 51
Table 20 - System Status Display Codes . . . . . . . . . . . . . . . . . . 51
Table 21 - Main Menu Options . . . . . . . . . . . . . . . . . . . . . . . . . . 51
SERVICE LABEL . . . . . . . . . . . . . . . . . . . . . . . . . . . . . . . . . . . . . . 53
START-UP, ADJUSTMENT, AND SAFETY CHECK . . . . . . . . . 53
Table 22 - Test Sequence . . . . . . . . . . . . . . . . . . . . . . . . . . . . . . 54
WIRING DIAGRAM . . . . . . . . . . . . . . . . . . . . . . . . . . . . . . . . . . . . 55
ADJUSTMENTS . . . . . . . . . . . . . . . . . . . . . . . . . . . . . . . . . . . . . . . 56
Table 23 - Altitude Derate Multiplier for U.S.A. . . . . . . . . . . . . 56
Table 24 - Gas Rate (CU ft./hr). . . . . . . . . . . . . . . . . . . . . . . . . . 58
Table 25 - Orifice Size and Manifold Pressure (in. w.c.) for Gas Input
Rate . . . . . . . . . . . . . . . . . . . . . . . . . . . . . . . . . . . . . . . . . . . . . . . 58
SERVICE AND MAINTENANCE PROCEDURES. . . . . . . . . . . . 60
CARE AND MAINTENANCE . . . . . . . . . . . . . . . . . . . . . . . . . . . . 61
WINTERIZATION. . . . . . . . . . . . . . . . . . . . . . . . . . . . . . . . . . . . . . 66
SEQUENCE OF OPERATION . . . . . . . . . . . . . . . . . . . . . . . . . . . . 66
TROUBLESHOOTING . . . . . . . . . . . . . . . . . . . . . . . . . . . . . . . . . . 68
PARTS REPLACEMENT INFORMATION GUIDE . . . . . . . . . . . 72
MODEL NOMENCLATURE . . . . . . . . . . . . . . . . . . . . . . . . . . . . . 72
To learn more about this appliance and installation via a mobile device,
go to
https:\\bryant.hvacpartners.com/NFC
access airflow tables or troubleshooting guide on your mobile device go
to
mlctraining.com/training/techdocs/35/
or use the QR code below. To
or use the QR code below.
A220942
A200352
Advertisement
Table of Contents

Related Manuals for Bryant 912SE


Summary of Contents for Bryant 912SE
-
Page 1: Table Of Contents
912SE Single-Stage, 35-in. (889 mm) Tall, 4-Way Multipoise High Efficiency Condensing Gas Furnace Installation, Start-up, Operating and Service and Maintenance Instructions NOTE: Read the entire instruction manual before starting the Table 16 – Maximum Allowable Exposed Vent Lengths in Uncondi- installation. -
Page 2: Required Notice For Massachusetts Installations
912SE: Installation, Start-up, Operating and Service and Maintenance Instructions REQUIRED NOTICE FOR MASSACHUSETTS INSTALLATIONS IMPORTANT The Commonwealth of Massachusetts requires compliance with regulation 248 CMR as follows: 5.08: Modifications to NFPA-54, Chapter 10 2) Revise 10.8.3 by adding the following additional requirements: a. -
Page 3: Safety Considerations
912SE: Installation, Start-up, Operating and Service and Maintenance Instructions A210796 Fig. 1 – Dimensional Drawing Table 1 – Dimensions SHIP WT. FURNACE SIZE CABINET WIDTH OUTLET WIDTH BOTTOM INLET WIDTH AIR INTAKE LB (KG) 36040M14 14-3/16 (361) 12-1/2 (319) 12-9/16 (322) - Page 4 912SE: Installation, Start-up, Operating and Service and Maintenance Instructions WARNING WARNING FIRE, EXPLOSION, ELECTRICAL SHOCK, AND PERSONAL INJURY AND PROPERTY DAMAGE CARBON MONOXIDE POISONING HAZARD HAZARD Failure to follow this warning could result in dangerous operation, Failure to follow this warning could result in property damage, personal personal injury, death, or property damage.
-
Page 5: For All Units
912SE: Installation, Start-up, Operating and Service and Maintenance Instructions 2. Install this furnace only in a location and position as specified in the NOTICE “Location” section of these instructions. 3. Provide adequate combustion and ventilation air to the furnace Important Installation and Start-up Procedures space as specified in “Air for Combustion and Ventilation”... -
Page 6: Codes And Standards
912SE: Installation, Start-up, Operating and Service and Maintenance Instructions Refrigerating, and Air-Conditioning Engineers; or other approved WARNING engineering method to calculate heating load estimates and select the furnace. Excessive oversizing of the furnace may cause the furnace FIRE, INJURY OR DEATH HAZARD and/or vent to fail prematurely, customer discomfort and/or vent freezing. -
Page 7: Electrostatic Discharge (Esd) Precautions Proce
912SE: Installation, Start-up, Operating and Service and Maintenance Instructions Duct Systems 6. Before removing a new control from its container, discharge your body’s electrostatic charge to ground to protect the control from • US and CANADA: Current edition of Air Conditioning Contractors damage. -
Page 8: Air For Combustion And Ventilation
912SE: Installation, Start-up, Operating and Service and Maintenance Instructions CAUTION CAUTION PERSONAL INJURY AND/OR PROPERTY FURNACE RELIABILITY HAZARD DAMAGE HAZARD Failure to follow this caution may result in nuisance limit switch cycling and unit component damage. Improper use or installation of this furnace may result in premature furnace component failure. - Page 9 912SE: Installation, Start-up, Operating and Service and Maintenance Instructions Outdoor Combustion Air Method WARNING 1. Provide the space with sufficient air for proper combustion, ventilation, and dilution of flue gases using permanent horizontal or CARBON MONOXIDE POISONING HAZARD vertical duct(s) or opening(s) directly communicating with the Failure to follow this warning could result in personal injury or death.
- Page 10 912SE: Installation, Start-up, Operating and Service and Maintenance Instructions Indoor Combustion Air NFPA & AGA Standard and Known-Air-Infiltration Rate Methods Indoor air is permitted for combustion, ventilation, and dilution, if the Standard or Known-Air-Infiltration Method is used. WARNING CARBON MONOXIDE POISONING HAZARD Failure to follow this warning could result in personal injury or death.
-
Page 11: Condensate Trap
912SE: Installation, Start-up, Operating and Service and Maintenance Instructions openings in doors or floors having free area of at least 2 furnace is installed in the downflow orientation, the condensate trap in.2/1,000 BTUh (4,400 mm2/kW) of total input rating of all gas must be relocated for proper condensate drainage. - Page 12 912SE: Installation, Start-up, Operating and Service and Maintenance Instructions To Relocate the Condensate Trap: • Orient the furnace in the downflow position. • Fig. 9 shows the condensate trap and tubing before and after relocation. Refer to Fig. 9 to begin the trap conversion.
-
Page 13: Condensate Drain Connection
912SE: Installation, Start-up, Operating and Service and Maintenance Instructions from sagging or being dislocated from the furnace or termination point. NOTICE In the absence of local codes, consult the current edition of the National Standard Plumbing Code, in the current edition of U.S. or the National The field-supplied, accessory horizontal drain trap grommet is ONLY Plumbing Code of Canada in Canada. - Page 14 912SE: Installation, Start-up, Operating and Service and Maintenance Instructions 2. Locate the Z-pipe. Remove the pre-formed drain elbow and four spring clamps from the loose parts bag. 3. The Z-pipe is connected to the condensate trap and the outside of the furnace by modifying the formed rubber drain elbow as shown Fig.
-
Page 15: Installation
912SE: Installation, Start-up, Operating and Service and Maintenance Instructions 13. Slide a spring clamp over the end of the remaining rubber drain 3. Remove the knock-out for the condensate trap in the side of the elbow. casing. 14. Re-attach the condensate trap with Z-pipe assembly. Make fine 4. - Page 16 912SE: Installation, Start-up, Operating and Service and Maintenance Instructions casing. Bypass humidifier may be attached into unused return air CAUTION side of the furnace casing. See Fig. Fig. 23, and Fig. Bottom Return Air Inlet FURNACE RELIABILITY HAZARD These furnaces are shipped with bottom closure panel installed in bottom Failure to follow this caution may result in nuisance limit switch return-air opening.
- Page 17 912SE: Installation, Start-up, Operating and Service and Maintenance Instructions Supply Air Connections NOTE: For downflow applications, this furnace is approved for use on combustible flooring when any one of the following three accessories are used: APPLIES TO ALL MODEL SIZES HORIZONTAL •...
- Page 18 912SE: Installation, Start-up, Operating and Service and Maintenance Instructions Connect supply-air duct to flanges on furnace supply-air outlet. Bend WARNING flange upward to 90° with wide duct pliers. See Fig. 20. The supply-air duct must be connected to ONLY the furnace supply-outlet-air duct FIRE, EXPLOSION, AND CARBON MONOXIDE flanges or air conditioning coil casing (when used).
-
Page 19: Filter Arrangement
912SE: Installation, Start-up, Operating and Service and Maintenance Instructions For downflow applications, the optional media cabinet (or field supplied accessory air cleaner) must only be connected to the bottom opening on FURNACE FURNACE (OR COIL CASING WHEN USED) APPROVED the furnace. See Fig. - Page 20 912SE: Installation, Start-up, Operating and Service and Maintenance Instructions Table 7 – Filter Media Pressure Drop (Clean) Versus Airflow - in. w.c. (Pa) (Continued) Factory-Accessory 20 x 25 Filter Factory-Accessory Representative After-Market Filter Media (508 x 635 mm) Washable Media...
- Page 21 912SE: Installation, Start-up, Operating and Service and Maintenance Instructions COMBUSTION - AIR PIPE (SEE VENTING SECTION) 30 IN. (762 mm) MIN. WORK AREA 2-IN. (51 mm) ROLLOUT PROTECTION REQUIRED Install 12” x 22” (305x559 mm) sheet metal in front of burner compartment area.
-
Page 22: Air Ducts
912SE: Installation, Start-up, Operating and Service and Maintenance Instructions AIR DUCTS 2. For each leg, install nut on bolt and then install bolt with nut in hole. (Install flat washer if desired.) NOTICE 3. Install another nut on other side of furnace base. (Install flat washer if desired.) - Page 23 912SE: Installation, Start-up, Operating and Service and Maintenance Instructions Left Side Gas Entry. Gas Pipe WARNING Gas Pipe Grommet Required Grommet Required For Direct For Direct Vent Applications Vent Applications. FIRE OR EXPLOSION HAZARD Failure to follow this warning could result in personal injury, death, and/or property damage.
-
Page 24: Electrical Connections
912SE: Installation, Start-up, Operating and Service and Maintenance Instructions Piping should be pressure and leak tested in accordance with the current have been made, purge lines and check for leakage at furnace prior to addition of the NFPA 54/ANSI Z223 in the United States, local, and operating furnace. - Page 25 912SE: Installation, Start-up, Operating and Service and Maintenance Instructions WARNING FIELD 24-V WIRING FIELD 115-, 208/230-, 460-V WIRING FACTORY 24-V WIRING FACTORY 115-V WIRING NOTE 2 THERMOSTAT ELECTRICAL SHOCK AND FIRE HAZARD FIVE WIRE FIELD-SUPPLIED TERMINALS DISCONNECT THREE-WIRE HEATING-ONLY Failure to follow this warning could result in personal injury, death, or...
- Page 26 912SE: Installation, Start-up, Operating and Service and Maintenance Instructions The J-Box must be used when field line voltage electrical connections 1. Select and remove 7/8-in. (22 mm) knockout or plug on the desired are made to the furnace wiring harness inside the furnace casing. The side of the casing.
-
Page 27: Access0Ries
912SE: Installation, Start-up, Operating and Service and Maintenance Instructions 24-V Wiring 3. Install 2 screws through the outside of the casing to secure the J-Box bracket to the furnace casing. Make field 24-V connections at the 24-V terminal strip. See Fig. -
Page 28: Venting
912SE: Installation, Start-up, Operating and Service and Maintenance Instructions THERMOSTAT A210192 NOTE 7 Fig. 38 – Example of Single Stage Furnace Control THERMOSTAT See notes 1, 2, 3, 4, 5, 6, 7 and 8 Single-Stage Furnace with Single-Speed Heat Pump A230220 Fig. - Page 29 912SE: Installation, Start-up, Operating and Service and Maintenance Instructions Consignes spéciales pour l’installation de Venting for this furnace shall follow all Local codes for Category IV venting systems. This furnace is CSA approved for venting with ventilation au Canada PVC/ABS DWV venting systems. This furnace is also CSA approved L’installation faite au Canada doit se conformer aux exigences du code...
- Page 30 912SE: Installation, Start-up, Operating and Service and Maintenance Instructions Table 12 – Vent Termination Kit for Direct Vent (2-pipe) Systems Approved Two-Pipe Termination Fittings Vent and Combustion Allowable Concentric Concentric Vent 1 1/2-in. 2-in. 2 1/2-in. 3-in. 4-in. Air Pipe Diameters...
- Page 31 912SE: Installation, Start-up, Operating and Service and Maintenance Instructions the exhaust gases from one appliance from contaminating the WARNING combustion air of other gas appliances. Do not take combustion air from inside the chimney when using CARBON MONOXIDE POISONING HAZARD ventilated combustion air or single-pipe vent option.
- Page 32 912SE: Installation, Start-up, Operating and Service and Maintenance Instructions outdoor atmosphere. Air for combustion must be supplied as described radius 90 degree elbow is required to be attached to the combustion air in the Air For Combustion and Ventilation Section. Do not use an pipe adapter on the furnace.
- Page 33 912SE: Installation, Start-up, Operating and Service and Maintenance Instructions A190032 Fig. 42 – Inside Corner Termination Inside Corner Terminations Inside corner vent terminations are permitted provided that: • Only two exterior walls come together to form an angle of 90 degrees to 135 degrees. There are no other exterior walls attached to either wall to form an alcove.
- Page 34 912SE: Installation, Start-up, Operating and Service and Maintenance Instructions A12326 Fig. 43 – Direct Vent Termination Clearance NOTE: The following is based upon National codes for gas appliances and is provided as a reference. Refer to local codes which may supersede these standards and/or recommendations.
- Page 35 912SE: Installation, Start-up, Operating and Service and Maintenance Instructions A12325 Fig. 44 – Ventilated Combustion Air and Non-Direct Vent Termination Clearance NOTE: The following is based upon National codes for gas appliances and is provided as a reference. Refer to local codes which may supersede these standards and/or recommendations.
- Page 36 912SE: Installation, Start-up, Operating and Service and Maintenance Instructions When determining appropriate location for termination, consider the WARNING following guidelines: 1. Comply with all clearance requirements stated in Fig. 43 Fig. 44 CARBON MONOXIDE POISONING HAZARD per application. Failure to follow the instructions outlined below for each appliance 2.
- Page 37 912SE: Installation, Start-up, Operating and Service and Maintenance Instructions ventilation fans are present in these areas, the combustion air pipe must instructions are adhered to. Refer to the appropriate Vent Termination terminate outdoors as a Direct Vent System. section above for locating the vent termination If the unobstructed distance from the foundation to the property line of the adjacent lot is no less than 4 ft.
- Page 38 912SE: Installation, Start-up, Operating and Service and Maintenance Instructions Recommended to prevent moisture from trickling into the furnace vestibule, a trap can be installed in the intake air pipe near the furnace. To prevent moisture, connecting a drain line to the trap is recommended as trace amounts of moisture will evaporate into the intake air stream.
- Page 39 912SE: Installation, Start-up, Operating and Service and Maintenance Instructions 3. For each pipe, multiply the number of elbows by the equivalent 6. When using polypropylene venting systems with flexible vent length for the type of elbow used. Record the equivalent length of pipes, perform adjustments for the equivalent length of the flexible all the elbows for each pipe.
- Page 40 912SE: Installation, Start-up, Operating and Service and Maintenance Instructions A13110 Table 15 – Deductions from Maximum Equivalent Vent Length - Ft. (M) Pipe Diameter (in): 1-1/2 2-1/2 (2.4) (2.4) (2.4) (2.4) (2.4) Mitered 90º Elbow (1.5) (1.5) (1.5) (1.5) (1.5) Medium Radius 90º...
- Page 41 912SE: Installation, Start-up, Operating and Service and Maintenance Instructions 3. Tighten the clamp around the vent elbow. Torque the clamp to 15 lb-in. See Fig. 54 Fig. Slope vent pipe back to the furnace at least ¼” per foot Use 45 deg. Elbows where...
- Page 42 912SE: Installation, Start-up, Operating and Service and Maintenance Instructions DOWNFLOW VERTICAL Fig. 55 – Downflow Configurations (Appearance may vary) See “Notes for Venting Options” Additional coupling required from transition to polypropylene piping. A11336 Representative drawing only, some models may vary.
- Page 43 912SE: Installation, Start-up, Operating and Service and Maintenance Instructions Table 16 – Maximum Allowable Exposed Vent Lengths in Unconditioned Space Table - Ft. 40,000* BTUH 60,000 BTUH Unit Size 3/8-in. 1/2-in. Uninsulated Uninsulated 3/8-in. Insulation 1/2-in. Insulation Winter Insulation Insulation Design Pipe Dia.
- Page 44 912SE: Installation, Start-up, Operating and Service and Maintenance Instructions 120,000 BTUH 140,000 BTUH Unit Size Uninsulated 3/8-in. Insulation 1/2-in. Insulation Uninsulated 3/8-in. Insulation 1/2-in. Insulation Winter Pipe Dia. Design Temp 15.2 12.2 22.9 28.9 22.9 32.0 16.7 15.2 19.8 32.0 19.8...
- Page 45 912SE: Installation, Start-up, Operating and Service and Maintenance Instructions Concentric Vent Table 17 – Hanger Spacing Material Single or multiple concentric vent must be installed as shown in Fig. Diameter PVC Sch SDR 21 & Polypro- Maintain the required separation distance between vents or pairs of vents...
- Page 46 912SE: Installation, Start-up, Operating and Service and Maintenance Instructions 2-Pipe and 1-Pipe Vent Termination NOTE: Follow the instructions of the vent terminal manufacturer. These instructions are provided as a reference, only. NOTICE RECOMMENDED SUPPORT FOR VENT TERMINATIONS It is recommended that sidewall vent terminations in excess of 24 inches (0.6 M) in vertical length be supported by EITHER the Direct...
- Page 47 912SE: Installation, Start-up, Operating and Service and Maintenance Instructions Venting System Length Calculations The Total Equivalent Vent Length (TEVL) for EACH combustion air or vent pipe equals the length of the venting system, plus the equivalent length of elbows used in the venting system from Table Standard vent terminations or factory accessory concentric vent terminations count for zero deduction.
-
Page 48: Air Delivery - Cfm
912SE: Installation, Start-up, Operating and Service and Maintenance Instructions AIR DELIVERY - CFM Table 18 – Air Delivery - CFM (with filter) External Static Pressure (in. w.c.) Airflow Default Unit Size Setting Setting Cont. Fan Heat 36040M14 1040 1010 1085... - Page 49 912SE: Installation, Start-up, Operating and Service and Maintenance Instructions Table 18 – Air Delivery - CFM (with filter) (Continued) Airflow Default External Static Pressure (in. w.c.) Unit Size Setting Setting Cont. Fan Heat 42060M17 1010 1065 1015 1135 1085 1040...
- Page 50 912SE: Installation, Start-up, Operating and Service and Maintenance Instructions Table 18 – Air Delivery - CFM (with filter) (Continued) Airflow Default External Static Pressure (in. w.c.) Unit Size Setting Setting Cont. Fan 1045 1130 1065 1210 1145 1080 1015 1285...
-
Page 51: Furnace Control Programming And Navigation
912SE: Installation, Start-up, Operating and Service and Maintenance Instructions Table 19 – Airflow Settings Designated Airflow Settings Default Airflow Settings Unit Size Heating Cooling Heating Const. Fan 36040M14 (5-8) (1-4) 36040M17 (4-9) (1-1) 36060M14 (6-14) (1-6) 42060M17 (7-14) (1-8) 48080M17... - Page 52 912SE: Installation, Start-up, Operating and Service and Maintenance Instructions The Main Menu provides access to operating parameters of the furnace will operate. Do NOT program the control board with a Model Program control including airflows as well as other diagnostics. See Fig.
-
Page 53: Service Label
912SE: Installation, Start-up, Operating and Service and Maintenance Instructions SERVICE LABEL Scan QR code or reference troubleshooting guide in installation manual. Scroll through main menu by pressing the MENU/SELECT button. The major status code is displayed in the first 2 digits of the display. The minor status Press NEXT/OPTION button to view current setting (will flash on code is displayed in the third digit . - Page 54 912SE: Installation, Start-up, Operating and Service and Maintenance Instructions c. To initiate the component test sequence, the control must be in CAUTION (idL) mode. no thermostat demands (W, Y, G). Select component test (Ct) from menu select buttons to start the...
-
Page 55: Wiring Diagram
912SE: Installation, Start-up, Operating and Service and Maintenance Instructions WIRING DIAGRAM SCHEMATIC DIAGRAM CONNECTION DIAGRAM TO 115VAC FIELD - DISCONNECT SWITCH NOTE #2 EQUIPMENT PRINTED CIRCUIT BOARD GROUND 24VAC HUM STATUS HSIR CODE LED SEE R ATING PLA T EFO R... -
Page 56: Adjustments
912SE: Installation, Start-up, Operating and Service and Maintenance Instructions 6. Pour one quart (liter) of water into funnel/tube. Water should run The gas input rate on rating plate is for installations at altitudes up to through collector box, overfill condensate trap, and flow into open 2000 ft. - Page 57 912SE: Installation, Start-up, Operating and Service and Maintenance Instructions Heating value = 1050 Btu/cu ft. screwdriver) counterclockwise (out) to decrease input rate or clockwise (in) to increase input rate. See Fig. Specific gravity = 0.62 Therefore: Orifice No. 44 NOTICE Manifold pressure: 3.4-in.
- Page 58 912SE: Installation, Start-up, Operating and Service and Maintenance Instructions Table 24 – Gas Rate (CU ft./hr) Table 25 – Orifice Size and Manifold Pressure (in. w.c.) for Gas Input Rate SIZE OF TEST DIAL SIZE OF TEST DIAL SEC. SEC.
- Page 59 912SE: Installation, Start-up, Operating and Service and Maintenance Instructions 3. Restore furnace to normal operating condition. 3. Adjust air temperature rise by adjusting blower speed. Increase a. Turn gas valve ON/OFF switch to OFF. blower speed to reduce temperature rise. Decrease blower speed to b.
-
Page 60: Service And Maintenance Procedures
912SE: Installation, Start-up, Operating and Service and Maintenance Instructions c. Turn on 115-V power to furnace. WARNING d. Set thermostat to “call for heat” and wait 1 minute. When low pressure switch is functioning properly, hot surface igniter should NOT glow and control diagnostic light flashes a status ELECTRICAL SHOCK, FIRE OR EXPLOSION HAZARD code (31.1). -
Page 61: Care And Maintenance
912SE: Installation, Start-up, Operating and Service and Maintenance Instructions 1. To retrieve the last 7 fault codes, proceed with the following: WARNING NOTE: NO thermostat signal may be present at control, and all blower-OFF delays must be completed. CARBON MONOXIDE POISONING AND FIRE a. - Page 62 912SE: Installation, Start-up, Operating and Service and Maintenance Instructions 4. If equipped with permanent, washable filter, clean filter by spraying 8. Reassemble motor and blower wheel by reversing items 7b through cold tap water through filter in opposite direction of airflow. Rinse 7f.
- Page 63 912SE: Installation, Start-up, Operating and Service and Maintenance Instructions 11. Remove the four screws that attach the top plate of the casing to the furnace. 12. Raise top plate up slightly and prop it up with a small piece of wood or folded cardboard.
- Page 64 912SE: Installation, Start-up, Operating and Service and Maintenance Instructions 15. Turn gas on at electric switch on gas valve and at external shut-off d. If replacement is required, remove the screw that secures the or meter igniter on igniter bracket and remove the igniter.
- Page 65 912SE: Installation, Start-up, Operating and Service and Maintenance Instructions 7. Remove the screw that secures the condensate trap to the collector WARNING box, remove the trap and set aside. 8. Remove the trap gasket from the collector box if it did not come off ELECTRICAL SHOCK, FIRE OR EXPLOSION HAZARD when the trap was removed.
-
Page 66: Winterization
912SE: Installation, Start-up, Operating and Service and Maintenance Instructions NOTE: After cleaning, inspect the heat exchangers to ensure they are 11. If a condensate pump is used, check with pump manufacturer to verify pump is safe for use with antifreeze used. Allow pump to free of all foreign objects that may restrict flow of combustion products. - Page 67 912SE: Installation, Start-up, Operating and Service and Maintenance Instructions f. Blower-OFF Delay- When the thermostat is satisfied, the R-to-W circuit is opened, de-energizing the gas valve GV, stopping gas flow to the burners, and de-energizing the humidifier terminal HUM. The inducer motor IDM will remain energized for a 15-sec post-purge period.
-
Page 68: Troubleshooting
912SE: Installation, Start-up, Operating and Service and Maintenance Instructions TROUBLESHOOTING A221116 Manufacturer reserves the right to change, at any time, specifications and designs without notice and without obligations. - Page 69 912SE: Installation, Start-up, Operating and Service and Maintenance Instructions A221119 Manufacturer reserves the right to change, at any time, specifications and designs without notice and without obligations.
- Page 70 912SE: Installation, Start-up, Operating and Service and Maintenance Instructions A221120 Fig. 71 – Troubleshooting Guide Manufacturer reserves the right to change, at any time, specifications and designs without notice and without obligations.
- Page 71 912SE: Installation, Start-up, Operating and Service and Maintenance Instructions A230014 Fig. 72 – Gas Furnace Checklist Manufacturer reserves the right to change, at any time, specifications and designs without notice and without obligations.
-
Page 72: Parts Replacement Information Guide
912SE: Installation, Start-up, Operating and Service and Maintenance Instructions PARTS REPLACEMENT INFORMATION GUIDE Casing Group Filter Group Blower door Filter(s) Bottom plate Media Cabinet (when used) Gas Control Group Control door Door knob assembly Burner Top filler plate Flame sensor...
Need help?
Do you have a question about the 912SE and is the answer not in the manual?
Questions and answers