Advertisement
Quick Links
Advertisement

Related Manuals for ADIR Viva ADIME902-WALL-36-GRY


Summary of Contents for ADIR Viva ADIME902-WALL-36-GRY
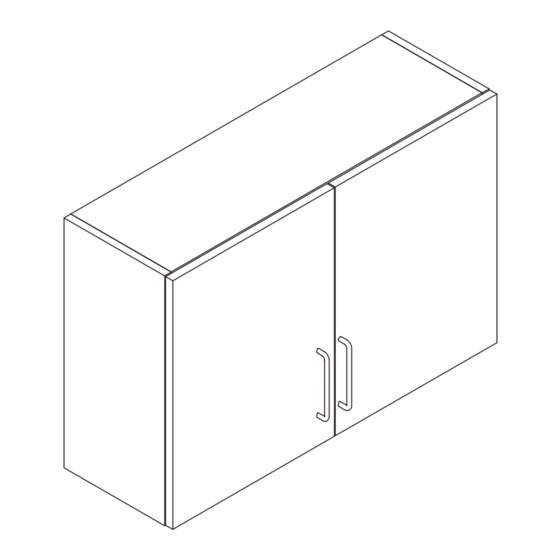
- Page 1 36 INCH WALL CABINET ADIME902-WALL-36-GRY USER GUIDE...
- Page 2 Thank you for your purchase. Viva by AdirMed maintains a strong practice of ongoing development of products and commercial research. We recognize that starting and maintaining a medical practice is expensive. We’ll help make the process cost-effective and elegant. Additionally, our team of specialists will ensure everything you need works as efficiently as possible, so you can effectively treat your clients.
-
Page 3: Table Of Contents
Table of Contents Parts Hardware Assembling Your Wall Cabinet Hanging Your Wall Cabinet Warranty... -
Page 4: Parts
Parts Left Panel Right Panel Middle Panel Back Panel Top Panel Bottom Panel Removable Shelf (x2) Top Back Rail Center Back Rail Bottom Back Rail Left Door Right Door... -
Page 5: Hardware
Hardware Ø4x15 mm Hinge (x4) Wooden Screw (x24) Shelf Support (x8) Ø4x30 mm Wooden Screw (x2) Cam Lock (x16) Cam Lock Bolt (x16) Hardware Specifications: • Ø4x15 mm Wooden Screw (x24) • Ø4x30 mm Wooden Screw (x2) • Ø15*13 mm Cam Lock (x16) •... -
Page 6: Assembling Your Wall Cabinet
Assembling Your Wall Cabinet NOTE: Before starting, ensure you have an open, clean area to assemble your cabinet. Ensure you have all the necessary parts and hardware listed above. We highly recommend hiring a professional contractor to assemble and install your cabinet(s). Step 1: A. - Page 7 Step 2: A. Turn your structure to rest on the Top Panel (E) and Bottom Panel (F) edges. a. On both panels, two predrilled holes are at the etched channels’ top and bottom. b. Gently tap eight Wooden Dowels (7) into both panels. c.
- Page 8 Step 3: A. Locate the Back Panel (D) and slide it between the etched channels on both the Top Panel (E) and the Bottom Panel (F), as pictured. Step 4: A. Take the Right Panel (B), and lay it on a flat, clean surface with the predrilled holes facing up. B.
- Page 9 Step 5: A. Take one Ø4x30 mm Wooden Screw (4) and secure it to the middle of the Top Back Rail (H), as pictured. B. Repeat the above step for the Bottom Back Rail (J), as shown.
- Page 10 Step 6: A. Locate the Hinges (1), Ø4x15 mm Wooden Screws (2), the Left Door (K), and the Right Door (L). B. Adhere the Hinges (1) to the inside of the doors using two screws per Hinge (1), as pictured. a.
- Page 11 Step 7: A. On the Left Panel (A) and the Right Panel (B), install the other side of the Hinges (1) with two Ø4x15 mm Wooden Screws (2) per Hinge (1), as pictured. B. Insert eight Shelf Supports (3), as pictured, and at your desired height. C.
- Page 12 Step 8: A. Connect the Hinges (1) as pictured and secure them together with one Ø4x15 mm Wooden Screws (2), per Hinge (1). a. Four screws total will be used between the two doors. B. If your doors do not line up, adjust the screws, as shown.
-
Page 13: Hanging Your Wall Cabinet
Hanging Your Wall Cabinet Using The French Cleating System Parts: Hardware: Screws (x3) Top Back Rail Bottom Cleat Plastic Anchors (x3) (M6 x 70 mm) Tools Needed (But Not Included): Pencil Tape Measure 3 ft Level Drill Phillips Head Electric 9 mm Drill Bit Screwdriver Screwdriver... - Page 14 Step 1: A. Using a stud finder, find at least one stud that a mounting screw will be secured in prior to beginning. B. Taking your tape measure, measure from the ground up 76 1/4”. a. Mark this measurement on the wall with a pencil. b.
- Page 15 Step 2: A. You will need to find the center of your line that you just made in the step above. B. Take your tape measure or level, and measure from right to left on your line, 17 1/16”. a. Mark this measurement on the wall. b.
- Page 16 Step 3: A. Drill the three holes marked on the wall with a 9 mm drill bit at a depth of 2.75”. B. Insert the three Plastic Anchors (1) into the holes.
- Page 17 Step 4: A. Locate the Bottom Cleat (B), and line it up with the holes you drilled in Step 3. a. Insert the three included Screws (2) into the predrilled holes on the cleat. b. Secure them in place with either a Philips head screwdriver or an electric screwdriver.
- Page 18 Step 5: A. With two people, lift your wall cabinet up and over the Bottom Cleat (B). B. Slowly slide the cabinet down until the Top Back Rail (A) 45° edge fits securely on the Bottom Cleat’s (B) edge.
-
Page 19: Warranty
Warranty Adir Corp (the “Company” or “Tiger Companies”) warrants to the purchaser that the product will be free from defects in workmanship and materials for a period of 3 years from the date of purchase. The warranty period is not extended if we repair, replace, exchange, or provide a refund for the product (as determined in our sole discretion). - Page 20 ADIME902-WALL-36-GRY © 2023 AdirCorp adircorp.com...
Need help?
Do you have a question about the Viva ADIME902-WALL-36-GRY and is the answer not in the manual?
Questions and answers