Advertisement
Quick Links
Advertisement

Related Manuals for ADIR ADIHO201-01 Series


Summary of Contents for ADIR ADIHO201-01 Series
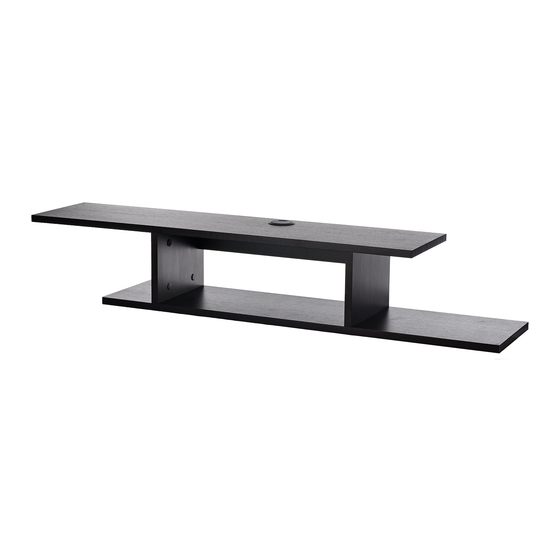
- Page 1 Wall Mounted Media Console Shelving Unit ADIHO201-01-SERIES USER GUIDE...
- Page 2 Thank you for your purchase. AdirHome is dedicated to bringing our customers the best possible selection of products to improve their homes. We pride ourselves on creating uniquely exquisite products for your home that you will enjoy for many years to come. Furnishing your home can be expensive and stressful, but we’ll help make the process affordable and stress-free.
- Page 3 Table of Contents Parts and Hardware Assembly Instructions 11 Warranty 12 Disclaimer...
- Page 4 Parts and Hardware Parts List: 1. Bottom Panel 2. Left Support Panel 3. Right Support Panel 4. Top Panel 5. Cross Panel...
- Page 5 Parts and Hardware Wooden Dowel (x11) Cam Lock (x11) Cam Lock Bolt (x11) Plastic Cover (x11) Mounting Bracket (x4) M4x15 Screw (x6) M6x50 Screw (x4) Plastic Anchor M6x50 (x4) Plastic Grommet Tools Required (But Not Included) • Screwdriver • Drill •...
- Page 6 Assembly Instructions STEP 1 A. Take your Bottom Panel (1) and your Top Panel (4) and insert four Cam Lock Bolt’s (C) in the Bottom Panel (1) in the outer pre-drilled holes, as pictured. B. Insert five Cam Lock Bolt’s (C) in the outer pre-drilled holes and the middle hole, as pictured.
- Page 7 Assembly Instructions STEP 2 A. Locate your Left Panel (2) and Right Panel (3) place them on a flat surface with the pre-drilled holes facing up. B. Place a Cam Lock (B) and a Cam Lock Bolt (C) in the outer, pre-drilled hole, as pictured. Tighten the Cam Lock Bolt (3) with a screwdriver.
- Page 8 Assembly Instructions STEP 3 A. Locate your Cross Panel (5), place it on its edge, as pictured. Insert one Wooden Dowel (A) on each end of the Cross Panel (5) and gently tap them in until they’re secure. B. Insert a Cam Lock (B) and a Cam Lock Bolt (C) at the bottom of the Cross Panel (5). Tighten the Cam Lock Bolt (3) with a screwdriver.
- Page 9 Assembly Instructions STEP 4 A. Take the Right Support Panel (3) and line it up with the Cam Lock Bolt’s (C) on the right of the Bottom Panel (1). B. Gently tap in the Right Support Panel (3) until it is flush with the Bottom Panel (1). C.
- Page 10 Assembly Instructions STEP 5 A. Line up the Top Panel (4) with the Wooden Dowels (A) on the Right Support Panel (3) and the Left Support Panel (2). B. Gently tap the Top Panel (4) until it becomes flush with the Right Support Panel (3) and the Left Support Panel (2).
- Page 11 Assembly Instructions STEP 6 A. Locate on your wall where you would like to mount your Wall Mounted Media Console. B. Mark on the wall where you want to drill your holes to secure your Mounting Brackets (E). C. Drill four holes and place the Plastic Anchors (H) inside of them. D.
- Page 12 Assembly Instructions STEP 7 A. On the back of the Cross Panel (5), secure the remaining 2 Mounting Brackets (E) using the included 4 M4x15 Screw’s (F). B. Once you have tightened all screws, check that the brackets are facing in the correct direction, grab your Wall Mounted Media Console, and slide the Mounting Brackets (E) on the back of the unit, downward onto the wall Mounting Brackets (E).
- Page 13 Assembly Instructions STEP 8 Once completed, your Adir Home Wall Mounted Media Console should look like this.
- Page 14 Limited Warranty 1. AdirCorp (the company) warrants to the purchaser that the product will be free from defects in workmanship and materials for a period of three (3) year from the date of purchase. 2. These warranties are not assignable or transferable to any other person. 3.
- Page 15 Disclaimer By purchasing products from AdirCorp, the user agrees as follows: TO THE MAXIMUM EXTENT PERMITTED BY LAW, THE PRODUCTS AND INFORMATION ON THIS SITE IS PROVIDED “AS IS” AND WITH ALL FAULTS AND ALPINE INDUSTRIES. MAKES NO PROMISES, REPRESENTATIONS, OR WARRANTIES, EITHER EXPRESS, IMPLIED, STATUTORY, OR OTHERWISE, WITH RESPECT TO THE PRODUCTS AND INFORMATION, INCLUDING ITS CONDITION, ITS CONFORMITY TO ANY REPRESENTATION OR DESCRIPTION, OR THE EXISTENCE OF ANY LATENT OR PATENT DEFECTS, AND ALPINE INDUSTRIES.
- Page 16 ADIHO201-01-SERIES ADIHO201-01-BLK 27 Selvage Street • Irvington, NJ • 07111 • © 2021 AdirCorp 27 Selvage Street • Irvington, NJ • 07111 • © 2021 AdirCorp adircorp.com adircorp.com...
Need help?
Do you have a question about the ADIHO201-01 Series and is the answer not in the manual?
Questions and answers