Table of Contents
Advertisement
Quick Links
Advertisement
Table of Contents

Related Manuals for Electrolux EHH6540FHK


Summary of Contents for Electrolux EHH6540FHK
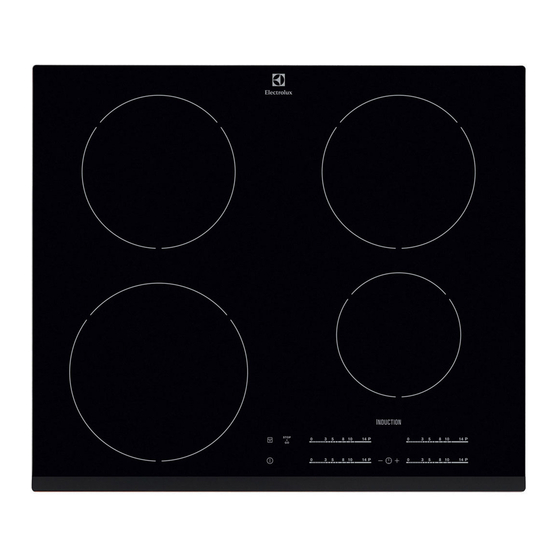
- Page 1 EHH6540FHK EN HOB USER MANUAL...
-
Page 2: Table Of Contents
10. ENERGY EFFICIENCY..................19 WE’RE THINKING OF YOU Thank you for purchasing an Electrolux appliance. You’ve chosen a product that brings with it decades of professional experience and innovation. Ingenious and stylish, it has been designed with you in mind. So whenever you use it, you can be safe in the knowledge that you’ll get great results every time. - Page 3 ENGLISH injuries and damages. Always keep the instructions with the appliance for future reference. 1.1 Children and vulnerable people safety This appliance can be used by children aged from 8 • years and above and persons with reduced physical, sensory or mental capabilities or lack of experience and knowledge if they have been given supervision or instruction concerning use of the appliance in a safe way and understand the hazards involved.
-
Page 4: Safety Instructions
After use, switch off the hob element by its control and • do not rely on the pan detector. If the glass ceramic surface / glass surface is cracked, • switch off the appliance to avoid the possibility of electric shock. - Page 5 ENGLISH such a way that it cannot be removed • Users with a pacemaker must keep a without tools. distance of minimum 30 cm from the • Connect the mains plug to the mains induction cooking zones when the socket only at the end of the appliance is in operation.
-
Page 6: Product Description
• Do not use water spray and steam to • Contact your municipal authority for clean the appliance. information on how to discard the • Clean the appliance with a moist soft appliance correctly. cloth. Only use neutral detergents. Do •... - Page 7 ENGLISH Sen- Function Comment field Lock / The Child Safety To lock / unlock the control panel. Device STOP+GO To activate and deactivate the function. Heat setting display To show the heat setting. Timer indicators of cook- To show for which zone you set the time. ing zones Timer display To show the time in minutes.
-
Page 8: Daily Use
3.4 OptiHeat Control (3 step The induction cooking zones make the heat necessary for cooking process Residual heat indicator) directly in the bottom of the cookware. The glass ceramic is heated by the heat of WARNING! the cookware. There is a risk of burns from residual heat. - Page 9 ENGLISH 4.5 Power function To stop the sound: touch This function makes more power available CountUp Timer (The count up timer) to the induction cooking zones. The You can use this function to monitor how function can be activated for the induction long the cooking zone operates.
- Page 10 To deactivate the function: touch comes on. Touch of the timer to The previous heat setting comes on. choose one of the following: • - the sounds are off 4.8 Lock • - the sounds are on You can lock the control panel while To confirm your selection wait until the cooking zones operate.
- Page 11 ENGLISH Changing the automatic mode signal communicator. Speed of the fan is 1. Deactivate the appliance. defined automatically on basis of mode setting and temperature of the hottest 2. Touch for 3 seconds. The display cookware on the hob. You can also comes on and goes off operate the fan from the hob manually.
-
Page 12: Hints And Tips
5. HINTS AND TIPS 5.2 The noises during operation WARNING! Refer to Safety chapters. If you can hear: • crack noise: cookware is made of 5.1 Cookware different materials (sandwich construction). For induction cooking zones • whistle sound: you the cooking zone... - Page 13 ENGLISH Heat setting Use to: Time Hints (min) 1 - 3 Hollandaise sauce, melt: but- 5 - 25 Mix from time to time. ter, chocolate, gelatine. 1 - 3 Solidify: fluffy omelettes, 10 - 40 Cook with a lid on. baked eggs.
-
Page 14: Care And Cleaning
To find the full range of cooker hoods It may happen that other which work with this function refer to our remote controlled appliances consumer website. The Electrolux cooker may block the signal. To hoods that work with this function must avoid it do not operate the... - Page 15 ENGLISH Problem Possible cause Remedy Activate the hob again and set the heat setting in less than 10 seconds. You touched 2 or more Touch only one sensor field. sensor fields at the same time. STOP+GO function oper- Refer to "Daily use" chapter. ates.
-
Page 16: Installation
Problem Possible cause Remedy There is no cookware on Put cookware on the zone. comes on. the zone. The cookware is incorrect. Use the correct cookware. Refer to “Hints and tips” chapter. The diameter of the bottom Use cookware with correct of the cookware is too small dimensions. - Page 17 ENGLISH 8.3 Connection cable The rating plate is on the bottom of the hob. • For a single phase or two phase Serial number ......connection use the following (or higher) mains cable type: H05BB-F Tmax 8.2 Built-in hobs 90°C. •...
- Page 18 38 mm min. 2 mm R 5mm min. 55mm min. 12 mm min. 2 mm 8.5 Protection box If you use a protection box (an additional accessory), the front airflow space of 2 mm and the protective floor directly below the hob are not necessary.
-
Page 19: Technical Information
ENGLISH 9. TECHNICAL INFORMATION 9.1 Rating plate Modell EHH6540FHK PNC 949 596 348 00 Typ 58 GAD D5 AU 220 - 240 V 50 - 60 Hz Induction 7.4 kW Made in Germany Ser.Nr....7.4 kW ELECTROLUX 9.2 Cooking zones specification... - Page 20 EN 60350-2 - Household electric cooking • Put smaller cookware on smaller appliances - Part 2: Hobs - Methods for cooking zones. measuring performance • Put the cookware directly in the centre of the cooking zone. 10.2 Energy saving •...
- Page 21 ENGLISH...
- Page 22 www.electrolux.com...
- Page 23 ENGLISH...
- Page 24 www.electrolux.com/shop...
Need help?
Do you have a question about the EHH6540FHK and is the answer not in the manual?
Questions and answers