Table of Contents
Advertisement
The following features are available in
this PDF document.
Quick Keyword Search
Enter the keyword in the search box
and hit the search button
Quick Jump between
Chapters
Click the title of a specific chapter on
the Contents to jump to it
*Reading software such as Adobe Reader is
needed to support the functions above.
Advertisement
Table of Contents

Subscribe to Our Youtube Channel
Related Manuals for Zhiyun CRANE-M 3S


Summary of Contents for Zhiyun CRANE-M 3S
- Page 1 The following features are available in this PDF document. Quick Keyword Search Enter the keyword in the search box and hit the search button Quick Jump between Chapters Click the title of a specific chapter on the Contents to jump to it *Reading software such as Adobe Reader is needed to support the functions above.
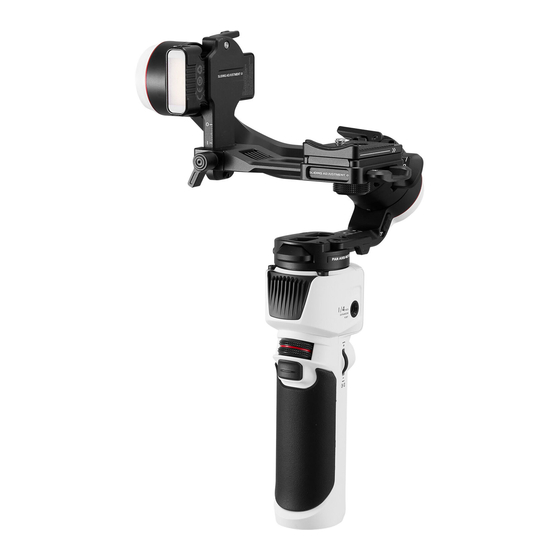
- Page 2 CRANE-M 3S User Guide...
-
Page 3: Table Of Contents
Contents Product■List ■ Product■List■ ······················ 1 Get■to■Know■CRANE-M■3S ■ Get■to■Know■CRANE-M■3S■ ················ 3 Battery■and■Charging ■ Battery■and■Charging■·················· 4 Mounting■and■Balancing ■ Mounting■the■Tripod■ ·················· 5 Mounting■the■Camera■ · ················· 5 Mounting■the■Smartphone■ ··············· 9 Mounting■the■Action■Camera■ · ·············· 10 Balancing■······················· 12 How■to■Use■CRANE-M■3S ■ Button■Description■··················· 14 Touchscreen■Introduction■················ 15 Touchscreen■Menu■··················· 16 Motor■Torque■Adjustment■... - Page 4 Firmware■Upgrade■&■Calibration ■ Circumstances■When■Calibration■Is■Needed■ ········ 29 Six-side■Calibration■··················· 29 Motor■Fine-tuning■ ··················· 32 Firmware■Upgrade■ ··················· 32 Product■Specifications ■ Disclaimer■and■Warning ■ Reading■Tips■ ····················· 36 WARNING■······················· 37 Safe■Operation■Guidelines■················ 37 Warranty■Card ■ Warranty■Period■ ···················· 38 Warranty■Exclusions■ ·················· 38 Warranty■Claim■Procedure■················ 38 Contact■Card ■...
- Page 5 Before using this product, please check carefully that all the following items are included in the product package. In case that any item is found missing, please contact ZHIYUN or your local selling agent. CRANE-M 3S x 1 USB Type-C Cable x 1...
- Page 6 Product List Backpack x1** Quick Start Guide x1 Items marked “*” are included in CRANE-M 3S. Items marked “**” are included in CRANE-M 3S COMBO.
-
Page 7: Get To Know Crane-M 3S
Get to Know CRANE-M 3S Get to Know CRANE-M 3S 1. 1/4"Camera Installation Screw 17.Roll Axis Motor 2.Quick Release Plate 18.Roll Axis Lock Switch 3.Quick Release Plate Leveling Base 19.Touchscreen 4.Level Mount 20.Mode Switch 5.Leveling Base Lock Screw 21.Photo/Video Button 6.Quick Release Plate Safety Lock... -
Page 8: Battery And Charging
Battery and Charging Battery and Charging CRANE-M 3S is equipped with built-in battery. When using CRANE-M 3S for the first time, please fully charge the battery to activate it and to ensure the proper function of the gimbal. Charging method: Use provided USB Type-C cable to connect the USB charger (not provided, recommend chargers that meet the USB Power Delivery Specification, supports 12W at most) to the charging port of CRANE-M 3S. -
Page 9: Mounting And Balancing
Mounting and Balancing Mounting the Tripod Mount the tripod to the bottom of the CRANE-M 3S handle, then unfold the tripod and place the CRANE-M 3S on a flat surface. Mounting the Camera ① Please mount the camera before powering on CRANE-M 3S and balance the gimbal. - Page 10 Mounting and Balancing Locked state for storage Locked state for installation...
- Page 11 Mounting and Balancing 1. Hold down the quick release plate safety lock ① and remove the quick release plate from the quick release plate leveling base ② , then install the camera onto the quick release plate ③ . Install the camera and quick release plate as a whole onto the leveling base ④...
- Page 12 There are three camera control cables: Type-C to Multi USB/Type-C to Type-C USB / Type-C to Micro USB. Choose the correct cable corresponding to the USB port type of the camera. For compatibility details, please visit the official website of ZHIYUN (www.zhiyun-tech.com) and check the CRANE-M 3S Camera Compatibility List.
-
Page 13: Mounting The Smartphone
Mounting and Balancing Mounting the Smartphone Hold down the quick release plate safety lock ① and remove the quick release plate from the quick release plate leveling base ② , then install the phone onto the phone clamp ③ . Install the phone and phone clamp as a whole onto the quick release plate ④... -
Page 14: Mounting The Action Camera
Mounting and Balancing Mounting the Action Camera Hold down the quick release plate safety lock ① and remove the quick release plate from the quick release plate leveling base ② , then install the action camera onto the camera base (not provided) ③ . Install the action camera and base as a whole onto the quick release plate ④... - Page 15 Mounting and Balancing CRANE-M 3S only provides stabilization for smartphones and action cameras. Button controls are not supported.
-
Page 16: Balancing
Mounting and Balancing Balancing 1.Horizontal Balance of the Tilt Axis Unlock the tilt axis arm ① and loosen the tilt axis latch ② . Push the camera to move forward or backward ③ until the camera is steady and is at almost level with the ground ④... - Page 17 Complete this step by tightening up the pan axis latch ④ . ③ ② ① ④ After balancing CRANE-M 3S, the motor torque needs to be adjusted for proper function. For the adjustment details, please see the methods introduced in "Motor Torque Adjustment".
-
Page 18: How To Use Crane-M 3S
How to Use CRANE-M 3S Button Description Power Button Press and hold: Power on/off POWER Mode Switch Single press: Switch gimbal modes (PF-L-F) Double press: Switch gimbal modes (POV-V) Press and hold: Sleep mode/wake mode for the gimbal motor Photo/Video Button Half press: Activate auto-focus on certain cameras. -
Page 19: Touchscreen Introduction
How to Use CRANE-M 3S Adjustment Wheel Scroll: Adjust parameters customized in the touchscreen menu (aperture, shutter, ISO, digital focus/zoom, roll axis, tilt axis, pan axis). Touchscreen Introduction Main page (set as default) Gimbal Settings Interface... -
Page 20: Touchscreen Menu
How to Use CRANE-M 3S Motor Torque Smoothness Follow Speed Parameter Settings Interface Swipe right at the left edge of the screen to return to the previous menu. Touchscreen Menu Mode: For selecting gimbal modes. Available modes are: Pan Follow Mode (PF)/Lock Mode (L)/POV Mode (POV)/ Follow... - Page 21 How to Use CRANE-M 3S Settings: 1. Auto Calibration: To perform auto-calibration after the balancing is finished. 2. Parameter Settings: Sets the motor torque/smoothness/ follow speed/joystick speed/deadband of the gimbal. 3. Parameter Reset: Reset the parameters to default. 4. Control Wheel: Customize the control wheel. Can be...
-
Page 22: Motor Torque Adjustment
You can adjust the motor torque according to the weight of your camera and lens, so that the CRANE-M 3S can be used in its ideal state. Following are two methods for adjustment. It is recommended to use auto-calibration. - Page 23 How to Use CRANE-M 3S 2.Motor Torque: Three levels (Low/Medium/High) are provided based on the mainstream lens combo weight in the market. Select the appropriate level according to the weight of the carried camera and lens. Operation steps: Select "Settings"- "Parameter Settings" - "Motor Torque" to enter motor torque setting interface.
-
Page 24: Bluetooth Shutter Control
Bluetooth and enter pairing mode. Then tap the “Gimbal Setting” in the touchscreen menu, select “Bluetooth Shutter Control” , make sure the camera Bluetooth is turned on and tap to confirm. CRANE-M 3S will then automatically search for the camera Bluetooth name. Select the Bluetooth name that needs to be connected, and finally confirm the connection on the camera. -
Page 25: Gimbal Modes Description
How to Use CRANE-M 3S Gimbal Modes Description Motors circled in red are free to move in line with the movement of the gimbal handle while motors circled in grey are locked. Pan Follow mode (PF): The tilt axis and roll axis motors are locked, and the camera rotates with the handle while panning horizontally. - Page 26 How to Use CRANE-M 3S Follow mode (F): The roll axis motor is locked, and the tilt axis and pan axis motors follow the rotation of the handle. Push the joystick up/down to change the tilt angle of the Tilt Axis camera and left/right to change the horizontal orientation of the camera.
- Page 27 How to Use CRANE-M 3S Vortex mode (V): The tilt axis motor rotates upward by 90° , and the tilt axis, roll axis, and pan axis motors follow the rotation of the handle. Push the joystick to the left/right to control the rotation of the pan axis.
- Page 28 How to Use CRANE-M 3S Portrait mode The tilt axis motor rotates upward by 90° and the pan axis rotates counterclockwise by 90° . You can enter this mode for vertical filming.
-
Page 29: Manual Reposition
How to Use CRANE-M 3S Manual Reposition In Pan Follow mode (PF) and Lock mode (L), the camera can be rotated by a certain angle by hand. Hold it for 2s and the camera angle will be fixed at that... -
Page 30: How To Use The App
1. Power on CRANE-M 3S and turn on Bluetooth on the smartphone. 2. Launch the “ ZY Play” app. Select the CRANE-M 3S page and tap to connect. Select the Bluetooth name of your CRANE-M 3S to connect (the CRANE-M 3S Bluetooth name can be found on the side of the tilt axis USER ID: XXXX). - Page 31 How to Use the App CRANE-M 3S CRANE-M 3S_XXXX � �...
-
Page 32: Zy Play Feature Description
Control camera to take Virtual Joystick photo/film video Control Motion Sensor Control Timelapse ZY Play Firmware Upgrade Panorama For more details of the “ ZY Play” app features, please visit the official website of ZHIYUN (www.zhiyun-tech.com) and watch CRANE-M 3S video tutorials. -
Page 33: Firmware Upgrade & Calibration
2. Six-side calibration via "Zhiyun Gimbal Tools": Power on the gimbal and enter standby mode. Connect the charging/upgrade port of the gimbal to the computer with the Type-C USB cable, Open "Zhiyun Gimbal Tools", click "open" on the top and click "calibration" on the bottom. - Page 34 Firmware Upgrade & Calibration Step 1 Step 2 Step 3...
- Page 35 Firmware Upgrade & Calibration Step 4 Step 5 Step 6...
-
Page 36: Motor Fine-Tuning
Select the “Settings” in the touchscreen menu and select “Motor fine-tuning” to enter the tilt axis/roll axis angle fine-tuning interface. Firmware Upgrade You can use "Zhiyun Gimbal Tools" or "ZY Play" App to upgrade the firmware of CRANE-M 3S. Method One: 1. - Page 37 When CRANE-M 3S is connected to “ZY Play” app, if a firmware update prompt pops up on the app, please follow the instructions to upgrade. Internet connection is required. To know how you can connect CRANE-M 3S to “ZY Play” , please check the method introduced in "How to Use the App".
-
Page 38: Product Specifications
Product Specifications Product Model: CR127 Item Min. Standard Max. Remark Operation Voltage 9.6V 11.1V 12.6V Operation Current 135mA 4000mA Output Voltage (Camera Control Port) Output Current (Camera Control Port) Tilt Mechanical 305° Range Roll Mechanical 314° Range Pan Mechanical 360° Range Controllable Tilt -45°... - Page 39 Lab Data 1: The above data is collected at a specified temperature of 25℃ . The CRANE-M 3S is fully charged and mounted with Sony α 1+FE 24 mm F1.4 GM. The CRANE-M 3S is properly balanced and put on a flat surface. The maximum runtime is 7h30min.
-
Page 40: Disclaimer And Warning
Guilin Zhishen Information Technology Co., Ltd (hereinafter referred to as "ZHIYUN") reserves all rights for final explanation on this instruction and other documents related to the product. The information is subject to update without notice. -
Page 41: Warning
DO NOT use with incompatible components or in any way otherwise as mentioned or instructed in the product documents provided by ZHIYUN. The safety guidelines herein contain instructions for safety, operation and maintenance. It is essential... -
Page 42: Warranty■Card
1. Customers are entitled to replacement or free repair service in case of quality deficits found in the product within 15 days upon receipt of the product. 2. Customers are entitled to free repair service from ZHIYUN for any product proven defective in material or workmanship that results in product failure during normal consumer usage and conditions within the valid warranty period, which is 12 months counting from the date of selling. - Page 43 Warranty■Card Customer Information Customer Name: Phone Number: Address: Sales Information Sales date: Product Serial Number: Distributor Name: Distributor’ s Contact Number: First Maintenance Record Service Date: Repairman Signature: Cause of Problem: Service Result: □ Solved □ Unsolved □ Refunded/Replaced...
-
Page 44: Contact Card
Contact Card Website Weibo Vimeo Google+ Facebook Facebook (Zhiyun Support) (Zhiyun Tech) Youku Youtube Wechat Instagram... - Page 45 E-mail: info@zhiyun-tech.com Address: 09 Huangtong Road, Tieshan Industrial Zone, Qixing District, Guilin, 541004, Guangxi, China For full product information, please visit ZHIYUN's official website: Content on www.zhiyun-tech.com is subject to update without notice. ZHIYUN ™ is a trademark of ZHISHEN All product names or brands referred to hereunder may be trademarks or registered trademarks of their respective holders.
Need help?
Do you have a question about the CRANE-M 3S and is the answer not in the manual?
Questions and answers