Table of Contents
Advertisement
The following features are available in
this PDF document.
Quick Keyword Search
Enter the keyword in the search
box and hit the search button
Quick Jump between
Chapters
Click the title of a specific chapter
on the Contents to jump to it
*Reading software such as Adobe Reader is
needed to support the functions above.
Advertisement
Table of Contents

Subscribe to Our Youtube Channel
Related Manuals for Zhiyun CRANE-M2


Summary of Contents for Zhiyun CRANE-M2
- Page 1 The following features are available in this PDF document. Quick Keyword Search Enter the keyword in the search box and hit the search button Quick Jump between Chapters Click the title of a specific chapter on the Contents to jump to it *Reading software such as Adobe Reader is needed to support the functions above.
- Page 2 CRANE-M2 U s e r Gui d e...
-
Page 3: Table Of Contents
Contents Packing List ■ Packing List ····················································································1 Get to Know CRANE-M2 ■ Get to Know CRANE-M2 ································································2 Charging Procedure ■ Charging Procedure ········································································3 Installation and Balancing ■ Tripod Installation ············································································4 Camera Installation ·········································································4 GoPro Camera Installation ·······························································6 Smartphone Installation ···································································6 Balance Adjustment Method ···························································7... - Page 4 After First-time Connection ······························································18 ZY Play Main Functions ···································································18 Calibration and Firmware Upgrade ■ When do you need to calibrate the stabilizer? ··································19 Initialization Method ·········································································19 Six-Side Calibration ········································································20 Motor Fine-Tuning ···········································································22 Firmware Upgrade ··········································································22 Calibration and Firmware Upgrade ■ Product Specifications ■...
- Page 5 Packing List Packing List The product package comes with the following items. In case that any item is found missing, please contact ZHIYUN or your local selling agent. CRANE-M2 × 1 Tripod × 1 Quick Release Plate × 1 1/4" Camera Fixing Wrist Strap ×...
-
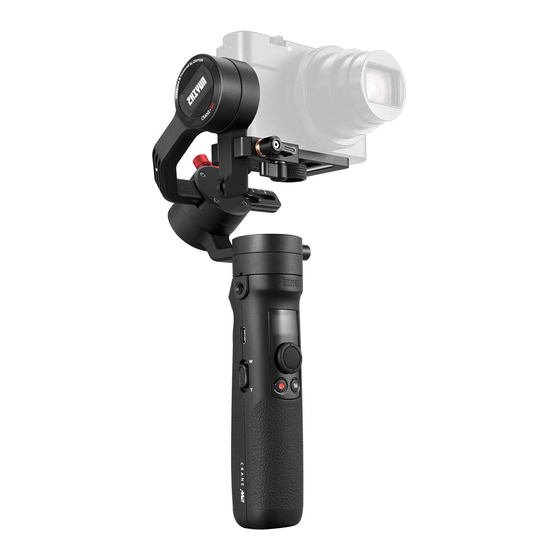
Page 6: Get To Know Crane-M2
Get to Know CRANE-M2 Get to Know CRANE-M2 1. Tilt Axis Thumb Screw 14. Micro USB Power Outlet 2. Quick Release Plate Thumb Screw 15. Roll Axis Thumb Screw 3. Pan Axis Latch 16. Roll Axis Motor 4. Trigger 17. Pan Axis Motor 5. -
Page 7: Charging Procedure
Charging Procedure Charging Procedure When using CRANE-M2 for the first time, please fully charge the batteries to activate them and to ensure the proper function of the stabilizer. Charging method: please charge the stabilizer using a power adapter (not included in the package) and the USB Type-C cable provided by connecting to the charging port on the stabilizer. -
Page 8: Installation And Balancing
Installation and Balancing Tripod Installation Mount the stabilizer on the tripod and unfold the tripod on a flat surface. Camera Installation Take Sony DSC-RX100M5 as example: 1. Take out the quick release plate, mount the camera on the plate and then tighten the 1/4"... - Page 9 Installation and Balancing 收纳状态 收纳状 1. Lock the latch button 2. Fold the tilt axis in 3 . Pre s s d o w n a n d under pan axis; line with the roll axis as stick roll axis to pan shown in the picture;...
-
Page 10: Gopro Camera Installation
“Balance Adjustment Method” (adjustable range of the phone holder is 59-90mm). There are two 1/4" threaded holes on the phone holder. Please use the shallower one for mounting phone holder on CRANE-M2 and use the deeper one for mounting on the tripod. -
Page 11: Balance Adjustment Method
Installation Balance Adjustment Method ❶ Loosen the 1/4'' screw at the bottom of the quick release plate. Hold tilt axis arm lightly and push camera to move forward or backward until the camera can stay still and almost level with its lens facing front (as shown in the picture). - Page 12 Installation ❺ After balance adjustment, toggle on the memory lock on the roll axis to mark the balanced position for easy and quick balance adjustment for the next time. ❻ Unlock the pan axis, slightly loosen the thumb screw on it, then adjust the pan axis until it stays still and horizontal to the ground (as shown on the right).
-
Page 13: How To Use
How to Use Button Description 1. Zoom Slider 5. Power Button • Push the zoom slider to control the • Push upwards and hold the Power camera to perform digital zoom after Button for more than 2 seconds to the stabilizer is connected to the turn on/off the stabilizer. -
Page 14: Display Screen Description
How to Use Display Screen Description motor wifi axis lock history Camera Not Camera Axis Locked Menu Connected Connected Icon Description: Camera successfully connected to stabilizer 相机与云台成功连接 Stabilizer Bluetooth is connected 稳定器蓝牙为连接状态 Stabilizer joystick is locked 稳定器云台摇杆锁定 Stabilizer is charging 闪烁时正在充电,停止时完成充电... -
Page 15: Menu Option Description
How to Use Menu Option Description Low-torque motor (Motor Torque medium Medium-torque Settings) high High-torque C: Camera Brand wifi (WIFI Information) S: WIFI Name list 1-5 WIFI History history (WIFI History) clear Clear WIFI History vertical joystick (Joystick reverse Settings) horizontal about Firmware Version;... -
Page 16: Control Mode Description
How to Use Control Mode Description Red circle means the motor’s rotation follows the movement of the stabilizer handle while grey circle means the motor’s rotation is independent from the handle’s movement. Tilt Axis Tilt Axis 俯仰轴 俯仰轴 Roll Axis Roll Axis 横滚轴... - Page 17 How to Use Tilt Axis 俯仰轴 Tilt Axis-90° 俯仰轴90° Roll Axis 横滚轴 Roll Axis 横滚轴 Pan Axis 航向轴 Pan Axis 航向轴 Vortex Mode (V): Double click Mode Full Following Mode (F): Single press or Button to switch to this mode. long hold the trigger for 2 seconds to Tilt axis turns upward 90°automatically switch to this mode.
-
Page 18: Manual Angle Lock
How to Use Manual Angle Lock Under pan following mode (PF) and locking mode (L), you can manually rotate the camera to a certain angle, then loosen the grip and the camera position will be fixed. Under pan following mode (PF), you can manually adjust the angle of tilt axis. -
Page 19: App Operations
④ GoPro HERO6 Black: turn on the camera > SETTINGS > CONNECTIONS > CONNECT NEW DEVICE > GoPro App 2. Open ZY Play and select the product page of CRANE-M2. Tap "Connect now", and select the Bluetooth name of the corresponding stabilizer. Click “Enter now” to pair. - Page 20 APP Operations 3. After pairing, please select device type - Camera or Phone. 4. After the selection, a corresponding control interface appears on the screen. The camera control interface is shown on the left and the smartphone control interface is shown on the right.
- Page 21 APP Operations 5. Enter camera control interface, tap the grey WIFI icon, select corresponding camera WIFI name to connect and enter password. 6. After the connection, ZY Play will identify camera brand automatically. If auto- identification fails, please select camera brand manually. The stabilizer is ready to control the camera after a connection icon(...
-
Page 22: After First-Time Connection
APP Operations After First-time Connection • Once your stabilizer has been WIFI-connected to a camera, the stabilizer will automatically connect to that camera via WIFI when turned on again (with camera’s WIFI on). • If your stabilizer has been WIFI-connected to more than one camera, enter stabilizer’s menu >... -
Page 23: Calibration And Firmware Upgrade
Calibration and Firmware Upgrade When do you need to calibrate the stabilizer? Please calibrate the stabilizer when necessary. When 1. Slight deviation is found in the tilt angle of the camera in level position after turning on. Initializing 2. Slight deviation is found in the roll angle of the camera in level position after turning on. -
Page 24: Six-Side Calibration
Please connect the stabilizer and ZY Play following the steps listed in “APP Operations”. Enter “Calibration” and complete calibration according to the prompts given by the app. 2.Perform six-side calibration by using Zhiyun Gimbal Tools : Turn on the stabilizer and long press the Mode Button to enter into Standby Mode. - Page 25 Calibration and Firmware Upgrade STEP 1 STEP 2 STEP 3 STEP 4 STEP 5...
-
Page 26: Motor Fine-Tuning
2. Connect the stabilizer and your computer with a USB cable and install the USB Driver. 3. Turn on the stabilizer and long press the Mode Button to enter Standby mode. 4. Open “Zhiyun Gimbal Tools” and update firmware according to the instructions. -
Page 27: Product Specifications
The charging time varies according to different environment and actual results may be different. All the data in this guide is gathered from internal experiments of ZHIYUN laboratories. Under different scenarios, data is different to some extent and please refer to actual use... -
Page 28: Disclaimer And Warning
CRANE-M2 or nearby property. ZHIYUN reserves the right of final explanation for this document and all relevant documents relating to CRANE-M2, and the right to make changes at any time without notice. - Page 29 CAUTION : 1. CRANE-M2 is a high-precision control device. Damage may be caused to CRANE-M2 if it is dropped or subject to external force, and this may result in malfunction. 2. Make sure the rotation of the gimbal axes is not blocked by external force when CRANE-M2 is turned on.
- Page 30 2. Do not attach the batteries to a wall outlet or car charger socket directly. Always use a ZHIYUN approved adapter for charging. ZHIYUN takes no responsibility if the battery is charged using a non-ZHIYUN charger.
- Page 31 Disclaimer and Warning to prevent over-discharge of battery which may result in battery damage and permanent failure. Battery Maintenance : 1. Do not over-charge or over-discharge the battery, which will damage the battery. 2. The battery performance will be affected for not being used for a long time. 3.
-
Page 32: Warranty Terms
1. Customers are entitled to replacement or free repair service in case of quality defect(s) found in the product within 15 days upon receipt of the product. 2. Customers are entitled to free repair service from ZHIYUN for any product proven defective in material or workmanship that results in product failure during normal consumer usage and conditions within the valid warranty period, which is 12 months counting from the date of selling. -
Page 33: Contact Card
Contact Card Search and follow “Zhiyun Tech” on Facebook, Instagram, Twitter, YouTube and Vimeo to connect with us. Tel: +86(0)773-3561275 USA Hotline: +1 808-319-6137,9:00-18:00 GMT-7,Mon-Fri Europe Hotline: +49(0)61018132180,10:00-17:00 GMT+1,Mon-Fri Web: www.zhiyun-tech.com E-mail: service@zhiyun-tech.com Address: 6th floor Building No.13 Creative Industrial Park, GuiMo Road, Qixing...
Need help?
Do you have a question about the CRANE-M2 and is the answer not in the manual?
Questions and answers