Advertisement
Quick Links
Advertisement

Related Manuals for MClimate MC-LW-WT-01


Summary of Contents for MClimate MC-LW-WT-01
- Page 1 MClimate Wireless Thermostat LoRaWAN® User manual...
- Page 2 Wireless Thermostat Slovak Polish Czech Hungarian LoRaWAN® extended Chcete-li zjistit, jak A MClimate Wireless Thermostat Ak chcete zistiť, ako Aby dowiedzieć się, jak nainstalovat MClimate LoRaWAN® telepítésének nainštalovať MClimate Wireless zainstalować MClimate Wireless Wireless Thermostat kiderítéséhez keresse meg a Thermostat LoRaWAN®,...
-
Page 3: Table Of Contents
What’s inside the box? What is in the box? Technical details, Safety instructions, Legal Notices & Compatibility Device Parts, Mechanical dimensions ORGANIC SOLAR PANEL Placement guidelines Display’s content Wall mounting plate Secure bolt Buttons MClimate Wireless Thermostat LoRaWAN® Behavior Installation Commissioning... -
Page 4: Legal Notices & Compatibility
The LoRaWAN® network manufacturer MClimate Jsc., is not responsible for any loss and humidity sensor, LUX sensor and 3 buttons. The user can change the target temperature and see current indoor conditions. The device or damage caused by failure to follow the instructions in the sends an uplink after any event as well as periodically. -
Page 5: Device Parts, Mechanical Dimensions
Device parts Display Solar panel Secure screw hole Mounting holes OK button PIR Sensor Down Assembled MClimate Wireless Thermostat LoRaWAN®, top view Wall mounting plate, top view... -
Page 6: Placement Guidelines
Placement guidelines Do not place the device in direct sunlight, as this will result in gradual worsening of the performance of the solar panel. A few hours a day in direct sunlight >20cm wouldn’t be an issue. 150cm... -
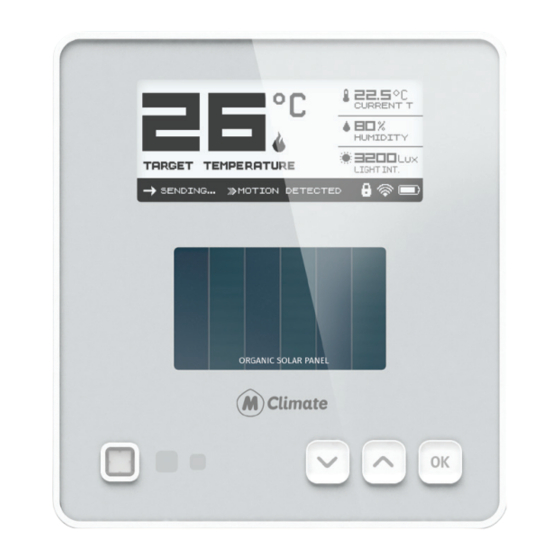
Page 7: Display's Content
Display’s content Description Target temperature The image below has all visible elements of the display activated. Sensor temperature The 2.9” e-ink display supports fast partial refresh. Full refresh is performed every 12 hours (period can be adjusted via a downlink) to avoid the e-ink phenomena “image sticking”... -
Page 8: Buttons
Resets the device, triggers Reset another Join-Request on SF9. Performs full refresh of the screen. Performing a Reset IS NOT equal to factory reset. All Assembled MClimate Wireless Assembled MClimate Wireless configured parameters are Thermostat LoRaWAN®, top view Thermostat LoRaWAN®, bottom view preserved. -
Page 9: Behavior
Behavior Start-up behavior Using multiple energy The device starts when you expose it to light or press the Reset The Wireless Thermostat has three options for power supply: button on the back. - Organic Solar Panel At startup, the device measures the voltage of the supercapacitor, - USB-C which is storing the energy harvested by the solar panel. -
Page 10: Installation
Installation We recommend installing the device in an open environment (e.g. not in a recess) at 1.5m height. Do not install the device near big metal items as it will worsen the RF performance. Use double-sided tape to attach it to the surface or screws and dowels to attach the anti-theft bracket in a more permanent manner. -
Page 11: Commissioning
Commissioning Before you install the device, we highly recommend that you first commission it on your LNS. Once the device is restarted or exposed to light, it’ll initiate a LoRaWAN Join Procedure using SF9. Please, make sure you enable ADR in your LNS and/or mark the device as static. - Page 12 Designed & Manufactured by MClimate in Europe. last update: 23.02.2023...
Need help?
Do you have a question about the MC-LW-WT-01 and is the answer not in the manual?
Questions and answers