Table of Contents
Advertisement
Quick Links
Advertisement
Table of Contents

Related Manuals for Stihl MS 651


Summary of Contents for Stihl MS 651
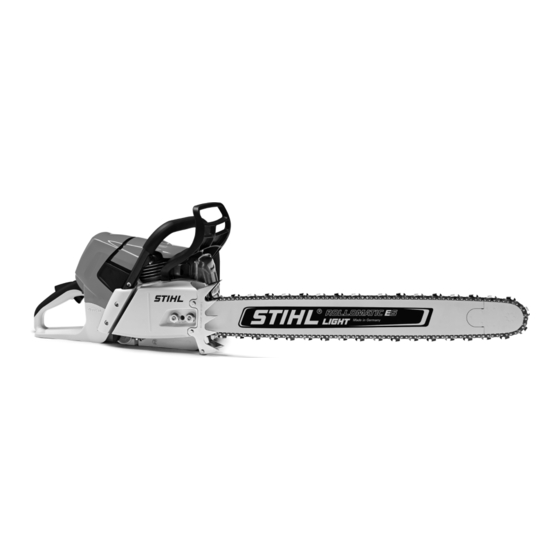
- Page 1 STIHL MS 651 Instruction Manual...
-
Page 3: Table Of Contents
Dear Customer, Guide to Using this Manual Ordering Spare Parts Safety Precautions Maintenance and Repairs Thank you for choosing a quality engineered STIHL product. Reactive Forces Disposal It has been built using modern Working Techniques EC Declaration of Conformity production techniques and Cutting Attachment comprehensive quality assurance. - Page 4 STIHL's philosophy is to continually This Instruction Manual refers to a improve all of its products. For this Intake air baffle: summer STIHL chain saw, also called a machine reason we may modify the design, operation in this Instruction Manual.
- Page 5 Keep bystanders, especially children, injury. STIHL excludes all liability for and animals away from the work area. personal injury and damage to property The user is responsible for avoiding...
- Page 6 (bayonet-type) in chain scabbard. This avoids the risk of have been approved by STIHL for this position, turn as far as the saw chain starting unintentionally. machine. If you have any questions in stop and fold the cliplock this respect, consult a servicing dealer.
- Page 7 – the chain must not an emergency, switch off the engine touch any objects or the floor – danger of immediately by moving the Master injury due to the rotating saw chain. Control lever / stop switch to STOP, 0 or †. MS 651...
- Page 8 Check condition and secure fitting – regularly and correct when possible. Store the machine in a safe, dry room. Check sharpness Have the machine repaired by a STIHL – servicing dealer if the saw chain still Never touch the saw chain when the Vibrations continues to move during idling.
- Page 9 Instruction Manual. All other work should periodically. be carried out by a servicing dealer. Inspect chain catcher – replace if STIHL recommends that maintenance damaged. and repair work be carried out only by Switch off the engine authorised STIHL dealers. STIHL...
- Page 10 Always cut at full throttle – caught or encounters a foreign object in Be aware of the location of the guide – the wood, the chain saw may suddenly bar nose Do not cut with the guide bar nose – MS 651...
- Page 11 – In these cases, do not use a chain saw – use a hoist, winch or dragline instead. Pull out trunks that are lying about and have been cut free. Whenever possible, deal with them in open areas. MS 651...
- Page 12 If there is a risk of fire, do not and off balance. Always engage the use your chainsaw near combustible spiked bumper securely in the tree or limb. MS 651...
- Page 13 – other than helpers. chain will otherwise be damaged. of deadwood (dry, decayed or rotted wood) Make sure no-one is endangered by the falling tree – the noise of your engine may drown any warning calls. MS 651...
- Page 14 On steep slopes, plan escape – routes parallel to the slope. When walking away along the – escape path, watch out for falling limbs and watch the top of the tree. MS 651...
- Page 15 Make cuts at both sides of Leave a broader hinge on rotten the trunk at same height as bottom of – trees. MS 651...
- Page 16 English The tree is felled with the felling cut (E). Begin cut by applying the lower Contact your STIHL dealer for advice on portion of the guide bar nose – do selecting the right felling wedge (length, Cut horizontally. –...
- Page 17 Do not cut into the stabilizing strap. – stabilizing strap (3). Do not cut into the stabilizing strap. – Continue the felling cut on the other side of the trunk. Make sure the second cut is at the same height as the first cut. MS 651...
- Page 18 Holding the saw with outstretched arms, cut through the stabilizing Enlarge the felling cut in direction of strap horizontally at the same level holding strap (2). as the felling cut. Cut horizontally. – Do not cut into the holding strap. – MS 651...
- Page 19 Enlarge felling cut as far as hinge (2). Do not cut into the hinge. – Enlarge felling cut as far as holding strap (3). Do not cut into the holding strap. Shout a second warning immediately – before the tree falls. MS 651...
-
Page 20: Cutting Attachment
If non-matching components are used, the cutting attachment may be damaged Depending on the model, the scabbard beyond repair after a short period of extension either comes standard with operation. the saw or is available as a special accessory. MS 651... -
Page 21: Mounting The Bar And Chain
Put on protective gloves – risk of injury Turn screw (1) to the left until the by the sharp cutters tensioner slide (2) butts against the Fit the chain starting at the nose of left end of the housing slot the guide bar MS 651... -
Page 22: Tensioning The Chain
STIHL MotoMix Retensioning during cutting work: Shut off the engine. Shut off the engine. Wear work gloves to protect your STIHL recommends the use of STIHL hands. Loosen the nuts. MotoMix. This ready-to-use fuel mix The chain must fit snugly against contains no benzol or lead, has a high Hold the bar nose up. -
Page 23: Fueling
Engine Oil can quickly make the fuel mix unusable. If you mix the fuel yourself, use only STIHL MotoMix may be stored for up to STIHL two-stroke engine oil or another 2 years without any problems. high-performance engine oil in... - Page 24 Take care not to spill fuel while fueling and do not overfill the tank. The marks on the tank cap and fuel tank STIHL recommends you use the STIHL are then in alignment. filler nozzle for fuel (special accessory). Fill up with fuel.
-
Page 25: Chain Lubricant
Biological chain oil must be resistant to Right: Bottom of cap in correct posi- aging (e.g. STIHL BioPlus), since it will tion – inner mark is under the otherwise quickly turn to resin. This grip. It is not in line with the results in hard deposits that are difficult outer mark. -
Page 26: Checking Chain Lubrication
All oil pump settings Take care not to spill chain oil during refilling and do not overfill the tank. STIHL recommends use of the STIHL The saw chain must always throw off a filling system for chain oil (special small amount of oil. -
Page 27: Winter Operation
Remove the filter cover have servicing and repair work carried Pull the hand guard back toward the in the filter cover, move the slide (1) out exclusively by an authorized STIHL front handle, from summer position to winter servicing dealer. Maintain the following... -
Page 28: Starting / Stopping The Engine
(disengage chain brake!) Setting the Master Control Lever To move the Master Control lever from the normal run position (F) to cold start (n), press down the throttle lockout and squeeze the throttle trigger at the same time. MS 651... - Page 29 – Put your right foot into the rear chamber. handle or your right heel on the rear hand guard and press down. Holding the Saw There are two ways of holding the saw when starting. MS 651...
- Page 30 – necessary to pull the starter rope several been running for about one minute. times to prime the fuel system. Hold and start your saw as described. MS 651...
- Page 31 (F) and the engine stop position (0). settles down to idling speed. If the engine does not start Check that all settings are correct. Check that there is fuel in the tank and refuel if necessary. MS 651...
-
Page 32: Operating Instructions
Slacken off the chain if you have retensioned it at operating Check chain tension frequently temperature during work. A new saw chain must be retensioned more frequently than one that has been in use already for an extended period. MS 651... -
Page 33: Oil Quantity Control
If an increased oil flow is no longer Picco 1/4“ P 4.0 mm required, reset the adjusting screw to the Rapid 1/4“ 4.0 mm standard setting. NOTICE The saw chain must always be coated with oil. MS 651... -
Page 34: Remove Air Filter
If there is a noticeable loss of engine If the groove is not at least this deep: power: Replace guide bar Wash the filter in STIHL special- purpose cleaner (special Otherwise the drive links will grind accessory) or a clean, non- against the base of the groove –... -
Page 35: Adjusting The Carburetor
Setting the idle speed Whenever the low speed adjusting screw (L) has been adjusted, it is usually Set to the standard setting also necessary to readjust the idle Start engine and let it warm up speed adjusting screw (LA). MS 651... -
Page 36: Spark Plug
Fit a new spark plug after about 100 operating hours – or sooner if the electrodes are badly eroded. Install only suppressed spark plugs of the type approved by STIHL – see "Specifications". Clean dirty spark plug. Check electrode gap (A) and Removing the spark plug readjust if necessary –... -
Page 37: Storing The Machine
(5) including needle cage (6) from the crankshaft – with STIHL recommends use of original QuickStop Super chain brake, press STIHL chain sprockets in order to throttle trigger lockout beforehand ensure optimal functioning of the chain brake. Install spur chain sprocket / rim sprocket... -
Page 38: Maintaining And Sharpening The Saw Chain
Carbide-tipped (Duro) saw chains are The diameter of file to be used depends especially wear-resistant. For an optimal on the chain pitch – see table sharpening result, STIHL recommends "Sharpening tools". STIHL servicing dealers. The angles of the cutter must be WARNING maintained during resharpening. - Page 39 With the Quickstop Super chain Sharpening angle Use a file holder brake system, additionally press the STIHL saw chains are sharpened with a Always use a file holder (special throttle trigger lockout 30° sharpening angle. Ripping chains, accessory, see table "Sharpening tools") Sharpen frequently, removing little which are sharpened with a 10°...
- Page 40 – if the depth gauge gauge protrudes past the file gauge, the depth gauge must be reworked The depth gauge determines the depth to which the cutter penetrates the wood and thus the chip thickness. MS 651...
- Page 41 0814 252 3356 5605 007 1029 0.404 (10.26) 5.5 (7/32) 5605 772 5506 5605 750 4330 1106 893 4000 0814 252 3356 5605 007 1030 consisting of file holder with round file, taper square file and file gauge MS 651...
-
Page 42: Maintenance And Care
Replace Fuel tank Clean Chain oil tank Clean Chain lubrication Check Inspect, also check sharpness Chain Check chain tension Sharpen Check (wear, damage) Clean and turn over Guide bar Deburr Replace Chain sprocket Check Clean Air filter Replace MS 651... - Page 43 Decoke after first 139 hours of operation, then Exhaust port every 150 hours of operation Safety labels Replace STIHL recommends a STIHL servicing dealer Firmly tighten down the cylinder base screws of professional saws (3.4 kW or more) after 10 to 20 hours of operation. MS 651...
-
Page 44: Minimize Wear And Avoid Damage
English servicing dealer. STIHL dealers are Minimize Wear and Avoid regularly given the opportunity to attend Damage training courses and are supplied with the necessary technical information. Observing the instructions in this manual helps reduce the risk of unnecessary If these maintenance operations are not wear and damage to the power tool. -
Page 45: Main Parts
14 Front hand guard 15 Front handle (handlebar) 16 Decompression valve 17 Starter grip 18 Fuel filler cap 19 Master control lever 20 Throttle trigger 21 Throttle trigger lockout 22 Rear handle 23 Rear hand guard Machine number MS 651... -
Page 46: Specifications
MS 651: 7.4 kg Pitch: .404" (10.26 mm) Drive link gauge: 1.6 mm Cutting Attachment STIHL single cylinder two-stroke engine Chain Sprocket Displacement: 91.1 cc Actual cutting length may be less than 7-tooth for 3/8" (rim sprocket) Bore: 56 mm the specified length Max. -
Page 47: Guide To Using This Manual 2 Ordering Spare Parts
The applicable exhaust emission requirements are fulfilled by the intended usage and maintenance MS 651... -
Page 48: Safety Precautions 3 Maintenance And Repairs
Take the product, replacement parts which have been accessories and packaging to an conforms to the relevant provisions of approved by STIHL for this power tool or approved disposal site for environment- Directives 2006/42/EC, 2014/30/EU and are technically identical. Only use high- friendly recycling. - Page 49 Spremberger Straße 1 D-64823 Groß-Umstadt Certification No. K-EG-2016/7866 Technical documents deposited at: ANDREAS STIHL AG & Co. KG Produktzulassung (Product Licensing) The year of manufacture and serial number are applied to the product. Done at Waiblingen, 28.10.2016 ANDREAS STIHL AG & Co. KG...
- Page 50 English MS 651...
- Page 52 0458-784-0121-A englisch www.stihl.com *04587840121A* 0458-784-0121-A...
Need help?
Do you have a question about the MS 651 and is the answer not in the manual?
Questions and answers