
Related Manuals for PTZOptics PT30X-4K-WH-G3


Summary of Contents for PTZOptics PT30X-4K-WH-G3
- Page 1 Share Your Vision PTZOptics 30X Move 4K User Manual Model No. PT30X-4K-WH-G3 / PT30X-4K-GY-G3, (English) Please check www.ptzoptics.com for the most up to date version of this document. v1_1 rev. 1-23...
-
Page 2: Table Of Contents
Preface ............Precautions . -
Page 3: Preface
Ŝ Ensure that there are no obstacles in the pan or tilt ranges of the camera lens. Ŝ Never power down the camera on before installation is complete. • Do not dismantle the camera – PTZOptics is not responsible for any unauthorized modification or dismantling. -
Page 4: Warranty
Copyright Notice The entire contents of this manual / guide, whose copyright belongs to PTZOptics, may not be cloned, copied, or translated in any way without the explicit permission of the company. The product specifications referred to in this document are for reference only and as such are subject to updating at any time without prior notice. -
Page 5: Ndi®|Hx 3 Connection
NDI®|HX 3 Connection The NDI®|HX 3 connection allows you to connect and control your camera through any NDI compatible hardware or software on your Local Area Network. Once your camera is setup on a LAN, you can utilize the NDI®|HX connection. NDI®|HX 3 Setup: 1. - Page 6 Connection Guide Please check connections are correct before starting. Connect the power adapter to the power connector on the rear panel of the camera. The power indicator on the front panel of the camera will be on. After the camera is powered on, it starts to initialize. It will rotate to the left and right limit positions, and then both horizontal and vertical limit positions.
-
Page 7: Features
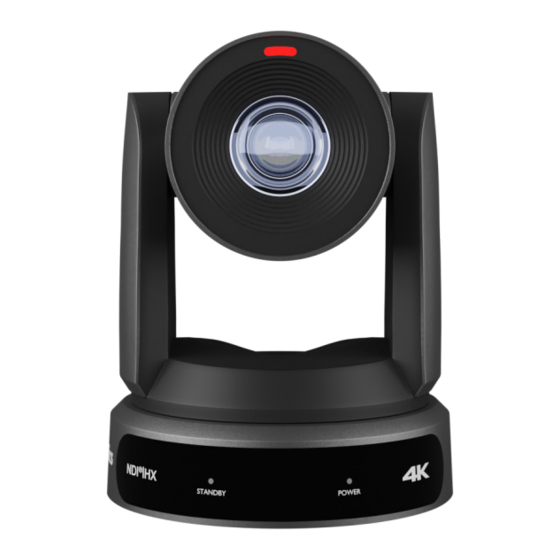
Features • Built-In Auto-Tracking Advanced AI algorthms to enable auto tracking in various scenarios such as education, conferences and live broadcasts. • 4K 60 fps UltraHD 4K (3840x2160p) video resolutions up to 60 FPS. • Tally Light Features a built-in tally light. The light shines GREEN to indicate when the camera is in preview mode. -
Page 8: Technical Specifications
Technical Specifications Model PT30X-4K-WH-G3 / PT30X-4K-GY-G3 Type PTZOptics Move 4K Description 4K60 PTZ camera with auto tracking & HDMI, SDI, USB, & IP video outputs HDMI: 2160p-60/59.94/50/30/29.97/25, 1080p-60/59.94/50/30/29.97/25, 1080i- Resolution & Frame Rate 60/59.94/50, 720p-60/59.94 SDI: 1920x1080p-60/59.94/50/30/29.97/25, 1920x1080i-60/59.94/50, 1280x720p-60/59.94 Sensor Sony 1/1.8 inch, CMOS, Effective pixels: 8.42M... - Page 9 USB Features Operating System Windows 7 / 8.1 / 10 / 11 / Mac OS, Linux, Android Color System/Compression YUY2 / MJPEG / H.264 / H.265 Video Format YUY2: Max resolution: 1920x1080@5 H264: Max resolution: 3840x2160@30 H265: Max resolution: 3840x2160p@30 MJPEG: Max resolution: 3840x2160p@30 USB Audio Supported...
- Page 10 Physical Parameter Input Voltage DC 12V / PoE+(802.3at) Current Consumption Max 2A Operating Temperature 14°F ~ 104°F (-10°C ~ 40°C) Storage Temperature -40°F ~ 140°F (-40°C ~ 60°C) Humidity Range 10% - 80% Power Consumption Max 18W Size in. (W x D x H) 6.69”...
-
Page 11: Dimensions
Dimensions 8.98 in (228mm) 6.69 in (170 mm) 7.12 in (181 mm) v1_1 rev. 1-23... -
Page 12: Ir Remote Controller Guide
IR Remote Controller 3. * Button For multiple functions. Typically used when Guide calling shortcuts. 4 & 13. Set / Clear Preset Buttons Set Preset: Store a preset position [PRESET] + Numeric button (0-9): Setting a corresponding numeric key preset position. Clear Preset: Erase a preset position. - Page 13 11. # Button [*] > [#] > [9]: Quickly set mount mode For multiple functions. Typically used (flip / normal) when calling shortcuts [*] > [#] > [MANUAL]: Resets IP information to default 12. Multiple Function Buttons [#] > [*] > [4]: Enable Dynamic IP address Function 1.
-
Page 14: Resolution Dial
Resolution Dial [*] > [#] > [1]: Sets OSD Menu to English Resolution Dial [*] > [#] > [3]: Sets OSD Menu to Chinese HDMI [*] > [#] > [6]: Quickly restore default settings 1080p 60 1080p 60 [*] > [#] > [8]: Show the camera firmware version [*] >... -
Page 15: Serial Communication Control
Serial Communication Control RS-232 Interface Function IR OUT For Initial Connection For Daisy Chain Control Camera Windows DB-9 Camera Mini DIN 1.DTR 1.CD 1. DTR 1. DTR 2.DSR 2.RXD 2 DSR 2. DSR 3.TXD 3.TXD 3. TXD 3. TXD 4.GND 4.DTR 4. -
Page 16: Rs-485 Interface
RS-485 Interface The camera can be controlled via RS-485, Half- duplex mode, with support for VISCA, Pelco-D, or Pelco-P protocol. The parameters of RS485 are as follows: RS-485 Communication Control Baud rate: 2400/4800/9600/38400; Starting position: 1 bit Data bit: 8 bits Stop bit: 1 bit Check digit: None The left phoenix connector port is Positive (+) - Page 17 PTZOptics Serial VISCA & VISCA over IP Command List Part 1: Camera Issued Commands ACK / Completion Messages Command Function Command Packet Comments z0 4y FF Returned when the command is accepted. (y: Socket No.) ACK / Completion Messages z0 5y FF...
- Page 18 Part 2:PTZOptics Command List Command Function Command Packet Comments 8x 01 00 01 FF IF Clear Broadcast I/F Clear 8x 01 04 00 02 FF Power On/Off CAM_Power 8x 01 04 00 03 FF 8x 01 04 07 00 FF...
- Page 19 8x 01 04 03 00 FF Reset Default Bright position 8x 01 04 03 02 FF CAM_RGain 8x 01 04 03 03 FF Down 8x 01 04 43 00 00 0p 0q FF Direct pq: Red Gain 8x 01 04 04 00 FF Reset Manual control of blue gain 8x 01 04 04 02 FF...
- Page 20 8x 01 04 50 02 FF Auto ND2D Auto/Manual CAM_NR(2D)Mode 8x 01 04 50 03 FF Manual 8x 01 04 53 0p FF CAM_NR(2D)Level Direct p: NR Setting (0: Off, level 1 to 5) 8x 01 04 54 0p FF CAM_NR(3D)Level Direct p: NR Setting (0: Off, level 1 to 8)
- Page 21 8x 01 06 07 00 0W 0Y 0Y 0Y LimitSet W: 1 (UpRight), 0: DownLeft 0Y 0Z 0Z 0Z 0Z FF YYYY: Pan position, ZZZZ: Tilt Pan_TiltLimitSet position 8x 01 06 07 01 0W 07 0F 0F LimitClear 0F 07 0F 0F 0F FF 8x 01 04 A1 00 00 0p 0q FF CAM_Brightness Direct...
- Page 22 8x 2a 02 a0 04 0p FF Toggle USB Audio p=2: On, p=3: Off CAM_UACStatus 8x 0A 11 A8 pq FF Toggle RTMP p: 1 Stream 1; p: 2 stream 2; q: 2 ON, q: 3 CAM_RTMPSet 8x 0A 11 42 0p rs tv FF Focus Range p=0: Off p=1: On, rs: furthest position(0x00 CAM_FocusRange...
- Page 23 Part 3: PTZOptics Query Command List 8x 09 04 00 FF y0 50 02 FF CAM_PowerIng y0 50 03 FF Off (Standby) y0 50 04 FF Internal Power Circuit Error 8x 09 04 47 FF y0 50 0p 0q 0r 0s FF...
- Page 24 8x 09 04 3F FF y0 50 0p FF CAM_MemoryInq p: Memory number last operated y0 50 02 FF CAM_LR_ReverseIng 8x 09 04 61 FF y0 50 03 FF y0 50 02 FF CAM_PictureFlipIng 8x 09 04 66 FF y0 50 03 FF 8x 09 04 49 FF y0 50 00 00 00 0p FF CAM_ColorGainIng...
- Page 25 Block Inquiry Command List Command Command Packet Inquiry Packet Comments 8x 09 7E 7E 00 FF y0 50 0u 0u 0u 0u CAM_LensBlockIng UUUU: Zoom position 00 00 0v 0v 0v 0v VVVV: Focus position 00 0w 00 FF W.bit0: Focus mode 1: Auto, 0: manual 8x 09 7E 7E 01 FF y0 50 0p 0p 0q 0q...
- Page 26 Part 4: Pelco-D Protocol Command List Function Byte1 Byte2 Byte3 Byte4 Byte5 Byte6 Byte7 0xFF Address 0x00 0x08 Pan Speed Tilt Speed Down 0xFF Address 0x00 0x10 Pan Speed Tilt Speed Left 0xFF Address 0x00 0x04 Pan Speed Tilt Speed Right 0xFF Address...
-
Page 27: Network Connection
Network Connection Operating Environment • Operating System: Windows 7 / 8.1 / 10 / 11, Mac OS X, Linux, Android • Network Protocol: TCP/IP • Client PC: P4 / 128M RAM / 40G HDD / supported scaled graphics card, support for DirectX 8.0+. - Page 28 IP, please do one of the following: • Method 1: Use a Internet browser and type in “http://ptzoptics.local/” to reach the camera’s web interface. From there, the Network Settings page will allow you to view the camera’s network settings.
- Page 29 1. Open a new Finder window and go to the Applications folder. 2. Open the Utilities folder and select the Terminal program. 3. Once the Terminal program is open, type in “ipconfig getifaddr en0” and press the Enter key. 4. In the example above, the Mac’s local address is “192.168.17.107”, making the network range “192.168.17”.
-
Page 30: Web Ui
Web UI Access Camera 1. Enter “http://ptzoptics.local/” or the camera’s IP address into a web browser. 2. Enter the username and password into the login fields. Both the username and password are “admin” by default. You can change the login credentials on the System Settings page. - Page 31 Navigation Panel The Navigation Panel allows you to quickly and easily select the various control options for the camera. It can be collapsed for more room on the user interface. You can load preconfigured Profiles to the camera by selecting the desired Profile from the Navigation Panel.
- Page 32 Camera Settings The Camera Settings page gives you access to the Camera’s Video Feed, PTZ Control, OSD Menu, Preset Control, Speed Settings, Image Settings & Control Settings. All of the settings available in the Image tab are also available in the camera’s menu. The settings are offered in the Web UI so you don’t have to open the Menu while the camera is in use.
- Page 33 Image The Image > Image tab within the Camera Settings page allows you to adjust the camera’s Luminance, Saturation, Contrast, Sharpness, Hue, 3D Noise Reduction, Inversion Mode & Black and White Mode. Ŝ You must hit the “Apply” button for these changes to take effect. Ŝ...
- Page 34 Exposure The Image > Exposure tab within the Camera Settings page allows you to fine tune the camera’s Exposure settings to ensure image clarity as well as ensuring the images from multiple cameras match. • You must click the “Apply” button to save the Exposuresettings to the camera. •...
- Page 35 Color The Image > Color tab within the Camera Settings page allows you to fine tune the camera’s white balance and color tint settings to adjust for lighting, as well as ensuring images from multiple cameras match. • You must click the “Apply” button to save the Color settings to the camera. •...
- Page 36 Focus The Image > Focus tab within the Camera Settings page allows you to adjust the various focus set- tings, including Auto Focus, Auto Focus Zone, Auto Focus Sensitivity, Focus Lock and Focus Limit. • You must click the “Apply” button to save the Focus settings to the camera. •...
- Page 37 Control Mode The Control > Mode tab within the Camera Settings page allows you to toggle available camera modes, such as Auto Tracking, Tracking Box, Patrol Mode, Preset Freeze, Zoom Mode, Motion Sync & Tally Mode. • Auto Tracking: Select whether the camera automatically tracks the selected target Ŝ...
- Page 38 Control Ports The Control > Ports within the Camera Settings page allows you to change the camera’s TCP, UDP, & HTTP control ports. The Sony UDP Port can not be changed • You must click the “Apply” button to save the Ports to the camera. •...
- Page 39 Audio Video Settings The Audio & Video Settings page accesses the Video Encoding Settings, IP Video Stream 1 / Stream 2 Encoding Settings & Audio Encoding Settings sections of the network video feeds. • Video Encoding Settings Ŝ HDMI/SDI Output: Set either HDMI or SDI to output video (not simultaneous). ▪...
- Page 40 ▪ When any of the NDI |HX3 templates are selected, the Hard Output, Refresh Rate, Encoding Profile, Encoding Protocol, Resolution, Bitrate, Frame Rate, I Key Frame Interval, & Bit Rate Control settings are all locked. Ŝ Advanced: Hybrid Zoom decreases the output resolution to increase the maximum zoom level.
- Page 41 Streaming Settings The Streaming Settings page accesses the RTMP(S) Settings, SRT Settings, RTSP Settings, Multicast Settings, & ONVIF Settings sections. v1_1 rev. 1-23...
- Page 42 • RTMP(S) Stream 1 & 2 Settings Ŝ RTMP(S) Stream URL: Define the RTMP Address of the CDN you wish to stream to. Ŝ RTMP(S) Stream Key: Define the stream key of the CDN you wish to stream to. Ŝ Enable Stream: Toggle the RTMP stream on or off. •...
- Page 43 Profile Settings The Profile Settings page gives you access to the Logo Upload, Profile Configuration, Quick Profiles, Custom CSS & Tutorial Mode sections. v1_1 rev. 1-23...
- Page 44 • Logo Upload Ŝ Upload File: Browse your PC for an image file you’d like to upload to the camera’s web interface. The resolution of this logo should be 2500x1000 and PNG or JPG type file. • Profile Menu Ŝ Profile Name: Give your Profile a unique name so you can easily remember. Ŝ...
- Page 45 Network Settings The Network Settings page accesses the LAN Settings & NTP Settings sections. v1_1 rev. 1-23...
- Page 46 • LAN Settings Ŝ IP Configuration Type: Select whether the camera automatically configured the network settings (DHCP) or whether you manually configure the network settings (Static). Ŝ IP Address: The IP address is a unique address the network uses to connect and configure the camera.
- Page 47 Config Settings ® The NDI Config Settings page accesses the camera’s NDI settings. v1_1 rev. 1-23...
- Page 48 Ŝ NDI Port: The NDI Port is how you reach the NDI feed of your camera. For more information on how to utilize the NDI Discovery Server, please see : ® https://help.ptzoptics.com/en/support/solutions/articles/13000086877-ndi-discovery-server NewTek®, NDI®, NDI® 4, & NDI®|HX are all registered trademarks by Vizrt Group®. v1_1 rev. 1-23...
- Page 49 MIDI Control The MIDI Control page accesses the PTZOptics MIDI Control, Control Mapping, Mass Command Edit & Information sections. The MIDI Control page can be reached by accessing the HTTPS version of the camera’s web interface. (https://[Camera IP]/). The page must remain open for MIDI Control tofunction.
- Page 50 • PTZOptics MIDI Control Ŝ MIDI Control: Toggle MIDI Control on or off. Ŝ MIDI Controller: Select a MIDI Controller that’s connected to your PC. • Control Mapping Ŝ Command: What function you’d like the camera to perform. Ŝ Event: How you would like the trigger the command to be sent.
- Page 51 Ŝ Firmware Version: The Firmware Version displays the firmware file currently running on the camera. Ŝ Device Model: The Device Model is a field that PTZOptics uses to designate the camera. Ŝ Webware Version: The Webware Version is the version of the web interface.
- Page 52 System Settings The System Settings page gives access to the HTTPS Settings, IR Remote Channel Selection, Access Settings, Firmware Check, Restore Default (Basic), Firmware Upload & Restore Default (Advanced) sections. • HTTPS Settings Ŝ HTTPS Certificate: Upload a HTTPS Certificate from your computer. Ŝ...
- Page 53 Firmware Check • Ŝ Mirrors: Define a server address for acquiring the latest PTZOptics firmware files. By default, the camera will query PTZOptics at https://firmware.ptzoptics.com/ Ŝ Check Firmware Version: Check to see if your camera is running the latest firmware from the Firmware Update Server.
-
Page 54: Maintenance And Troubleshooting
Maintenance and Troubleshooting Camera Maintenance 1. If the camera will not be used for a long time, power off the camera. 2. Use a soft cloth or lotion-free tissue to clean the camera body. 3. Use a soft, dry, lint-free cloth to clean the lens. If the camera is very dirty, clean it with a diluted neutral detergent. - Page 55 2. Verify that the controlling device is using the appropriate control port for the protocol. 3. The default control ports are as follows: TCP: 5678, UDP: 1259, Sony UDP: 52381, NDI: 5961 If you need further assistance, please contact our support team at https://community.ptzoptics.com/s/login/ v1_1 rev. 1-23...
Need help?
Do you have a question about the PT30X-4K-WH-G3 and is the answer not in the manual?
Questions and answers