
Related Manuals for PTZOptics Studio Pro


Summary of Contents for PTZOptics Studio Pro
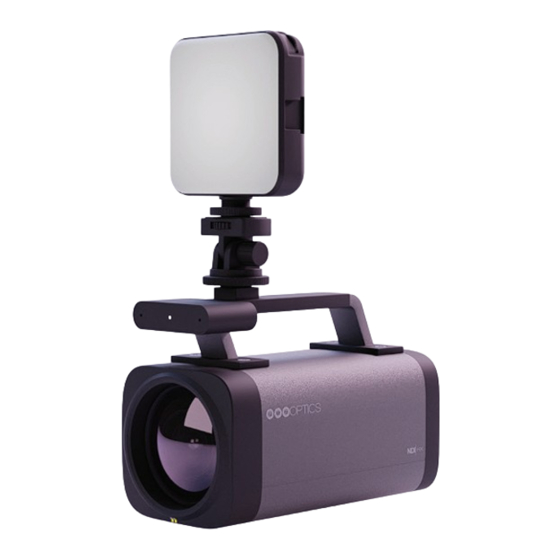
- Page 1 Share Your Vision PTZOptics Studio Pro User Manual MODEL No. PT-STUDIOPRO Rev 2.0 2023-10-23...
-
Page 2: Table Of Contents
Troubleshooting ........ptzoptics.com II 1-800-486-5276... -
Page 3: Precautions
Ŝ Please make sure that there are no obstacles in the pan or tilt ranges of the camera lens. Ŝ After installation is complete, power on the camera. Ŝ Do not dismantle the camera - PTZOptics is not responsible for any unauthorized modification or dismantling. Rev 2.0 2023-10-23... -
Page 4: Packing List
Warranty PTZOptics includes a limited parts & labor warranty for all PTZOptics manufactured cameras. The warranty is valid only if PTZOptics receives proper notice of such defects during the warranty period. PTZOptics, at its option, will repair or replace products that prove to be defective. PTZOptics manufactures its hardware products from parts and components that are new or equivalent to new in accordance with industry-standard practices. -
Page 5: Fcc Statement
Copyright Notice The entire contents of this manual / guide, whose copyright belongs to PTZOptics, may not be cloned, copied, or translated in any way without the explicit permission of the company. The product specifications referred to in this document are for reference only and as such are subject to updating at any time without prior notice. -
Page 6: Features
™ Features • Full-featured USB Interface Full-featured USB Type-C interface, compatible with USB 3.0 and USB 2.0, supports audio, encoding output, and UVC 1.5. • Precise Focus Equipped with TOF close-range assisted focusing, combined with advanced focusing algorithms, it can quickly and stably focus regardless of distance. •... -
Page 7: Camera Features
™ Camera Features • Camera Control Video Templates: The PTZOptics team is making it easy to select the best performance IP video streams for your project by providing easily selectable video templates for NDI and IP streaming. White Balance Modes: This feature helps in adjusting the color balance in your images, specifically focusing on the color white. - Page 8 • Networking Simple Network Discovery: This is a feature that allows the camera to be easily discovered and connected to a network. PTZOptics cameras can now be found by simply entering http:/ /ptzoptics.local/ into any web-browser. The IP address can then easily be changed through the user interface.
-
Page 9: Technical Specifications
Digital Noise Reduction 3D & 2D Digital Noise Reduction Video Signal Noise Reduction ≥55dB Horizantal & Vertical Flip Supported Image Freeze Supported Number of Presets Rev 2.0 2023-10-23 534 Trestle Place Downingtown, PA, 19335 USA · Tel: +1(484)593-2247 · Email: support@ptzoptics.com... - Page 10 ™ USB Specifications Operating System Windows 7 / 8.1 / 10 / 11 / Mac OS, Linux, Android Color System/Compression YUY2 / MJPEG / H.264 Video Format ▪ YUY2: Max resolution: 1920x1080p@30 ▪ MJPEG: Max resolution: 1920x1080p@60 ▪ H.264 AVC: Max resolution: 1920x1080p@30 ▪...
-
Page 11: Powering The Led Light
1.74 lbs | 0.7 kg Powering the LED Panel Light The Studio Pro is able to power and charge the LED Panel Light when connected to the included power supply or via a power over ethernet (PoE) connection. When connected via USB, the cam- era does not receive enough power to also charge the LED light. -
Page 12: Dimensions
™ Dimensions 4.21” 4.21” 5.55” 5.55” 3.03” 3.03” Rev 2.0 2023-10-23... -
Page 13: Connection Guide
8. USB 3.0 Type C (Video) 9. Horizontal & Vertical Screen Flip Switch 10. Mic Line In 11. LAN (POE) 12. DC 12V Power Rev 2.0 2023-10-23 534 Trestle Place Downingtown, PA, 19335 USA · Tel: +1(484)593-2247 · Email: support@ptzoptics.com... -
Page 14: Ir Remote Controller Guide
™ IR Remote Controller Guide Rev 2.0 2023-10-23... - Page 15 ™ To control multiple IR PTZOptics cameras, this camera uses the same IR remote included with our Pan Tilt Zoom models. However, being a fixed camera lens, this camera cannot pan or tilt. 1. Standby Button Press this button to enter standby mode. Press it again to enter normal mode.
- Page 16 [F4]: Disable auto-tracking (Studio Pro nonfunctional) ▪ [F4]: When the IR remote is on the same IR channel as the Studio Pro, pressing the [F4] button will pause the video feed. Pressing the [F4] button again will play the video feed.
-
Page 17: Shortcut Functions
[#] > [*] > [#] > [9]: Sets IP address to 192.168.100.89 [#] > [*] > [#] > [0]: Sets IP address to 192.168.100.80 Rev 2.0 2023-10-23 534 Trestle Place Downingtown, PA, 19335 USA · Tel: +1(484)593-2247 · Email: support@ptzoptics.com... -
Page 18: On-Screen Display
™ On-Screen Display (Exposure) Mode: Auto, Manual, SAE, AAE, Bright Main Menu There are many ways to adjust the ExpCompMode: On, Off (Effective only in camera’s On-Screen Display (OSD) Menu. Auto mode). The following instructions will go over Exp-Comp: -7 ~ +7 (Effective only when the OSD Menu while using the included ExpCompMode is On). - Page 19 Auto, One Push, VAR mode). Style: Default, Face, Jewelry Saturation: Camera Saturation value. Options include: 20% - 200% Hue: Camera Hue value. Options include: 0 ~ 14 Rev 2.0 2023-10-23 534 Trestle Place Downingtown, PA, 19335 USA · Tel: +1(484)593-2247 · Email: support@ptzoptics.com...
- Page 20 ™ Focus Noise Reduction Move the main menu cursor to [Focus], Move the main menu cursor to [Noise and press [HOME] key enter the Focus Reduction], and press [HOME] key enter page as shown in the following figure: the Noise reduction page, as shown in the following figure.
- Page 21 Serial Number *********** Return Version: Firmware version Model: Model Number Date: Date AF Verison IP: IP address for the camera Gateway Netmask Serial Number Rev 2.0 2023-10-23 534 Trestle Place Downingtown, PA, 19335 USA · Tel: +1(484)593-2247 · Email: support@ptzoptics.com...
-
Page 22: Network Connection
IP address, the camera will default to “192.168.100.88”. If you don’t know the camera IP, please do one of the following: Method 1: Use a Internet browser and type in “http:/ /ptzoptics.local/” to reach the camera’s web inter face. The username and password are both “admin” by default. The Network Settings page will allow you to make adjustments to the camera’s network settings. - Page 23 4. Locate the “IPv4 Address” in that section. This is your computers local IP address. 5. In the example above, the PC’s local address is “192.168.15.117”, making the network range “192.168.15.xxx”. Rev 2.0 2023-10-23 534 Trestle Place Downingtown, PA, 19335 USA · Tel: +1(484)593-2247 · Email: support@ptzoptics.com...
- Page 24 ™ 1. Open a new Finder window and go to the Applications folder. 2. Open the Utilities folder and select the Terminal program. 3. Once the Terminal program is open, type in “ipconfig getifaddr en0” and press the Enter key. 4.
-
Page 25: Ndi®|Hx 3 Connection
Setting & Calling Presets The PTZOptics Move 4K, the Move SE, Link 4K, and Studio Pro cameras all utilize the same newly upgraded camera presets system, and in this section, we will explain how to get the most out of presets and how to properly use them. - Page 26 ™ Image Tab Default Settings Exposure Tab Default Settings Rev 2.0 2023-10-23...
- Page 27 ™ Color Tab Default Settings Focus Tab Default Settings Rev 2.0 2023-10-23 534 Trestle Place Downingtown, PA, 19335 USA · Tel: +1(484)593-2247 · Email: support@ptzoptics.com...
- Page 28 ™ Advanced Tab Default Settings Rev 2.0 2023-10-23...
- Page 29 4. Use the drop down tab to select the preset number you wish to save. Then click set. Rev 2.0 2023-10-23 534 Trestle Place Downingtown, PA, 19335 USA · Tel: +1(484)593-2247 · Email: support@ptzoptics.com...
-
Page 30: Achieving The Bokeh Effect
Step 2: Connection While the LAN output is viable, for the best resolutions and frame rates, it is recommended that you use the HDMI output to send the video signal from your Studio Pro to your encoding device or computer. - Page 31 Step 6: Focus Menu Return to the main menu and scroll down to select the Focus Menu. Please copy the settings in the image below and exit the menu. Please see the Studio Pro manual linked here for a de- tailed explanation of this menu.
-
Page 32: Web Ui
Web UI Accessing the Camera 1. Enter “http://ptzoptics.local/” or the camera’s IP address into a web browser. 2. Enter the username and password into the login fields. Both the username and password are “admin” by default. You can change the login credentials on the System Settings page. - Page 33 Navigation Panel is maximized. • Quick Profile: You can quickly change between pre-configured camera settings using the Profiles saved to the Navigation Panel. Rev 2.0 2023-10-23 534 Trestle Place Downingtown, PA, 19335 USA · Tel: +1(484)593-2247 · Email: support@ptzoptics.com...
- Page 34 All settings in the Image tab are also available in the camera’s menu. The settings are offered in the Web UI so you don’t have to open the Menu while the camera is in use. • The PTZ Control section lets you Pan, Tilt, Zoom, and Focus the camera. (The Studio Pro cannot pan or tilt.) •...
- Page 35 The “Default” button will revert the Image settings to factory default. ▪ The “Undo” button will revert the Image settings to the last saved settings. Rev 2.0 2023-10-23 534 Trestle Place Downingtown, PA, 19335 USA · Tel: +1(484)593-2247 · Email: support@ptzoptics.com...
- Page 36 ™ Exposure The Advanced Image > Exposure tab within the Camera Settings page allows you to fine-tune the camera’s Exposure settings to ensure image clarity as well as ensure the images from multiple cameras match. ▪ You must click the “Apply” button to save the Exposure settings to the camera. ▪...
- Page 37 You must click the “Apply” button to save the Color settings to the camera. ▪ The “Default” button will revert the Color settings to factory default, as shown in the image above Rev 2.0 2023-10-23 534 Trestle Place Downingtown, PA, 19335 USA · Tel: +1(484)593-2247 · Email: support@ptzoptics.com...
- Page 38 ™ Focus The Advanced Image > Focus tab within the Camera Settings page allows you to adjust the var- ious focus settings, including Auto Focus, Auto Focus Zone, Auto Focus Sensitivity, Focus Lock and Focus Limit. ▪ You must click the “Apply” button to save the Focus settings to the camera. ▪...
- Page 39 You must click the “Apply” button to save the Mode to the camera. ▪ The “Undo” button will revert the Mode settings to the last saved settings. Rev 2.0 2023-10-23 534 Trestle Place Downingtown, PA, 19335 USA · Tel: +1(484)593-2247 · Email: support@ptzoptics.com...
- Page 40 ™ Control Ports The Control > Ports tab on the Camera Settings page allows you to change the camera’s TCP, UDP & HTTP control ports. The Sony UDP Port can not be changed. ▪ You must click the “Apply” button to save the Ports to the camera. ▪...
- Page 41 The Audio & Video Settings page accesses the Video Encoding Settings, IP Video Stream 1 / Stream 2 Encoding Settings & Audio Encoding Settings sections of the network video feeds. Rev 2.0 2023-10-23 534 Trestle Place Downingtown, PA, 19335 USA · Tel: +1(484)593-2247 · Email: support@ptzoptics.com...
- Page 42 ™ HDMI Output: Encoding Settings ▪ Video Format: Adjusts resolution and frame rate. 1080p60, 1080p50, 1080p30, 720p60, 720p50 Video: Encoding Settings ▪ Refresh Rate: Frequency adjustment for displays. Select the refresh rate for your region. Ŝ Options include: 50Hz, 60Hz ▪...
- Page 43 ™ Streaming Settings The Streaming Settings page accesses the RTMP(S) Settings, SRT Settings, RTSP Settings Multicast Settings & ONVIF Settings sections. Rev 2.0 2023-10-23 534 Trestle Place Downingtown, PA, 19335 USA · Tel: +1(484)593-2247 · Email: support@ptzoptics.com...
- Page 44 ™ • RTMP(S) Stream 1 & 2 Settings Ŝ RTMP(S) Stream URL: Define the RTMP Address of the CDN you wish to stream to. Ŝ RTMP(S) Stream Key: Define the stream key of the CDN you wish to stream to. Ŝ...
- Page 45 ™ Profile Settings The Profile Settings page gives you access to the Logo Upload, Profile Configuration, Quick Profiles, Custom CSS & Tutorial Mode sections. Rev 2.0 2023-10-23 534 Trestle Place Downingtown, PA, 19335 USA · Tel: +1(484)593-2247 · Email: support@ptzoptics.com...
- Page 46 ™ • Logo Upload Ŝ Upload File: Browse your PC for an image file you’d like to upload to the camera’s web interface. The resolution of this logo should be 2500x1000 and PNG or JPG type file. • Profile Menu Ŝ...
- Page 47 ™ Network Settings The Network Settings page accesses the LAN Settings & NTP Settings sections. Rev 2.0 2023-10-23 534 Trestle Place Downingtown, PA, 19335 USA · Tel: +1(484)593-2247 · Email: support@ptzoptics.com...
- Page 48 ™ • LAN Settings Ŝ IP Configuration Type: Select whether the camera automatically configured the network settings (DHCP) or whether you manually configure the network settings (Static). Ŝ IP Address: The IP address is a unique address the network uses to connect and configure the camera.
- Page 49 ™ NDI Settings The NDI Settings page allows you to manage the NDI settings of the Studio Pro camera. • NDI Local Device Name: The name you assign to your NDI device. • NDI local Device Channel: The video feed you assign to your local device name.
- Page 50 Ŝ Firmware Version: The Firmware Version displays the firmware file currently running on the camera. Ŝ Device Model: The Device Model is a field that PTZOptics uses to designate the camera. Ŝ Webware Version: The Webware Version is the version of the web interface.
- Page 51 “!@#$^()” can be used, up to 15 characters. Please note the circles in the field are encrypted and do not reflect the password saved on the camera. Rev 2.0 2023-10-23 534 Trestle Place Downingtown, PA, 19335 USA · Tel: +1(484)593-2247 · Email: support@ptzoptics.com...
- Page 52 ™ • Firmware Check Ŝ Mirrors: Define a server address for acquiring the latest PTZOptics firmware files. By default, the camera will query PTZOptics at https:/ /firmware.ptzoptics.com/ Ŝ Check Firmware Version: Check to see if your camera is running the latest firmware from the Firmware Update Server.
-
Page 53: Serial & Ip Command List
0) auto focus mode. Executable VISCA over IP control: z = 9 Serial VISCA control: z = Camera Address + 8 Rev 2.0 2023-10-23 534 Trestle Place Downingtown, PA, 19335 USA · Tel: +1(484)593-2247 · Email: support@ptzoptics.com... - Page 54 ™ Part 2: PTZOptics Command List Command Function Command Packet Comments IF Clear Broadcast 8x 01 00 01 FF I/F Clear 8x 01 04 00 02 FF Power On/Off CAM_Power 8x 01 04 00 03 FF Stop 8x 01 04 07 00 FF...
- Page 55 8x 0A 01 12 pq FF pq: Red / Blue Tuning position 0x00 (-10) ~ 0x14 Direct 8x 0A 01 13 pq FF CAM_BTuning (+10) Rev 2.0 2023-10-23 534 Trestle Place Downingtown, PA, 19335 USA · Tel: +1(484)593-2247 · Email: support@ptzoptics.com...
- Page 56 ™ Full Auto 8x 01 04 39 00 FF Automatic Exposure mode Manual 8x 01 04 39 03 FF Manual exposure mode Shutter Priority 8x 01 04 39 0A FF Shutter priority auto ex- CAM_AE posure mode Iris Priority 8x 01 04 39 0B FF Iris priority auto exposure mode Bright...
- Page 57 Recall 8x 01 04 3F 02 pp FF Preset Speed 8x 01 06 01 p FF P: Speed grade (0x01 ~ Preset_Recall_ Speed 0x18) Rev 2.0 2023-10-23 534 Trestle Place Downingtown, PA, 19335 USA · Tel: +1(484)593-2247 · Email: support@ptzoptics.com...
- Page 58 ™ CAM_ImageFreeze Freeze Image 8x 01 04 62 0p FF p: 2 ON; p: 3 OFF 8x 01 04 61 02 FF Image Flip Horizontal On CAM_LR_ Reverse / Off 8x 01 04 61 03 FF 8x 01 04 66 02 FF Image Flip Vertical On / CAM_PictureFlip 8x 01 04 66 03 FF...
- Page 59 8x 0B 01 03 FF 8x 0B 01 04 FF CAM_Multicast Mode Multicast Mode 8x 0B 01 23 0p FF p=1: On, p=2: Off Rev 2.0 2023-10-23 534 Trestle Place Downingtown, PA, 19335 USA · Tel: +1(484)593-2247 · Email: support@ptzoptics.com...
- Page 60 8x 01 04 A0 10 FF Reset to Factory Settings Reset Network 8x 0A 01 AA FF CAM_NetworkReset Parameters Part 3: PTZOptics Query Command List CAM_PowerIng 8x 09 04 00 FF y0 50 02 FF y0 50 03 FF Off (Standby)
- Page 61 8x 09 04 05 ApertureModeInq y0 50 03 FF Manual Sharpness (Sharpness) y0 50 02 FF 8x 09 06 06 SYS_MenuModeInq y0 50 03 FF Rev 2.0 2023-10-23 534 Trestle Place Downingtown, PA, 19335 USA · Tel: +1(484)593-2247 · Email: support@ptzoptics.com...
- Page 62 ™ y0 50 02 FF CAM_ 8x 09 04 63 PictureEffectModeInq y0 50 04 FF B&W CAM_MemoryInq 8x 09 04 3F FF y0 50 0p FF p: Memory number last operated y0 50 02 FF CAM_LR_ReverseIng 8x 09 04 61 FF y0 50 03 FF y0 50 02 FF CAM_PictureFlipIng...
- Page 63 R: WB Mode, S: Aperture TT: AE Mode, U.bit2: Backlight U.bit1: Exposure Comp, VV: Shutter position. WW: Iris position, XX Bright position, Z: Exposure Comp position Rev 2.0 2023-10-23 534 Trestle Place Downingtown, PA, 19335 USA · Tel: +1(484)593-2247 · Email: support@ptzoptics.com...
- Page 64 ™ CAM_OtherBlockIng 8x 09 7E 7E 02 FF y0 50 0p 0q 00 0r P.bit0: Power 1: On, 0: Off, 00 00 00 00 00 Q.bit2: LR Reverse: 1: On, 0: Off 00 00 00 00 FF R.bit3~0: Picture Effect Mode CAM_ 8x 09 7E 7E 03 FF y0 50 00 00 00 00 P: AF Sensitivity...
- Page 65 Byte Query Zoom Position 0xFF Address 0x00 0x55 0x00 0x00 Query Zoom Position 0xFF Address 0x00 0x5D Value High Value Low Response Byte Byte Rev 2.0 2023-10-23 534 Trestle Place Downingtown, PA, 19335 USA · Tel: +1(484)593-2247 · Email: support@ptzoptics.com...
-
Page 66: Troubleshooting
™ Maintenance and Troubleshooting Camera Maintenance 1. If the camera will not be used for a long time, power off the camera. 2. Use a soft cloth or lotion-free tissue to clean the camera body. 3. Use a soft, dry, lint-free cloth to clean the lens. If the camera is very dirty, clean it with a diluted neutral detergent. - Page 67 Ŝ The default control ports are as follows: TCP: 5678, UDP: 1259, Sony UDP: 52381 If you need further assistance, please contact our support team at https://community.ptzoptics.com/s/login/ Rev 2.0 2023-10-23 534 Trestle Place Downingtown, PA, 19335 USA · Tel: +1(484)593-2247 · Email: support@ptzoptics.com...
Need help?
Do you have a question about the Studio Pro and is the answer not in the manual?
Questions and answers