Advertisement
Quick Links
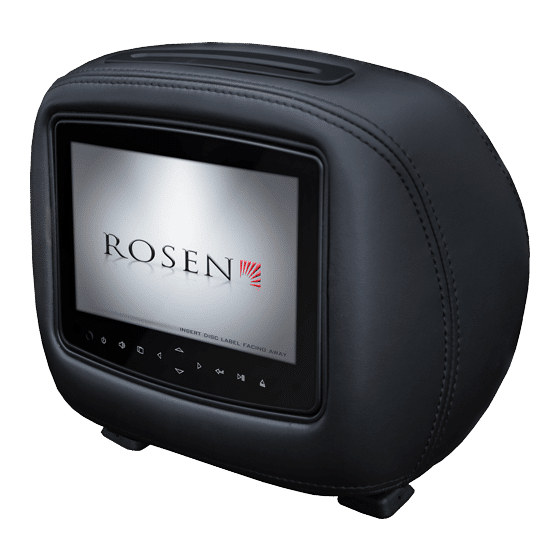
AV7950H Dual Multimedia Headrest Replacement System
AV7950H VIDEO PRODUCTS ARE NOT INTENDED FOR VIEWING BY THE DRIVER, AND ARE TO BE
INSTALLED ONLY TO BE VIEWED BY REAR-SEAT OCCUPANTS.
IMPROPER INSTALLATION COULD DISTRACT THE DRIVER OR INTERFERE WITH SAFE
OPERATION OF THE VEHICLE, WHICH COULD RESULT IN SERIOUS INJURY OR DEATH, AND
COULD ALSO VIOLATE STATE LAW. ROSEN ELECTRONICS DISCLAIMS ANY LIABILITY FOR ANY
BODILY INJURY OR PROPERTY DAMAGE THAT MAY RESULT FROM ANY IMPROPER OR
BEFORE YOU START THE INSTALLATION, READ THIS GUIDE!
Rosen "Headrest Multimedia" systems are the easiest-to-install entertainment systems available today.
However, we strongly recommend reading this guide before starting the installation!
1 Make sure you have the tools you will need
These common items are needed to complete this installation:
· Digital multimeter (DMM)
· Appropriate tool for headrest removal · Allen wrench set
· Panel removing tools
· Security latch tool (included)
· Wire cutters, strippers, and a crimping tool
· 1/4" drive sockets are often needed for dashboard and trim disassembly
· Check if Torx or Allen-drive bolts are used on any panels you will be removing
· You will need a DVD disc in good condition when testing the system
Standard installation parts you will need include wire, wire ties, wire crimp connectors or solder, and
electrical insulating tape. Installation of aftermarket automotive electronics also often requires access to
special parts. It is a good idea to have a source for these common installation parts.
AV7950H Installation Guide
INSTALLATION GUIDE
NOTICE OF INTENDED INSTALLATION AND USE
UNINTENDED INSTALLATION AND/OR USE.
· #2 Phillips screwdriver
· Cable routing tool (included)
· Retractable knife
Copyright 2015 All Rights Reserved
GC1077 Rev A
E
Page 1
Advertisement

Subscribe to Our Youtube Channel
Related Manuals for Rosen AV7950H


Summary of Contents for Rosen AV7950H
- Page 1 AV7950H Dual Multimedia Headrest Replacement System NOTICE OF INTENDED INSTALLATION AND USE AV7950H VIDEO PRODUCTS ARE NOT INTENDED FOR VIEWING BY THE DRIVER, AND ARE TO BE INSTALLED ONLY TO BE VIEWED BY REAR-SEAT OCCUPANTS. IMPROPER INSTALLATION COULD DISTRACT THE DRIVER OR INTERFERE WITH SAFE OPERATION OF THE VEHICLE, WHICH COULD RESULT IN SERIOUS INJURY OR DEATH, AND COULD ALSO VIOLATE STATE LAW.
- Page 2 Attach posts to headrest in the desired spacing indicators for your particular vehicle Post spacing indicators are located at bottom of headrest bucket IF YOU HAVE PURCHASED A PRE-ASSEMBLED HEADREST SYSTEM, SKIP TO STEP 4 Copyright 2015 All Rights Reserved AV7950H Installation Guide GC1077 Rev A Page 2...
- Page 3 Do NOT allow the cables to cross over one another or leave excess cable slack in the headrest bucket. This will prevent the unit from closing properly, could permanently damage the unit. Copyright 2015 All Rights Reserved AV7950H Installation Guide GC1077 Rev A Page 3...
- Page 4 Headrest core shown here without anything installed Top part of DVD mechanism/multimedia dock gets inserted first and then bottom part gets snapped into the integrated locking tabs inside bucket Copyright 2015 All Rights Reserved AV7950H Installation Guide GC1077 Rev A Page 4...
-
Page 5: Wiring Diagram
7 Mounting the AV7950H LCD assembly into the headrest bucket You will need to mount the AV7950H LCD assembly into the headrest bucket. The following step will guide you through this process. • Be sure to securely connect both harnesses •... - Page 6 8 Installing the AV7950H headrests You will need to install the AV7950H headrests and route the cables through the seat backs. The following steps will guide you through this process. Step 1: Check the headrest down tubes in the seat backs for any obstructions.
- Page 7 FM transmission.) Step 5: When connecting the power harness, Rosen recommends soldering all connections. When using T-Tap or crimp connectors, always ensure the connections are made with the proper gauge connectors.
-
Page 8: Installer Setup
Solution: Open power points can be located in the fuse box, which are designed for accessory equipment. Copyright 2015 All Rights Reserved AV7950H Installation Guide GC1077 Rev A Page 8... - Page 9 “B” on headphones. If audio is not present, check the following. Solution: Check A/B switch on headphones. Solution: Check all cable connections Solution: Please refer to “Install Set-up Menu”. Solution: Force channel B via Installer Setup menu Copyright 2015 All Rights Reserved AV7950H Installation Guide GC1077 Rev A Page 9...
- Page 10 This Installation Instruction ONLY Applies to (AV7950H-MM) Systems You will need to route the cables through the headrest posts. The following step will guide you through this process. • Gray cable gets tucked behind monitor as it is NOT used. Be sure cable is strapped down to avoid rattling.
- Page 11 LCD. CAUTION! Do NOT press directly on the surface of the LCD. This will cause permanent damage to the LCD which will not be covered by warranty. Copyright 2015 All Rights Reserved AV7950H Installation Guide GC1077 Rev A Page 11...
- Page 12 Tap or crimp connectors, always ensure the connections are made with the proper gauge connectors. Failure to make a proper connection will result in a system failure in the future. Copyright 2015 All Rights Reserved AV7950H Installation Guide GC1077 Rev A Page 12...
- Page 13 Remove the protective films and clean the unit as needed c. Place the Owners Information package in the glove compartment d. Place the IR headphones and remote control in a convenient location Copyright 2015 All Rights Reserved AV7950H Installation Guide GC1077 Rev A Page 13...
- Page 14 By default both monitors are set to “Pod Addr A.” For system to operate properly, one monitor needs to be set to “Pod Addr A” and the other needs to be set to “Pod Addr B” Copyright 2015 All Rights Reserved AV7950H Installation Guide GC1077 Rev A Page 14...
- Page 15 “B” on headphones. If audio is not present, check the following. Solution: Check A/B switch on headphones. Solution: Check all cable connections Solution: Please refer to “Install Set-up Menu”. Solution: Force channel B via Installer Setup menu Copyright 2015 All Rights Reserved AV7950H Installation Guide GC1077 Rev A Page 15...
Need help?
Do you have a question about the AV7950H and is the answer not in the manual?
Questions and answers