Table of Contents
Advertisement
Available languages
Available languages
Quick Links
Advertisement
Chapters
Table of Contents

Related Manuals for Evolar XS


Summary of Contents for Evolar XS
- Page 1 Modelnummers: EVO-CS-XS, EVO-CS-S, EVO-CS-M, EVO-CS-L, EVO-CS-XL, EVO-CS-T EVOLAR CONDENSORSCHERM Gebruikershandleiding EVOLAR CONDENSERSCREEN User manual EVOLAR KONDENSATORSIEB Benutzerhandbuch...
-
Page 3: Table Of Contents
VOORWOORD Bedankt voor het aanschaffen van het Evolar condensorscherm. In deze handleiding vindt u alle informatie voor het veilig en correct gebruiken en installeren van het Evolar condensorscherm. Zorg ervoor dat u de volledige inhoud van deze handleiding hebt gelezen en begrepen voordat u het product installeert of onderhoudt. -
Page 4: Product
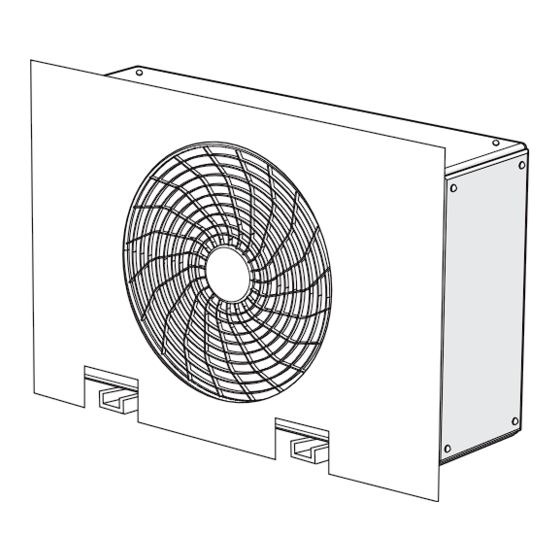
PRODUCT Omschrijving Het Evolar condensorscherm is een condensorscherm voor Evolar airco- warmtepompomkastingen. Deze handleiding is geschikt voor de volgende Evolar omkastingen: • Evolar XS (600 × 900 × 400 mm) • Evolar S (700 × 1100 × 500 mm) •... -
Page 5: Veiligheidsinstructies
• Reinig het product regelmatig met een zachte, schone, droge doek. Vermijd schuurmiddelen die het oppervlak kunnen beschadigen. • Gebruik geen agressieve chemische reinigingsmiddelen zoals ammoniak, zuur of aceton bij het schoonmaken van het product. Evolar condensorscherm | Gebruikershandleiding www.evolarshop.com... -
Page 6: Installatie
INSTALLATIE Controleer de inhoud van het pakket Controleer of alle onderdelen aanwezig zijn en dat deze niet beschadigd zijn. Als er onderdelen ontbreken of beschadigd zijn contacteer dan Evolar BV. Installatiestappen STAP 1 Haal de omkasting van de airco/warmtepomp, als deze al geïnstalleerd is. - Page 7 STAP 3 Snij het condensorscherm op maat. STAP 4 Meet de afmetingen van de airco/warmtepomp, opstelprofielen en/of beugels en teken deze af op het condensorshot. Evolar condensorscherm | Gebruikershandleiding www.evolarshop.com...
- Page 8 STAP 5 Snij de afgetekende stukken uit het condensorschot. STAP 6 Plaats de zelfklevende klittenbandjes (haak) verdeeld over de airco/warmtepomp. LET OP Plaats in ieder geval in elke hoek van de airco/warmtepomp een zelfklevend klittenbandje. Evolar condensorscherm | Gebruikershandleiding www.evolarshop.com...
- Page 9 STAP 7 Plaats de zelfklevende klittenbandjes (oog) op de zelfklevende klittenbandjes (haak). STAP 8 Druk het condensorschot tegen de zelfklevende klittenbandjes (oog). Evolar condensorscherm | Gebruikershandleiding www.evolarshop.com...
- Page 10 STAP 9 Plaats de omkasting terug over de airco/warmtepomp. Evolar condensorscherm | Gebruikershandleiding www.evolarshop.com...
-
Page 11: Onderhoud
Volg de locale regelementen voor het afdanken van het Evolar condensorscherm. GARANTIE Het Evolar condensorscherm heeft een garantie van 24 maanden. Deze garantie vervalt indien het Evolar condensorscherm anders gebruikt is dan aangegeven in deze handleiding. Evolar condensorscherm | Gebruikershandleiding... - Page 12 FOREWORD Thank you for purchasing the Evolar condenser screen. This manual contains all the information required for the safe and correct use and installation of the Evolar condenser screen. Make sure you have read and understood the entire contents of this manual before installing or maintaining the product.
-
Page 13: Product
PRODUCT Description The Evolar condenser screen is a condenser screen for Evolar air conditioning and heat pump enclosures. This manual is suitable for the following Evolar enclosures: • Evolar XS (600 × 900 × 400 mm) • Evolar S (700 × 1100 × 500 mm) •... -
Page 14: Safety Instructions
Clean the product regularly with a soft, clean, dry cloth. Avoid abrasives that could damage the surface. • Do not use harsh chemical cleaning agents such as ammonia, acid or acetone when cleaning the product. Evolar condenserscreen | User manual www.evolarshop.com... -
Page 15: Installation
Check that all parts are present and that they are not damaged. If parts are missing or damaged, contact Evolar BV. Installation steps STEP 1 Remove the enclosure from the air conditioning/heat pump, if already installed. STEP 2 Measure the inside dimensions of the enclosure. Evolar condenserscreen | User manual www.evolarshop.com... - Page 16 STEP 3 Cut the condenser screen to size. STEP 4 Measure the dimensions of the air conditioning/heat pump, installation profiles and/or brackets and mark them off on the condenser partition. Evolar condenserscreen | User manual www.evolarshop.com...
- Page 17 Cut the marked pieces out of the condenser partition. STEP 6 Distribute the self-adhesive Velcro strips (hook) over the air conditioning/heat pump. NOTE Always put a self-adhesive Velcro strip in each corner of the air conditioning/heat pump. Evolar condenserscreen | User manual www.evolarshop.com...
- Page 18 STEP 7 Place the self-adhesive Velcro strips (loop) on the self-adhesive Velcro strips (hook). STEP 8 Press the condenser partition against the self-adhesive Velcro strips (loop). Evolar condenserscreen | User manual www.evolarshop.com...
- Page 19 STEP 9 Replace the enclosure over the air conditioning/heat pump. Evolar condenserscreen | User manual www.evolarshop.com...
-
Page 20: Maintenance
Follow the local regulations for disposing of the Evolar condenser screen WARRANTY The Evolar condenser screen has a warranty period of 24 months. This warranty is void if the Evolar condenser screen has been used differently than indicated in this manual. - Page 22 VORWORT Vielen Dank, dass Sie sich für das Evolar Kondensatorsieb entschieden haben. In dieser Anleitung finden Sie alle Informationen, die Sie für die sichere und korrekte Installation des Evolar Kondensatorsiebs brauchen. Bitte vergewissern Sie sich, dass Sie den gesamten Inhalt dieser Anleitung gelesen und verstanden haben, bevor Sie das Produkt installieren oder warten.
-
Page 23: Produkt
PRODUKT Beschreibung Der Evolar Kondensatorsieb ist ein Kondensatorsieb für Evolar Gehäuse für Klimageräte und Wärmepumpen. Dieses Handbuch ist für die folgenden Evolar Gehäuse geeignet: • Evolar XS (600 × 900 × 400 mm) • Evolar S (700 × 1100 × 500 mm) •... -
Page 24: Sicherheitshinweise
Reinigen Sie das Produkt regelmäßig mit einem weichen, sauberen und trockenen Tuch. Vermeiden Sie Scheuermittel, die die Oberfläche beschädigen können. • Verwenden Sie zum Reinigen des Produkts keine aggressiven chemischen Reinigungsmittel wie Ammoniak, Säure oder Aceton. Evolar kondensatorsieb | Benutzerhandbuch www.evolarshop.com... -
Page 25: Installation
INSTALLATION Überprüfen Sie den Inhalt der Verpackung Überprüfen Sie, ob alle Teile vorhanden und unbeschädigt sind. Falls Teile fehlen oder beschädigt sind: Wenden Sie sich bitte an Evolar BV. Schritte zur Installation SCHRITT 1 Nehmen Sie das Gehäuse von dem Klimagerät/der Wärmepumpe, falls es bereits installiert ist. - Page 26 SCHRITT 3 Schneiden Sie das Kondensatorsieb zu. SCHRITT 4 Messen Sie die Abmessungen des Klimageräts/der Wärmepumpe, der Tragprofile und/ oder der Halterungen und zeichnen Sie diese auf dem Kondensatorsieb an. Evolar kondensatorsieb | Benutzerhandbuch www.evolarshop.com...
- Page 27 Schneiden Sie die angezeichneten Teile aus dem Kondensatorsieb aus. SCHRITT 6 Bringen Sie die selbstklebenden Klettbänder (Hakenseite) über das Klimagerät/die Wärmepumpe verteilt an. ACHTUNG Bringen Sie mindestens in jeder Ecke des Klimageräts/der Wärmepumpe ein selbstklebendes Klettband an. Evolar kondensatorsieb | Benutzerhandbuch www.evolarshop.com...
- Page 28 SCHRITT 7 Bringen Sie die selbstklebenden Klettbänder (Flauschseite) an den selbstklebenden Klettbändern (Hakenseite) an. SCHRITT 8 Drücken Sie das Kondensatorsieb gegen die selbstklebenden Klettbänder (Flauschseite) Evolar kondensatorsieb | Benutzerhandbuch www.evolarshop.com...
- Page 29 SCHRITT 9 Setzen Sie das Gehäuse wieder auf das Klimagerät/die Wärmepumpe. Evolar kondensatorsieb | Benutzerhandbuch www.evolarshop.com...
-
Page 30: Pflege
Verwenden Sie zum Reinigen des Produkts keine aggressiven chemischen Reinigungsmittel wie Ammoniak, Säure oder Aceton. ENTSORGEN Befolgen Sie für die Entsorgung des Evolar Kondensatorsiebs die am Ort geltenden Vorschriften. GARANTIE Evolar gewährt auf das Kondensatorsieb 24 Monate Garantie. Diese Garantie erlischt, wenn das Evolar Kondensatorsieb auf eine andere Weise als in dieser Anleitung angegeben verwendet wird. - Page 32 Evolar Mercuriusstraat 5 NL – Oorspronkelijke gebruikershandleiding 6541 BM Nijmegen EN – Translation of the original instructions The Netherlands DE – Übersetzung der originalen Sprache T +31 (0)24 2120369 www.evolarshop.com V1.0 | 03-2023...
Need help?
Do you have a question about the XS and is the answer not in the manual?
Questions and answers