
Subscribe to Our Youtube Channel
Related Manuals for Siko MSA510


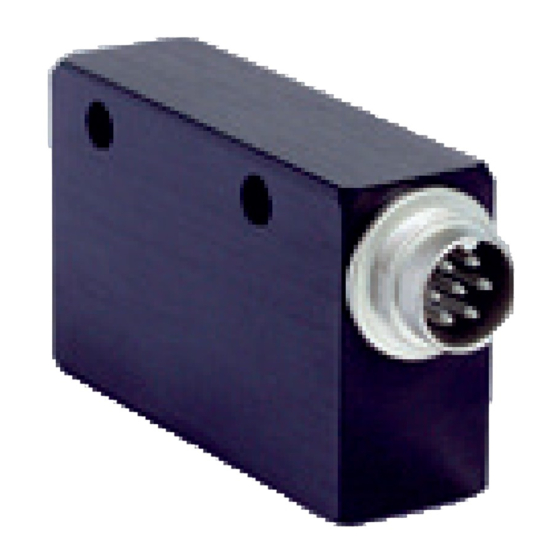
Summary of Contents for Siko MSA510
- Page 1 MSA510 Magnetsensor Deutsch Originalmontageanleitung Seite 2 Magnetic sensor English Translation of the Original Installation Instructions page 19 107/22...
-
Page 2: Table Of Contents
5.4 Nullung 5.5 Messbereich 6 Befehlsliste Servicemode 7 Fehlerbehandlung 8 Transport, Lagerung, Wartung und Entsorgung 9 Zubehör Anschluss-Stecker 9.1 Gegenstecker M16 gerade 9.2 Gegenstecker M16 gewinkelt 10 Technische Daten MSA510 · Datum 18.05.2022 · Art. Nr. 81535 · Änd. Stand 107/22... -
Page 3: Dokumentation
Todesfolge, Sachschäden oder ungeplanten Gerätereaktionen führen können, sofern Sie die gegebenen Anweisungen missachten. Gefährdungen, die zu schweren Körperverletzungen, Sachschäden oder WARNUNG ungeplanten Gerätereaktionen führen können, sofern Sie die gegebenen Anweisungen missachten. MSA510 · Datum 18.05.2022 · Art. Nr. 81535 · Änd. Stand 107/22... -
Page 4: Zielgruppe
Geräte/Systeme gemäß den Standards der Sicherheitstech- nik in Betrieb zu nehmen, zu erden und zu kennzeichnen. 2.4 Grundlegende Sicherheitshinweise Explosionsgefahr GEFAHR ` Magnetsensor nicht in explosionsgefährdeten Zonen einsetzen. MSA510 · Datum 18.05.2022 · Art. Nr. 81535 · Änd. Stand 107/22... -
Page 5: Identifikation
` Keinerlei Veränderung am Gerät vornehmen. ` Kabel mit Zugentlastung installieren. Wenn nötig Schleppkette oder Schutzschlauch vorsehen. Verlust der Messwerte ACHTUNG ` Toleranz- und Abstandsmaße über die gesamte Messstrecke einhalten. MSA510 · Datum 18.05.2022 · Art. Nr. 81535 · Änd. Stand 107/22... -
Page 6: Montage Magnetband
3. Magnetband aufkleben. 4. Magnetbandoberfläche sorgfältig reinigen. 5. Schutzfolie des Abdeckbandes entfernen. 6. Abdeckband aufkleben (an beiden Enden leicht überlappen lassen). 7. Überlappende Enden des Abdeckbandes gegen Ablösen sichern. MSA510 · Datum 18.05.2022 · Art. Nr. 81535 · Änd. Stand 107/22... - Page 7 Magnetband vollständig darin eingebettet ist. Abb. 2: Magnetband Abb. 3: Magnetband von vorne angeschrägt verschraubt Abb. 4: Magnetband von oben Abb. 5: Magnetband in Nut verschraubt MSA510 · Datum 18.05.2022 · Art. Nr. 81535 · Änd. Stand 107/22...
-
Page 8: Montage Magnetsensor
Abstand um die Dicke des Abdeckbandes inkl. Klebefilm. Die Addition der Montagetolerenzen in allen Ebenen muss vermieden werden. <3° <0.5° aktive Seite Magnet- band zulässige Abweichung Band/Sensor 0.1 ... 1 mm Abb. 7: Montage Sensor/Magnetband, Abstandsmaße, Toleranzen MSA510 · Datum 18.05.2022 · Art. Nr. 81535 · Änd. Stand 107/22... -
Page 9: Elektrische Installation
Funkenlöschgliedern beschaltet sein. Anschlussart • EX: 7 pol. Stiftkontakt (M16) Zubehör Gegenstecker und Kabelverlängerungen siehe Kapitel 9. Signal SSI (nach RS422) Nullung/Konfiguration Daten+/DÜA Daten-/DÜB Ansichtseite = Takt+ Steckseite Stiftkontakt Takt- MSA510 · Datum 18.05.2022 · Art. Nr. 81535 · Änd. Stand 107/22... -
Page 10: Inbetriebnahme
Sie sofort mit der Programmierung beginnen, indem Sie: • ein geeignetes Terminalprogramm starten und Ihre Befehle gemäß der Tabelle "Befehlsliste – Servicemode MSA510" manuell eingeben (siehe Kapitel 6). Berücksichtigen Sie die vorgegebenen Schnittstel- lenparameter. MSA510 · Datum 18.05.2022 · Art. Nr. 81535 · Änd. Stand 107/22... -
Page 11: Applikationsbeispiel Zur Sensorprogrammierung Und Visuelle Positionswertdarstellung
Länge der Anschlussleitung abhängt. 5.4 Nullung Ausgangsschaltung SSI: a) SSI-Betrieb: Aktivieren des Nullungseinganges (siehe Kapitel 4.4) mit +24 V DC (länger als 2 Sekunden). b) RS485: Schnittstellenbefehl "l" (siehe Kapitel 6). MSA510 · Datum 18.05.2022 · Art. Nr. 81535 · Änd. Stand 107/22... -
Page 12: Messbereich
MSA510 direkt an einem PC oder Terminal betreiben. Die Schnittstelle muss folgende Einstellung haben: 4800 Baud, kein Parity, Wortlänge 8 Bit, 1 Start- und 1 Stoppbit, kein Handshake. MSA510 · Datum 18.05.2022 · Art. Nr. 81535 · Änd. Stand 107/22... - Page 13 = 5: 0.1 i x = 6: 0.01 i x = 7: 0.001 i "Adr.23>" SIKONETZ3-Adresse ausgeben (default 01) ">" SIKONETZ3-Adresse übergeben (zweistel- lig z. B. 03) " " Software-RESET ">" Nullung auslösen MSA510 · Datum 18.05.2022 · Art. Nr. 81535 · Änd. Stand 107/22...
-
Page 14: Fehlerbehandlung
• Kabelunterbrechung/Abtrennung durch scharfe Kanten/Quetschung. • Der Magnetsensor ist mit der aktiven Seite vom Band abgewandt mon- Abb. Abb. tiert (siehe Abb. Abb. 7 • Der Magnetsensor wurde nicht, entsprechend ausge- richtet. MSA510 · Datum 18.05.2022 · Art. Nr. 81535 · Änd. Stand 107/22... -
Page 15: Transport, Lagerung, Wartung Und Entsorgung
Die Umweltrichtlinien des jeweiligen Landes müssen hierzu beachtet werden. 9 Zubehör Anschluss-Stecker (nicht im Lieferumfang enthalten) 9.1 Gegenstecker M16 gerade Empfehlung ACHTUNG ` Litzenquerschnitt Leitungen ≤0.75 mm² / Kabeldurchlass: ø4 ... ø6 mm. MSA510 · Datum 18.05.2022 · Art. Nr. 81535 · Änd. Stand 107/22... -
Page 16: Gegenstecker M16 Gewinkelt
Abb. 9: Gegenstecker M16 gerade 9.2 Gegenstecker M16 gewinkelt Empfehlung ACHTUNG ` Litzenquerschnitt Leitungen ≤0.75 mm² / Kabeldurchlass: ø4 ... ø6 mm. • Zubehör SIKO Art.Nr. "78088" (Buchse 7 pol.). MSA510 · Datum 18.05.2022 · Art. Nr. 81535 · Änd. Stand 107/22... - Page 17 1. Druckschraube aufdrehen. 2. Deckel und Distanzhülse entfernen. 3. Kontakteinsatz und Positionshülse leicht herausziehen und in gewünschte Winkelstellung (45° Schritte) verdrehen. 4. Deckel und Distanzhülse montieren, Druckschraube aufschrauben. MSA510 · Datum 18.05.2022 · Art. Nr. 81535 · Änd. Stand 107/22...
-
Page 18: Technische Daten
±(0.05 + 0.03 x L) , L in m bei T = 20 °C Wiederholgenauigkeit ≤0.01 mm Messbereich ≤5120 mm Verfahrgeschwindigkeit ≤5 m/s Umgebungsbedingungen Ergänzung Umgebungstemperatur -20 … 60 °C Lagertemperatur -20 … 70 °C Schutzart IP65 EN 60529 MSA510 · Datum 18.05.2022 · Art. Nr. 81535 · Änd. Stand 107/22... - Page 19 6 List of commands / service mode 7 Trouble shooting 8 Transport, Storage, Maintenance and Disposal 9 Accessory connector 9.1 Straight mating connector M16 9.2 Right angle mating connector M16 10 Technical data MSA510 · Date 18.05.2022 · Art. No. 81535 · Mod. status 107/22...
-
Page 20: Documentation
Danger that may cause minor injury, property damage or unplanned device CAUTION reactions if you disregard the instructions given. MSA510 · Date 18.05.2022 · Art. No. 81535 · Mod. status 107/22... -
Page 21: Target Group
Bruising, rubbing, abrasing, seizing of extremities or clothes by touching during operation any movable parts as for example sensor. ` Install protective facilities to prevent people from getting access. MSA510 · Date 18.05.2022 · Art. No. 81535 · Mod. status 107/22... -
Page 22: Identification
` The cable must be provided with strain relief. If necessary use drag chain or protective sleeve. Loss of measured values NOTICE ` The tolerances and distance dimensions must be observed over the whole measurement length. MSA510 · Date 18.05.2022 · Art. No. 81535 · Mod. status 107/22... -
Page 23: Mounting The Magnetic Tape
4. Clean surface of magnetic tape carefully. 5. Remove protective film of the cover tape 6. Fix cover tape (both ends should slightly overlap). 7. Also fix cover tape's ends to avoid unintentional peeling. MSA510 · Date 18.05.2022 · Art. No. 81535 · Mod. status 107/22... - Page 24 Fig. 2: Magnetic tape Fig. 3: Magnetic tape screwed beveled on the front Fig. 4: Magnetic tape screwed Fig. 5: Magnetic tape in groove from top MSA510 · Date 18.05.2022 · Art. No. 81535 · Mod. status 107/22...
-
Page 25: Mounting The Magnetic Sensor
<3° <0.5° Active side of the magnetic tape Admissible deviation of tape/sensor 0.1 ... 1 mm Fig. 7: Assemblage sensor / magnetic tape, gap measure, tolerances MSA510 · Date 18.05.2022 · Art. No. 81535 · Mod. status 107/22... -
Page 26: Electrical Installation
• EX: 7-pole plug pin (M16) For mating connector and cable extension accessories see chapter 9. Signal SSI (acc. to RS422) Zeroing/Configuration Data+/DÜA Data-/DÜB viewing side = plug-in side Cycle+ plug pin Cycle- MSA510 · Date 18.05.2022 · Art. No. 81535 · Mod. status 107/22... -
Page 27: Commissioning
(see command list). 5.1 Sensor programming MSA510 can be adjusted to user requirements via the "Service mode" of the integrated RS485 interface. For this purpose you can program some specific parameters which will be stored in the non-volatile memory with the option of changing them any time. -
Page 28: Application Example For Sensor Programming And Display Of The Position Value
RS485: By interface command "l" (see chapter 6). 5.5 Measurement range The "Boundary" parameter is factory-set to the 0 value. This equals a NOTICE value range of -120.00 ... 5000.00 mm. MSA510 · Date 18.05.2022 · Art. No. 81535 · Mod. status 107/22... -
Page 29: List Of Commands / Service Mode
Value range: 2/3 Byte: 0 ... 65535 / 0 ... 2 The service mode serves for test purposes, automatic configuration, and for computer coupling. Via the RS232 serial interface, the MSA510 can be operated directly from a computer or terminal. The interface must have... - Page 30 Write output code 0 = Gray 1 = binary "0x>" Device status (for internal purposes) "004800" Read out baud rate ">" Start alignment (only for use in our fac- tory!) MSA510 · Date 18.05.2022 · Art. No. 81535 · Mod. status 107/22...
-
Page 31: Trouble Shooting
• Magnetic fields near the measuring surface distort the measuring val- ues. If required, pro-vide for adequate screening. • Wrong measuring values due to EMC interferences (see chapter 4). MSA510 · Date 18.05.2022 · Art. No. 81535 · Mod. status 107/22... -
Page 32: Transport, Storage, Maintenance And Disposal
` Strand cross sections of lines ≤0.75 mm² / cable feed-through: ø4 ... ø6 mm. • Accessory SIKO art. no. "76141" (socket contact 7 pole). Mounting (Fig. 1. Slip over outer cable. 2. Strip cable. MSA510 · Date 18.05.2022 · Art. No. 81535 · Mod. status 107/22... -
Page 33: Right Angle Mating Connector M16
, pinch ring , seal , shielding ring 3. Dismantle cable, shorten screening, strip and tin conductor. 4. Thread-up wires through the housing 5. Mount shielding ring and pinch ring MSA510 · Date 18.05.2022 · Art. No. 81535 · Mod. status 107/22... - Page 34 3. Slightly pull out female contact and positioning sleeve rotate to desired angular position (in steps of 45°). 4. Mount cover and distance sleeve; tighten pressure screw. Fig. 11: Angle positions MSA510 · Date 18.05.2022 · Art. No. 81535 · Mod. status 107/22...
-
Page 35: Technical Data
Repeat accuracy ≤0.01 mm Measuring range ≤5120 mm Travel speed ≤5 m/s Ambient conditions Additional information Ambient temperature -20 … 60 °C Storage temperature -20 … 70 °C Protection category IP65 EN 60529 MSA510 · Date 18.05.2022 · Art. No. 81535 · Mod. status 107/22... - Page 36 SIKO GmbH Weihermattenweg 2 79256 Buchenbach Telefon/Phone + 49 7661 394-0 Telefax/Fax + 49 7661 394-388 E-Mail info@siko-global.com Internet www.siko-global.com Service support@siko-global.com...
Need help?
Do you have a question about the MSA510 and is the answer not in the manual?
Questions and answers