Table of Contents
Advertisement
Quick Links
S S C C 1 1 2 2 0 0 0 0 U U D D - - U U S S / / S S C C 1 1 3 3 7 7 5 5 U U D D - - U U S S / /
S S C C 1 1 5 5 7 7 5 5 U U D D - - U U S S / / S S C C 1 1 7 7 2 2 5 5 U U D D - -
U U S S P P o o w w e e r r C C o o n n v v e e r r s s i i o o n n S S y y s s t t e e m m
( ( P P C C S S ) ) I I n n s s t t a a l l l l a a t t i i o o n n M M a a n n u u a a l l
S S C C 1 1 2 2 0 0 0 0 _ _ 1 1 3 3 7 7 5 5 _ _ 1 1 5 5 7 7 5 5 _ _ 1 1 7 7 2 2 5 5 U U D D - -
U U S S - - I I E E N N - - V V e e r r 1 1 3 3 - - 2 2 0 0 2 2 1 1 0 0 4 4
SC1200_1375_1575_1725UD-US-IEN-Ver13-202104
SC1200UD-US/SC1375UD-US/
SC1575UD-US/SC1725UD-US
P P o o w w e e r r C C o o n n v v e e r r s s i i o o n n S S y y s s t t e e m m ( ( P P C C S S ) )
I I n n s s t t a a l l l l a a t t i i o o n n M M a a n n u u a a l l
Advertisement
Table of Contents

Related Manuals for Sungrow SC1200UD-US


Summary of Contents for Sungrow SC1200UD-US
- Page 1 U U S S - - I I E E N N - - V V e e r r 1 1 3 3 - - 2 2 0 0 2 2 1 1 0 0 4 4 SC1200_1375_1575_1725UD-US-IEN-Ver13-202104 SC1200UD-US/SC1375UD-US/ SC1575UD-US/SC1725UD-US...
-
Page 3: Table Of Contents
C C o o n n t t e e n n t t s s 1 About This Manual ..................1 1.1 Validity ......................1 1.2 Brief Introduction..................1 1.3 Target Group....................2 1.4 How to Use This Manual................2 1.5 Symbols Explanation .................. - Page 4 3.4 Storage ...................... 14 4 Product Description .................. 15 4.1 Mechanical Data ..................15 4.2 Ventilation Design..................15 4.3 Cable Inlet/Outlet Design ................16 5 Installation Design ..................17 5.1 The Solution with Optional Devices ............. 17 5.2 Installation Site Selection ................17 5.2.1 Basic Requirements................
- Page 5 7.4 Preparation before Electrical Connections ..........33 7.4.1 Opening the Front Door ..............33 7.4.2 Removing the Protection Grid ............34 7.4.3 Checking the Cables................. 34 7.4.4 During Connection ................34 7.5 Overview of the Connection Area ............... 34 7.6 Cable Requirements................... 35 7.7 DC Connection...................
-
Page 7: About This Manual
The suggestions for installation space and cable connection are also mentioned. Commissioning • The safety instructions of commissioning and commissioning processes are introduced. Others • Technical data of the PCS, exclusion of liability and the way to contact Sungrow. -
Page 8: Target Group
All rights reserved including the pictures, markings and symbols used. Any reproduction or disclosure, even partially, of the contents of this manual is strictly forbidden without prior written authorization of Sungrow. 1.5 Symbols Explanation This manual contains important safety and operational instructions that must be accurately understood and followed during the installation and maintenance of the equipment. - Page 9 Installation Manual 1 About This Manual NOTE indicates additional information, emphasized contents or tips to help you solve problems or save time. The symbols below may be pasted on the electrical parts of the PCS. Make sure to read the following symbols and fully understand them before installing the equipment. S S y y m m b b o o l l s s E E x x p p l l a a n n a a t t i i o o n n s s Risk of electric shock!
-
Page 10: Safety Instructions
Safety Instructions 2.1 Intended Usage This series of Power Conversion System researched and developed by Sungrow Power Supply Co., Ltd., is a PCS for energy storage system without transformer. It provides an interface for the grid and battery for storage system charging and discharging. Through step up by the external transformer, the PCS AC side can connect to the grid or load. -
Page 11: Important Safety Instructions
Installation and connections other than the contents described in this section • may lead to device damages and void warranty claims from Sungrow. 2.2 Important Safety Instructions This section introduces the safety instructions during installing or commissioning of the PCS. -
Page 12: Manuals
2 Safety Instructions Installation Manual The equipment shall be dried after passing through condensing environment, and it is recommended to dry it under ventilation for at least 24 hours. Before running the equipment, insulation resistance test shall be performed, and then withstand voltage test after the insulation resistance test is passed: When all the tests pass, the running operation can be continued. -
Page 13: Safety Warning Signs
Installation Manual 2 Safety Instructions 2.2.4 Safety Warning Signs Please respect the followings during installation, daily maintenance or troubleshooting of the PCS: An obvious marking should be placed in the PCS switches upstream and • downstream to keep the switch from accidental reconnection; A temporary warning sign or barrier must be posted around the installation area;... -
Page 14: Electrical Connection
2 Safety Instructions Installation Manual Smog warning device is recommended to install inside the control room for quick response of plant staff to the potential fire. 2.2.8 Electrical Connection Electrical connection must be in accordance with the circuit diagram and the description in this manual. -
Page 15: Measuring Instrument
Installation Manual 2 Safety Instructions 2.2.9 Measuring Instrument To ensure each electrical parameter meets requirement during electrical connection and commissioning, please use related electrical measurement instruments. Instrument for measurement of the electrical parameters should be high • quality instrument with sufficient measuring range Make sure the connection and use of the instrument are correct to avoid arc •... -
Page 16: Disposal Of Waste
PCS. The actual product you receive may differ. Should you have any specific requirements, please inform us. This manual may not cover all possible situations. Should a specific • problem occur that is not explained in this manual, please contact Sungrow. -
Page 17: Delivery
Delivery 3.1 Scope of Delivery Materials described in this section should be included in the crate. Q Q u u a a n n t t i i - - I I t t e e - - N N a a m m e e N N o o t t e e t t y y Including keys and other accessories... -
Page 18: Appearance
Stop: Close the PCS Used as the external maintenance network Maintenance interface port of the device. The AC switch is located inside the PCS and only used to start/stop the PCS. SUNGROW shall hold no liability for damage caused by inappropriate operations. -
Page 19: Nameplate
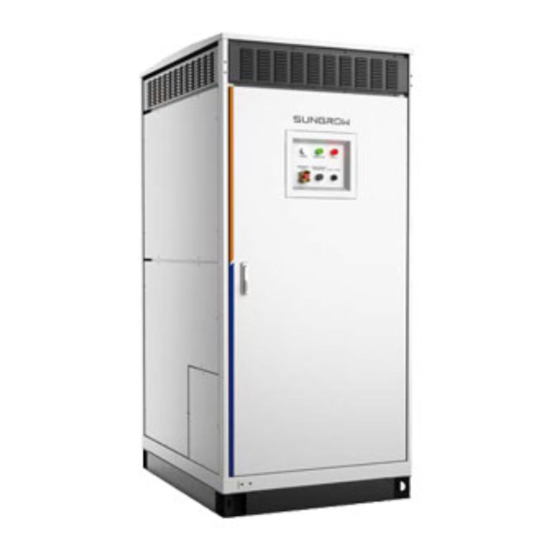
Installation Manual 3 Delivery 3.2.2 Nameplate Identify the PCS from its nameplate. The identical nameplate is located separately as shown by Item A in the figure below. The nameplate is attached to the side cover plate of the PCS. The nameplate includes information such as the model, serial number, main technical parameters, marks of conformity, and production place of the PCS. -
Page 20: Checking The Pcs
• during transportation. If any damage is detected, contact the shipping company or Sungrow immediately. A relevant photo is preferred. We will provide you with the fast and best service. Only install the PCS when it is technically faultless and safe to do so. -
Page 21: Product Description
Product Description 4.1 Mechanical Data D D i i m m e e n n s s i i o o n n s s F F i i g g u u r r e e 4 4 - - 1 1 Dimensions of the PCS W W i i d d t t h h H H e e i i g g h h t t D D e e p p t t h h... -
Page 22: Cable Inlet/Outlet Design
4 Product Description Installation Manual 4.3 Cable Inlet/Outlet Design For a PCS with standard configuration, all the cables come into or go out of the cabinet through the bottom of the PCS. The bottom cable entries are designed according to onsite conditions. -
Page 23: Installation Design
Installation Design 5.1 The Solution with Optional Devices The configuration of the energy storage system is shown in "Figure 5-1 Configuration of energy storage system". F F i i g g u u r r e e 5 5 - - 1 1 Configuration of energy storage system D D e e s s c c r r i i p p t t i i o o n n I I t t e e m m N N a a m m e e... -
Page 24: Installation Foundation And Space Requirements
5 Installation Design Installation Manual An awning or other shading equipment is recommended when the PCS is installed • outdoor, so as to reduce impact on charge and discharge of PCS caused by over temperature from direct exposure to sunlight. 5.2.3 Installation foundation and space requirements The installation foundation should be suitable for the weight of the PCS. -
Page 25: Clearance Space
Installation Manual 5 Installation Design F F i i g g u u r r e e 5 5 - - 2 2 Position of the positioning opening on the PCS bottom 5.3.3 Clearance Space The minimum clearance space around the PCS shown below should be maintained for service operation, ventilation and escape route. -
Page 26: Cable Trench
5 Installation Design Installation Manual 5.3.4 Cable Trench The external cables can route into or out of the cabinet through the bottom of the PCS. Cable trenches or steel supports above the floor are recommended (Refer to relevant design guides or standards). If cable trenches are designed, fix the PCS with foot screw or steel channel;... -
Page 27: Other Requirements
Installation Manual 5 Installation Design V V e e n n t t i i l l a a t t i i o o n n e e n n v v i i r r o o n n m m e e n n t t The installation environment should meet the following ventilation requirements: The PCS should be installed in well-ventilated place with high air volume. -
Page 28: Wiring Specification
5 Installation Design Installation Manual Avoid direct exposure to sunlight. Otherwise, excessively high temperature will impair charge and discharge. 5.4 Wiring Specification Cables in the PCS can be classified into power cables, control cables and data cables. It is recommended that the power cables and data cables be installed on separate cable support arms for at least 200mm. - Page 29 Installation Manual 5 Installation Design Protection of communication cables • Communication cables are thin and easily to be broken. Lay power cables first and then communication cables. Communication cables should be laid in cable trenches or cable support arms and tightened up by cable ties.
-
Page 30: Mechanical Installation
6.1 Transport and Shipping 6.1.1 Attentions The PCS should be transported and installed as an integrated unit. • Disassembly without the permission of Sungrow will void any or all warranty right. Transport the PCS by strictly following description in this chapter. •... -
Page 31: Moving The Unpacked Pcs
Installation Manual 6 Mechanical Installation 6.1.2 Moving the Unpacked PCS Lay the DC and AC cables before moving the PCS to the final installation place. Since those cables are thick, once the PCS is installed, those cables are hard to operate and easily broken. Unpack the PCS only just before it is to be installed. - Page 32 Take the dimensions of the PCS and other devices into account when designing the door of the control room for convenient transport of the PCS. Hoisting with flexible rope! The hoisting beam of the equipment is included in the delivery accessories. If the customer provides hoisting tools, please contact Sungrow in advance.
-
Page 33: Field Installation
The auxiliary hoisting beam on the top of the equipment is included in the delivery accessories. If the customer provides hoisting tools, please contact Sungrow in advance. 6.2 Field Installation Do not perform any mechanical operations that are not related to the PCS •... -
Page 34: Checking Before Fixing
6 Mechanical Installation Installation Manual F F i i g g u u r r e e 6 6 - - 3 3 PCS fixed to the wooden baseboard - - - - E E n n d d Once the PCS is removed from the wooden baseboard, do not transport the PCS by the baseboard. - Page 35 Installation Manual 6 Mechanical Installation Step 3 Install the front and rear panel of PCS base to finish the PCS fixing. F F i i g g u u r r e e 6 6 - - 4 4 Fix the PCS - - - - E E n n d d Connection sequence between PCS base and channel steels is described below.
-
Page 36: Electrical Connection
Electrical Connection 7.1 Safety Instructions The safety instructions in this chapter and country/regional-specific safety instructions must be respected for safe electrical connection. High voltage! Electrical hazards! Do not touch the live components of the device. • Make sure the AC and DC sides are voltage-free before installation. •... -
Page 37: Installation Tools
Installation Manual 7 Electrical Connection Verify that no voltage or current is present inside the PCS with appropriate testing • devices. Ground and short-circuit whenever necessary. • Cover possible live parts with insulation cloth. • 7.2 Installation Tools Prepare the following tools before installation: Torque wrench •... -
Page 38: Aluminum Wire Connection
7 Electrical Connection Installation Manual F F i i g g u u r r e e 7 7 - - 1 1 Copper Wire Connection Sequence Copper Bar Copper Bolt Spring Flat washer terminal washer 7.3.2 Aluminum Wire Connection When the aluminum wire is selected, an albronze filter is needed as shown below: F F i i g g u u r r e e 7 7 - - 2 2 Aluminum wire connection sequence Aluminum... -
Page 39: Preparation Before Electrical Connections
Installation Manual 7 Electrical Connection F F i i g g u u r r e e 7 7 - - 4 4 Albronze filter connection sequence 7.4 Preparation before Electrical Connections 7.4.1 Opening the Front Door Proceed as follows to open the front door before cable connection: F F i i g g u u r r e e 7 7 - - 5 5 Disconnect the AC and DC switches S S t t e e p p D D e e s s c c r r i i p p t t i i o o n n... -
Page 40: Removing The Protection Grid
7 Electrical Connection Installation Manual 7.4.2 Removing the Protection Grid The PCS is equipped with protection grid inside to maintain safe operation. Remove the grid prior before electrical connections. All external cables connect to the connection terminal through the cable entries on the bottom of the PCS. -
Page 41: Cable Requirements
Installation Manual 7 Electrical Connection F F i i g g u u r r e e 7 7 - - 6 6 Overview of the connection area Description of the terminals is shown in the following table: I I t t e e - - D D e e s s c c r r i i p p t t i i o o n n M M a a r r k k Communication terminal... - Page 42 7 Electrical Connection Installation Manual C C o o n n n n e e c c t t i i o o n n S S p p e e c c i i f f i i c c a a t t i i o o n n s s R R e e q q u u .
-
Page 43: Dc Connection
Installation Manual 7 Electrical Connection Cable sizes in the above table are only for copper cables. If aluminum • cables are used on site, please choose cable with appropriate cross sectional areas. Cable specifications and input numbers in the above table are for standard •... - Page 44 7 Electrical Connection Installation Manual F F i i g g u u r r e e 7 7 - - 7 7 DC side connection terminals Step 1 Ensure that all DC load switches are disconnected. Internal DC maintenance switch is closed.
- Page 45 Installation Manual 7 Electrical Connection Cable protectors are advisable in the cable crosses if the multi-core cables are used. Step 9 Connect the cable. Select bolt matching with the cable lug. Attach the cable lug to the DC connection copper bar following the sequence in the following figure.
-
Page 46: Ac Connection
7 Electrical Connection Installation Manual 7.8 AC Connection 7.8.1 Safety Instructions Incorrect AC connection may affect the normal operation of or cause damages to the PCS. Electric shock hazards upon touching the live components! Disconnect the AC switches and make sure the contact terminals are •... -
Page 47: Ac Cable Connection
Installation Manual 7 Electrical Connection F F i i g g u u r r e e 7 7 - - 9 9 AC cable layout inside the cable trench D D e e s s c c r r i i p p t t i i o o n n R R e e q q u u i i r r e e m m e e n n t t I I t t e e m m Cable cross-section... - Page 48 7 Electrical Connection Installation Manual Step 4 Lead the cable through the gland at the bottom of the PCS. Step 5 Strip off the insulation cover of the cable end with a stripped length of 5mm longer than the depth of the cable lug. It is advisable to use DT×××-12 (xxx is the cross-sectional area of the cable selected) copper lug according to the cable specification.
- Page 49 Installation Manual 7 Electrical Connection F F i i g g u u r r e e 7 7 - - 1 1 2 2 Connection sequence when two cable lugs are used Incorrect AC connection sequence may cause fire. Please notice the cable •...
-
Page 50: Ground Connection
7 Electrical Connection Installation Manual 7.9 Ground Connection Ground cable should be grounded properly. Otherwise, Electrical hazards may follow if a fault occurs. • Device may be damaged during lightning. • Device may not operate normally. • Observe country-specific codes and regulations to perform ground •... -
Page 51: Ground Of The Shielded Layer Of Communication Cable
Installation Manual 7 Electrical Connection 7.9.3 Ground of the Shielded Layer of Communication Cable Communication method for standard configured PCS is RS485 communication. Shielded twisted-pair cables are adopted. Ground the shielded layer to reduce the communication interference. If RS485 communication cable is selected, the shielded layer must be connected securely and single grounded. - Page 52 7 Electrical Connection Installation Manual D D e e s s c c r r i i p p t t i i o o n n N N o o . . W W i i r r e e m m a a r r k k XB5–4/XB5–10 XB5-4/PT-J15-10 Shield...
- Page 53 Installation Manual 7 Electrical Connection D D e e s s c c r r i i p p t t i i o o n n N N o o . . W W i i r r e e m m a a r r k k XB8–73/XB8-53 XB8-53/PT-J9-12 XB8–14/XB8-34...
-
Page 54: Installation Checklist
7 Electrical Connection Installation Manual D D e e s s c c r r i i p p t t i i o o n n N N o o . . W W i i r r e e m m a a r r k k XB9–7/XB9–14 XB9-7/PT-J20-1 RS485#9–A... - Page 55 Installation Manual 7 Electrical Connection O O t t h h e e r r s s Insulation belts tighten all unused cables □ No tools, spare parts, dusts or other foreign objects falls inside the PCS □ □ No condensing or ice inside the cabinet...
-
Page 56: Commissioning
Commissioning 8.1 Commissioning Requirements Before starting PCS for the first time, all installation performed on the device should be checked thoroughly. Make sure all cables are connected correctly and all bolts are screwed securely. • Make sure all switches are in correct state. •... -
Page 57: Checking The Pcs
Installation Manual 8 Commissioning 8.2.2 Checking the PCS Check the PCS before PCS power on: Ensure the AC and DC switches are disconnected. • Ensure that the maintenance switch (Q1) and AC switch (Q3) are closed. • Ensure the START/STOP switch is at the START position and can work normally. •... -
Page 58: Preparation Before Starting
8 Commissioning Installation Manual Adjust the transfer ratio of the transformer by qualified personnel if the grid voltage deviation is serious. Measure accurately the AC grid side frequency. The measured data should not • exceed the grid permissible frequency range of the PCS. Measure the voltage THD of each phase if necessary. -
Page 59: Completing Commissioning
Installation Manual 8 Commissioning Step 4 Running status on the Web pageis "Stop". Refer to the section O O p p e e r r a a t t i i o o n n P P a a r r a a m m e e t t e e r r s s in the Operation manual, and select an operation mode and running parameters on the running parameter interface according to demands. - Page 60 8 Commissioning Installation Manual PCS needs no manual control in daily operation. Open the cabinet door only for maintenance or troubleshooting and by qualified personnel only. Keep the door closed and locked and store the keys of the door by appointed personnel during normal operation.
-
Page 61: Appendix
Appendix 9.1 Technical Data S S C C 1 1 2 2 0 0 0 0 U U D D - - S S C C 1 1 3 3 7 7 5 5 U U D D - - S S C C 1 1 5 5 7 7 5 5 U U D D - - S S C C 1 1 7 7 2 2 5 5 U U D D - - P P a a r r a a m m e e t t e e r r... - Page 62 9 Appendix Installation Manual S S C C 1 1 2 2 0 0 0 0 U U D D - - S S C C 1 1 3 3 7 7 5 5 U U D D - - S S C C 1 1 5 5 7 7 5 5 U U D D - - S S C C 1 1 7 7 2 2 5 5 U U D D - - P P a a r r a a m m e e t t e e r r...
-
Page 63: Exclusion Of Liability
Installation Manual 9 Appendix S S C C 1 1 2 2 0 0 0 0 U U D D - - S S C C 1 1 3 3 7 7 5 5 U U D D - - S S C C 1 1 5 5 7 7 5 5 U U D D - - S S C C 1 1 7 7 2 2 5 5 U U D D - - P P a a r r a a m m e e t t e e r r... -
Page 64: Contact Information
9 Appendix Installation Manual The use of supplied software produced by Sungrow Power Supply Co., Ltd. is subject to the following conditions: Sungrow Power Supply Co., Ltd. assumes no liability for direct or indirect damages • arising from the use of SolarInfo software. This also applies to the provision or non- provision of support activities. - Page 65 M M a a l l a a y y s s i i a a P P h h i i l l i i p p p p i i n n e e s s Sungrow SEA Sungrow Power Supply Co., Ltd Selangor Darul Ehsan Mandaluyong City...
- Page 66 L L u u x x e e m m b b o o u u r r g g ( ( B B e e n n e e l l u u s s ) ) Sungrow Vietnam...
- Page 67 Sungrow Power Supply Co., Ltd. Add: No.1699 Xiyou Rd.,New & High Technology Industrial Development Zone, 230088,Hefei, P. R. China. Web: www.sungrowpower.com E-mail: info@sungrow.cn Tel: +86 551 6532 7834 / 6532 7845 Specifications are subject to changes without advance notice.
Need help?
Do you have a question about the SC1200UD-US and is the answer not in the manual?
Questions and answers