Table of Contents
Advertisement
Advertisement
Table of Contents

Related Manuals for LONGER RAY5 20W


Summary of Contents for LONGER RAY5 20W
- Page 2 Dear customer, Thank you for choosing LONGER products RAY5. Maybe you are familiar with the engraving machine or have bought a similar engraving machine before, we still highly recommend that you read this manual carefully. The installation techniques and precautions in this manual can help you avoid any unnecessary damage or frustration.
-
Page 3: Table Of Contents
Contents A. Safety Precautions.................... 1 B. Product Information ..................8 Specifications ..................8 Components Introduction ..............9 Packing List ..................10 Machine assembly ................11 C. Machine Operation ..................16 Focusing the Laser Module..............16 Power On ..................... 17 Touch Screen Operation ..............17 Wi-Fi Control operation ............... -
Page 4: Safety Precautions
A. Safety Precautions (1) The RAY5 engraves and cuts materials by the means of a high-energy diode laser beam. The hazards associated with a high-energy diode laser beam include the possibility of fires, generation of hazardous and/or irritating toxic fumes, but more importantly damage to eyes and skin. - Page 5 Please wear Personal Protective Equipment (PPE, Safety Glasses are designed to filter specific ranges of laser wavelength. The RAY5 Safety Glasses provided are specific for LONGER Laser Module;) when using the machine. • DO NOT look directly into the laser beam.
- Page 6 LONGER products (cover) in the follow-up. (4) The high-energy diode laser beam can produce extremely high temperatures and significant amounts of heat as the substrate material is burned away while engraving and cutting. Some materials are prone to catch fire during cutting operations creating flame, fumes, and smoke.
- Page 7 • DO NOT use materials that are highly flammable, explosive or produce toxic by-products. • DO NOT remove material from the cutting bed before it has cooled. • DO NOT leave the RAY5 operating unattended. • ALWAYS clean up clutter, debris, and flammable materials in the laser RAY5 bed after use.
- Page 8 is not in this list, do not consider it to be safe to use. Obtain the Safety Data Sheet (SDS) from the material’s manufacturer when handling unknown materials. Material Reason to avoid engraving / cutting it PVC will emit Chlorine gas when laser cut, or laser engraved. This PVC (Poly toxic gas can ruin the optics and motion control system of the Vinyl...
- Page 9 RAY5 is not a toy and should be operated with care and respect. (10) Important information regarding your RAY5 RAY5 20W use 24V DC power system: • Never Use a different voltage Power Adapter. The RAY5 requires DC 24V 5A.
- Page 10 Motherboard and the Power adapter to mains power a green LED does not turn on, please verify your power adapter is receiving Mains Power. www.longer3d.com info@longer3d.com...
-
Page 11: Product Information
B. Product Information Specifications Machine Machine Model RAY5 20W Working Area 375 x 375 mm (14.76 x 14.76 in) Power Adapter Input Voltage (AC) 110-240 V, 50-60 Hz Power Adapter Output Voltage (DC) 24 V Power Max Consumption 120 W Packaging Size 621 x 347 x 127mm(24.45 x 13.66 x 5 in) -
Page 12: Components Introduction
Components Introduction www.longer3d.com info@longer3d.com... -
Page 13: Packing List
Packing List www.longer3d.com info@longer3d.com... -
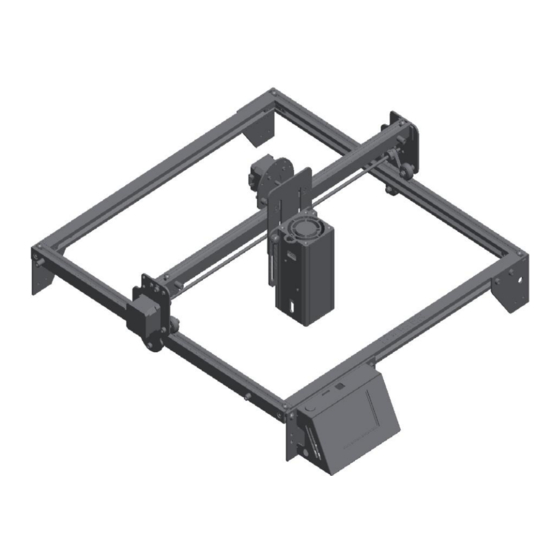
Page 14: Machine Assembly
Machine assembly The machine step-by-step assembly process is described in the document “RAY5 20W Quick Start Guide”. Please follow the guide to assemble machine. • During the machine assembly, if there is any unclear place, please refer to the video “RAY5 20W Quick Start Guide”. - Page 15 www.longer3d.com info@longer3d.com...
- Page 16 www.longer3d.com info@longer3d.com...
- Page 17 www.longer3d.com info@longer3d.com...
- Page 18 www.longer3d.com info@longer3d.com...
-
Page 19: Machine Operation
C. Machine Operation (1) Focusing the Laser Module a) Place the machine on a flat table and make sure that the machine is stable and will not shake. b) Place the wood board to be engraved or cut under the laser. c) Loosen the two thumb screws on the front of laser head by hand. -
Page 20: Power On
Connect the computer and the engraving machine through a USB computer (or insert a Micro SD card). d) Turn ON your RAY5 20W by press the power switch (To Turn OFF your RAY5 20W by press the power switch once again.) (3) Touch Screen Operation RAY5 20W has a full-color 3.5-inch touch screen with a user-friendly... - Page 21 b) Adjustment page 5% laser power 50% laser power Turnoff laser c) Control page Unlock axis Set user Zero point Home to user Home to hard Zero point Zero point Move distance Move X Y axis Move speed User zero point refers to the position where the user manually confirms that the position of the laser head to the zero.
- Page 22 e) Ready to engraving/cutting page Set user Zero position Start to engrave Work frame f) Engraving/cutting working page Working speed rate g) Set speed page www.longer3d.com info@longer3d.com...
-
Page 23: Wi-Fi Control Operation
Wi-Fi Control operation a) Tap tool icon on the home page b) Tap Wi-Fi icon on the top right corner of tool page Board: LGT RAY V1.2 Firmware: LGT RAY V1.1 c) Select Wi-Fi name on Wi-Fi list page d) Enter password and waiting for connect to the Wi-Fi you select. - Page 24 Wi-Fi name IP address Signal strength f) Enter the IP address in the browser of mobile phone or computer, then the control interface will pop up. g) Click SD File tag, it will change to SD file page. www.longer3d.com info@longer3d.com...
- Page 25 h) Upload “.gcode/.nc” files generated by “LaserGRBL” or “LightBurn” software(The two software are introduced in the following sections). Then go and play! www.longer3d.com info@longer3d.com...
-
Page 26: Lasergrbl Software Operation
LaserGRBL Software Operation LaserGRBL is an easy-to-use and fully free software for laser engraver only running on Windows. Setup a) Find LaserGRBL software in attached SD card(path: /software), download from link: https://lasergrbl.com/download/ b) After installing laserGRBL, power up the RAY5, press the power switch button, and connect the laser engraver and computer via USB cable. - Page 27 Usage a) Main Interface b) Open file and set parameters www.longer3d.com info@longer3d.com...
- Page 28 c) Start to engrave Place a board under the laser, then calibrate the laser. Move the laser head to the place you want. iii. Click “Frame” button to check the work frame. Click button to start engraving. Or you can save gcode file to SD card by click “File” >> “Quick Save”...
-
Page 29: Lightburn Software Operation
More help information about LaserGRBL, please refer to the link: https://lasergrbl.com/usage/ LightBurn Software Operation LightBurn is professional software for engraver, a charging software running on Windows, MacOS, and Linux. It provides a trial period. You could pay for it afterward if you like it. Setup a) Find Lightburn software in SD card(path: /software) came with the package. - Page 30 X = 375 Y = 375 The max engrave size of RAY5 20W is different from RAY5 5W or 10W, so if you own RAY 5W or 10W before, please add the new engraver manually before using the RAY5 20W.
- Page 31 g) Select “Front Left” as your Origin X,Y and activate “Auto ‘Home’”, then click “Next” button. The automatic home function is turned on by default, if you do not want the engraver to automatically home when power on, it is recommended to turn off this function.
- Page 32 b) Select correct port (depends on your PC), then the RAY5 is connected to the computer. c) Click Menu “File” >> “Import image from disk.” Or just use draw tool on left column to design your own pattern. www.longer3d.com info@longer3d.com...
- Page 33 d) Set the name, speed, maximum power, mode, and other parameters in the cutting/layer; (engraving function and cutting function are only different in speed, power. Normally, the cutting speed parameter is slower). e) After placing the board under the laser, click Frame to check the laser path whether is completely inside of the board.
-
Page 34: Firmware Upgrading
The firmware upgrade operations are different for different systems. The detailed tutorial about firmware upgrading is contained in the firmware package. Please download RAY5 firmware package from the LONGER official website: RAY5 firmware download Install the MKSLaserTool_setup V1.1.2.exe file, click... -
Page 35: App Operation
Copy the dlc_cfg.txt file from the configuration folder to the root directory of the SD card, insert the SD card into the main board of the engraver, restart the engraver, and the configuration file update will be completed automatically. APP Operation RAY5 can be controlled or engraved through MKSLaser APP when the engraver and APP are connected to the same WIFI. - Page 36 to page 20 about the operation of connecting the engraver to WIFI. a) How to download the MKSLaser APP Please search for "MKSLaser" in Google play or app store or visit the address below to download Android system https://play.google.com/store/apps/details?id=makerbase.com.mks laser Please search for "MKSLaser"...
- Page 37 c) Connect APP to WIFI When the RAY5 engraver is connected to wifi, we will get an IP address, click the connect button in the upper left corner of the APP, enter the IP address, and click CONNECT. d) Enter text or take a photo to engrave Take a photo Select photo from album...
- Page 38 Frame Engrave Click Creation, choose free drawing or input text, click Next, adjust the brightness and contrast, click Next, set the size, engraving speed, laser power (such as input 1000 for 100% power, and so on), click Frame to confirm the engraving range, click Engrave for working.
- Page 39 Pause Cancel www.longer3d.com info@longer3d.com...
- Page 40 e) Control the engraver from APP Move to the positive direction of the Y axis Move to the negative Move to the positive direction of the X axis direction of the X axis Move to the negative direction of the Y axis Set move speed Choose the distance to move per step...
- Page 41 Set speed and power Cancel www.longer3d.com info@longer3d.com...
-
Page 42: Faq
D. FAQ Question 1: Are there recommended engraving and cutting parameters? Please refer to the table “LONGER Laser Engraver Material Profiles” which describes the common materials engraving and cutting parameters for RAY5. If there is no information you need. Please wait for our updates in the future.
Need help?
Do you have a question about the RAY5 20W and is the answer not in the manual?
Questions and answers
MACHINE WAS ENGRAVING STAINLESS STEEL WITH NO PROBLEM AND ALL OF A SUDDEN STOPPED MARKING AT ALL
The LONGER RAY5 20W machine may stop engraving stainless steel suddenly because it is not powerful enough to effectively engrave or cut stainless steel at the recommended settings. The engraving may appear but then wipe off easily, indicating it is only marking the surface without proper penetration.
This answer is automatically generated
What size is the set screw for the lens cover on the Ray5 20W laser head
where can i get a parts manual for my Ray% 20 watt and how do i order parts.?
where do i find parameters to change rapid speeds. also machine doesnt cut 5 mm wood faster than 225 mm/min. you said 450mm/min.