CHORTAU B-T27 - Dual 1080P Dash Cam Front and Inside Manual
- User manual (45 pages)
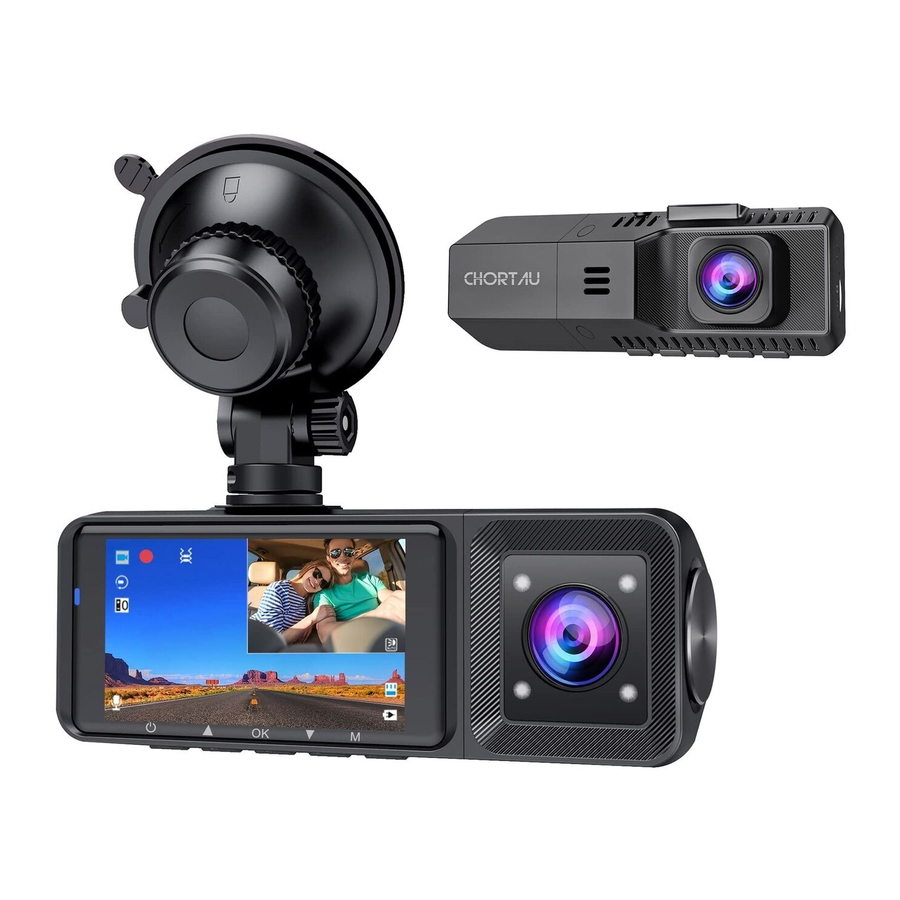
Advertisement
- 1 What's in the packing box
- 2 Very important
- 3 Warm tips
- 4 Overview
- 5 Installation
- 6 Get started
- 7 Main Function and Features Introduction
- 8 Viewing Video/Photos on the Camera
- 9 Viewing video/photo on a computer
-
10
Common Problems and Solutions
- 10.1 The camera can not record video or take photos
- 10.2 The camera automatically stop recording
- 10.3 The camera can not turn on
- 10.4 Suction mount cannot attach on windshield well
- 10.5 The recorded video is unclear
- 10.6 Color of the video or photo is not good
- 10.7 The camera crashes or not responding to operations
- 11 Warranty
- 12 Support
- 13 About us
- 14 Documents / Resources
What's in the packing box

- CHORTAU B-T27 dual lens dash cam
- Car charger power cord
- Suction cup mount
- Type C data cable
- B-T27 dual dash cam user manual
- Pin (use to insert/remove the micro sd card)
Very important
- This car camera is intended for use in motor vehicle only. Do not install the camera where it might block the driver's view of road (including the mirrors) or the deployment of the air bags.
- Please use a genuine micro SD memory card from 16GB to 32GB with a speed rating of class 10 or higher. Insert the memory card into the camera's card slot until it clicks. To insert/remove the card, please power off the camera first, then push the card into the slot until it clicks again.
Before use the card, please format it correctly follow below steps:
- Turn off the camera, then insert card, after inserted card into camera then turn on camera, press M button to enter setup, if the camera is recording video, click OK button to stop recording, then long press M button to enter video setup page.
- After enter setup, short click M button again enter system settings menu, then click down button to highlight format option, click OK button to confirm, finally click down button to select OK option, then click OK button to confirm format, card formatted.
Warm tips
- Ideally, the Micro SD card should be formatted monthly to maximize the lifetime of the memory card.
- Please do not remove the card while the camera is recording to prevent data loss/corruption.
- This camera features built-in battery as internal power, it's used only for emergency recording and saving settings after external power supply cuts off (car turns off). This dash camera will not turn on without external power supply. Please keep it plug in always.
- To avoid damage, be sure the car camera lens is clean and there is nothing blocking the lens.
- The camera is design to operate in temperatures from -86°F〜+158°F, temperatures outside this range risk degrading. The dash cam's performance work and causing damage. To avoid damage, in summer, do not leave the camera in direct sunlight for a long period of time when car parked, or where the temperature could go above 140°F (60°C) inside car. In cold winter, like -22°F (-30°C) or lower, detach the camera from the windshield when not in use, and store in the glove box.
Overview


Basic Key Function & Shortcut key:
| NO. | Name | Description |
| 1 | Front camera lens | Front facing camera for video recording road view |
| 2 | Speaker | Record sound & delivery sound during video playback |
| 3 | Inside camera lens | Rear facing camera for in-car video recording |
| 4 | IR LED lights | 4 IR LED lights enhance night vision in the car |
| 5 | LCD display screen | 1.5 inch color LCD display screen |
| 6 | Power button | Power On/Off When you are driving, short click power button, to turn off screen, get into screen-saver mode(camera is still keep recording), short click power button again to turn on screen. Long press power button, to turn on /off camera. |
| 7 | Up button | Move select up Short click up button to switch screen display mode, there are 4 display mode, picture in picture /half front and half inside /only front /only inside. Long press up button to turn on /off IR LED light. Long press up button to turn on /off IR LED light. |
| 8 | OK button | Confirm the action; Stop/Start the video recording In video recording mode, short press to start and stop recording. In photo taking mode, short press to take a photo. In playback, short press to start/stop playing the video. In setting menu, short press to confirm selection. |
| 9 | Down button | Move select down Short click down button to turn On /Off audio record directly, Long press down button to turn on /off parking mode. |
| 10 | Menu button | Enter /Exit setup menu When camera is recording, short click M button directly to lock /unlock current video, long press M button to take picture directly. When camera is not recording, click M button to enter take picture mode, short click M button again to enter picture album, click up/down button to view picture album. Long press M button to enter video setting page directly, short click M button again to enter system setting page. In setting menu, short press to switch between mode setting and system general setting. |
| 11 | Type C port | Type C port for charging or transferring data |
| 12 | Mount connector | Connect to the dash cam suction cup mount |
| 13 | Reset button | Use a pin to click/poke to force reset the camera |
| 14 | Micro SD card slot | Insert micro SD card, provide storage space up to 32GB |
Installation
- Attach the suction cup mount to the camera's mount connector, pushing it in until it clicked.

- Clean the car windshield.
- Wipe the suction mount pad clean on the suction cup mount.
- Attach the suction cup mount to the windshield, then rotate the locking clamp on the mount 90° upward until it clicks.

- Route the power cord around the windscreen and tuck/hide it under the trim.

- Insert car charger into the car's cigarette lighter port.
- Start the car, the power cord car charger red indicator will light up. The dash cam will auto power on and start recording.


Get started
- Before use this dual dash cam, please kindly charge the camera 2 - 3 hours.
When charge, please using the supplied car charger, make sure the car camera and cable are well connected. When the dash cam is charging, the charger red LED indicator light will keep on. - Insert a memory card.
Please use a 16GB - 32GB micro SD memory card, with speed class 10 or higher. Turn off dash cam, then use the supplied pin, carefully insert the micro SD card into the camera' s card slot until it clicks then turn on dash cam. If you need remove the card, please power off the camera first.


Operating Mode
The B-T27 operates in 3 modes:
- Video Recording Mode,
- Photo Mode,
- Playback Mode,
These modes also have menus to help you configure recording and taking photos, press Mode Button to access the mode you want. Watch the icon on top right corner of the screen for each mode.
Display screen overview
Red light is visible: Camera is charging

Red light turn purple and blinks: Camera is recording

Video Recording Mode

- Recording status
- Loop recording
- White balance
- Motion detection
- Audio on
- Date /Time (current date, YY/MM/DD,24H)
- Recording time(current clip)
- Resolution
- Parking mode on
- Gravity sensor on
- HDR on
- IR light on
- Memory card inserted or not 14.Current battery level
 (Battery is charging,
  Current battery level)
In all 3 operating mode, you can press the MENU once to access the menu settings for that particular mode, and press twice to display System Setting Menu. Press ![]() and
and ![]() to scroll through the various settings and press OK to select, Press Menu button again to exit the setting menu.
to scroll through the various settings and press OK to select, Press Menu button again to exit the setting menu.
Video recording menu

In standby mode, long press the "M" button to enter the setting menu of video recording mode, short press the "M" button again to enter the system setting menu. If camera is in recording situation, click OK button to stop recording first, then long press M button to enter video setting menu.
Resolution: By default (dual camera recording mode), both cameras record at 1080P and 720P options are available.
Loop recording: This function allows you to set video file length to 1/3/5 minutes per video clip. Press OK to enter and click down button to change the duration: 1 /3 /5 minutes or off. Select a value to activate loop recording, so when storage fills up, it will automatically loop back to the earliest file and record over it.
High Dynamic Range: Off /On, It's a technique used to combine high light and low light in a picture to get a proper exposure image effect, so there will not be overexposed or underexposed. Recommend to turn on to get a better video quality.
Exposure: Adjustable exposure value, used to change the image brightness, Default is 0. Pressing OK gives the following options: 0, -1, -2, -3, 0,+1, +2, +3.

Motion Detection: This function allows the camera to start recording when it detects movement. Default setting is Off, press OK and press down button to select Off/On.
Audio: Default is On. Press the OK button to toggle it On/Off.
Gravity sensing(Emergency recording):
Critical event detection is triggered by the Gravity Sensor and will auto-detect vehicle impacts and collisions. This will cause the camera to protect the current video clip from being overwritten by locking it and saving the footage in the "Video /EMR" folder, and cannot be automatically overwritten. It will need you delete them manually. The gravity sensitivity is adjustable with 3 settings: Low /Medium /High. It is set to medium by default. The gravity sensing can also be deactivated in video setup.
Warm tips:
EMR folder has accumulated 30% of the card capacity. Please regularly transfer and save important videos to your computer or another storage location like external hard drive. To maintain good read/write performance, the micro SD card should be formatted every 1 or 2 weeks.
Parking monitor: Default is Off. Press down followed by OK to toggle it Off/On. Parking mode operates as a sensory function under different situations. To activate parking mode, go to "Record setup" to find "Parking monitor", press OK and select On. Parking Mode operates as a sensory function under different situations.
In Parking Mode, with this function on, after you stop the car and the camera powers off, it will stay in standby, when camera detects shocking, it will automatically turn on and take a short video and locked it, then shut down automatically. The sensor sensitivity can be adjusted to Low /Medium/ High in gravity sensing option to set.
Warm tips:
To ensure the camera is able to function in parking mode, please keep it powered with a mobile power bank or use hard wire kit install it directly to the car battery. We do not recommend running the camera continuously for more than 12 hours.
Photo Taking Mode
In standby mode, long press the "M" button to enter the setting menu of video recording mode, short press the "M" button again to enter the system setting menu. If camera is in recording situation, click OK button to stop recording first, then long press M button to enter video setting menu.

- Photo Taking Mode
- Exposure value, Sequence
- AWB
- ISO
- Picture quality
- Date
- Time
- Memory Card Status
- Power Status
- Picture resolution
- The free space (this show it free space could store 8752 pictures)
- Anti shaking
Menu of Photo Taking Mode
In standby mode, long press the "M" button to enter the setting menu of video recording mode, short press the "M" button again to enter the system setting menu.

Capture mode: Single shot/2s Delay/5s Delay/10s Delay
Resolution: Set the photo resolution to VGA/1M/2M/3M/5M/8M/10M.
Continuous shooting: Turn On /Off continuous shooting.
Quality: Defines the quality of image you capture, Fine /Normal/Economy.

Sharpness: Defines the clarity of details in the photos, Optional: Strong /Normal /Soft.
White balance: Establishes the condition to capture an image based on the option given.
Optional: Auto /Daylight /Cloudy /Tungsten /Fluorescent.
Color: Normal /Black and White /Sepia
ISO: Auto /100 /200 /400

Exposure: Default is 0. Pressing OK gives the following options: 0, -1, -2,-3, 0,+1, +2, +3
Anti-shaking: Press OK and select Off /On.
Date stamp: Press Up /Down and OK button to set the current date and time. Press the Menu button to exit.
Playback Mode
When camera is recording, click OK button to stop recording, short press the "M" button twice to enter the setting menu of playback mode, then long press the "M" button to enter the playback setting menu.
If camera is not recording which in standby mode, just short click twice of "M" button to enter playback mode directly.
Use ![]() and
and ![]() to scroll through the recorded files / photos, and press OK to view recorded video.
to scroll through the recorded files / photos, and press OK to view recorded video.


Delete: Delete the current file displayed or delete all files.
Protection: Lock / Unlock the current file displayed or Lock one / Unlock one/Lock All/Unlock All.
System Setting Menu
After powering on the dash cam, long press the M button to enter the video setup process, then short click M button to enter system setup.(If the camera is recording video, press the OK button to stop recording first, then long press M button enter the video setup, short press M button to enter system setup)

Screen Saver: Set the time to automatically turn off the LCD display screen after no operation. Off /30 Seconds /1 Minutes /2 Minutes. (camera is still keep recording after screen turns off.)
Auto Power Off: Default is the camera turn off directly after car engine stopped. Press the OK button to select the duration in minutes: 1 /3 / 5, or Off to disable it.
Frequency: Default is 50Hz. Press OK button to toggle between 50Hz/60Hz.
Beep Sound: Turn on sounds when you press any buttons.

Language: Default is English. Press OK to select between English, Simplified Chinese, German, Japanese, Spanish, French, or Italian.
Date/Time: Press Up/Down and OK button to set the current date and time. Press the Menu button to exit. Enter the MENU interface, click M button enter"System Setup",press down button to find"Date/Time", and press the OK button to set the Date/Time. Navigate up or down button to select date and time values. Press OK to confirm and proceed. To finish setup, just press the M button to exit.
Date format is DD/MM/YY with the time in 24 hour format.

IR LED lights: Press OK and select Off /On /Auto to turn on/off IR LED lights. (When you turn on this function, the image of inside camera will turn to in black and white.
When you select "Auto", the image of inside camera will auto in colour or black and white, according to the light environment.)
Format: Press Up/Down and OK button to select format card.

Default Setting: Press OK and select OK to reset the device back to stock factory settings. Press the Menu button to exit and complete the setup.
Version: Press OK to check the camera firmware version.
Main Function and Features Introduction
Dual lens recording mode
By default (dual lend recording mode), 1080P+1080P resolution will show on the display screen, both cameras will capture road front and inside cabin at dual 1920x1080P. It can be switched to single front camera recording mode/single inside recording mode/both front and inside dual lens recording mode by press down button directly.

Loop recording
After inserted a memory card, the camera will immediately start loop recording video when connected to a power source and powered on. If the camera is not connected to a power source, it will not immediately start recording after you press the POWER ON button, press the OK button to start recording. By default, the loop recording time is 3 minutes. Go to "Record Setup"-"Loop Recording" to change it to 1/3/5 minute. When loop recording is turned off, the camera will record video in 1-5 minute clips, but will not overwrite old videos when the memory card is full.
The loop recording standard files are stored in the "DCIM-FRONT /INSIDE" folder. When the micro SD card is full, the camera will overwrite the older files automatically. The dual dash cam automatically store front and inside video in different 2 fold of memory card.

When you click DICM fold on laptop, there will appear 2 separate 2 fold. They are named FRONT and INSIDE, the FRONT /INSIDE fold included EMR /NORM/PHOTO, means both front and inside fold included front camera /inside camera emergency video, normal video and photo.

Motion Detection
Motion Detection is used to save storage space, when motion detection is turn on, once the camera detects movement at the front, the camera will automatically start recording when the camera detects movement is stopped. It will stop recording after 10 seconds of inactivity.
We do not recommend turning on this function during driving for your safety especially in highway.
IR LED light
By default, the IR LED light is "AUTO" mode. Long press "UP" button to toggle the night vision mode to On/Off/Auto.
Warm tips:
When you turn on this function, the image of inside camera will turn into black and white. When you switch this function to "AUTO", the image of inside camera will in colour or in black and white according to the light environment.

Emergency recording(Gravity sensing)
Critical event detection is triggered by the Gravity Sensor and will auto-detect vehicle impacts and collisions. This will cause the camera to protect the current video clip from being overwritten by locking it and saving the footage in the "Video /EMR" folder, and cannot be automatically overwritten. It will need you delete them manually. The gravity sensitivity is adjustable with 3 settings: Low /Medium /High. It is set to medium by default. The gravity sensing can also be deactivated in video setup.
Warm Tips:
Because the sensor is very sensitive, to avoid card easily get full, we suggest you adjust gravity sensor to "Low" option.
Warm tips:
EMR folder has accumulated 30% of the card capacity.
Please regularly transfer and save important videos to your computer or another storage location like external hard drive. To maintain good read/write performance, the micro SD card should be formatted every 1 or 2 weeks.
Audio recording
Default setting the voice recording is On. It can be turned Off using below 2 methods:
- Go to "Video Setup" to find "Audio" then press OK button and select Off, press OK to confirm.
- While recording video, press the DOWN button to toggle voice recording Off/On.
When the audio recording has been turned Off, the MIC icon at the bottom left of the screen will come with a red line across it.

Parking monitor
Parking mode operates as a sentry function under different situations. To activate parking mode, go to "Record setup" to find "Parking mode", press OK and select On. Parking Mode operates as a sensory function under different situations. With this function on, after you stop the car and the camera powers off, it will stay in standby, when camera detects shocking, it will automatically turn on and take a short video(20 seconds) and locked it, then shut down automatically. The sensor sensitivity can be adjusted to Low /Medium/ High.
Warm tips: To ensure the camera is able to function in parking mode, please keep it powered with a mobile power bank or use hard wire kit install it directly to the car battery. We do not recommend running the camera continuously for more than 12 hours.
Taking a Snapshot
When the camera is recording video, pressing the OK button to stop recording, click M button, the left top corner will appear a camera icon, then press OK button to take picture will capture a snapshot.

Click M to enter gallery, click up/down button to view the pictures.
Click M button to exit and go back to recording situation.
Screen saver
In order to guarantee safe driving, not to be effected by the light of recorder, you can set the time of screen saver in the setting menu of camera, the screen of camera will go black at the time you set when the camera is recording and no operation, press any key to turn it back on. And you can shor press the "Power" button to turn off the screen when the camera is recording.
Viewing Video/Photos on the Camera
Click OK button to stop recording if the camera is in recording situation when you turn on the car camera. Then press M button twice enter video list, press Up/Down button to select the video/picture and press OK button confirm to playback or pause.
Long press M button to enter video setting page, click up/down button to select to delete or protect(lock) this single video by click OK button.

Viewing video/photo on a computer
- Use the supplied USB data cable to connect the camera to your compute.
- You will see "Mass Storage", " PC Camera" and "REC-Mode" on the camera screen, just navigate to "Mass Storage" and press OK button to transfer video from dash cam to your computer.

- Depending on your computer OS, the device will appear either as a removable drive or a removable volume.

NOTE:
- When connected to your computer under "Mass Storage" status, standard camera setup and operations will be disabled.
- Some mac system computer player do not support MOV/MP4 video, if view playback video on mac computer the video could not be played, just download "VLC" player which could view playback video easily.
| Model | B-T27 |
| Image Sensor | Front/Rear High Resolution CMOS Sensor |
| Display | 1.5 inch LCD Display |
| Lens | Front: 170° wide viewing angle, full 6 layer glass lens with F/1.8 wide aperture. Inside: 140° wide viewing angle, F/2.0 wide aperture lens. |
| Video Resolution | 1080P / 720P |
| Video Format | MOV |
| Video Mode | Normal /Loop Record/Motion Detection /Parking Monitor |
| Image | JPGE format |
| Photo Resolution | VGA/ 1M/ 2M/ 3M |
| Loop Recording | 1 /3 /5 Minute |
| Power on recording | Supported |
| Gravity-Sensor Lock | Supported |
| Language | English /Chinese /Japanese /French /German /Italian /Spanish |
| Audio | Built-in microphone & speaker |
| Memory storage | Micro SD Card (up to 32GB) |
| USB Interface | Type C |
| Battery | Built-in Battery, 150mAh 3.7V Polymer Li-ion battery |
| External power supply | DV 5V / 2A |
| Storage temperature | -86°F~+158°F(-20°C ~ 75°C) |
| Operating temperature | -86°F~+149°F(-20°C ~ 65°C) |
To avoid damage
- In hot weather, do not expose the camera directly to the sun when the car is parked.
- In extreme winter conditions, i.e. 4°F (-20°C) or lower, detach the camera from the windshield when not in use, and store in the glove box.
Common Problems and Solutions
The camera can not record video or take photos
Be sure you are using suitable memory card: Speed over Class 10, Capacity 16GB ~ 32GB.Be sure the memory card is formatted properly and inserted correctly.
The camera automatically stop recording
Format the memory card in setting menu.
The gravity sensor might be triggered too often and locks too many video files, try low or turn off gravity sensor and parking mode.
The camera can not turn on
This camera features Built-in battery as internal power, it's used only for saving the video file after external power supply cuts off (car turn off). This camera will not turn on without external power supply. Check the power supply, make sure they are connected properly, power indicator on the power adapter is on, and the connectors are tight.
Suction mount cannot attach on windshield well
Please clean the windshield with a glass cleaning wipe. Removed the protective film of the suction mount.
Please kindly soak suction mount to warm water for a moment. If it is still not working, just contact us at support@chortau.cc to get a replacement.
The recorded video is unclear
Make sure there are no fingerprints or dirt on the lens, Try to adjust the angle to avoid blocks or glare or windshield reflecting.
Color of the video or photo is not good
Verify that frequency option is set to 60Hz (North America) or set accordingly.
The camera crashes or not responding to operations
Use a pin or and unfolded paper clip, press the RESET button to restart the camera. When reset camera, please keep the power supply keeps on.
Warranty
CHORTAU B-T27 Dual dash cam comes with a full 12 months warranty.
Support
If you have any questions regarding this dash cam, please do not hesitate to contact us at support@chortau.cc , we will get back to you within 24hours.
About us
CHORTAU is firmly committed to always improving our products, services, and user experience. As our VIP customer, if you have any thoughts on how we can do even better, we welcome your constructive feedback and suggestions. Connect with us today at support@chortau.cc
Thank you for choosing CHORTAU!

Documents / ResourcesDownload manual
Here you can download full pdf version of manual, it may contain additional safety instructions, warranty information, FCC rules, etc.
Download CHORTAU B-T27 - Dual 1080P Dash Cam Front and Inside Manual
Advertisement


Need help?
Do you have a question about the B-T27 and is the answer not in the manual?
Questions and answers