Advertisement
- 1 Front camera installation
- 2 2 way of run the wire for rear cam
- 3 2 way of install rear cam, inside of car & outside of car
- 4 2 situations you may meet
- 5 Fix the rear cam on licence plate
- 6 Footage picture
- 7 Video storage fold
- 8 Before use the car camera you should know
- 9 How to format micro SD card on dash cam?
- 10 About settings
-
11
Q&A
- 11.1 How to view playback video? (on dash cam)
- 11.2 Why my dash cam saying "card full"?
- 11.3 Why my dash cam turn off randomly?
- 11.4 Dash cam keeps on and off when i am driving, what's happened?
- 11.5 Camera saying "please insert a C6 card" after inserted a card, why?
- 11.6 The camera could not turn on?
- 11.7 The rear cam does not work?
- 12 Warranty & Support (After-Sales Service)
- 13 Videos
- 14 Documents / Resources
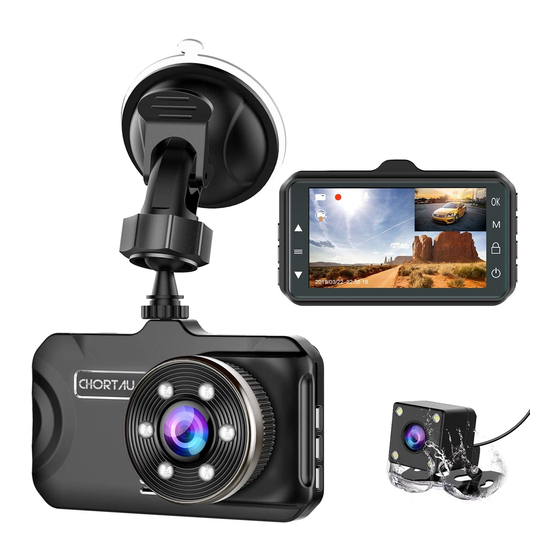
Front camera installation

Connect the car charger with camera, then hide extra cable into interior panel.

2 way of run the wire for rear cam


2 way of install rear cam, inside of car & outside of car


After wired the rear cam cable, then connect rear cam with rear cam cable

2 situations you may meet

Situation 1: If your car do NOT have built in reverse system monitor display screen, need this dash cam reverse function, please connnect rear cam cable red wire to car reversing lamp positive terminal.When you reverse car, the display screen will switch to full screen of rear view.
Situation 1

- Find out the car reversing lamp wire.

- Connect red wire to car reversing lamp positive electrode.


Situation 2

Situation 2: If your car already have reverse system display monitor, just need this dash cam record rear view when you are driving, please ignore the rear cam cable red wire, it no need connect to anywhere. When you drive forward or reverse car, the dash cam display screen will always show picture in picture of both front and rear view.
Fix the rear cam on licence plate


Footage picture


Video storage fold
DCIMA: front camera video
DCIMB: rear camera video

LOCA: front camera locked video
MOVA: front camera normal video

LOCB: rear camera locked video
MOVB: rear camera normal video

Before use the car camera you should know

- Find a 32GB, class 10 micro SD card,
- Charge dash cam 2 ~ 3 hours,
- Insert card first(poke the card with a slim needle or credit card deeply till it clicked in the card slot), then power on camera & format card on it,


How to format micro SD card on dash cam?
- Click OK button to stop recording first, then click mune button enter mune page,

- Click menu botton again to enter settings page,

- Click OK button to format card.


About settings
- How to enter setting/menu page
Without card inserted: click mune button directly

With card inserted:

- Click OK button to stop recording

- Click mune button to enter mune page


Q&A
How to view playback video? (on dash cam)
- Stop recording
 Step 1")
- MOVA is front camera video
 Step 2")
- MOVB is rear cam video
 Step 3")
- LOCB is rear cam locked video
 Step 4")
 Step 1")
 Step 2")
 Step 3")
 Step 4")
View playback on laptop in 2 methods:
Method 1: Use card reader to view playback video on laptop
- Insert card into card reader

- Connect card reader with laptop


Method 2: Connect dash cam with laptop directly with package included mini USB data cable

Select "Mass Storage", click "OK" button


Suggestion: Download VLC media player, to view the playback video on PC more smoothly


Why my dash cam saying "card full"?
Answer: If you turn on G sensor and parking mode, too many locked file will result card full, just turn off G sensor, motion detection & parking mode is fine.
Why my dash cam turn off randomly?
Answer: The first reason reason is might be power connection not stable, just well connected power supply is OK. another reason is card full, when card full the camera have no space to store new files so it turn off which to remind you format card. We suggest you format card monthly to extend its life span.
Dash cam keeps on and off when i am driving, what's happened?
Answer: It's might be the power connection is not stable, please make sure connect power cord cigar lighter car charger tight with car cigar lighter socket, and keep continiously power supply. If well connected but still have this situation, it's the power cord car charger defective, just contact us and we will send you a new charger replacement.
Camera saying "please insert a C6 card" after inserted a card, why?
Answer: there are 2 reason will result this problem,
1): the card is low speed or bad quality card, change a high speed good quality card is OK,
2): insert card when camera turn on, dash cam could not recognize card, just turn off camera and insert card, then turn on camera is OK.
The camera could not turn on?
Answer: there are 3 reason will result this problem,
1). the dash cam need continuous power supply, just check power connection if it is OK,
2). the camera need reset, just connect power supply and click reset button, then start camera is OK, we attached below 2 picture for your better understanding,


3).the card defective will result camera could not turn on, just take out card or change a new card to insert camera,
The rear cam does not work?
Answer: there are 2 reason will result this problem,
1). the rear cam wire is not well connected, just check all wire connection part and make them connected tight.
2). the rear cam or rear cam wire is defective, please kindly contact us to get a new wire or rear cam,


Warranty & Support (After-Sales Service)

Warranty
CHORTAU B-T13 Dual dash cam comes with full 1 year warranty.
Support
If you have any questions regarding this dual dash cam, please do not hesitate to send us your order ID to support@chortau.cc, we will get back to you within 24 hours.
About us
CHORTAU is firmly committed to always improving our products, services, and customer experience. As our VIP customer, if you have any thoughts on how we can do even better, we appreciated your constructive feedback & suggestions. Connect with us at support@chortau.cc
VideosCHORTAU B-T13 - How to install Video
Documents / ResourcesDownload manual
Here you can download full pdf version of manual, it may contain additional safety instructions, warranty information, FCC rules, etc.
Advertisement


Need help?
Do you have a question about the B-T13 and is the answer not in the manual?
Questions and answers