Table of Contents
Advertisement
Advertisement
Table of Contents

Subscribe to Our Youtube Channel
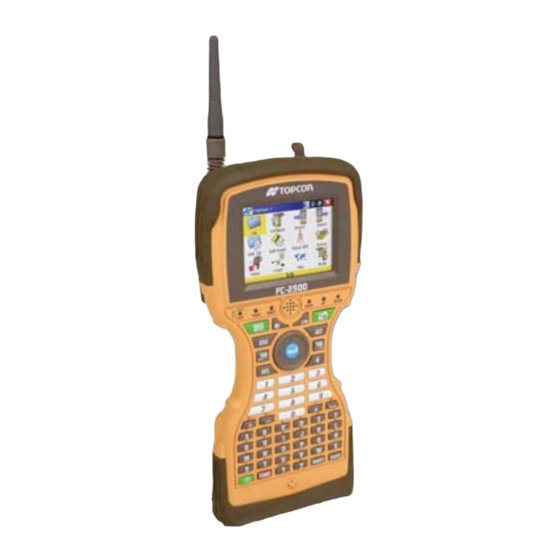
Related Manuals for Topcon FC-2500


Summary of Contents for Topcon FC-2500
- Page 3 Rev A ©Copyright Topcon Positioning Systems, Inc. October, 2008 All contents in this manual are copyrighted by Topcon. All rights reserved. The information contained herein may not be used, accessed, copied, stored, displayed, sold, modified, published, or distributed, or otherwise reproduced without express written consent from Topcon.
- Page 4 ECO#3422...
-
Page 5: Table Of Contents
Keypad Controls ............1-4 Camera Settings for the FC-2500 ........1-5 EyeSetup Menu ..............1-6 The Viewfinder ..............1-8 Taking a Photo Using the FC-2500 ......... 1-10 Taking Good Photos with the FC-2500 ....1-11 Composition ............1-12 Focus ..............1-13 Exposure ............. - Page 6 Table of Contents Notes: FC-2500 Quick Reference Guide...
-
Page 7: Introduction
• The FC-2500 has four illuminators that allows you to take pictures in low light conditions. • The FC-2500 has two 635 nm red visible lasers that you can use to position objects and to align the FC-2500. P/N 7010-0910... -
Page 8: Positioning The Fc-2500
LCD display, the FC-2500’s display is the viewfinder that operates on a horizontal plane. Instead of holding the FC-2500 up to your eye, you hold it in front of you, about waist high (or whatever is comfortable). -
Page 9: Settings For The Fc-2500
When you start eyeWARE, a configuration file is loaded. This activates the keys on the FC-2500 or you can use the buttons from your application to activate camera functions. You don’t have to write an application to take pictures just yet. Pre- programmed applications within eyeWARE Setup allow you to take pictures until you are ready to take your own. -
Page 10: Keypad Controls
When using eyeWARE with a standard 55-key joystick keypad, use the default control buttons on the left when taking pictures.?? Keypads on the FC-2500 can vary. Consequently, not all the functions listed in Figure 1-3 or in Table 1-1 on page 1-4 may work as described. -
Page 11: Camera Settings For The Fc-2500
Camera Settings for the FC-2500 Table 1-1. FC-2500 Button Functions (Continued) Colon (:) Manual Focus Forward (Changes the focus setting forward) (FUNC + O) Semicolon (;) Manual Focus Back (Changes the focus setting backward) (FUNC + P) Saves the current picture... -
Page 12: Eyesetup Menu
The viewfinder consists of nine equal sections when you press the Camera button (Figure 1-5). The FC-2500 uses the center section to measure the amount of available light and to adjust the exposure accordingly (this process is known as Spot Meter Exposure). - Page 13 EyeSetup Menu Table 1-2. eyeSETUP Menu (Continued) Figure 1-6. Camera Behavior Options Screen Light Conditions Enables you to configure the FC-2500 to compensate for different light conditions and environments (Figure 1-6). Select either Daylight, Cloudy, Tungsten, or Fluorescent. Shutter Speed The speed at which the shutter operates (Figure 1-6 on page 1-7).
-
Page 14: The Viewfinder
When the focusing process completes, a green square displays on the right side of the viewfinder. When the exposure has stabilized, a green square displays on the left side of the viewfinder (Figure 1-8). Figure 1-8. The Focusing Process FC-2500 Quick Reference Guide... - Page 15 The Viewfinder If the camera is overexposed, a red square displays in the top left section of the viewfinder. In this case, the mirror finish of the license plate causes a glare (Figure 1-9 on page 1-9). Figure 1-9. An Overexposed Picture If the camera has reached an underexposure limit, a red square appears in the top left section of the viewfinder.
-
Page 16: Taking A Photo Using The Fc-2500
My Documents folder. Hold the FC-2500 parallel to the ground to avoid a skewed perspective. The best way to hold the FC-2500 is in front of you, about waist high, with your arms comfortably bent (Figure 1-11 on page 1-10). -
Page 17: Taking Good Photos With The Fc-2500
Taking a Photo Using the FC-2500 Holding the FC-2500 out in front of you with one hand may cause your image to blur. Using a stationary object for support helps to reduce the blur (Figure 1-12). Figure 1-12. Reduce Blur by Using a Stationary Support Remember! The Beep is your friend! Don’t move... -
Page 18: Composition
Figure 1-14 shows an improved image of Figure 1-10 above. Figure 1-14. Full Image of Truck Some cropping will occur on the sides of your final image. Make sure that you capture your entire CAUTION subject, then take a step back. FC-2500 Quick Reference Guide 1-12... -
Page 19: Focus
Taking a Photo Using the FC-2500 Focus Focus is the sharpness of the photograph. Images that are out of focus lose detail and can appear blurry. Poor focus can be the result of one of the following: • not waiting for the green focus indicator •... - Page 20 Introduction The photograph shown in Figure 1-16 shows motion blur. Chances are that the FC-2500 was not held still while taking the photograph. Motion Blur Figure 1-16. Example of Motion Blur The photograph in Figure 1-17 is in focus. The edges are sharp. To achieve an excellent photograph you must have a steady hand and stand as still as possible.
- Page 21 To have objects both close and far from you in focus (known as a great depth of field), you need to set up the FC-2500 to use the small aperture setting of F8.0. The focus is equally distributed between foreground and background (Figure 1-18).
-
Page 22: Exposure
Once you become familiar with how the FC-2500 reacts to certain environments, you can fine tune your settings appropriately. Do the following to avoid underexposure or overexposure: •... - Page 23 Taking a Photo Using the FC-2500 Table 1-3 describes what setting you should use depending upon the light conditions of your picture. Table 1-3. Light Condition Settings Light Condition Setting Circumstance of Use Daylight Parking lots, on the water, extremely bright indoor...
- Page 24 Figure 1-20. Underexposed with Insufficient Light to Show Details Figure 1-21. Improved Image with Sufficient Light to Show Details Change your illumination settings in eyeSEE setup. Please refer to your eye.WARE Users Guide for instructions. FC-2500 Quick Reference Guide 1-18...
- Page 25 • When working in bright sunlight, avoid taking pictures if glare appears on the viewfinder (such as taking pictures of windshields or windows) by slightly moving the FC-2500 up and down or side to side until you find a good angle that produces little or no glare.
- Page 26 When this picture was taken, a red box displayed on the upper left of the viewfinder indicating overexposure. If you examine this photograph, you will see that the sun is in front of the FC-2500. Figure 1-23. The Hood is Overexposed The photograph in Figure 1-24 on page 1-21 is properly exposed.
-
Page 27: Color Temperature
(more yellow/red light), while sunlight has a higher color temperature (more blue light). As a result, you must adjust the FC-2500 for indoor lighting versus daylight conditions. There are four color temperature settings to choose from: •... - Page 28 Figure 1-25. Example of FC-2500 Set to Daylight The photograph in Figure 1-26 on page 1-23 is the opposite of the one shown above. It was taken in daylight with the FC-2500 set to Fluorescent. The result is an overall bluish tint.
- Page 29 Taking a Photo Using the FC-2500 Figure 1-26. Example of FC-2500 Set to Fluorescent A surrealistic image resulted when taking a daylight photograph with the FC-2500 set to Tungsten in Figure 1-27. Figure 1-27. Example of FC-2500 Set to Tungsten The photograph in Figure 1-28 on page 1-24 was taken with the correct color temperature.
- Page 30 Introduction Figure 1-28. Example of Photo Taken with the Correct Color Temperature Practice makes perfect. The more comfortable you are with the FC-2500, the better your photographs NOTE will be. FC-2500 Quick Reference Guide 1-24...
- Page 31 Notes: Notes...
- Page 32 Notes: Notes...
- Page 34 Topcon Positioning Systems, Inc. 7400 National Drive, Livermore, CA 94550 800∙443∙4567 www.topconpositioning.com ISO 9001:2000 FM 68448 FC-2500 Quick Reference Guide P/N: 7010-0910 Rev A 010/08 ©2008 Topcon Corporation All rights reserved. No unauthorized duplication.
Need help?
Do you have a question about the FC-2500 and is the answer not in the manual?
Questions and answers