
Related Manuals for ZyXEL Communications EX3301-TO


Summary of Contents for ZyXEL Communications EX3301-TO
- Page 1 ZYXEL EX3301-TO Wireless Gigabit Ethernet Dual Band Router User Guide light up your life with gigabit full fibre...
-
Page 3: Table Of Contents
Introduction ............4 1.1. -
Page 4: Introduction
1. Introduction 1.1. Document Overview This document provides instructions on how to set up the Zyxel wireless AX1800 Gigabit Ethernet IAD EX3301-T0 (further referred to as the Zyxel device) and how to configure the most common settings. 1.2 Target Audience This document is intended for subscribers who set up and configure the Zyxel device. -
Page 5: Overview
2. Overview The Zyxel device is a dual-band wireless AX1800 Gigabit IAD that provides fast and secure Internet access for wireless devices such as personal computers, laptops, tablets, and smartphones. It is a dual-band gateway that provides both 2.4G and 5G networks at the same time. -
Page 6: Front Panel
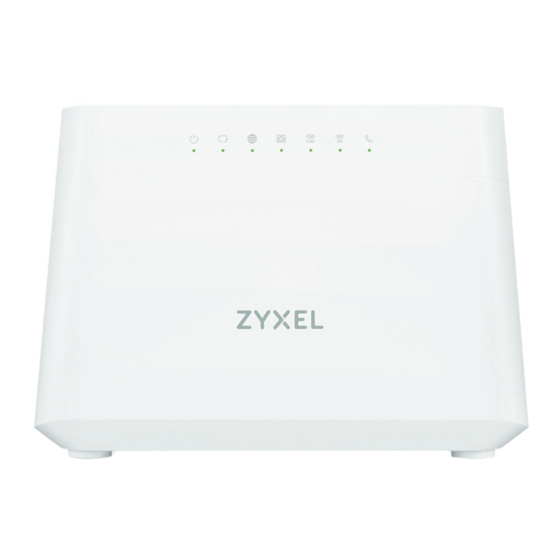
2.3 Front Panel The LED status indicators are located on the front panel of the Zyxel device. The following table describes the LED status indicators: Colour Status Description The device is receiving power and is ready for use. Green Blinking The device is starting up. - Page 7 The 2.4GHz wireless network is activated. The Zyxel device is communicating with a 2.4GHz Green Blinking wireless client. 2.4G WLAN/WPS The link is down or disabled. The Zyxel device is setting up a WPS connection Amber Blinking with a 2.4GHz wireless client. The 5GHz wireless network is activated.
-
Page 8: Rear Panel
2.4 Rear Panel The connection ports are located on the rear panel of the Zyxel device. The following table describes the ports and buttons of the rear panel: Ports/Buttons Function POWER Connect the power cable here. ON/OFF Press the ON/OFF button to switch on and off the device. If you want to return the device to factory defaults because, for example, you forgot your password or cannot access the Web Configurator, press and hold the RESET... -
Page 9: Connecting The Cables
3. Connecting the cables Perform the following steps to set up the Zyxel device: 1. Use an Ethernet cable to connect your gateway modem to the WAN port. 2. (Optional) Connect a computer to the LAN port using the yellow Ethernet cable. You can skip this step if you want to wirelessly connect to the Internet. -
Page 10: Logging In To The Web Configurator
5.3. Logging in to the Web Configurator Perform the following steps to log in to the Web Configurator: 1. Make sure that the Zyxel device is on, the Power LED is solid green, and you are connected to the Zyxel WiFi network. 2. -
Page 11: Configuring The Zyxel Device Using The Wizard
5.4. Configuring the Zyxel device using the Wizard When logging in to the Web Configurator for the first time, the Quick Start Wizard screen automatically pops up, where you can configure basic settings like time zone, Internet, and WiFi. If this is not the first time you are logging in, click the Wizard icon on the Navigation panel. - Page 12 4. The Wizard will check the Internet connectivity. Click Next to continue. NOTE You can bypass this step by clicking Skip. 5. After the Zyxel device is connected to the Internet, click Next. 6. The next screen shows the WiFi Settings. To change the WiFi name and the WiFi password, enter the changes into the respective fields.
-
Page 13: Layout
5.5. Layout Layout The Web Configurator is divided into the following two parts: • The main window (1) shows basic settings in the form of widgets. For more information, see Main Window. • The navigation panel (2) contains the configuration menus. For more information, see Navigation Panel. - Page 14 The following table describes the configuration menus: Link Function This is the main window of the Web Configurator. Use this screen to configure basic Internet access, Connection wireless settings, and parental controls. This screen status also shows the network status of the Zyxel device and your wireless devices connected to it.
- Page 15 Function Link Use this screen to set the Local Area Network IP LAN Setup address and subnet mask of the Zyxel Device. User this screen to assign IP addresses on the LAN to Static DHCP individual computers based on their MAC Addresses. Use this screen to enable or disable UPnP State or UPnP UPnP NAT-T State.
- Page 16 Use this screen to enable or disable QoS and set General the upstream bandwidth or assign traffic priority. Use this screen to configure QoS queue assignment Queue Setup to decide the priority on WAN/LAN interfaces. Classification Setup Use this screen to add, edit, or delete QoS classifiers. Use this screen to limit outgoing traffic rate on the Shaper Setup selected interface.
- Page 17 Security Use this screen to set the security level of the firewall General on the Zyxel device. Use this screen to configure customized services Protocol and port numbers. Firewall Use this screen to add new Access Control List (ACL) Access Control rules and view the list of configured incoming or outgoing filtering rules.
- Page 18 VoIP Use this screen to set up information about your SIP account and configure audio settings, such as SIP Account volume levels for the phones connected to the Zyxel device. Use this screen to view the SIP service provider SIP Service Provider information on the Zyxel Device.
- Page 19 Use the ARP table to view the IPv4-to-MAC address mappings for each device connected to the Zyxel ARP Table device. The neighbour table shows the IPv6-to-MAC address mappings of each neighbour. Use this screen to view the routing table of the Routing Table Zyxel device Use this screen to view the status of the wireless...
-
Page 20: Icons
Use this screen to ping, traceroute, or nslookup for Ping & troubleshooting the Zyxel device. Ping and Traceroute & traceroute are used to test whether a particular Nslookup host is reachable. Nslookup is used to find the IP address for a host name and vice versa. Use this screen to configure and perform Diagnostics Connectivity Fault Management (CFM) actions as... -
Page 21: Configuring The Wireless Network Settings
5.6. Configuring the Wireless Network Settings You can enable your wireless devices, such as laptops, tablets, and smartphones to es- tablish wireless Internet connection. Perform the following steps to configure the wireless connection: 1. Go to Network Settings > Wireless > General. -
Page 22: Setting Up A Secure Wireless Network Using Wps
2. To change the wireless network name, go to Wireless Network Settings and enter the name in the Wireless Network Name field. 3. To set the security level, go to Security Level and select More Secure. 4. Select WPA2-PSK from the Security Mode drop-down menu. 5. - Page 23 Push-Button Configuration Perform the following steps to create a push-button configuration: 1. Make sure the Zyxel device is switched on and that your device is within the range of the wireless signal. 2. Enable PBC in one of the following two ways: a) Press and hold the WPS button on the back panel of the Zyxel device for more than one second.
-
Page 24: Configuring The Firewall
PIN Configuration Perform the following steps to set up a PIN configuration: 1. Turn on the WiFi on your wireless device. 2. Open the WiFi settings and select WPS PIN Entry to get a PIN. 3. In the Web Configurator, select Network Settings > Wireless > WPS. 4. -
Page 25: Configuring The Wifi Network
2. Click the IPv4 Firewall and/or IPv6 Firewall toggle buttons to turn on or off the firewall for IPv4 and/or IPv6 traffic. By default, both are enabled. 3. Select the security level based on the following: Security Level Description It allows LAN to WAN and WAN to LAN packet directions. Medium (recommended) It allows LAN to WAN but denies WAN to LAN packet directions. - Page 26 4. To give different names to the 2.4GHz and 5GHz WiFi networks, clear the Keep 2.4G and 5G the same checkbox. The WiFi Settings screen will change in this case. To be able to clear the Keep 2.4G and 5G the same checkbox, NOTE disable MPro MESH in Network Settings >...
-
Page 27: Configuring The Guest Wifi Network
5.9. Configuring the Guest WiFi Network Perform the following steps to configure the guest WiFi network: 1. Go to the Guest WiFi Settings widget on the main window. This page shows the WiFi names and passwords of the guest wireless networks. Click the eye icon to show the passwords. -
Page 28: Changing The Lan Ip Address
Field Description Enter a descriptive name for your wireless network, which can be up WiFi Name to 32 characters. WiFi Password Enter a password of 8-64 case-sensitive characters. If it is selected, the Zyxel device automatically generates a Random Password password. -
Page 29: Creating A Sip Account
5.11. Creating a SIP Account To be able to make and receive Internet phone calls, you need to create a SIP account and map it to a phone port. The SIP account contains information that allows the Zyxel device to connect to your VoIP service provider. Perform the following steps to change the LAN IP address: 1. - Page 31 Parameter Description SIP Account Selection This field displays Change Me if you are creating a new SIP SIP Account Selection account or the name of the SIP account you are modifying. SIP Server Provider Association Select the SIP service provider profile to use for this SIP SIP Account Associated With account.
- Page 32 G.711a is typically used in Europe. G711u is typically used in North America and Japan. G.726-24 operates at 24 kbps. G.726-32 operates at 32 kbps. G.722 is a 7kHz wideband voice codec that operates at 48, 56 and 64 kbps. By using a sample rate of 16KHz, G.722 can provide higher fidelity and better audio quality that narrowband codecs like G.711, where the voice signal is sampled at 8KHz.
- Page 33 Select it if you want the Zyxel device to forward incoming calls to the specified phone number if the phone port is busy. Specify the Enable Busy Forward phone number in the To Number field on the right. If you have call waiting, the incoming call is forwarded to the specified phone number if you reject or ignore the second incoming call.
-
Page 34: Editing An Existing Sip Account
5.11.1 Editing an Existing SIP Account Perform the following steps to edit an existing SIP account: 5. Go to VOIP > SIP > SIP Account. 6. Select the account you want to edit. 7. Click the edit icon in the Modify column. 8. -
Page 35: Configuring Parental Control
2. Select the account you want to edit. 3. Click the delete icon in the Modify column. 4. In the pop-up window, click OK to confirm the deletion. 5.12. Configuring Parental Control Parental control allows you to limit the time a user can access the Internet. Perform the following steps to create a parental control profile: 1. - Page 36 3. Click Add more Profile. 4. On the Select Device page, configure the following parameters: 5. In the Profile Name field, enter a name for the profile. 6. Click the Profile Active toggle button to enable the parental control profile. 7.
-
Page 37: Editing An Existing Pcp
5.12.1 Editing an Existing PCP Perform the following steps to edit an existing PCP: 1. Go to the Parental Control widget on the main window and click the arrow on the bottom right corner. 2. Open the PCP you want to edit by clicking the arrow on the bottom right corner. 2. -
Page 38: Deleting An Existing Pcp
5.12.2 Deleting an Existing PCP Perform the following steps to delete an existing PCP: 1. Go to the Parental Control widget on the main window and click the arrow on the bottom right corner. 2. Open the PCP you want to edit by clicking the arrow on the bottom right corner. 2. -
Page 39: Port Forwarding
5.13. Port Forwarding Port forwarding is used to forward incoming service requests from the Internet to the server(s) on your local network. Port forwarding is commonly used when you want to host online gaming, P2P file sharing, or other servers on your network. You may enter a single port number or a range of port numbers to be forwarded, and the local IP address of the desired server. -
Page 40: Technical Support
Parameter Description Click the toggle button to enable the rule. When the switch goes Active to the right, the function is enabled. Enter a name to identify this rule using keyboard characters Service Name (A-Z, a-z, 1-2, and so on). Select the WAN interface through which the service is forwarded. -
Page 41: Glossary
7. Glossary Terms Definitions Domain Name System. Used for mapping a domain name to its corresponding IP address and vice versa. Denial of Service. They are attacks aimed at devices and networks with a connection to the Internet. Their goal is to disable a device or network, so users do not have access to network resources. - Page 42 Terms Definitions It is a type of VoIP account that allows you to make phone calls over the Internet in SIP account accordance with your service provider. SMTP Simple Mail Transfer Protocol. It is an Internet standard used for mail transmission. SSID Service Set Identifier.
- Page 43 Notes...
- Page 44 Contact: help@lilaconnect.co.uk +44 (0)800 955 6670 lilaconnect.co.uk © 2022 LilaConnect Ltd, ALL RIGHTS RESERVED.
Need help?
Do you have a question about the EX3301-TO and is the answer not in the manual?
Questions and answers