SOMFY ALTUS 40 RTS Instructions Manual
Hide thumbs
Also See for ALTUS 40 RTS:
- Installation manual (6 pages) ,
- Installation manual (7 pages) ,
- Installation manual (7 pages)

Related Manuals for SOMFY ALTUS 40 RTS


Summary of Contents for SOMFY ALTUS 40 RTS
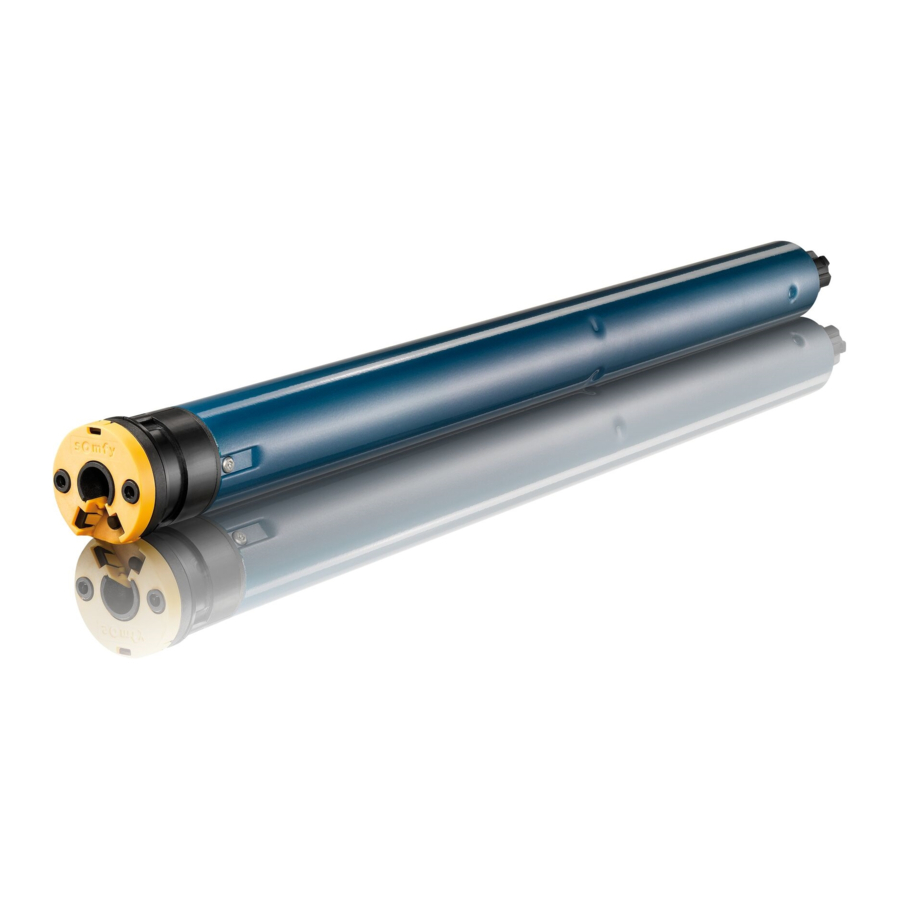
- Page 1 ALTUS 40 Instructions Anleitung Notices Handleiding Bruksanvisning Manuale Instrucciones Instrukcja...
-
Page 2: Table Of Contents
ALTUS 40 RTS ORIGINAL INSTRUCTIONS These instructions apply to all ALTUS 40 RTS drives, the different versions of which are available in the current catalogue. CONTENTS 1. Prior information 3.2. Stop function 1.1. Sphere of application 3.3. Favourite position (my) 1.2. -
Page 3: Liability
Any operation of the drive outside the sphere of application described above is prohibited. Such op- eration shall exclude Somfy from all liability and invalidate the Somfy warranty, as will any failure to comply with the instructions given herein and in the enclosed Safety instructions document. -
Page 4: Wiring
Live (L) Blue Brown not connected 230 V 50 Hz Attention Do not use as a switch. • Make sure that the clip k is correctly positioned to ensure closure. © Copyright 2021 SOMFY ACTIVITES SA, Société Anonyme. All rights reserved. -
Page 5: Commissioning
The motorised product rises and stops in the raised position. 5) To confirm the end limits, press the my button until the motorised product moves up and down, The end limits are programmed. © Copyright 2021 SOMFY ACTIVITES SA, Société Anonyme. All rights reserved. -
Page 6: Tips And Advice On Installation
Crown is not properly fitted to the Fit the crown properly to the tube. product stops tube. too soon. The motorised product is within the Consult a Somfy contact or visit recommended weight limit. www.somfy.com. © Copyright 2021 SOMFY ACTIVITES SA, Société Anonyme. All rights reserved. - Page 7 3) Press the UP or DOWN button to move the motorised product to the new desired position. 4) To confirm the new end limit, press the my button until the motorised product moves up and down. © Copyright 2021 SOMFY ACTIVITES SA, Société Anonyme. All rights reserved.
- Page 8 (If the application is at the upper or lower end limit, it will make a brief up and down movement). 6) Press the PROG button on the Somfy local control point for ≈ 7 seconds, until the motorised product moves up and down twice: PROG.
-
Page 9: Use And Maintenance
2) To stop the motorised product, press the my button. 3) If a favourite position (my) is recorded, to move the motorised product to this favourite position (my), press briefly the my button. © Copyright 2021 SOMFY ACTIVITES SA, Société Anonyme. All rights reserved. -
Page 10: Up, Down, My: In Tilting Mode
3) Press the my button until the motorised product moves up and down to reverse the rotation direction. 4) Press the UP button to check the new rotation direction. The motor rotation direction is reversed. © Copyright 2021 SOMFY ACTIVITES SA, Société Anonyme. All rights reserved. -
Page 11: Operating With A Somfy Sun Sensor
(my or Down limit) if no sun disappearing position has been memorised. To set the sun disappearing position, see chapter 3.8.2. © Copyright 2021 SOMFY ACTIVITES SA, Société Anonyme. All rights reserved. -
Page 12: Operating With A Somfy Wind Sensor
2) Press and hold the MY button until the motorised product moves up and down. The Sun disappearing position is deleted. 3.9. OPERATING WITH A SOMFY WIND SENSOR Attention This drive is not compatible with wind functions. © Copyright 2021 SOMFY ACTIVITES SA, Société Anonyme. All rights reserved. -
Page 13: Technical Data
EU declaration of conformity is available at www.somfy.com/ce. Philippe Geoff roy, Approval manager, acting on behalf of Activity director, Cluses, 08/2021. Somfy limited, Yeadon LS19 7ZA UK, hereby declares that the radio equipment covered by these instructions is in compliance with the requirements of UK legislation: the Radio Equipment Regulations S.I. -
Page 14: Vorbemerkungen
ALTUS 40 RTS ÜBERSETZTE ANLEITUNG Diese Anleitung gilt für alle Antriebe vom Typ ALTUS 40 RTS, deren Ausführungen im aktuellen Katalog zu finden sind. INHALT 1. Vorbemerkungen 3.2. Funktion STOP 1.1. Anwendungsbereich 3.3. Lieblingsposition (my) 1.2. Ha ung 3.4. Auswahl der Betriebsart: Betriebsart Rollo oder Jalousie 2. -
Page 15: Ha Ung
Verwendung, wie auch bei Nichtbefolgung der Hinweise in dieser Anleitung und in den beiliegenden Sicherheitshinweisen entfällt die Ha ung und Gewährleistungspflicht von Somfy. Der Installateur hat seine Kunden über die Verwendungs- und Wartungsbedingungen des Antriebs zu informieren und muss ihnen die Gebrauchs- und Wartungsanweisungen sowie die beiliegenden Sicherheitshinweise nach der Installation des Antriebs aushändigen. -
Page 16: Elektrischer Anschluss
Neutralleiter (N) Phase (L) Blau Braun nicht 230 V 50 Hz angeschlossen Achtung Nicht als Schalter verwenden. • Stellen Sie sicher, dass der Clip k zum Schließen korrekt positioniert ist. © Copyright 2021 SOMFY ACTIVITES SA, Société Anonyme. All rights reserved. -
Page 17: Inbetriebnahme
Endlage. 5) Um die beiden Endlagen zu bestätigen, drücken Sie die my-Taste, bis der Antrieb mit einer Auf- und Abbewegung bestätigt. Die beiden Endlagen wurden gespeichert. © Copyright 2021 SOMFY ACTIVITES SA, Société Anonyme. All rights reserved. -
Page 18: Tipps Und Empfehlungen Für Die Installation
Den Adapter richtig an der Welle Der Behang Welle befestigt. befestigen. hält zu früh an. Der Behang fällt in die empfohlenen Wenden Sie sich bitte an Ihren Gewichtsgrenzen. Somfy-Ansprechpartner oder besuchen Sie www.somfy.com. © Copyright 2021 SOMFY ACTIVITES SA, Société Anonyme. All rights reserved. - Page 19 3) Drücken Sie eine der Tasten AUF oder AB, um den Behang in die gewünschte neue Endlage zu bringen. 4) Um die neue Endlage zu bestätigen, drücken Sie die my-Taste, bis der Antrieb eine Auf- und Abbewegung ausführt. © Copyright 2021 SOMFY ACTIVITES SA, Société Anonyme. All rights reserved.
- Page 20 Bedieneinheit für ca. 7 Sekunden gedrückt, bis der Behang zwei Auf- und Abbewegungen ausführt: → Der Antrieb wurde jetzt auf seine Werkseinstellung zurückgesetzt. Wiederholen Sie alle Schritte der Inbetriebnahme (siehe Kapitel Inbetriebnahme). © Copyright 2021 SOMFY ACTIVITES SA, Société Anonyme. All rights reserved.
-
Page 21: Bedienung Und Wartung
2) Drücken Sie die Taste my, um den Behang anzuhalten. 3) Wenn eine Lieblingsposition (my) gespeichert ist, fährt der Behang in diese Lieblingsposition (my), wenn Sie die my-Taste kurz drücken. © Copyright 2021 SOMFY ACTIVITES SA, Société Anonyme. All rights reserved. -
Page 22: Auf, Ab, My: In Der Betriebsart Jalousie
Auf- und Abbewegung ausführt. Damit wird angezeigt, dass die Drehrichtung geändert wurde. 4) Drücken Sie die AUF-Taste, um die neue Drehrichtung zu überprüfen. Die Drehrichtung des Antriebs ist umgekehrt. © Copyright 2021 SOMFY ACTIVITES SA, Société Anonyme. All rights reserved. -
Page 23: Betrieb Mit Einem Somfy-Sonnensensor
Behang in die Position „Keine Sonne“ oder bleibt in Position (my-Position oder untere Endlage), wenn keine Position „Keine Sonne“ gespeichert ist. Beachten Sie zur Einstellung der Position „Keine Sonne“ das Kapitel 3.8.2. © Copyright 2021 SOMFY ACTIVITES SA, Société Anonyme. All rights reserved. -
Page 24: Betrieb Mit Einem Somfy-Windsensor
2) Drücken Sie auf die my-Taste und halten Sie diese, bis der Behang sich auf und ab bewegt. Die Position „Keine Sonne“ ist jetzt gelöscht. 3.9. BETRIEB MIT EINEM SOMFY WINDSENSOR Achtung Dieser Antrieb ist nicht Windfunktionen kompatibel. © Copyright 2021 SOMFY ACTIVITES SA, Société Anonyme. All rights reserved. -
Page 25: Technische Daten
Internetadresse www.somfy.com/ce verfügbar. Philippe Geoff roy, Bevollmächtigter für Gerätekonformität, in Vertretung des Geschä sbereichsleiters, Cluses, 08/2021. Somfy limited, Yeadon LS19 7ZA UK, erklärt hiermit, dass das in dieser Anleitung beschriebene Funkgerät den Anforderungen der Rechtsvorschri en des Vereinigten Königreichs entspricht: der Funkanlagenrichtlinie S.I. 2017 Nr. 1206. Der vollständige Text der UKCA-Konformitätserklärung ist unter www.somfy.co.uk verfügbar. -
Page 26: Informations Préalables
3.7. Réglages supplémentaires 2.3. Mise en service 3.8. Fonctionnement avec un capteur Soleil Somfy 35 2.4. Astuces et conseils d’installation 3.9. Fonctionnement avec un capteur de vent Somfy 36 3. Utilisation et maintenance 4. Caractéristiques techniques 3.1. Touches Montée et Descente GÉNÉRALITÉS... -
Page 27: Responsabilité
Consignes de sécurité. La motorisation doit être installée par un professionnel de la motorisation et de l’automatisation de l’habitat, conformément aux instructions de Somfy et à la réglementation applicable dans le pays de mise en service. Toute utilisation de la motorisation hors du domaine d’application décrit ci-dessus est interdite. -
Page 28: Câblage
Phase (L) Bleu Marron non connecté 230 V 50 Hz Attention Ne pas utiliser comme interrupteur inverseur. • S'assurer que la bague k est correctement placée pour garantir la bonne fermeture. © Copyright 2021 SOMFY ACTIVITES SA, Société Anonyme. All rights reserved. -
Page 29: Mise En Service
5) Pour valider les réglages des fins de courses, appuyer sur la touche my jusqu’au va-et-vient du produit motorisé. Les fins de courses sont enregistrées. © Copyright 2021 SOMFY ACTIVITES SA, Société Anonyme. All rights reserved. -
Page 30: Astuces Et Conseils D'installation
Fixer correctement la couronne au tube. s’arrête fixée au tube. trop tôt. Le produit motorisé se trouve dans la Consulter un représentant Somfy ou limite de poids recommandée. aller sur le site www.somfy.com. © Copyright 2021 SOMFY ACTIVITES SA, Société Anonyme. All rights reserved. - Page 31 3) Appuyer sur la touche Montée ou Descente pour déplacer le produit motorisé vers la nouvelle position souhaitée. 4) Pour valider la nouvelle fin de course, appuyer sur la touche my jusqu’au va-et-vient du produit motorisé. © Copyright 2021 SOMFY ACTIVITES SA, Société Anonyme. All rights reserved.
- Page 32 ALTUS 40 RTS 2.4.3. Remplacement d’un point de commande Somfy perdu ou cassé Attention Ne réaliser la double coupure de courant qu’au niveau du produit à remettre à zéro. Cette remise à zéro supprime tous les points de commande locaux, cependant les capteurs, les réglages de fin de 2 s...
-
Page 33: Utilisation Et Maintenance
2) Pour arrêter le produit motorisé, appuyer sur my. 3) Si une position favorite (my) est enregistrée, faire un appui bref sur la touche my pour amener le produit motorisé jusqu’à la position favorite (my). © Copyright 2021 SOMFY ACTIVITES SA, Société Anonyme. All rights reserved. -
Page 34: Montée, Descente, My : En Mode Orientation
3.7.3. Ajout / suppression de points de commande et capteurs Somfy Se référer à la notice correspondante. 3.7.4. Modification du sens de rotation de la motorisation 1) Manœuvrer le produit motorisé... -
Page 35: Fonctionnement Avec Un Capteur Soleil Somfy
Soleil couchant ou reste sur sa position (my ou fin de course basse) si aucune position Soleil couchant n'a été enregistrée. Pour régler la position Soleil couchant, consulter le chapitre 3.8.2. © Copyright 2021 SOMFY ACTIVITES SA, Société Anonyme. All rights reserved. -
Page 36: Fonctionnement Avec Un Capteur De Vent Somfy
2) Faire un appui long sur la touche my jusqu’au va-et-vient du produit motorisé. La position de disparition du soleil est supprimée. 3.9. FONCTIONNEMENT AVEC UN CAPTEUR DE VENT SOMFY Attention Cette motorisation n'est pas compatible avec les fonctionnalités Vent. © Copyright 2021 SOMFY ACTIVITES SA, Société Anonyme. All rights reserved. -
Page 37: Caractéristiques Techniques
Le déposer dans un point de collecte agréé pour son recyclage. Par la présente, SOMFY ACTIVITES SA, 74300 CLUSES déclare en tant que fabricant que la motorisation couverte par ces consignes, marquée pour être alimentée en 230 V~50 Hz et utilisée comme indiqué... -
Page 38: Informatie Vooraf
ALTUS 40 RTS VERTAALDE HANDLEIDING Deze handleiding is geldig voor alle ALTUS 40 RTS motoren, waarvan de verschillende versies in de huidige catalogus staan. INHOUD 1. Informatie vooraf 3.2. Stop-functie 1.1. Toepassingsgebied 3.3. Favoriete positie (my) 1.2. Aansprakelijkheid 3.4. Werkingsmodi: rol- of kantelmodus 3.5. -
Page 39: Aansprakelijkheid
Elke dienst na verkoop aan de motor moet uitgevoerd worden door een professionele installateur van motoriserings- en huisautomatiseringssystemen. Neem contact op met een Somfy-vertegenwoordiger of ga naar de website www.somfy.com in geval van twijfel bij de installatie van de motor of voor aanvullende informatie. -
Page 40: Bedrading
Fase (L) Blauw Bruin niet aangesloten 230 V 50 Hz Let op Niet als schakelaar gebruiken. • Zorg ervoor dat de klem k correct geplaatst is voor een stevige bevestiging. © Copyright 2021 SOMFY ACTIVITES SA, Société Anonyme. All rights reserved. -
Page 41: In Bedrijf Stellen
5) Druk, om de eindpunten te bevestigen, op de my toets tot het gemotoriseerde systeem op en neer gaat. De eindpunten zijn geprogrammeerd. © Copyright 2021 SOMFY ACTIVITES SA, Société Anonyme. All rights reserved. -
Page 42: Tips En Adviezen Voor De Installatie
Bevestig de adapter goed op de as. gemotoriseerde de as. systeem stopt te Het gemotoriseerde systeem hee het Neem contact op met een vroeg. aanbevolen gewicht. Somfy-vertegenwoordiger of ga naar www.somfy.com. © Copyright 2021 SOMFY ACTIVITES SA, Société Anonyme. All rights reserved. - Page 43 3) Druk op de OP of NEER toets om het gemotoriseerde systeem naar de gewenste nieuwe positie te verplaatsen. 4) Druk op de my toets tot het gemotoriseerde systeem op en neer gaat om het nieuwe eindpunt te bevestigen. © Copyright 2021 SOMFY ACTIVITES SA, Société Anonyme. All rights reserved.
- Page 44 ALTUS 40 RTS 2.4.3. Vervangen van een verloren of defect Somfy bedieningspunt Let op Voer de dubbele stroomonderbreking alleen uit op het systeem dat gereset moet worden. Deze reset wist alle lokale bedieningspunten, maar de sensoren, de afgestelde eindpunten en de favoriete positie 2 sec.
-
Page 45: Gebruik En Onderhoud
2) Druk op de my toets om het gemotoriseerde systeem te stoppen. 3) Om het gemotoriseerde systeem in de favoriete positie (my) te zetten (als deze is ingesteld), drukt u kort op de my toets. © Copyright 2021 SOMFY ACTIVITES SA, Société Anonyme. All rights reserved. -
Page 46: Op, Neer, My: In Kantelmodus
3) Druk op de my toets tot het gemotoriseerde systeem op en neer beweegt om de draairichting om te keren. 4) Druk op de OP toets om de nieuwe draairichting te controleren. De draairichting van de motor is veranderd. © Copyright 2021 SOMFY ACTIVITES SA, Société Anonyme. All rights reserved. -
Page 47: Werking Met Een Somfy Zonnesensor
Zie voor het instellen van de zon weg-positie paragraaf 3.8.2. © Copyright 2021 SOMFY ACTIVITES SA, Société Anonyme. All rights reserved. -
Page 48: Werking Met Een Somfy Windsensor
2) Houd de MY toets ingedrukt tot het gemotoriseerde systeem op en neer beweegt. De zon weg-positie is gewist. 3.9. WERKING MET EEN SOMFY WINDSENSOR Let op Deze motor is niet compatibel met windfuncties. © Copyright 2021 SOMFY ACTIVITES SA, Société Anonyme. All rights reserved. -
Page 49: Technische Gegevens
Wij geven om ons milieu. Werp het apparaat niet weg met het huishoudelijk afval. Breng het naar een erkend inzamelpunt voor recycling. Als fabrikant verklaart SOMFY ACTIVITES SA, 74300 CLUSES FRANCE hierbij dat de motor die in deze handleiding wordt beschreven, bij gebruik met een ingangsspanning van... -
Page 50: Viktigt Att Veta
ALTUS 40 RTS ÖVERSATT BRUKSANVISNING Den här bruksanvisningen gäller alla ALTUS 40 RTS-motorer som finns att beställa i den aktuella katalogen. INNEHÅLL 1. Viktigt att veta 3.2. STOPP-funktion 1.1. Användningsområde 3.3. Mellanläge (”my”) 1.2. Ansvar 3.4. Funktionsval: rullgardins- eller persiennläge 2. -
Page 51: Ansvar
Säkerhetsanvisningar, e er installation av motorn. Service på produkten får endast utföras av fackman inom motorisering och hemmaautomatisering. Kontakta Somfy eller besök www.somfynordic.se om du behöver hjälp vid installationen av motorn eller annan information. 2. INSTALLATION Försiktighet... -
Page 52: Kablage
Neutral (N) Fasledare (L) Blå Brun ej ansluten 230 V 50 Hz Obs! Använd inte som en strömställare. • Se till att klämman k är korrekt positionerad för att säkerställa stängning. © Copyright 2021 SOMFY ACTIVITES SA, Société Anonyme. All rights reserved. -
Page 53: Idri Tagning
Den motordrivna produkten höjs upp och stannar i det övre läget. 5) För att bekrä a gränslägena trycker du in knappen my tills den motordrivna produkten gör en upp- och nedrörelse. Gränslägena har programmerats. © Copyright 2021 SOMFY ACTIVITES SA, Société Anonyme. All rights reserved. -
Page 54: Tips Och Råd Vid Installationen
Sätt fast medbringaren ordentligt på motordrivna på röret. röret. produkten stannar för Den motordrivna produkten Fråga en Somfy-återförsäljare eller gå in tidigt. ligger inom den rekommenderade på www.somfynordic.se. viktgränsen. © Copyright 2021 SOMFY ACTIVITES SA, Société Anonyme. All rights reserved. - Page 55 önskade läget. 4) För att bekrä a det nya gränsläget trycker du in knappen my tills den motordrivna produkten gör en upp- och nedrörelse. © Copyright 2021 SOMFY ACTIVITES SA, Société Anonyme. All rights reserved.
- Page 56 ALTUS 40 RTS 2.4.3. Byte av en defekt eller borttappad Somfy- ärrkontroll Obs! Använd endast strömavbrottsfunktionen vid nollställning. Nollställningen raderar alla lokala ärrkontroller, men givare, inställningarna av gränslägen och mellanläget sparas. 1) Placera den motordrivna produkten i halvt upphissat läge.
-
Page 57: Användning Och Underhåll
2) Tryck på my-knappen för att stanna den motordrivna produkten. 3) Om ett mellanläge (my) har registrerats och du vill förflytta den motordrivna produkten till detta läge trycker du kort på my-knappen. © Copyright 2021 SOMFY ACTIVITES SA, Société Anonyme. All rights reserved. -
Page 58: Upp, Ned, Mellanläge: I Persiennläge
3.7.3. Lägga till/ta bort ärrkontroller och sensorer från Somfy Se motsvarande anvisningar. 3.7.4. Ändra motorns rotationsriktning 1) Kör den motordrivna produkten bort från gränslägena. -
Page 59: Användning Med En Somfy-Solsensor
RTS Soliris-sensorn går den motordrivna produkten till skuggläget eller stannar i sitt läge (mellanläge eller nedre gränsläge) om inget skuggläge har registrerats. För att ställa in skuggläget, se kapitel 3.8.2. © Copyright 2021 SOMFY ACTIVITES SA, Société Anonyme. All rights reserved. -
Page 60: Användning Med En Somfy-Vindsensor
2) Håll in MY-knappen tills den motordrivna produkten gör en upp- och nedåtrörelse. Skuggläget har tagits bort. 3.9. FUNKTION MED EN VINDSENSOR FRÅN SOMFY Obs! Denna motor är inte kompatibel med vindsäkerhetsfunktioner. © Copyright 2021 SOMFY ACTIVITES SA, Société Anonyme. All rights reserved. -
Page 61: Teknisk Data
Philippe Geoff roy, godkännandeansvarig, på uppdrag av Aktivitetsansvarig, Cluses, 08/2021 Somfy limited, Yeadon LS19 7ZA UK intygar härmed att radioutrustningen som beskrivs i denna bruksanvisning överensstämmer med lagsti ningen i Storbritannien: direktiv för radioutrustning S.I. 2017 N°1206. Hela UKCA-dokumentet fi nns på www.somfy.co.uk. -
Page 62: Informazioni Preliminari
ALTUS 40 RTS ISTRUZIONI TRADOTTE Le presenti istruzioni si applicano a tutte le motorizzazioni ALTUS 40 RTS, le cui versioni sono disponibili nel catalogo vigente. INDICE 1. Informazioni preliminari 3.2. Funzione STOP 1.1. Ambito di applicazione 3.3. Posizione preferita (“my”) 1.2. -
Page 63: Responsabilità
Il motore deve essere installato da un professionista di impianti di motorizzazione e domotica, conformemente alle istruzioni di Somfy e alle norme applicabili nel paese in cui avviene l'installazione. È vietato utilizzare il motore per scopi diversi da quelli descritti nel presente manuale. Il mancato rispetto di tale prescrizione, così... -
Page 64: Cablaggio
Fase (L) Marrone non collegato 230 V 50 Hz Attenzione Non utilizzare come commutatore. • Accertarsi che la clip k sia posizionata in modo da garantire una corretta chiusura. © Copyright 2021 SOMFY ACTIVITES SA, Société Anonyme. All rights reserved. -
Page 65: Messa In Servizio
5) Per confermare i finecorsa, premere il pulsante my fino a quando il prodotto motorizzato non effettua un breve movimento di salita/discesa, I finecorsa sono stati programmati. © Copyright 2021 SOMFY ACTIVITES SA, Société Anonyme. All rights reserved. -
Page 66: Consigli E Raccomandazioni Per L'installazione
Fissare correttamente la corona al tubo. ferma troppo al tubo. presto. Il prodotto motorizzato rientra nel Consultare un interlocutore Somfy o limite di peso raccomandato. visitare il sito www.somfy.com. © Copyright 2021 SOMFY ACTIVITES SA, Société Anonyme. All rights reserved. - Page 67 4) Per confermare il nuovo finecorsa, premere il pulsante my fino a quando il prodotto motorizzato non effettua un breve movimento di salita/discesa. © Copyright 2021 SOMFY ACTIVITES SA, Société Anonyme. All rights reserved.
- Page 68 ALTUS 40 RTS 2.4.3. Sostituzione di un punto di comando Somfy smarrito o guasto Attenzione Togliere l'alimentazione solo al prodotto da resettare. Questo reset elimina tutti i punti di comando locali, ma i sensori, le regolazioni dei finecorsa e la posizione preferita rimangono memorizzati.
-
Page 69: Uso E Manutenzione
2) Per arrestare il prodotto motorizzato, premere il pulsante my. 3) Se è registrata una posizione preferita (my), per spostare il prodotto motorizzato in tale posizione preferita (my) premere brevemente il pulsante my. © Copyright 2021 SOMFY ACTIVITES SA, Société Anonyme. All rights reserved. -
Page 70: Salita, Discesa, My: In Modalità Tenda Veneziana
4) Premere il tasto Salita per controllare il nuovo senso di rotazione. Il senso di rotazione del motore è stato invertito. © Copyright 2021 SOMFY ACTIVITES SA, Société Anonyme. All rights reserved. -
Page 71: Funzionamento Con Un Sensore Solare Somfy
(my o finecorsa inferiore) nel caso in cui non sia stata memorizzata alcuna posizione di scomparsa del sole. Per impostare la posizione di scomparsa del sole, vedere il capitolo 3.8.2. © Copyright 2021 SOMFY ACTIVITES SA, Société Anonyme. All rights reserved. -
Page 72: Funzionamento Con Un Sensore Vento Somfy
2) Premere e tenere premuto il pulsante MY finché il prodotto motorizzato non sale e scende. La posizione di scomparsa del sole è stata eliminata. 3.9. FUNZIONAMENTO CON UN SENSORE VENTO SOMFY Attenzione Questa motorizzazione non è compatibile con le funzioni vento. © Copyright 2021 SOMFY ACTIVITES SA, Société Anonyme. All rights reserved. -
Page 73: Dati Tecnici
Philippe Geoff roy, Responsabile approvazione, per conto del Direttore delle attività, Cluses, 08/2021. Con la presente Somfy limited, Yeadon LS19 7ZA UK dichiara che il dispositivo radio coperto da queste istruzioni è conforme ai requisiti della legislazione britannica: Norma sulle Apparecchiature Radio S.I.2017 N°1206. -
Page 74: Información Previa
ALTUS 40 RTS INSTRUCCIONES TRADUCIDAS Este manual es aplicable a todas las motorizaciones ALTUS 40 RTS, cuyas versiones se encuentran disponibles en el catálogo actual. ÍNDICE 1. Información previa 3.2. Función de parada 1.1. Ámbito de aplicación 3.3. Posición favorita (My) 1.2. -
Page 75: Responsabilidad
El motor debe ser instalado por un profesional de la motorización y la automatización de la vivienda de acuerdo con las instrucciones de Somfy y la normativa vigente aplicable en el país de instalación. Queda prohibido utilizar el motor fuera de cualquier campo de aplicación arriba descrito. Cualquier uso fuera del campo de aplicación mencionado en esta guía y el documento adjunto Instrucciones... -
Page 76: Cableado
Neutro (N) Fase Azul Marrón no conectado 230 V 50 Hz Atención No lo utilice como interruptor. • Asegúrese de que el clip k esté correctamente colocado para garantizar el cierre. © Copyright 2021 SOMFY ACTIVITES SA, Société Anonyme. All rights reserved. -
Page 77: Puesta En Marcha
5) Para confirmar los finales de carrera, pulse el botón my hasta que se produzca un movimiento de subida y bajada del producto automatizado. Los finales de carrera quedan memorizados. © Copyright 2021 SOMFY ACTIVITES SA, Société Anonyme. All rights reserved. -
Page 78: Sugerencias Y Consejos De Instalación
El producto automatizado se Consulte a un representante de Somfy o pronto. encuentra en los límites de peso visite el sitio web www.somfy.com. recomendados. © Copyright 2021 SOMFY ACTIVITES SA, Société Anonyme. All rights reserved. - Page 79 4) Para confirmar el nuevo final de carrera, pulse el botón my hasta que se produzca un movimiento de subida y bajada del producto automatizado. © Copyright 2021 SOMFY ACTIVITES SA, Société Anonyme. All rights reserved.
- Page 80 Si la aplicación está en el fin de carrera superior o inferior, realizará un breve movimiento de subida y bajada. 6) Pulse el botón PROG del punto de mando local de Somfy durante unos 7 segundos, hasta que el producto PROG.
-
Page 81: Uso Y Mantenimiento
2) Para detener el producto automatizado, pulse el botón my. 3) Si se ha registrado una posición favorita (my), pulse brevemente el botón my para que el producto automatizado se desplace a dicha posición favorita (my). © Copyright 2021 SOMFY ACTIVITES SA, Société Anonyme. All rights reserved. -
Page 82: Subida, Bajada Y My : En Modo Orientación
3.7.3. Adición o eliminación de puntos de mando y sensores de Somfy Consulte el manual correspondiente. 3.7.4. Modificación del sentido de giro del motor 1) Aleje el producto automatizado de los finales de carrera. -
Page 83: Funcionamiento Con Un Sensor Solar De Somfy
(límite inferior o posición favorita). Para ajustar la posición en la que se oculta el sol, consulte el capítulo 3.8.2. © Copyright 2021 SOMFY ACTIVITES SA, Société Anonyme. All rights reserved. -
Page 84: Funcionamiento Con Un Sensor De Viento De
Se ha eliminado la posición en la que se oculta el sol. 3.9. FUNCIONAMIENTO CON UN SENSOR DE VIENTO SOMFY Atención Esta motorización no es compatible con funciones de viento. © Copyright 2021 SOMFY ACTIVITES SA, Société Anonyme. All rights reserved. -
Page 85: Somfy
Philippe Geoff roy, jefe de homologaciones, en representación del director de actividades, Cluses, 08/2021. Somfy limited, Yeadon LS19 7ZA UK, declara que el equipo de radio objeto de las presentes instrucciones es conforme con las exigencias de la legislación británica: la regulación de equipos de radio S.I. -
Page 86: Informacje Wstępne
ALTUS 40 RTS INSTRUKCJA PRZETŁUMACZONA Ta instrukcja dotyczy wszystkich napędów ALTUS 40 RTS, których wersje są dostępne w aktualnym katalogu. SPIS TREŚCI 1. Informacje wstępne 3.2. Funkcja Stop 1.1. Zakres stosowania 3.3. Położenie ulubione (my) 1.2. Odpowiedzialność 3.4. Wybór trybu: tryb roletowy lub żaluzjowy 3.5. -
Page 87: Odpowiedzialność
W przypadku jakichkolwiek wątpliwości podczas montażu napędu lub w celu uzyskania dodatkowych informacji należy skontaktować się z pracownikiem firmy Somfy lub odwiedzić stronę www.somfy. com. 2. INSTALACJA Środek ostrożności... -
Page 88: Okablowanie
Neutralny (N) Faza (L) niebieski brązowy niepodłączony 230 V 50 Hz Uwaga Nie używać jako przełącznika. • Sprawdzić, czy zacisk k jest prawidłowo umieszczony, aby zapewniać zamknięcie. © Copyright 2021 SOMFY ACTIVITES SA, Société Anonyme. All rights reserved. -
Page 89: Uruchomienie
Produkt napędzany podnosi się i zatrzymuje w położeniu podniesionym. 5) Aby potwierdzić ustawione położenia krańcowe, naciskać przycisk my, aż napędzany produkt poruszy się w jednym kierunku i z powrotem. Położenia krańcowe zostały zaprogramowane. © Copyright 2021 SOMFY ACTIVITES SA, Société Anonyme. All rights reserved. -
Page 90: Wskazówki I Porady Dotyczące Instalacji
Prawidłowo przymocować adapter do produkt przymocowany do rury. rury. zatrzymuje się Napędzany produkt nie przekracza Skontaktować się z pracownikiem za wcześnie. zalecanych ograniczeń masy. firmy Somfy lub odwiedzić stronę www.somfy.com. © Copyright 2021 SOMFY ACTIVITES SA, Société Anonyme. All rights reserved. - Page 91 3) Nacisnąć przycisk GÓRA lub DÓŁ, aby przesunąć napędzany produkt do nowego, wybranego położenia. 4) Aby potwierdzić nowe położenie krańcowe, naciskać przycisk my, aż napędzany produkt poruszy się w jednym kierunku i z powrotem. © Copyright 2021 SOMFY ACTIVITES SA, Société Anonyme. All rights reserved.
- Page 92 Somfy i przytrzymać przez ok. 7 sekund, do momentu, aż napędzany produkt wykona dwukrotnie ruch w PROG. C C C jednym kierunku i z powrotem: →Początkowa konfiguracja napędu została przywrócona. Dokonać ponownego uruchomienia (patrz rozdział Uruchomienie). © Copyright 2021 SOMFY ACTIVITES SA, Société Anonyme. All rights reserved.
-
Page 93: Użytkowanie I Konserwacja
2) Aby zatrzymać napędzany produkt, należy nacisnąć przycisk my. 3) Jeśli położenie ulubione (my) zostało zapisane, można przestawić napędzany produkt do tego położenia (my); w tym celu należy krótko nacisnąć przycisk my. © Copyright 2021 SOMFY ACTIVITES SA, Société Anonyme. All rights reserved. -
Page 94: Góra, Dół, My: W Trybie Żaluzjowym
3) Nacisnąć przycisk my, aż napędzany produkt zacznie się poruszać w jednym kierunku i z powrotem, aby zmienić kierunek obrotu. 4) Nacisnąć przycisk GÓRA, aby sprawdzić nowy kierunek obrotu. Kierunek obrotów napędu został zmieniony. © Copyright 2021 SOMFY ACTIVITES SA, Société Anonyme. All rights reserved. -
Page 95: Sposób Działania Z Czujnikiem Solarnym Somfy
(położenie my lub dolne położenie krańcowe), jeśli nie zapisano w pamięci położenia zachodzącego słońca. Ustawianie położenia zachodzącego słońca: patrz rozdział 3.8.2. © Copyright 2021 SOMFY ACTIVITES SA, Société Anonyme. All rights reserved. -
Page 96: Sposób Działania Z Czujnikiem Wiatru Somfy
2) Nacisnąć przycisk MY i przytrzymać, aż napędzany produkt wykona ruch w jednym kierunku i z powrotem. Skasowano położenie zachodzącego słońca. 3.9. SPOSÓB DZIAŁANIA Z CZUJNIKIEM WIATRU SOMFY Uwaga Ten napęd nie jest kompatybilny z funkcjami detekcji wiatru. © Copyright 2021 SOMFY ACTIVITES SA, Société Anonyme. All rights reserved. -
Page 97: Dane Techniczne
Philippe Geoff roy, Dyrektor ds. homologacji, działając w imieniu Dyrektora Zakładu, Cluses, 08/2021 Somfy limited, Yeadon LS19 7ZA UK, niniejszym oświadcza, że sprzęt radiowy, którego dotyczy niniejsza instrukcja, jest zgodny z wymaganiami przepisów obowiązujących w Wielkiej Brytanii: przepisy dotyczące sprzętu radiowego S.I. 2017 Nr 1206. Pełny tekst deklaracji zgodności UKCA jest dostępny pod adresem internetowym www.somfy.co.uk. - Page 100 SOMFY ACTIVITES SA 50 avenue du Nouveau Monde 74300 Cluses FRANCE www.somfy.com 5160813A...
Need help?
Do you have a question about the ALTUS 40 RTS and is the answer not in the manual?
Questions and answers