Advertisement
Quick Links
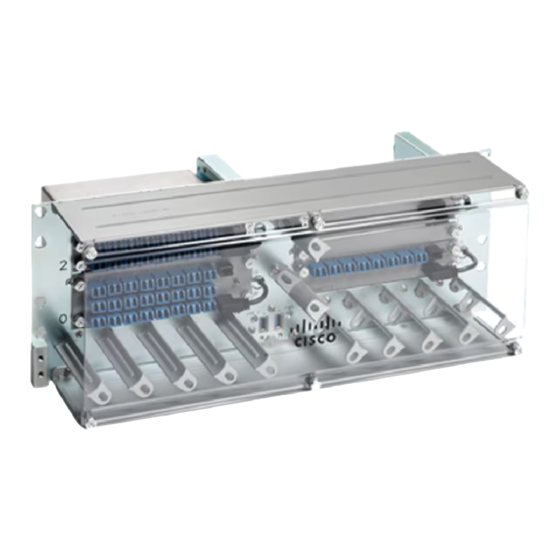
Install Cisco NCS 1010
This chapter contains tasks to install Cisco NCS 1010.
•
•
•
•
•
•
Rack Compatibility
The NCS1010 chassis can be installed in a standard EIA (19"), ANSI (23"), or ETSI rack. .
• The rack can be two post type or four post type rack.
• The 19" and 23" racks must be compliant with "EIA Universal" holes.
• The ETSI Rack must be compliant with "ETSI Universal" holes.
Figure 1: Rack Specification
Rack Compatibility, on page 1
Install Slide Rail into the Rack, on page 2
General Power and Grounding Requirements, on page 6
Equipment Installation to Power Warnings, on page 10
Rack-Mount Warnings, on page 12
Install Cisco NCS 1010 on an EIA/ANSI/ETSI Rack, on page 12
Install Cisco NCS 1010
1
Advertisement

Related Manuals for Cisco NCS 1010


Summary of Contents for Cisco NCS 1010
- Page 1 • Rack-Mount Warnings, on page 12 • Install Cisco NCS 1010 on an EIA/ANSI/ETSI Rack, on page 12 Rack Compatibility The NCS1010 chassis can be installed in a standard EIA (19"), ANSI (23"), or ETSI rack. . • The rack can be two post type or four post type rack.
- Page 2 Install Cisco NCS 1010 Install Slide Rail into the Rack Rack Type Rack Front Opening X Rack Mounting Hole Mounting Flange Center-Center Y Dimension Z 19" racks 450.8mm (17.75") 465mm (18.312") 482.6mm (19") 23" racks 552.45mm (21.75") 566.7mm (22.312") 584.2mm (23") ETSI racks 500.0mm(19.68")
- Page 3 Install Cisco NCS 1010 Install Slide Rail into an ANSI 23" Rack 8x 12–24 Pan head screws Step 4 Tighten the screws to a torque value of 4.65 N-m (41 lbs-in). Step 5 Similarly, fix the right side slide rail on the right side front post.
- Page 4 Install Cisco NCS 1010 Install Slide Rail into an ETSI Rack Figure 4: Slide Rail Integration Slide rail 12–24 Pan head screws (8x) Step 5 Tighten the screws to a torque value of 4.65 N-m (41 lbs-in). Step 6 Similarly, fix the right side slide rail on the right side post.
- Page 5 Install Cisco NCS 1010 Install Slide Rail into an ETSI Rack Figure 5: Fixing 19'' to ETSI Adapter ETSI rack to 19" rack adapter M6 screws (8x) Step 3 On the left side adapter, place the left side slide rail and insert the12–24 pan head screws (4x).
-
Page 6: General Power And Grounding Requirements
• Site power planning must include the power requirements for any external terminals and test equipment you will use with your system. Note Be sure to review the safety warnings in the Regulatory Compliance and Safety Information - Cisco Network Convergence System 1010 before attempting to install the chassis. Ground Connection Warnings... - Page 7 Ground Cisco NCS 1010 In the installation of the chassis, the ground lug must be connected first. This task provides the grounding details for the Cisco NCS 1010 chassis. In the installation of the chassis, connect the ground lug first.
- Page 8 Install Cisco NCS 1010 Ground Cisco NCS 1010 • Tighten the screws by using a screw driver to a torque value of 3.1 N-m (27.4 lbs-in). Figure 7: Fixing Ground Lug on the Ground Adapter - ETSI Rack Ground adapter 12–24 Pan head screws...
- Page 9 Install Cisco NCS 1010 Ground Cisco NCS 1010 Figure 8: Fixing Ground Lug in the Rear Side of the Slide Rail Ground lug Washers (2x) M5X10mmL screws (2x) c. To fix the ground lug at the rear side of the chassis: •...
- Page 10 Install Cisco NCS 1010 Equipment Installation to Power Warnings Figure 9: Fixing Ground Lug in the Rear Side of the Chassis Ground lug Washers (2x) M5X10mmL Screws (2x) Note When you use the options 'a' and 'b', the ground lug remains attached to the slide rails. This allows you to remove the chassis without needing to remove the ground lug.
- Page 11 Install Cisco NCS 1010 Equipment Installation to Power Warnings Warning Before performing any of the following procedures, ensure that power is removed from the DC circuit. Statement 1003 Warning This product relies on the building’s installation for short-circuit (overcurrent) protection. To reduce risk of electric shock or fire, ensure that the protective device is rated not greater than: 20 A for AC and 40A for DC.
-
Page 12: Rack Mount Warnings
To reduce the risk of fire or bodily injury, do not operate the unit in an area that exceeds the maximum recommended ambient temperature of 40 degree Celsius. Statement 1047 Install Cisco NCS 1010 on an EIA/ANSI/ETSI Rack Use this task to mount the Cisco NCS 1010 chassis on an EIA/ANSI/ETSI rack. Install Cisco NCS 1010... - Page 13 Install Cisco NCS 1010 Install Cisco NCS 1010 on an EIA/ANSI/ETSI Rack Caution • You must support the chassis with your hand during installation and replacement in a rack post. • The slide rails are used only for positioning the chassis. To prevent accidental fall of the chassis, ensure that you fix the chassis in the slide rail using the captive screws.
- Page 14 Install Cisco NCS 1010 Install Cisco NCS 1010 on an EIA/ANSI/ETSI Rack Install Cisco NCS 1010...
Need help?
Do you have a question about the NCS 1010 and is the answer not in the manual?
Questions and answers