Table of Contents
Advertisement
Quick Links
Advertisement
Chapters
Table of Contents

Related Manuals for HOLDEN VF UTE 2014


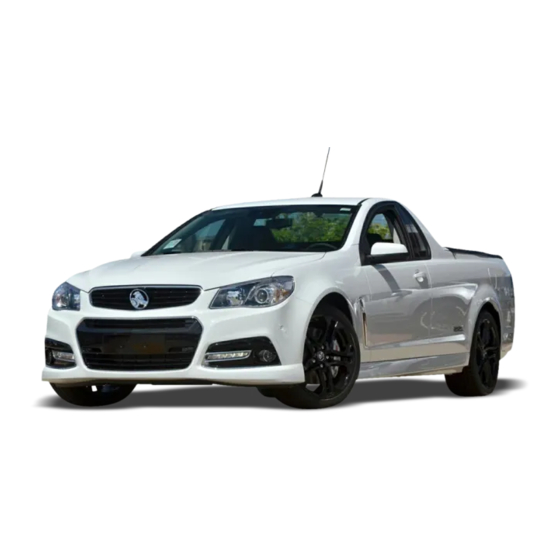
Summary of Contents for HOLDEN VF UTE 2014
- Page 1 VF UTE OWNER’S HANDBOOK...
- Page 2 Change of name, address or ownership In the event of a Safety Recall, or for various reasons, Holden may need to contact you as the owner of this vehicle. If you have recently changed your address, or name, or purchased this vehicle second-hand, please help us to help you by taking a few minutes to fill in and mail the forms at the beginning of the Service/warranty booklet.
- Page 3 2014 Holden VF Ute Owner Manual In Brief ......1-1 Instruments and Controls ..5-1 Climate Controls .
- Page 4 2014 Holden VF Ute Owner Manual Jump Starting ....10-55 Towing the Vehicle ..10-58 Appearance Care ... 10-58 Service and Maintenance .
- Page 5 Introduction...
- Page 6 Introduction Depending on the model variant, Introduction Warning integrated special equipment This Owner's Handbook provides and accessories, the scope of you with all the necessary equipment of your vehicle can Text marked Warning information to enable you to drive differ from the descriptions in provides information on risk of your vehicle safely and efficiently.
- Page 7 In Brief In Brief Initial Drive Door Locks Information Initial Drive Information Remote Keyless Entry Remote Keyless Entry (RKE) (RKE) System System ..... . 1-1 Door Locks .
- Page 8 Tonneau cover lock See Tonneau cover lock under Head Restraint Door Locks on page 2-8. Adjustment The vehicle may have a Genuine Holden Accessory hard tonneau Seat Adjustment cover. Warning The vehicle may have the following levers and switches for seat The head restraint is a safety adjustment.
- Page 9 In Brief Seat Belts Lift the head restraint up to To adjust horizontally, pull the raise it. front head restraint forwards and engage in one of three positions. Push the locking button and Pull the metal tongue across your push the head restraint down to To return to its rearmost position, body into the buckle, until it clicks lower it.
- Page 10 In Brief Mirror Adjustment Exterior mirrors Steering Wheel Adjustment Power mirrors Rear view mirror Warning Do not attempt to adjust the steering wheel while driving. L: Left side mirror selected Push the lever on the lower edge of the mirror towards the front of the R: Right side mirror selected vehicle, then adjust the position of : No mirrors selected...
- Page 11 In Brief 4. Ensure the steering wheel is locked in position before driving. See Steering Wheel Controls on page 5-5.
- Page 12 In Brief Instrument Panel Overview...
- Page 13 In Brief 1. Vents. See Adjustable Air Vents 13. Lever for: 20. Climate control switches. See on page 8-6. Air Conditioning System on Turn and Lane-Change Signals page 8-1. 2. Glove Box on page 4-1. on page 6-3. 21. Electric Parking Brake on 3.
- Page 14 In Brief Interior Lighting Exterior Lighting High/low beam High beam: Push lever : On/off : Off Low beam: Push the lever forward : Door activated AUTO: Automatic headlamps again See Dome Lamps on page 6-5. : Park lamps Headlamp flash: Pull lever See Cabin storage area lamp : Headlamps The high beam lamps can be...
- Page 15 In Brief Turn signals Hazard warning flasher Horn Left: Lever up Press to turn the hazard warning Press on either side. flasher on and off when the ignition Right: Lever down is in any position. See Exterior Lamp Controls on See Hazard Warning Flashers on page 6-1.
- Page 16 1-10 In Brief Washer and Wiper See Windscreen Wiper/Washer on Parking page 5-7. Systems 1. Apply the park brake. See Washer Fluid on page 10-14. 2. Automatic transmission: Select position P. Climate Controls Manual transmission: If facing uphill or on flat ground, select 1st gear.
- Page 17 In Brief 1-11 Ensure that all doors are closed Transmission See Automatic Transmission on and secured. page 9-8. Automatic transmission Position your seat for Manual transmission comfortable driving. Manual transmissions have six Adjust rear view mirrors. forward gears and a reverse gear. The shift pattern is shown on top of Fasten seat belts.
- Page 18 1-12 In Brief The vehicle may have an ignition Do not leave the switch in the ON lock/switch. position for a prolonged period, unless the engine is running, otherwise the vehicle battery will discharge. START: Turn the key to the START position momentarily and then release.
-
Page 19: Table Of Contents
Keys, Doors, and Windows Keys, Doors, and Keys and Locks Press then press and hold for remote vehicle start. See Windows Remote Vehicle Start on Keys page 2-7. Panic/vehicle locate button Keys and Locks Keys ......2-1 To locate the vehicle, press INFOCARD . - Page 20 Keys, Doors, and Windows Foldaway key blade If the vehicle's key is lost, inform a Features revert to the last setting Holden Dealer immediately so the used for each key. The vehicle keys have a foldaway vehicle can be reprogrammed and key blade.
-
Page 21: Infocard
If you are still having trouble, out of sight. contact a Holden Dealer. Metallic window tint reduces the If pressing the key buttons does range of the key. not work, the doors can be... -
Page 22: Remote Keyless Entry (Rke) System Operation
Keys, Doors, and Windows If a key is lost, a replacement can Remote Keyless Entry If the driver door is open when be ordered through any Holden (RKE) System Operation pressed, the passenger door locks, Dealer by quoting the key code... - Page 23 Keys, Doors, and Windows Keyless Unlocking/Locking from Pressing the lock/unlock button will Pressing will also unlock the the Driver Door cause all doors to lock if any of the fuel door. following occur: When the doors are locked and the The buttons on the keys are RKE transmitter is within 1 m of the It has been more than...
- Page 24 Keys, Doors, and Windows Unlocking, Starting” under Vehicle Any vehicle door has been To customise whether the doors To start the vehicle: Personalisation on page 5-30. opened and all doors are now automatically lock when exiting the closed. vehicle, see Remote Locking, Caution Unlocking, Starting under Vehicle Passive Locking...
-
Page 25: Remote Vehicle Start
Keys, Doors, and Windows See Starting the Engine on 2. Remove the battery cover by Other conditions can affect the page 9-7 prying it open with a finger. performance of the transmitter. See Remote Keyless Entry (RKE) Replace the transmitter battery as 3. -
Page 26: Door Locks
Keys, Doors, and Windows The engine coolant temperature The engine will continue to run for Cancelling a Remote Start is too high. 10 minutes. Repeat the steps to To cancel a remote start, do one of extend to 20 minutes. Remote start The oil pressure is low. - Page 27 Keys, Doors, and Windows From the inside: This will lock all doors and arm Danger (Continued) the alarm system. Push down on the door lock snib on the top of the door. To unlock, insert the key into the belts properly and the doors driver's door lock and turn it should be locked whenever Pulling the door handle unlocks...
- Page 28 Always remember to fully insert the Pull once to unlock, pull a key when locking and unlocking the A door is unlocked when the second time to open. doors. lock snib is up. If any problems occur, contact a Holden Dealer.
- Page 29 Danger (Continued) doors and the hard tonneau The vehicle may have a Genuine cover. Holden Accessory hard tonneau Do not place heavy objects on the cover. hard tonneau cover as this may Press on the key to unlock...
- Page 30 To close, push the tailgate to the Pull the lever to unlatch the upright position until it engages. 4. Lift to open. cover. If the hard tonneau cover key Push up the cover to open. is lost or damaged, contact a Holden Dealer.
-
Page 31: Door Open Reminder
Keys, Doors, and Windows 2-13 Automatic Door Locks Vehicle Security Warning The vehicle can be programmed to Vehicle Alarm System Do not operate the vehicle with lock all doors automatically when the tailgate in the open position the following are met: This vehicle has an anti-theft alarm as cargo may fall from the load All doors are closed. -
Page 32: Immobiliser Operation
2-14 Keys, Doors, and Windows The alarm automatically disarms. If the vehicle does not start and the security light stays on, there is a Immobiliser Operation problem with the system. Turn the vehicle off and try again. This vehicle has a passive If the RKE transmitter appears to be theft-deterrent system. -
Page 33: Exterior Mirrors
Keys, Doors, and Windows 2-15 Exterior Mirrors To adjust an exterior rear view Interior Mirrors mirror: Power Mirrors 1. Press the switch (2) to L or R. Manual Rear View Mirror 2. Press the switch (1) to adjust the mirror. Warning The passenger side mirror is convex shaped, to provide a... -
Page 34: Power Windows
2-16 Keys, Doors, and Windows Return the lever back to its original Windows position as soon as the glare has disappeared. Power Windows Sun visor mirrors Warning Take care when operating the power windows. Risk of injury, particularly to children. Keep a close watch on the windows when closing them. - Page 35 Keys, Doors, and Windows 2-17 Safety function on front Initialising the power windows windows If the windows cannot be closed automatically (e.g. after If the window glass encounters disconnecting the vehicle battery), a resistance above the middle of the warning message is displayed in the window during automatic closing, it Driver Information Centre.
- Page 36 2-18 Keys, Doors, and Windows NOTES...
- Page 37 Seats and Restraints Seats and Airbag System Head Restraints Airbag System ....3-7 Restraints Front Airbag System ..3-8 Warning Side Airbag System .
-
Page 38: Seats And
Seats and Restraints Front Seats Seat Position Warning To avoid reducing the effectiveness of seat belts, seatbacks should only be upright or at most semi-reclined when the vehicle is moving. Lift the head restraint up to To adjust horizontally, pull the raise it. -
Page 39: Power Seat Adjustment
Seats and Restraints Power Seat Adjustment Power Seat Adjustment Warning Do not adjust the driver's seat when the vehicle is moving as the seat could move suddenly causing the driver to lose control. The vehicle may have the following Forwards/Backwards Recline levers and switches for seat adjustment. - Page 40 Seats and Restraints Up/down Lumbar Tilt seatback Raise or lower the seat by pressing Adjust the lumbar support by Tilt the seatback forward by pulling the switch at the top or bottom. pressing the switch at the front the tilt latch lever. or rear.
-
Page 41: Seat Belts
Seats and Restraints Seat Belts Warning Warning (Continued) How to Wear Seat Belts Do not adjust the tilt latch lever Care should be taken to avoid while driving. contamination of the webbing with Properly polishes, oils and chemicals, and Ensure the tilt latch lever is particularly battery acid. -
Page 42: Three-Point Seat Belt
Seats and Restraints Three-Point Seat Belt 4. Give a gentle pull on the buckle The Emergency-locking Retractor to ensure full engagement. Belt allows you to move while the Fitting vehicle is travelling normally, but 5. Settle the belt at the hip. locks immediately on fast braking, 6. -
Page 43: Seat Belt Use During
Seats and Restraints Seat Belt Use During Replacing Seat Belt Airbag System Pregnancy System Parts after a Airbags and child restraints Crash Seat belts work for everyone, including pregnant women. Like all occupants, they are more likely to Warning be seriously injured if they do not It is essential to replace the entire wear a seat belt. -
Page 44: Front Airbag System
Seats and Restraints The airbag system consists of one Warning (Continued) Warning (Continued) airbag in the steering wheel, and one in the dashboard on the The child could be seriously Airbags inflate with great force. passenger side. These are identified injured if the airbag inflates, as If you are too close to an inflating by the word AIRBAG. -
Page 45: Side Airbag System
Seats and Restraints Airbags will inflate in certain severe Warning frontal or near frontal impacts. Airbags are not designed to inflate if Do not place any objects on or the vehicle is struck from the side, over the dashboard or between rear or, in rollovers. -
Page 46: Curtain Airbag System
3-10 Seats and Restraints Curtain Airbag System Warning Do not fit unauthorised seat covers as they may impair the deployment of the Side Impact Airbags (SIAB). Do not position your body or any object (including pillows) between front seats and doors. Do not lean on, or sleep against, the door. -
Page 47: What Will You See After An Airbag Inflates
Seats and Restraints 3-11 Switch off the fuel pump. Warning Switch on the hazard lamps. Do not position your body or any Switch on the interior lamp. object (including pillows) in the Unlock the doors. area in which the airbag inflates. Switch the ignition off and then on if There must be no objects in the restarting the engine is required. -
Page 48: Airbag System Check
The SRS may not function damaged. correctly in the event of an The headliner or trim panels are accident. See Airbag System on damaged. page 3-7. It is recommended that this work be carried out by a Holden Dealer or approved repairer. -
Page 49: Child Restraints
Seats and Restraints 3-13 The sash belt is centred on the Child Restraints Warning shoulder and chest. They are able to stay seated like Older Children Always move the passenger seat this for the entire trip. as far back as it will go before installing a child seat. -
Page 50: Child Restraint Systems
3-14 Seats and Restraints Warning Warning (Continued) Always move the passenger seat Holden strongly recommends that as far back as it will go before you refer to your specific State or installing a child seat. This Territory regulations to determine... -
Page 51: Where To Put The Restraint
Seats and Restraints 3-15 Child Restraint Warning Warning (Continued) Installation Locations Always follow the child restraint used for adult seat belts, Anchorage points manufacturer's fitting instructions harnesses, or for attaching other when installing a child restraint items or equipment to the vehicle. into the vehicle. - Page 52 If the child restraint anchor fitting is ever removed ensure that the bolt is securely tightened to 20 ± (Newton metres). Check with a Holden Dealer if unsure. If unsure about installing a child restraint anchor fitting, contact an approved restraint fitting station or Lift the head restraint up to 1.
- Page 53 Storage Storage Storage Cup holders Compartments Cup holders are designed for holding standard size soft drink Storage Compartments cans, small size bottles and cups Glove Box Glove Box ....4-1 with lids.Larger bottles may be Cup holders .
- Page 54 Storage The cupholders are located forward Sunglasses Storage Rear Storage of the centre console armrest. Seatback Pockets Front Storage The sunglasses holder is located in the roof and is designed to The storage pockets are on the rear accommodate one pair of of the front seats.
- Page 55 Storage Battery storage compartment Cabin storage compartments Net pocket The vehicle may have a net pocket. Storage compartments are Warning located at the rear of the cabin. The net pocket is located at the rear Store lightweight items such as Do not place any heavy, hard or of the cabin, for the storage of street directories, folders and...
- Page 56 Storage Centre Console Storage Additional Storage Features Tonneau Cover Soft tonneau cover The vehicle may have a soft tonneau cover. 2. Slide each bow through the tonneau bow support bracket. The front bow is longer than A storage area is located under the the rear bow.
- Page 57 Storage 3. To attach the front bar to the 5. Place the tonneau cover roughly 7. Position the other end of the tonneau cover, lay the tonneau in position over the tray with the front bar into the opposite slot cover out flat, with the inside attached bar towards the front of and lift upwards and rearwards.
- Page 58 Storage 8. The front edge of the cover has Removal: a magnetic strip. 1. Using the finger loops provided, Ensure it is seated down remove the cover by pulling the correctly. loops out and up. 2. From underneath the cover, remove the front bar on one side, by pushing it towards the front of the vehicle and...
- Page 59 Storage 6. Fold the other rear corner up. Fitting the tonneau cover with high loads 7. Fold and roll up the cover. 8. Place the folded cover, front bar and bows in the bag provided. 1. Remove the two bows if required.
- Page 60 Hard tonneau cover In certain conditions, small amounts of dust and/or water The vehicle may have a Genuine particles may enter the load area Holden Accessory hard tonneau via the hard tonneau cover. cover. Do not place heavy objects on the Danger...
- Page 61 Storage 5. To remove the gas struts from the upper ball pins, use a small flat-blade screwdriver to lever the clips open approximately 3 mm. 6. While holding the screwdriver and the clip in the open position, remove the gas strut from the ball pin.
- Page 62 4-10 Storage 10. Slide both hinge pins (2) Refitting of the hard tonneau: towards the passenger side of Two people are required to lift and the vehicle and remove. fit the tonneau cover onto the 11. Carefully lower the tonneau vehicle.
- Page 63 Do not place objects in front of The vehicle may have a Genuine cylinders are frequently the rear window or on the Holden Accessory sports bar. transported, that a purpose-built dashboard above the instrument carrying compartment be used. The sports bar is an appearance panel.
- Page 64 4-12 Storage Securing cargo Tie points Warning Do not operate the vehicle with the tailgate in the open position as cargo may fall from the load area and the number plate will be obscured from view. Use the six tie points (1) to secure cargo (three on either side of the load area).
- Page 65 Instruments and Controls Instruments and Airbag Readiness Light ..5-14 Lamps On Reminder ..5-19 Charging System Light ..5-14 Cruise Control Light ..5-20 Controls Malfunction Door open warning light .
- Page 66 Instruments and Controls Starting the Vehicle Messages ....5-29 Transmission Messages ..5-29 Vehicle Reminder Messages ....5-30 Washer Fluid Messages .
-
Page 67: Instruments And Controls
Instruments and Controls Instrument Panel Overview... - Page 68 Instruments and Controls 1. Vents. See Adjustable Air Vents 13. Lever for: 20. Climate control switches. See on page 8-6. Air Conditioning System on Turn and Lane-Change Signals page 8-1. 2. Glove Box on page 4-1. on page 6-3. 21. Electric Parking Brake on 3.
-
Page 69: Controls
Instruments and Controls Controls 3. To lock, move the lever up. Ensure the steering wheel is locked in position before driving. Steering Wheel Adjustment Steering Wheel Controls Warning Do not attempt to adjust the steering wheel while driving. The vehicle may have Forward collision alert and Lane departure warning. -
Page 70: Horn
Instruments and Controls RES/+ (Resume/Accel): Move the Horn Turn to select the next or thumbwheel up to resume to a previous favourite radio station, CD previously set speed or to track, DVD track/chapter, or MP3 accelerate. track. SET/ (Set/Coast): Move the Press SRC to change between thumbwheel down to set a speed audio sources. -
Page 71: Windscreen Wiper/Washer
Instruments and Controls Windscreen Wiper/ OFF: Off The intermittent wiper frequency is increased as vehicle Washer INT: Intermittent wipe speed increases. LO: Slow Rain sensing HI: Fast The vehicle may have rain sensing : Pull to wash the windscreen. windscreen wipers. The wipers will also cycle for a A sensor near the top centre of the short time. -
Page 72: Clock
Instruments and Controls The wiper speed and frequency are Caution (Continued) Warning (Continued) adjusted automatically. To manually adjust the sensitivity of blades are not replaced, the putting the occupants of the the rain sensing: wipers may continue to wipe even vehicle and other road users though most of the screen is dry. - Page 73 Instruments and Controls A power socket is located in front of the shift lever and inside the centre console.
-
Page 74: Warning Lights, Gauges, And Indicators
5-10 Instruments and Controls Warning Lights, Gauges, and Indicators Evoke, SV6, SS... - Page 75 Instruments and Controls 5-11...
-
Page 76: Instrument Cluster
5-12 Instruments and Controls Instrument Cluster Odometer Fuel Gauge The odometer shows how far the vehicle has been driven in kilometres. Trip Odometer The trip odometer can show how far the vehicle has been driven since the trip odometer was last reset. The trip odometer is accessed and reset through the Driver Information Centre (DIC). -
Page 77: Seat Belt Reminders
Instruments and Controls 5-13 is not removed during refuelling. If the indicator needle moves all the When the vehicle is started light This prevents false readings due to way to H (hot), the engine is too hot. flashes to remind drivers to fasten fuel movement when cornering. -
Page 78: Airbag Readiness Light
5-14 Instruments and Controls This cycle may continue several The airbag readiness light comes on The light should go out once the times if the passenger remains or for several seconds when the engine starts. If it stays on, becomes unbuckled while the vehicle is started. -
Page 79: Service Vehicle Soon
Instruments and Controls 5-15 To prevent more serious damage to Service Vehicle Soon Caution (Continued) the vehicle: Light Reduce vehicle speed. not be as good, and the engine If the light comes on, a might not run as smoothly. This Avoid hard accelerations. -
Page 80: Light
5-16 Instruments and Controls If necessary, contact your dealer. The parking brake warning light Warning should come on briefly when the Electric Parking Brake engine is started. If it does not come The brake system might not be Light on, have the vehicle serviced by working properly if the brake your dealer. -
Page 81: Lane Departure Warning
Instruments and Controls 5-17 If the ABS light stays on, turn the Lane Departure Warning The vehicle ahead light comes ignition off. If the light comes on (LDW) Light on green when a vehicle is detected while driving, stop as soon as it is ahead. -
Page 82: Electronic Stability Control (Esc) Indicator Light
Competitive Driving Mode (Redline). the system is turned on, contact a See Electronic Stability Control See Electronic Stability Control Holden dealer. (ESC) on page 9-18 for more (ESC) on page 9-18, Traction See Traction Control System (TCS) information. -
Page 83: Low Fuel Warning Light
Instruments and Controls 5-19 This light also comes on when the High-Beam On Light The oil pressure light fuel tank is low on fuel and flashes illuminates red when the ignition is The high-beam on light comes when very low on fuel. The low fuel switched on and goes out shortly light remains on until the fuel tank is on when the high-beam headlamps... -
Page 84: Cruise Control Light
5-20 Instruments and Controls Cruise Control Light Information Displays The cruise control light comes Driver Information on whenever the cruise control Centre (DIC) is set. The light goes out when the cruise The Driver Information Centre (DIC) control is turned off. See Cruise displays information about the Control on page 9-20 for more vehicle. - Page 85 Instruments and Controls 5-21 Trip/Fuel Menu Items Trip/Fuel Menu Items Trip Average Fuel Economy display is showing. On some models, this Press MENU on the turn signal lever Press MENU on the turn signal This display shows the current display is shown on the same page until Trip/Fuel Menu is displayed.
-
Page 86: Head-Up Display (Hud)
5-22 Instruments and Controls speed can be reset by pressing speed can be reset by pressing Battery Voltage ECO Menu Items SET/CLR while the Average Vehicle SET/CLR while the Average Vehicle This display, available on some Press MENU on the turn signal Speed display is showing. - Page 87 Instruments and Controls 5-23 Navigation (if fitted) To adjust the HUD image so that Warning (Continued) items are properly displayed: PRNDL (shift lever position) 1. Adjust the driver seat to a things you need to see when it is Posted Speed Limit comfortable position.
- Page 88 5-24 Instruments and Controls Page one displays: Page four displays: If You Cannot See the HUD Image When the Ignition Is On Is anything covering the HUD lens? Is the HUD dimmer setting bright enough? Is the HUD image adjusted to The display at the top of page four the proper height? Page two displays:...
-
Page 89: Vehicle Messages
Instruments and Controls 5-25 Vehicle Messages system starts reducing features of before you attempt to drive. See the vehicle that may be noticed. At Electric Parking Brake on page 9-14 DIC messages display when the the point that features are disabled, for more information. -
Page 90: Cruise Control Messages
5-26 Instruments and Controls pedal applied. See Electric Parking Engine Cooling System ENGINE OVERHEATED STOP Brake on page 9-14 for more ENGINE Messages information. This message displays and a A/C OFF DUE TO HIGH continuous chime sounds if the Cruise Control Messages ENGINE TEMP engine cooling system reaches unsafe temperatures for operation. -
Page 91: Engine Power Messages
Instruments and Controls 5-27 and do not operate it until the cause message stays on, the vehicle Replacement under Remote of the low oil pressure has been should be taken to your dealer for Keyless Entry (RKE) System corrected. Check the oil as soon as service as soon as possible. -
Page 92: Object Detection System
5-28 Instruments and Controls CHECK XXX INDICATOR LAMP SERVICE PARK ASSIST problem. See your dealer for service. The vehicle is safe to drive, When one of the turn signals is out, This message displays if there is a however, you do not have the this message displays to show problem with the Park Assist benefit of ESC, so reduce your... - Page 93 Instruments and Controls 5-29 SERVICE STEERING TURN STEERING WHEEL START SHIFT DENIED COLUMN LOCK VEHICLE AGAIN This message displays when This message displays if there is a This message displays when you try attempting to use the automatic problem with the steering column to start the vehicle, but the column transmission manual mode to shift lock system.
- Page 94 5-30 Instruments and Controls Vehicle Reminder Vehicle Entering the Personalisation Menus Messages Personalisation 1. Press CONFIG to access the ICE POSSIBLE DRIVE Configuration Settings menu or The infotainment system controls WITH CARE on vehicles with Navigation, are used to access the press HOME then touch Config This message displays when ice personalisation menus for...
- Page 95 Instruments and Controls 5-31 Personalisation by Driver Turn the TUNE/MENU switch to Comfort and Convenience Personalisation by Driver highlight the menu. Press the This allows the selection of the This allows the selection of the Selecting the Comfort and TUNE/MENU switch to select it. personalisation settings that are personalisation settings that are Convenience menu may display the...
- Page 96 5-32 Instruments and Controls Side Blind Zone Alert Exit Lighting Auto Door Unlock This allows selection of whether the This allows the selection of how This allows selection of which of the Side Blind Zone Alert is enabled or long the exterior lamps stay on doors will automatically unlock when disabled.
- Page 97 Instruments and Controls 5-33 Passive Door Lock Remote Door Unlock Press the TUNE/MENU switch when Passive Door Unlock is highlighted. Remote Left in Veh. Reminder This allows selection of which doors Turn the switch to select All Doors will unlock when pressing on the Remote Unlock Feedback or Driver Door.
- Page 98 5-34 Instruments and Controls Remote Left in Vehicle Reminder When on, a horn chirp will sound if the doors are closed with the ignition off and at least one transmitter has not been removed from the vehicle. Press TUNE/MENU when Remote Left in Veh.
- Page 99 Lighting Lighting Exterior Lighting (Park lamps): Turns on the park, tail and rear number plate lamps. Exterior Lamp Controls Exterior Lighting (Headlamps): Turns on the Exterior Lamp Controls ..6-1 headlamps and all park lamps. Headlamp High/Low-Beam (Fog lamps): Turns on the fog Changer .
-
Page 100: Daytime Running
Lighting To activate high beam: Daytime Running Lamps (DRL) With the headlamps on, push the lever toward the front of The vehicle may have DRL. vehicle until it clicks, then release. The DRL illuminate when the following occur: The high beam indicator lamp illuminates on the instrument During daylight conditions. -
Page 101: Hazard Warning Flashers
Lighting The automatic headlamp system not operating, these lamps turn off. Using hazard warning defaults to on with each ignition flashers while the vehicle is moving, Move the exterior lamp control to cycle. is illegal in some States and to disable this feature. Countries. -
Page 102: Fog Lamps
Lighting To signal a lane change, push Fog Lamps Interior Lighting the lever part way in the The vehicle may have fog lamps. direction of the turn. Instrument Panel In very heavy fog, vision may be The turn signals will flash three Illumination Control improved by having the park times (six times when a trailer is... -
Page 103: Dome Lamps
Lighting Switching the ignition on dims Dome Lamps Reading Lamps the lamp off immediately (unless a door remains open). Front reading lamps When the interior lamp is set to door activated, it operates automatically only when it is dark. The lamp switches off approximately 10 minutes after the ignition is turned off. -
Page 104: Lighting Features
Lighting Lighting Features Activation, deactivation and duration of lighting of this function can be changed. See Exterior Lighting by Entry Lighting Unlocking under Vehicle Personalisation on page 5-30. The headlamps, tail lamps, number plate lamps, reverse lamps, dome Battery Power Protection lamps and most of the interior lights turn on briefly when the Remote To prevent the battery from... - Page 105 Infotainment System Infotainment Navigation Introduction Using the Navigation System System ..... 7-40 General information Maps ......7-44 Do the following before driving: Navigation Symbols .
-
Page 106: Infotainment System
Infotainment System ® The Bluetooth word mark and Danger Warning logo are registered trademarks and are owned by the Bluetooth Taking your eyes off the road for Do not use a mobile phone when SIG, Inc. too long or too often while using driving. -
Page 107: Theft-Deterrent Feature
This electronically links the Limitation of liability The TMC service should not be infotainment system to the vehicle. Neither GM Holden nor the provider relied upon for journeys that are of the TMC will be liable to you or to Overview... - Page 108 Infotainment System Radio without Navigation 13. Source button 14. Eject button 1. Tone settings button 7. Disc slot (CD) 2. Favourites button 8. Seek next/forward button 3. Tune/menu switch 9. Configuration menu button 4. Back button 10. Phone/mute button 5. Play/pause button 11.
- Page 109 Infotainment System Radio with Navigation 13. Source button 14. Eject button Infotainment Control Buttons The buttons on the faceplate are used to start primary functions while using the infotainment system. The available buttons depend on the infotainment system fitted. SRCE (Source): Press to change the audio source to AM, FM, CD, USB, AUX, or Bluetooth Audio.
- Page 110 Infotainment System page 7-27, USB on page 7-31, page 7-27, USB on page 7-31, pressing Radio Settings, and then or Bluetooth Audio on or Bluetooth Audio on pressing Number of Favourite page 7-38. page 7-38. Pages. AM, FM: Press to seek to the AM, FM: Press to seek to the NAV (Navigation): previous strong station.
-
Page 111: Steering Wheel Controls
Infotainment System TUNE/MENU Switch: Steering Wheel Controls infotainment system. Press again to turn the sound on. Press to cancel Turn to change a radio station. voice recognition. See AM-FM Radio on page 7-14. (Thumbwheel Control): Press to select an audio source. Turn to highlight a feature within a menu. - Page 112 Infotainment System Voice recognition, activated through Fav: Press/touch to display a page displayed. The maximum the steering wheel controls, can be of stored (favourite) AM or FM number of buttons on Home used to control the infotainment stations. Keep pressing Fav to scroll Page 1 is eight.
- Page 113 Infotainment System Touch the Navigation screen button Touch the Phone screen button to to display a map of your current display the Phone main page. See vehicle position. See Using the Bluetooth on page 7-67 and Navigation System on page 7-40, Hands-Free Phone on page 7-74.
- Page 114 7-10 Infotainment System Touch the Tone screen button to display the Tone main page. Adjust the tone and speakers by pressing the screen buttons to change the levels of sound for treble, midrange, bass, fade, and balance. See AM-FM Radio on page 7-14. Touch the Pandora screen button to Touch the CD screen button to display the Pandora home page and...
-
Page 115: Operation
Infotainment System 7-11 microfibre cloth, use a soft bristle Touch the iPod screen button to brush to remove dirt that could display the iPod main page and play scratch the surface. Then use the the current or last track selected. microfibre cloth by gently rubbing to See Auxiliary Devices on page 7-38. - Page 116 7-12 Infotainment System Select or activate the highlighted Automatic Switch-Off 1. Rotate the TUNE/MENU switch menu option. to move the highlighted bar. If the infotainment system has been Confirm a set value. turned on after the ignition is turned 2. Press the TUNE/MENU switch to off, the system will turn off select the highlighted option.
- Page 117 Infotainment System 7-13 Setting a Value 1. Rotate the TUNE/MENU switch Press BACK to go back to the to highlight the function. Tone Settings menu. 2. Press the TUNE/MENU switch to Adjusting the EQ (Equaliser) turn the function on or off. For vehicles that have an equaliser: Audio Settings 1.
-
Page 118: Radio
7-14 Infotainment System 4. Select the number of available Maximum Startup Volume Radio favourite pages. The maximum volume played when the radio is first turned on can AM-FM Radio 5. Press BACK to go back to the be set. Radio Settings menu. Playing the Radio 1. - Page 119 Infotainment System 7-15 10 minutes. Opening the driver door To adjust the settings: Finding a Station will not turn the radio off when Press SRCE or SRC on the steering Bass: Touch + or to change Press SRCE or SRC on the steering pressing the power button.
- Page 120 7-16 Infotainment System steering wheel controls, or say To scroll through the pages, press Tune FM or FM through voice FAV or touch the Fav screen button 1. Touch the AM screen button on recognition. on the top bar. The current page the Home Page or select AM by number displays above the preset pressing SRCE or SRC on the...
-
Page 121: Radio Data System (Rds)
Infotainment System 7-17 In the AM or FM main page, audio screen. RDS can provide a touch one of the preset screen program type (PTY) for current The range for most AM stations is buttons to go to the selected programming and the name of the greater than for FM, especially at preset station. -
Page 122: Pandora Internet Radio
7-18 Infotainment System Quick Info gives access to quick A phone or tablet with Internet first-time use, set up stations before information on Audio playing and connection and the Pandora connecting to the vehicle. The Navigation. application installed is required. Pandora icon will be available on Personal mobile phone data plans the Home Page and the source... - Page 123 Infotainment System 7-19 ® Pandora will always be highlighted 2. Use one of the following to Using a Blackberry Phone on the Home Page when an launch: The phone must be unlocked. To ® ® ® iPhone , iPad , or iPod touch Launch the application on launch Pandora service: connected using the USB port.
- Page 124 7-20 Infotainment System the song. This helps Pandora Unlock the phone, close the app, choose which songs should play on then restart the app to ensure proper communication. this station. (Next Track): When touched, Pandora Menus Pandora changes to the next song. (Play/Pause): Press to pause playback.
- Page 125 Infotainment System 7-21 ® ® For iPhone , iPod touch Pandora Skip Limit Pandora Troubleshooting ® or iPad devices, check that the Pandora limits the number of skips Unable to Connect Device to USB cable is connected to the allowed on their service. When the Vehicle USB port and the screen is skip limit is reached,...
-
Page 126: Stitcher Internet Radio
7-22 Infotainment System Application needs to be If touching OK does not clear the Devices that allow multitasking may relaunched. issue on the phone, see "Please require an extra step to quit the Unlock Your Phone or Restart Pandora application. Close Pandora Connection between phone and Phone App and Try Again under on the device and launch again. - Page 127 Infotainment System 7-23 A phone or tablet with Internet vehicle. The Stitcher icon will be Stitcher will always be highlighted connection is required for this available on the Home Page and on the Home Page when an ® ® ® application.
- Page 128 7-24 Infotainment System 2. Use one of the following to Stitcher Menus Stitcher Station Categories: launch: Displays categories by topic. Select the application on When a category then sub-category the device. is selected, the radio will start playing the first program in that Select Stitcher on the sub-category.
- Page 129 Infotainment System 7-25 Switching Between Pandora and Unable to Start Stitcher (Thumbs Down): When Stitcher touched, Stitcher changes to the If the device is unable to launch next show. This helps Stitcher To switch between Pandora and Stitcher: provide a personalised listening Stitcher, select the application icon Check that the latest version of experience.
- Page 130 7-26 Infotainment System Loss of Audio If touching OK does not clear the No Stations Found: Logged in but issue, see Please unlock your no stations have been created. Loss of Stitcher audio can happen phone or restart phone app and try Touch OK to continue.
-
Page 131: Audio Players
Infotainment System 7-27 Audio Players To avoid damage to the CD player: Press to eject a disc from the CD player. If the disc is not removed Do not use scratched or within a short period of time, it is CD Player damaged discs. -
Page 132: Cd/Dvd Player
7-28 Infotainment System Press and hold to fast forward The air is very humid. Try the On the CD main page, the track through a track. Release the disc again later. number displays and the Song, button to return to playing Artist, and Album information There was a problem while speed. - Page 133 Infotainment System 7-29 Do not apply labels to discs. The Press to eject a disc from the : Use to move backwards from labels could get caught in the the current position. CD/DVD player. If the disc is not player. removed within a short period of (Play/Pause): Use to pause or Insert only one disc at a time.
-
Page 134: Mp3
7-30 Infotainment System There was a problem while Maximum number of folders: Press or touch Back to cancel the burning the disc. eight folders with 255 files per cursor control display. folder. The label is caught in the CD/ Keypad: Select to display the DVD player. -
Page 135: Usb
Infotainment System 7-31 that playlist. There might be a delay Genres: Touch to view the genres. File System and Naming before the list displays. Select a Select a genre to view a list of all The song titles, artists, albums, and song from the list to begin playback. - Page 136 7-32 Infotainment System ® Gracenote nicknames as voice commands to access music. See Voice Gracenote technology embedded Recognition on page 7-60. into the radio helps manage and Normalisation: If equipped, navigate the USB device music normalisation helps to improve the collection.
- Page 137 Infotainment System 7-33 2. Touch Radio Settings, then from the device, the system will music search will be available. The touch Gracenote Options. simply skip over those songs and radio will index and store two play the next available song. devices with up to 10,000 songs on 3.
- Page 138 7-34 Infotainment System The system attribute for previous track plays. If playing folders/files that contain audio longer than five seconds, the data must not be set. current track restarts. The radio supports plugging a To play a USB device, do one of the Press and hold to reverse mobile phone in as a USB drive as following:...
- Page 139 Infotainment System 7-35 2. The radio will show "Playlist 2. Select an artist name to view a 2. Songs are displayed in Creation Succeeded" and list of all songs by the artist. alphabetical order. To begin continue playing the playback, select a song from 3.
- Page 140 7-36 Infotainment System ® When connecting an iPod ® iPod Menu 2. The radio will show Playlist which firmware from other Creation Succeeded and providers is installed. continue playing the current song. ® To connect an iPod Delete Automatic Playlists: Touch 1.
- Page 141 Infotainment System 7-37 ® Albums: Songs: Playing from an iPhone ® or iPad 1. Touch to view the albums on 1. Touch to view a list of all songs ® ® the iPod on the iPod ® This feature supports iPhone ®...
-
Page 142: Auxiliary Devices
7-38 Infotainment System Some functionality may differ based Auxiliary Devices Connect a 3.5 mm cable from the on operating system version on auxiliary device to the auxiliary input This vehicle has an auxiliary input device. jack. When a device is connected, jack in the centre console. - Page 143 Infotainment System 7-39 ® ® To play music through a Bluetooth When a phone is connected to the When selecting Bluetooth audio as ® device: system through Bluetooth Audio a source, the infotainment system the phone notifications and sounds may display the Bluetooth Audio 1.
-
Page 144: Using The Navigation
7-40 Infotainment System ® ® ® For iPhone /iPod touch and iPad Navigation ® devices, Bluetooth Audio will not work if the device is connected Using the Navigation ® through the USB and Bluetooth System the same time. The vehicle may have a Navigation system. - Page 145 Infotainment System 7-41 The touch screen buttons Heading Indicator Map Modes available are: Touch Heading Indicator to display Touch to change the view of the the Map View. There are three maps while using the navigation Destination Entry indicator settings: function.
- Page 146 7-42 Infotainment System Traffic the left lower side of the map Not all roads are supported screen. See Configure Menu on with this information. page 7-54 in this section. Show POIs Nearby POIs Touch Traffic to display the Traffic Menu. Select the desired option. Options available are: Select to customise which major Select to display a search list of...
- Page 147 Infotainment System 7-43 the vehicle information tab on the Map Scales Scroll Features lower centre of the display. The location can be saved to the Address Book by touching Save in the split screen. Destination Position Info Touch to display a split screen showing detailed information about To scroll within the map, touch the destination.
-
Page 148: Maps
7-44 Infotainment System Detailed Areas Road network attributes are contained in the map database for detailed areas. Attributes include information such as street names, street addresses and turn Touch the cycling arrows located at The vehicle symbol indicates the restrictions. A detailed area includes the top of the map screen to toggle current position and heading all major highways, service roads... - Page 149 Infotainment System 7-45 The waypoint symbol marks one or Touch this screen symbol to change more set waypoints. to 3D mode. A waypoint is a stopover destination The 3D symbol is the same as the point added to the planned route. Heading up symbol, but the map is in 3D.
-
Page 150: Destination
7-46 Infotainment System Destination This symbol on the right of the map screen displays the speed limit while on a route. The speed limit Driving on a Highway may not always be accurate due to changes since the map data was created. - Page 151 Infotainment System 7-47 City/Suburb: Enter a city/suburb Alpha-Numeric Keyboard Address Entry Country: Enter a country name. name. Letters of the alphabet, symbols, Suburb/City: Enter a suburb Street: Enter a street name. punctuation and numbers, when or city. available, display on the Navigation House #: Enter a valid address Street: Enter a street name.
- Page 152 7-48 Infotainment System the entered information, then 3. Enter the POI name. displays it on the Destination 4. Select a few of the characters or Confirmation screen. spell the name in full, by using the alpha keyboard. 5. Touch the List screen button, or if the list has six or fewer items, a list of POIs will immediately display.
- Page 153 Infotainment System 7-49 Previous Destinations 2. Enter an address using any of 3. Touch the Start Guidance screen the destination methods button and the route calculates. (Address Entry, POI Entry, etc.). To edit Address Book entries: 3. On the Destination Confirmation 1.
- Page 154 7-50 Infotainment System Choose a destination based on 4. Touch the Start Guidance screen 6. Touch Back to save and exit. latitudinal and longitudinal button. The route calculates. Selecting a Favourite Route: coordinates. Favourite Routes 1. Touch the Home Page Destination screen button to display the Favourite Routes screen button.
- Page 155 Infotainment System 7-51 4. Touch Confirm to delete the If no home destination is entered, 2. Touch the Zoom in/out button on Favourite Route. save a destination by touching the the screen and touch the map to Home Page Destination screen locate the destination to select.
- Page 156 7-52 Infotainment System Call: Touch to initiate a phone call Fastest: This calculates the Use Time Restricted: Deselect to to the displayed phone number, quickest route. avoid time restricted roads. if phone capability is available. Shortest: This calculates the Use Car Train: Deselect to avoid Save as Home: Touch to save the shortest route.
- Page 157 Infotainment System 7-53 Destination List To delete a waypoint: 5. Touch Add. Up to three waypoints can be added 1. From the Destination menu, Instead of deleting individual to the current route. The waypoints touch Delete Waypoint. waypoints, select Delete All to can be sorted (moved) or deleted.
-
Page 158: Configure Menu
7-54 Infotainment System Avoid List Configure Menu Select Avoid List to display a list of avoided road segments with the option to remove the avoided items from the list. Voice Prompt Select Voice Prompt to view options to disable or manage navigation Voice Prompt voice prompts and traffic alert prompts. - Page 159 Infotainment System 7-55 Traffic Alert Prompts: Select to Alert if better route is available: turn the traffic voice prompt on or off Touch to prompt an alert if a better while travelling on a planned route. route is available. Navigation Volume: Select Sort Method: Touch to display a Navigation Volume to change the submenu of sort options.
- Page 160 7-56 Infotainment System Yellow indicates slightly impaired traffic flow with average speed between 40 and 73 km/h. Green indicates normal traffic flow with average speed above 73 km/h. Accident Road Closed Road Visibility Other Closed Roads, Incidents, Traffic Delays, Roadwork, Incidents, and Advisories Select the traffic event group for display on the map screen.
- Page 161 Infotainment System 7-57 Delete Saved Destinations Select either Manual or Automatic Station Selection mode to choose a radio station that broadcasts Traffic Message Channel (TMC) information. Guidance Alerts Select Display to enable bread crumbs on the map display. Select to delete all saved It is possible to record and store destinations.
-
Page 162: System (Gps)
7-58 Infotainment System Use Specified Location: Select to To exit from Simulation mode, return This system might not be available start the simulation from a specified to the Navigation Settings menu, or interference can occur if any of location. select Route Simulation, then select the following are true: Cancel Route Simulation. -
Page 163: Guidance
Infotainment System 7-59 The vehicle is approaching a tall The tyre pressure for the tyres is There is no route guidance when building or a large vehicle. incorrect. turning at an intersection. The surface streets run parallel This is the first Navigation use Plural names of places might be to a freeway. -
Page 164: Map Data Updates
7-60 Infotainment System sure the vehicle is parked in a Database Coverage Voice Recognition location that is safe and has a clear Explanations Voice recognition allows for view of the sky and away from large hands-free operation of the obstruction. Coverage areas vary with respect to infotainment system features. - Page 165 Infotainment System 7-61 When the command is showing the voice volume level Press twice on the steering recognised, the system will as it is being adjusted. This also wheel to skip the voice prompt either perform the function or changes the volume of the messages.
- Page 166 7-62 Infotainment System Help: The system plays back more parentheses. To use the voice say Dial. For example, say Call specific help commands such as commands, see the previous John at Home or Call John at Radio Settings for the user to instructions.
- Page 167 Infotainment System 7-63 Play CD: Instructs the system to composer. For example, say audiobook. For example, say play a CD. For example, say "Search Composer "Search audiobook Play CD. <composer name>. <audiobook name>. The following commands only apply Search Album (album name): Search Podcast (podcast name): to USB, iPod, and iPhone sources.
- Page 168 7-64 Infotainment System Go Back, Back, Previous: To activate the navigation voice example is to say, 191 Salmon Street, Port Melbourne Instructs the system to go back to a recognition: or Port Melbourne. prior menu. 1. Press on the steering Main Menu: Instructs the system to Directed Address: Allows an wheel.
-
Page 169: Settings
Infotainment System 7-65 pressing Destination from the Home Settings 2. Touch the scroll bar until the Page or DEST from the faceplate, desired option displays. Select The Configuration Menu is used to then selecting Point of Interest. POI the desired settings to change. adjust features and preferences, commands for Along Route and Languages... - Page 170 7-66 Infotainment System 12hr/24hr Format: Touch to select feature works best at lower volume Navigation Settings 12 hour or 24 hour time format. settings where background noise is See Configure Menu on page 7-54. typically louder than the sound Touch the Back screen button to system volume.
-
Page 171: Bluetooth Phone/Devices
Infotainment System 7-67 Park Assist Mode: Select to The Day setting brightens the Bluetooth Phone/ choose the default display as the map background. Devices rear-view camera, or the park assist The Night setting darkens the graphic, when selecting map background. reverse gear. - Page 172 7-68 Infotainment System ® phones. Available features and Voice Recognition Bluetooth Audio functions may be dependent on the See Bluetooth Audio on page 7-38. The voice recognition system uses device. commands to control the system Pairing with Infotainment ® and dial phone numbers. Bluetooth Controls Controls...
- Page 173 Infotainment System 7-69 phone changes or the mobile 5. Start the pairing process on the 8. Repeat to pair additional phone is deleted from the mobile phone to be paired to the phones. system. vehicle. See the mobile phone Listing All Paired and Connected manufacturer's user guide.
- Page 174 7-70 Infotainment System Connecting to a Different Phone Pairing a Phone 5. Repeat Steps 1 to 4 to pair additional phones. To connect to a different phone, the 1. Press . The system new phone must be in the vehicle Listing All Paired and Connected responds Please Say a and available to be connected to the...
- Page 175 Infotainment System 7-71 3. The system responds with: To Making a Call Using Phone The radio will display the first delete a device, please select its 1,000 contacts and the phone Book and Infotainment name from the list. Select the numbers for each contact including Controls device to delete on the display...
- Page 176 7-72 Infotainment System 4. Select the name or number Using the Infotainment Controls Call Waiting Using Steering to call. Wheel Controls Rotate TUNE/MENU to Answer or 5. Select Call. Decline and press TUNE/MENU or Call waiting must be supported on touch Accept or Decline on the the mobile phone and enabled by Making a Call Using the...
- Page 177 Infotainment System 7-73 the wireless service carrier to work. Muting a Call hold the button on the This feature is only supported when steering wheel. During a call, all sounds from inside the vehicle is not moving. the vehicle can be muted so that the To Transfer Audio to the To start a conference while in a person on the other end of the call...
-
Page 178: Hands-Free Phone
7-74 Infotainment System Hands-Free Phone Using the Dial or Call Using the Digit Dial Command Command This allows a phone number to be ® Using Bluetooth Voice To call a number: dialed by entering the digits one at Recognition a time. 1. - Page 179 Infotainment System 7-75 2. After the tone, say Re-dial. The system dials the last number called from the connected mobile phone. Once connected, the person called will be heard through the audio speakers. Clearing the System Unless information is deleted out of ®...
- Page 180 7-76 Infotainment System Text Messaging Using Text Messaging The infotainment system can display text messages, play back a message over the audio system, and send a predefined message reply. Not all phones support all functions and work with Bluetooth. 2. Select a message for viewing. The infotainment system only 1.
- Page 181 Infotainment System 7-77 Infotainment System 7-75 Replying to Text Messages Incoming Text Messages 3. View the message. The message A pop-up screen is displayed when view screen is not available while 1. Select the desired message there is an incoming text message. the vehicle is in motion.
- Page 182 7-78 Infotainment System 7-76 Infotainment System Text Messaging Settings Use the touch screen keyboard to enter the message. Touch Done to store. • To delete a predefined message, select the message and touch Yes to confirm. • Touch Text Alerts to choose the alert behaviour for incoming text messages: In the Text Message Inbox, touch...
- Page 183 Climate Controls Climate Controls Climate Control 2. Zone button 3. Windscreen demister button Systems 4. Face mode button Climate Control Systems Air Conditioning System 5. Fan speed knob Air Conditioning System ..8-1 The climate control panel is located 6.
- Page 184 Climate Controls Turning the temperature control Enter Dual-Zone mode by adjusting Leave the system in automatic knob clockwise past 30°C, will the passenger side temperature operation to: show HI (hottest). control knob when in Turn the air conditioning on Single-Zone mode. Turning the temperature control and off.
- Page 185 Climate Controls Floor and windscreen demist The AUTO icons on the (blend) mode directs air infotainment display are not When manually adjusting the displayed when the system is between the windscreen and fan speed, the system will operating manually. floor vents, some to the outer revert to semi-automatic dashboard vents and side operation.
- Page 186 Climate Controls Switch the air conditioning on Windscreen demister for at least 5 to 10 minutes Recirculation reuses interior Press to demist the once every 2 weeks to air so is not recommended windscreen and front passenger lubricate the system, even in for long periods of time.
- Page 187 Climate Controls When the system is off, only the Ensure in both cases that all Automatic transmission rear window demister and windows are closed. If the vehicle is stopped for a long recirculation mode can be used. Do not use recirculation for long time in hot weather with the engine periods of time.
- Page 188 Climate Controls The outside temperature sensor Air Vents is located in front of the radiator and relies on air moving Adjustable Air Vents across it. It can be affected by radiant heat when the vehicle is stationary. To prevent false temperature readings, the displayed temperature will not update at low vehicle speeds.
- Page 189 Pollen/dust filter A passenger compartment air filter may be fitted to filter contaminants such as pollen and dust from entering the vehicle. This can be fitted by a Holden Dealer. See the Service and Warranty Booklet for the maintenance schedule.
- Page 190 Climate Controls NOTES...
- Page 191 Driving and Operating Driving and Brakes Side Blind Zone Alert (SBZA) ....9-28 Antilock Brake Operating Rear Vision System (ABS) ....9-13 Camera (RVC) .
-
Page 192: Driving And Operating
Driving and Operating Drivers must always obey locally Driving Information Starting and posted speed limits. Operating Avoid making hard stops for the Driving Environment first 350 km to avoid premature New vehicle running-in wear and early replacement of Before entering the vehicle brakes. - Page 193 Adjust your driving Have the steering repaired as soon Warning to the road conditions: as possible by a Holden Dealer. Reduce speeds during wet Portable gas cylinders can leak, Mobile phones and CB radios conditions.
-
Page 194: Ignition Positions
Driving and Operating Crossing deep water can damage The engine is automatically disabled Warning (Continued) the engine: shortly after removing the key from the ignition. Avoid crossing water deeper Never remove the key while the than 175 mm. The steering wheel is automatically vehicle is moving, as this will lock locked when the key is removed. - Page 195 START position. If the strong radio antenna signal causing security warning light flashes, interference to the keyless access contact a Holden Dealer. system. See Remote Keyless Entry (RKE) System Operation on Warning page 2-4 for more information.
- Page 196 Driving and Operating The ignition will turn off, and and a DIC message will be 4. Shift to P (Park) and press the Retained Accessory Power (RAP) displayed. Turn the steering wheel ENGINE START/STOP button will remain active. See Retained to the left or right while attempting to once to turn the engine off.
-
Page 197: Starting The Engine
Driving and Operating ON/RUN/START (Green Indicator driven. The engine will not start in START/STOP button once and Light): This mode is for driving and Service Only Mode. Push the button release when engine cranking starting. With the ignition off, and again to turn the vehicle off. -
Page 198: Parking
Driving and Operating Once the ignition is turned off, the The engine fan may keep Automatic RAP allows the power windows to going for several minutes after the Transmission continue to operate for up to ignition has been turned off. This is 10 minutes. -
Page 199: Shift Lever
Driving and Operating Shift Lever Caution (Continued) Warning (Continued) Do not press the accelerator Do not coast the vehicle in pedal with the brakes on in any position N this decreases your gear except position P or N. This control and ability to accelerate will overheat the transmission. - Page 200 9-10 Driving and Operating If the road levels out and/or the In addition, the transmission can accelerator is pressed, the sense enthusiastic driving, at which It is recommended that cruise transmission will shift until the point it may delay upshifting and control in normal shift mode be appropriate gear is reached.
- Page 201 Driving and Operating 9-11 Normal shift mode To enable A/S mode: Normal shift mode is recommended 1. Move the shift lever to The transmission will shift to a for normal or freeway driving, as it position D. selected gear only if the engine provides optimum fuel economy.
-
Page 202: Manual Transmission
9-12 Driving and Operating To disable A/S mode and return to Manual Transmission Shift pattern normal shift mode, push the shift lever to the right, to position D (on the bottom of the display, D is displayed). To disable A/S mode and return to Sport shift mode, hold the shift lever in the + position for more than 1 second (on the bottom of the... -
Page 203: Antilock Brake
Driving and Operating 9-13 For vehicles fitted with a manual V6 and V8 engines equipped with Brakes transmission; when on level manual transmissions have six roads, in an unladen condition, it forward gears and a reverse gear, Antilock Brake is permissible to drive off in 2nd shown on top of the shift lever. -
Page 204: Electric Parking Brake
The electric parking brake (EPB) throughout the braking process, If the vehicle is travelling above ABS assistance. Have a Holden switch is located between the front without pumping it. 50 km/h and ABS braking occurs, Dealer check the system as soon seats. -
Page 205: Brake Assist
Driving and Operating 9-15 Applying the Parking Brake decelerate as long as the switch is Warning held in the up position. Releasing The EPB can be applied any time the EPB switch during the the vehicle is stopped. The EPB is Driving while is on may cause deceleration will release the parking... -
Page 206: Ride Control Systems Traction Control
9-16 Driving and Operating brake pedal in an attempt to quickly Ride Control Systems Warning (Continued) stop or slow down the vehicle. The stability system hydraulic brake Traction Control conditions. Always maintain an control module increases brake adequate distance to the vehicle System (TCS) pressure at each corner of the in front of you. - Page 207 Driving and Operating 9-17 control may be re-engaged when Caution (Continued) road conditions allow. See Cruise Control on page 9-20. warning lights and the SERVICE When the light is on solid, the ESC and/or SERVICE system will not limit wheel spin. TRACTION CONTROL messages Adjust your driving accordingly.
-
Page 208: Electronic Stability
9-18 Driving and Operating Electronic Stability and does not mean there is a vehicle directional control, problem with the vehicle. The especially in slippery road Control (ESC) system should initialise before the conditions, the system should vehicle reaches 40 km/h. always be left on. -
Page 209: Competitive Driving Mode
Driving and Operating 9-19 To disable both traction control and restarting the vehicle, see your engine and brake systems are ESC, press and hold the button for dealer for service. See Ride Control advised to turn the normal TCS and 5 seconds. -
Page 210: Cruise Control
9-20 Driving and Operating to account for the available engine Launch Control is only available Cruise Control power. See Launch Control later in when the following criteria are met: this section. Competitive Driving Mode is selected. light is on when the vehicle is in the Competitive Driving Mode. - Page 211 Driving and Operating 9-21 3. When travelling at the desired Warning Warning (Continued) speed, rotate the wheel down to SET/-. Do not use the cruise control When climbing steep hills The current speed is stored and when road or driving conditions (particularly when towing), the maintained.
-
Page 212: Forward Collision Alert (Fca)
9-22 Driving and Operating The shift lever is placed in N. increments.Alternatively, accelerate Object Detection to the desired speed and store by Traction Control (TC) or Systems rotating to RES/+. Electronic Stability Control (ESC) is operating. Deactivation Forward Collision Alert Resuming a stored speed Press (FCA) System... - Page 213 Driving and Operating 9-23 The green vehicle ahead indicator Warning Warning (Continued) will appear when a vehicle is detected ahead. Whenever this FCA is a warning system and proper condition. Keep the indicator does not appear, FCA will does not apply the brakes. When windscreen, headlamps, and FCA not respond.
- Page 214 9-24 Driving and Operating Selecting the Gap Setting Consider traffic and weather Cleaning the System conditions when selecting the alert If the FCA system does not seem to timing. The range of selectable alert operate properly, clean the outside timing may not be appropriate for all of the windscreen area in front of drivers and driving conditions.
- Page 215 Driving and Operating 9-25 Warning (Continued) Caution is only an aid and is neither Sensors are not working when: intended to, nor able to take over A confirmation tone does not any responsibility. sound. The park sensors may not be Park Assist Fault appears able to detect all objects under on the DIC.
- Page 216 9-26 Driving and Operating • • • At a distance of about 30 cm, When reverse is selected the Front sensor detection occurs At a distance of about 30 cm, If an object enters the range, the the warning tone sounds animation is displayed on when PA is turned on by pressing the warning tone sounds...
- Page 217 Flashes when the button is the tone will sound from the front pressed. speaker. Contact a Holden Dealer. The PA: Objects attached to the vehicle Automatically deactivates when the vehicle's speed exceeds When any device is attached to the 15 km/h.
-
Page 218: Side Blind Zone
3.5 m. This adjustment is for Holden vehicle damage. Before making a This zone starts at each side mirror approved tow bars fitted by a and goes back approximately 5 m. - Page 219 Driving and Operating 9-29 The height of the zone is When the vehicle is started, both system does not need to be approximately between 0.5 m and outside mirror SBZA displays will serviced. The system may light up 2 m off the ground. briefly come on to indicate the due to guardrails, signs, trees, system is operating.
-
Page 220: Rear Vision
Contact a There is a blind spot that cannot The area displayed depends on Holden Dealer. be sensed by the rear view the road condition and vehicle camera. Always keep the camera lens free orientation. - Page 221 Driving and Operating 9-31 Cleaning 9. Select reverse gear. Warning Do not use abrasive cleaners or scouring pads as they could scratch the lens, impairing the systems performance. Operation 1. Turn the ignition on. 2. Press VOL to turn the infotainment system on.
-
Page 222: Lane Departure
If the vehicle sustains any appear to be different distances damage in the area of the from the vehicle. camera lens. Contact a Holden Danger Dealer. The RVC display will override all The LDW system is an aid to help other operating displays. - Page 223 Driving and Operating 9-33 When the vehicle crosses a To turn LDW on and off, press the Danger (Continued) detected lane marking, the LDW button on the steering wheel. The indicator will flash and three beeps control indicator will light when LDW Detect lane markings under will sound.
- Page 224 9-34 Driving and Operating When the System Does Not LDW Messages Warning (Continued) Seem To Work Properly FRONT CAMERA BLOCKED, CLEAN WINDSCREEN: This windscreen is damaged. It may does not appear: message may appear because the also not detect a lane on winding The lane markings on the road front camera is blocked and cannot or hilly roads, or in conditions that...
-
Page 225: Driver Assistance Systems
Driving and Operating 9-35 Suitable parking space Press and hold for 2 seconds to Driver Assistance required, the direction of vehicle 1. With the vehicle in D (Drive) or a dimensions are: initiate a perpendicular parking movement and steering control forward gear, press to initiate Systems... - Page 226 9-36 Driving and Operating The APA searches for a suitable 2. Drive forwards at less than The APA will automatically Warning (Continued) parking space on the left side of 30 km/h, at a distance of 0.5 m control the steering and display the vehicle.
- Page 227 MONOXIDE POISONING 8 km/h, the APA system will to the vehicle. between two objects. cancel. Exhaust gases can contain If Genuine Holden Accessory • Drive parallel and straight for carbon monoxide, a dangerous The APA system will only wheels are fitted, the APA best results.
- Page 228 Take the vehicle to a Holden additive is known to cause Do not smoke or allow open Dealer if you think the vehicle contamination of catalytic...
-
Page 229: Recommended Fuel
Fuel Quality Standards E85 and unleaded petrol. Warranty to the extent that Act 2000, Fuel Standard (Ethanol Holden considers that the fuel The use of any fuel, other than E85) Determination 2012. Filling the affects the specifications and... -
Page 230: Filling The Tank
Always fill the fuel tank at the Warning (Continued) availability, visit: intermediate or fast fill rate. Do not www.holden.com.au add any more fuel after the fuel filler container at all times while filling, first clicks off or fuel blows back. -
Page 231: Trailer Towing
For recommended and mandatory tethered to the vehicle. towing equipment, see Towing and loading equipment later in this section. A Holden Dealer will assist with supply and installation of towing equipment. - Page 232 New Vehicle Voluntary Warranty, to equipment which should be used. affects the specifications or the extent that Holden considers the overloading or missing equipment to Holden will not accept liability for quality of your Holden vehicle. have affected the specifications or...
- Page 233 Ensure the weight of the packed Shift Lever on page 9-9. trailer is not greater than the towing capacity of the Holden approved Trailer recommendations tow bar package fitted to the vehicle. The tow ball load should be between 5% and 10% of the loaded trailer weight.
- Page 234 9-44 Driving and Operating *Electric brake controller Towing and loading equipment provision is provided in the Holden Recommended Genuine Accessory Trailer Wiring Tow load Mandatory equipment equipment Harness. Holden recommend that only this provision is used when Up to 750 kg Holden 1,600 kg rated tow bar using an electric brake controller.
- Page 235 Driving and Operating 9-45 Have the vehicle and trailer Do not use axle-mounted Warning correctly maintained and hitches. serviced, with particular attention Ensure that the tow bar does not At no time may the total front or given to the brakes, tyres, obscure the rear number plate.
-
Page 236: Trailer Sway
9-46 Driving and Operating Trailer brakes Running-in when towing Trailer Sway Conversions and • Trailer brakes are mandatory on Control (TSC) It is recommended that a new Add-Ons trailers with an aggregate trailer vehicle be driven for at least If the system detects trailer sway mass (ATM) of more than 750 kg. - Page 237 If a roo bar is to be fitted, it is critical injury to a pedestrian in the event of that the Holden approved roo bar be a collision. used. Other types must not be fitted.
- Page 238 9-48 Driving and Operating NOTES...
-
Page 239: Emission Control System
Electrical System General Information Fuses ..... . 10-25 Where specified, use only Holden Vehicle Tools genuine parts and accessories. General Information Tools . - Page 240 It is recommended that servicing be mixture control system. carried out by an authorised Holden Wheel alignment Dealer who will maintain the It is recommended that service and Maintain correct front and rear...
-
Page 241: Vehicle Checks
Vehicle Care 10-3 Accelerating, driving and braking Vehicle Checks Accelerate gently and avoid rapid starts. Bonnet Drive the vehicle at steady speeds Opening where possible (after running-in). Manual transmission: It is desirable to reach top gear as soon as possible, but do not force the engine to labour in top gear. - Page 242 10-4 Vehicle Care Lower the bonnet and allow it to Engine Compartment Overview drop into the catch. Check that the bonnet is engaged. Warning If while driving you notice that the bonnet has not been properly closed, pull the vehicle over to the side of the road at the earliest possible moment and close the bonnet correctly.
-
Page 243: Engine Cover
Vehicle Care 10-5 Engine Cover Warning Do not place hands on any under bonnet components when the engine is HOT or RUNNING. Before removing the engine cover, allow the engine to cool sufficiently. Removal Remove the engine cover to access the radiator cap (V6 engine). -
Page 244: Engine Oil
10-6 Vehicle Care Engine Oil 4. Remove and read the oil level. The level should be between the Checking oil level lower and upper area/marks. Add oil if the level is at or below The engine must be at operating the lower area/mark. -
Page 245: Engine Coolant
Their use increases costs, may be detrimental to the operation of the vehicle and may void the New Vehicle Voluntary Warranty, to the extent that Holden 1. Rotate the engine oil filler cap considers the non-recommended anticlockwise and remove. - Page 246 10-8 Vehicle Care Engine coolant level Check the coolant level at least once a week. The cap is yellow with the word DEXCOOL. Checking coolant level Warning Do not remove the radiator cap if the engine and radiator are still hot.
-
Page 247: Engine Overheating
Lubricants on page 11-2. Always Dealer. use the specified ratio. How the engine coolant works If the engine overheats or loses 1. Mix a solution of Holden coolant coolant, see Engine Overheating on The coolant contains special and clean fresh water. page 10-9. - Page 248 10-10 Vehicle Care 2. Ensure that the shift lever is in P Caution (Continued) Danger or neutral and apply the park brake. The engine temperature Do not open the bonnet if you can 3. Exit the vehicle and audibly gauge needle moving over to see or hear steam or coolant check that the cooling fan is the H.
- Page 249 Vehicle Care 10-11 4. If you do not find anything wrong, check the engine coolant level. See Engine Coolant on page 10-7. 5. DO NOT run the engine until any problems have been corrected. Low coolant level Danger Do not remove the radiator cap if the engine and radiator are still hot.
- Page 250 10-12 Vehicle Care Danger Do not remove the radiator cap if the engine and radiator are still hot. Scalding fluid and steam can be blown out under pressure which could cause serious burns. Remove the engine cover if required. See Engine Cover on page 10-5.
- Page 251 Check the coolant reservoir level for cap opening until full. the next two days. Wait 30 seconds and top up if If the coolant requires regular the level drops. topping up, contact a Holden 9. Replace the radiator cap. Dealer. 10. Turn the ignition off.
-
Page 252: Washer Fluid
1. Use the correct amount of recommended brake fluid may washer fluid additive. Refer to a cause corrosion to components of Holden Dealer. the braking system and reduced Do not use ordinary soap or braking performance. detergent as they froth up and (Continued) damage the wiper rubbers. - Page 253 5. Secure the cap and clean up 4. Top up with heavy duty brake any spilt fluid. fluid. If the brake fluid requires regular topping up, contact a Holden Dealer Warning immediately. Clutch/brake fluid Using brake fluid other than GM...
-
Page 254: Battery
10-16 Vehicle Care If the clutch/brake fluid requires Warning (Continued) Warning (Continued) regular topping up, contact a Holden Dealer immediately. Take care with all metal objects The battery vent tube must be and tools including items you may installed correctly to ensure the... -
Page 255: Bulb Replacement
Keys on page 2-1. Clean stained bulbs with methylated spirits. For emergency starting when the battery is flat, see Jump Starting on Bulbs to be changed by a Holden page 10-55. Dealer Fog lamps Instrument panel lamps Side indicator lamps... -
Page 256: Headlamps
10-18 Vehicle Care Headlamps 4. Drain the filler neck before 4. Disconnect the air flow meter pulling out. connector (1) (V8 only). Front lamp access Place a clean rag over the Front lamp assembly opening of the coolant reservoir. 1. Open the bonnet. 2. - Page 257 Vehicle Care 10-19 3. Pull to remove the wiring harness connector from the rear of the bulb. 4. Press and unclip the bulb spring retainer and pivot clear of the bulb. Check the orientation of the bulb tang for replacement. 2.
- Page 258 10-20 Vehicle Care 7. Refit the bulb spring retainer into 3. Remove the wiring harness 6. Install the wiring harness its original position. connector by squeezing the two connector and dust cap. tangs on the harness connector 8. Install the wiring harness 7.
-
Page 259: Front Turn Signal Lamps
Vehicle Care 10-21 3. Remove the park lamp bulb by pulling it straight out of the holder. 4. Insert the new bulb into the holder. 5. Install the holder by rotating clockwise. 6. Install components removed in Step 1. 7. Check lamp operation. 2. -
Page 260: Tail Lamps
10-22 Vehicle Care 9. Refit the wheel arch liner and Taillamp access stow the torx tool. Tail lamps Taillamp assembly Driver side shown 1. Reverse lamp (P21W bulb) 2. Brake/taillamp (P21/5W bulb) 3. Turn signal lamp (PY21W amber bulb) 4. Rear lamp wiring connector... - Page 261 Vehicle Care 10-23 To gain access to the rear turn 4. From the rear of the lamp 3. Install the new bulb by pushing it signal, stop/tail and reverse bulbs: disconnect the wiring connector. into the holder and rotating it clockwise.
-
Page 262: Number Plate Lamp
10-24 Vehicle Care Number Plate Lamp 5. Push the new bulb into the bulb holder. (W5W bulb) 6. Install the bulb holder into the lamp by rotating the bulb holder clockwise. 7. Insert the right hand side of the lamp into the opening and pivot the lamp upwards into position. - Page 263 Vehicle Care 10-25 Glove box lamp Electrical System Colour Rating (amps) (5W bulb) Brown Fuses Blue Warning Yellow Turn off the ignition and any electrical equipment before Natural changing a fuse. Green Replace the fuse cover securely A fuse puller is provided in the rear after use.
- Page 264 10-26 Vehicle Care Fuses and relays Warning (Continued) Rear fuse panel Any improper alterations to the electrical system may cause a fire hazard and engine damage. To maintain your own safety and that of the vehicle, have any work involving the electrical system or the replacement of high current fuses or relays carried out by a Dealer.
- Page 265 Vehicle Care 10-27 Fuse and relay index The vehicle may not be equipped with all of the fuses, relays and features shown. Fuses DRIVER FRONT / LH REAR WINDOW EMER / VEH / ACCY TRUNK RELEASE PASSIVE ENTRY PASSIVE START-BATT 2 RADIO FUEL SYSTEM CONTROL...
- Page 266 10-28 Vehicle Care AUXILIARY PASSENGER BATTERY BATTERY FRONT / RH VOLTAGE REAR WINDOW SENSING ELECTRIC PARK TAILGATE MOTOR 30A BRAKE REAR REAR SEAT ACCESSORY TAILGATE ENTERTAINMENT MODULE POWER OUTLET AUTOMATIC CAMERA IGN INTERIOR HEADLAMP ACCESSORY LEVELLING FRT VENT POWER OUTLET SEAT IGN FRT / LTR TRAILER...
- Page 267 Vehicle Care 10-29 Removing fuse panel cover LOGISTICS MODE Insert a screwdriver in the slot indicated and lever off the fuse panel cover. Refitting fuse panel cover CHILD LOCKS 1. Insert the rear edge of the fuse panel cover under the door seal. Relays R1, R2, R3 and R5 2.
- Page 268 10-30 Vehicle Care Cabin fuse and relay index The vehicle may not be equipped with all of the fuses, relays and features shown. Fuses BODY CONTROL MODULE 1 DIAGNOSTIC CONNECTOR LPG SHUT-OFF SOLENOID BODY CONTROL MODULE 2 IGNITION SWITCH 2A ELECTRIC STEERING CONTROL LOCK...
- Page 269 Vehicle Care 10-31 Engine compartment fuse panel AIRBAG / AOS BODY CONTROL MODULE 8 INSTRUMENT CLUSTER BLOWER FAN HVAC CONTROL ACCESSORIES MODULE BODY CONTROL RAIN SENSOR MODULE 7 BODY CONTROL Relays MODULE LOGISTICS LPG SHUT-OFF LPG SHUT-OFF SOLENOID SOLENOID LPG SHUT-OFF SWC BKLT Remove the clip-on cover on the SOLENOID...
- Page 270 10-32 Vehicle Care Engine compartment fuse and relay index The vehicle may not be equipped with all of the fuses, relays and features shown. HEATED MIRRORS REAR DEMISTER SPOT LAMP RH DRIVER POWER SEAT WASHER PUMP PASSENGER POWER SEAT EMER / VEH / FT / LP DRIVING LAMPS HEADLAMP...
- Page 271 Vehicle Care 10-33 ELECTRIC SPOT LAMP LH ECM-V8, INJ-V6 / POWER EMIS 1 ABS PUMP STEERING ABS VALVES STARTER MOTOR 30A FOG LAMPS LH HID IGNITION-IP HEATED FRONT HEADLAMP / BODY SEATS RH HID FUEL SYSTEM HEADLAMP CONTROL LH & RH HI BEAM MODULE HEADLAMP FRONT...
-
Page 272: Vehicle Tools
10-34 Vehicle Care Vehicle Tools BRAKE REAR WIPER CONTROL VACUUM PUMP FOG LAMPS Tools LOW BEAM HEADLAMPS CONDITIONING The jack and tools are located HIGH BEAM HEADLAMPS CLUTCH behind the driver seat. STARTER VAPORISER Headlamp tool CONTROL RUN / CRANK MODULE BRAKE VACUUM PUMP Relays... -
Page 273: Wheels And Tyres
Vehicle Care 10-35 This tool is stored with the Wheels and Tyres emergency tyre sealant and air compressor kit or with the jack and Tyre Pressure wheel wrench package. Keep the tyres at the recommended Spare wheel pressures to avoid increased fuel The vehicle may have a spare consumption, uneven and wheel located beneath the... - Page 274 10-36 Vehicle Care Check pressures when the The front tyre pressures are shown between the minimum and vehicle has been stationary for in the left column and the rear tyre maximum pressures given on over 3 hours. If tyre pressures pressures are shown in the right the tyre placard.
-
Page 275: Tread Depth
Vehicle Care 10-37 The tread or sidewall is cut, split, Tread Depth Tyre Rotation or cracked deep enough to It is recommended that you: expose the cord or fabric. Rotate tyres approximately every The tyre has a bump or bulge in year or 15,000 km, whichever it, indicating some kind of occurs first. -
Page 276: Buying New Tyres
Tyre condition is checked when the cannot be rotated. Warning vehicle is serviced by a Holden Dealer. They are able to diagnose Tyres with a lower speed or load Buying New Tyres any unusual signs of wear. If tyres... -
Page 277: Tyre Sealant And Compressor Kit
See Tyre Pressure evenly. the rear wheels. on page 10-35. Take the vehicle to a Holden Dealer Remove valve extensions that Whenever tyre chains are fitted, to have the tyre repaired or replaced contact parts of the chain. - Page 278 4. Remove the 12 volt power Replacement tyre sealant canisters connection (6) from the kit. are available from a Holden Dealer. Do not connect to the power socket yet. Temporary puncture repair 5. Unscrew the tyre valve cap anticlockwise and remove.
- Page 279 Contact a Holden Dealer. The pressure gauge (2) reads connection between the tyre slightly high while the valve and the sealant-air compressor is on.
- Page 280 Warning 24. Dispose of the used tyre 20. Drive the vehicle immediately sealant canister at a Holden for at least 8 km to distribute Always stow the tyre sealant and Dealer or in accordance with the sealant evenly within...
- Page 281 10-43 This is a temporary puncture repair. 4. Plug the 12 volt power Warning Take the vehicle to a Holden Dealer connection (6) into the vehicles to have the tyre repaired or replaced power socket. See Power Do not over inflate tyres due to as soon as possible.
- Page 282 11. Disconnect the 12 volt power connection (6) and the air-only 6. Dispose of the tyre sealant delivery hose (4). canister at a Holden Dealer or in accordance with local or State 12. Replace the tyre valve cap. codes and practices.
-
Page 283: Tyre Changing
Vehicle Care 10-45 4. Push the air-only delivery Warning (Continued) Warning (Continued) hose (4) onto the tyre sealant canister (3) inlet. If using a jack (or hoist) other was fully inflated when the vehicle 5. Push the lever (7) down. than the jack supplied with the was new, it can lose air over time. - Page 284 10-46 Vehicle Care 2. Apply the park brake. 3. Switch the hazard warning flashers on. 4. Turn the ignition off and remove the key from the vehicle. 5. Place manual transmissions in reverse gear and automatic transmissions in P. 7. To access the jack and tools, 9.
- Page 285 Vehicle Care 10-47 4. Wind the jack handle/extension Caution bar anticlockwise until it stops. Ensure that the wheel wrench is fully unfolded. Spare wheel access 3. Attach the hook end of the jack handle to the extension bar. 5. Ensure the spare wheel carrier is completely wound down and that the securing cable indicated, has free play.
- Page 286 10-48 Vehicle Care 7. From behind the vehicle, grasp 8. Hold the spare wheel up on an 9. Thread the end of the securing the spare wheel and pull it out angle, while with the other hand, cable through the centre of the towards the rear.
- Page 287 Vehicle Care 10-49 Jacking procedure 2. Wind the jack up by hand until it engages with the jacking point. Ensure that the jack is not tilted and the base is resting squarely on the ground. Warning Failure to position the jack as described could cause the vehicle to slip off the jack.
- Page 288 10-50 Vehicle Care 4. Grasp the hooked fold out 6. Turn the handle clockwise as Caution section with one hand. indicated. 5. With the other hand, turn the 7. Repeat the previous two steps Ensure that the wheel wrench is handle 180 degrees as until the bottom of the flat tyre is fully extended.
- Page 289 Vehicle Care 10-51 Ensure the centre cap is Incorrect tightening of the Wheel storage assembled along with the wheel wheel nuts can lead to brake nuts, if secured by them. pulsation and disc rotor damage. Tighten the wheel nuts in the proper 12.
- Page 290 10-52 Vehicle Care Warning Do not get under the vehicle. Do not drag the face of the wheel across the ground. 6. Insert the extension bar into the spare wheel lowering slot. 7. Twist the bar back and forth to engage into the carrier.
- Page 291 Replacing the tools Warning Do not use the spare wheel carrier if the wheel cannot be secured. Contact a Holden Dealer to have the carrier inspected. An alloy wheel with a flat tyre should always be stored under the vehicle using the spare wheel carrier.
- Page 292 10-54 Vehicle Care Trolley jack or vehicle hoist Warning As soon as possible after changing a wheel, have the wheel nuts tightened with a torque wrench to 170 ± 20 (Newton metres). Wheel nuts must be tightened evenly to the correct torque in the sequence shown (refer to Step 1 of the Wheel nut tightening sequence previously in...
-
Page 293: Jump Starting
If you are still unsure about jump current high enough to cause starting, Holden strongly burns. Therefore, adhere to the Always use the jack locations recommends for your safety and following when working near a... - Page 294 If a permanently connected power management system hands free telephone kit is may not work correctly. Refer fitted to the vehicle, remove to a Holden Dealer for battery the fuse for the telephone kit replacement. before jump starting. Remember to replace the Wear eye protection such as fuse afterwards.
- Page 295 Vehicle Care 10-57 6. Attach one end of the RED 13. Allow both vehicles to run for at jumper lead to the jump start least 4 minutes while positive post (1). connected, to stabilise battery voltage. 7. Attach the other end of the RED jumper lead to the positive 14.
-
Page 296: Towing The Vehicle
10-58 Vehicle Care Towing the Vehicle Appearance Care Exterior Care Warning Washing Flat tray towing is the only recommended towing procedure. The paintwork of the vehicle is exposed to environmental A slot location is provided to influences. Wash and wax regularly. move a bogged or disabled When using automatic vehicle vehicle a short distance or to pull... - Page 297 Have the door hinges of all doors Wax the vehicle regularly (at the Take care when moving the greased by a Holden Dealer. latest when water no longer beads). vehicle after washing, in case Polishing is necessary only if the water has affected the brakes.
- Page 298 Never use abrasive cleaners to Do not use petrol to clean tyres. clean glass. Use a good quality tyre and Refer to a Holden Dealer for bumper shine if required. windscreen washer additive. A good quality wheel cleaner Old wiper blades can cause can be used for cleaning alloy windscreen scratching.
-
Page 299: Interior Care
Vehicle Care 10-61 Have more extensive damage or Interior Care Interior and upholstery rust areas repaired by your Holden Only clean the vehicle interior, Dealer. including the instrument panel Warning fascia and panelling, with a dry cloth Caution Many cleaning products are toxic, or interior cleaner. -
Page 300: Floor Mats
Floor Mats Original equipment and Genuine variation in graining, colouring Holden Accessory floor mats are Pull up the small peg at the and wrinkling. designed for your vehicle. If the floor corner to remove the mat. - Page 301 Vehicle Care 10-63 Non-genuine floor mats may not fit properly and may interfere with the accelerator or brake pedal. Always check that the floor mats do not interfere with the pedals. Use the floor mat with the correct side up. Do not turn it over.
- Page 302 10-64 Vehicle Care NOTES...
- Page 303 Service and Maintenance 11-1 Service and General Information Maintenance Service Information In order to ensure economical and safe vehicle operation and to General Information maintain the value of your vehicle, it Service Information ..11-1 is of vital importance that all Recommended Fluids, maintenance work is carried out at...
- Page 304 ® Automatic transmission Dexron fluid Manual transmission SAE 75W-90 GL5 Holden part number 19264570 fluid Differential oil Castrol SAF Carbon Modified SAE 75W/85 API GL5 GM Brake and clutch fluid DOT 4 Hydraulic brake fluid conforming to specification number GMW3356...
- Page 305 Service and Maintenance 11-3 Warning Use only a manufacturer recommended battery with a ventilation system. Use of other batteries may affect the electric power management system and allow explosive gases into the vehicle cabin. Refer to a Holden Dealer or authorised repairer.
- Page 306 11-4 Service and Maintenance NOTES...
- Page 307 Technical Data 12-1 Technical Data Vehicle Identification Vehicle Identification Vehicle Identification Number (VIN) Vehicle Identification Number (VIN) ....12-1 Identification Plate ... 12-2 Vehicle Data Engine Data .
- Page 308 12-2 Technical Data Identification Plate Compliance label This label shows the vehicle make, model series, date of manufacture, Vehicle Identification Number (VIN), Cooling system/air conditioning Body and option plate approved seating capacity and label Plate (2) shows the model approval number. Label (1) shows the warnings for the identification, Vehicle Identification air conditioning and cooling system...
- Page 309 Technical Data 12-3 Engine number location V8 engine V6 engine The engine number is located at the rear of the engine on the The engine number is located at the passenger side. rear of the engine on the passenger side. The engine number can be viewed from the top, using a mirror, after The engine number can be viewed...
- Page 310 Air conditioning specifications Refrigerant type R-134A Refrigerant charge 480 g +/- 20 g Compressor oil type Polyalkylene glycol (Holden part no. 90510419) Warning The air conditioning system should be serviced by qualified personnel only. Improper service methods may cause personal injury.
- Page 311 SS, SS V 1120 1350 If the vehicle is fitted with Refer to the vehicle's compliance Genuine Holden Accessory 20 inch label for gross vehicle mass (GVM) wheels and Holden recommended figures. tyres, the maximum rear axle load is Carrying capacity 1,300 kg.
- Page 312 12-6 Technical Data Vehicle Dimensions Dimensions (mm) Length Width Width Height Wheel Front Rear Front Rear excl. incl. base overhang overhang track track mirrors mirrors Evoke 5062 1898 2099 1494 3009 1184 1602 1619 5083 1898 2099 1494 3009 1184 1590 1607 5083...
- Page 313 Technical Data 12-7 Capacities and Specifications Engine type 3.6L (SIDI) direct injection V6 6.0L Generation IV V8 7.0 L 7.6 L Refill engine oil including filter (approximately) Coolant (approximately) 10.3 L (manual) 10.2 L (manual) 10.1 L (automatic) 10.0 L (automatic) Fuel tank 71.0 L 71.0 L...
- Page 314 12-8 Technical Data SV6 Ute Wheel size and Recommended pressure Tyre size profile Normal load Maximum load Spare Front Rear Front Rear 245/45 R18 XL 100V 18 x 8.0 J T155/70 R18 18 x 4.0 T SS Ute Wheel size and Recommended pressure Tyre size profile...
- Page 315 Technical Data 12-9 SS V Series Ute Wheel size and Recommended pressure Tyre size profile Normal load Maximum load Spare Front Rear Front Rear 245/40 R19 XL 98W 19 x 8.5 J T155/70 R18 18 x 4.0 T SS V Series Redline Ute Wheel size and Recommended pressure Tyre size...
- Page 316 12-10 Technical Data NOTES...
- Page 317 However, if you prefer to contact. However, if you prefer to sometimes occur. write to or email Holden, your letter write the address is: should be addressed to: Therefore, we suggest you discuss The Manager...
- Page 318 Most of this information will be Applicable details for New Zealand your concern or query and include: found on the Vehicle Identification are set out in the Holden Warranty Certificate, located inside the front and Owner Assistance Information Your name and address...
- Page 319 INDEX AM-FM Radio ....7-14 Antilock Brake Accessory Power ....9-7 Battery .
- Page 320 INDEX Competitive Driving Mode ..9-19 Customer-installed Compressor Kit, Tyre Equipment, Notices ..3-11 Camera, Rear Vision ..9-30 Sealant .
- Page 321 INDEX Driving Engine (cont'd) Forward Collision Alert Coolant Temperature (FCA) System ....9-22 Competitive ....9-19 Environment .
- Page 322 INDEX Gauges (cont'd) Hill Start Assist (HSA) ..9-16 Tachometer ....5-12 Horn ......1-9, 5-6 Jump Starting .
- Page 323 INDEX Lane Departure Warning Lights (cont'd) Messages Seat Belt Reminders ..5-13 Battery Voltage and Light ......5-17 Light Security .
- Page 324 INDEX Outlets Pressure Power ......5-8 Tyre ......12-7 Navigation Overheating, Engine .
- Page 325 INDEX Replacement Parts Seats Starting the Engine ... . . 9-7 Head Restraints ....3-1 Starting the Vehicle Airbags .
- Page 326 INDEX Turn and Lane-Change Signals ......6-3 Tachometer ....5-12 Vehicle Tyre Pressure .
- Page 327 INDEX Warning Brake System Light ...5-15 Warning Light Forward Collision Alert (FCA) ....5-17 Warning Lights, Gauges, and Indicators .
- Page 328 i-10 INDEX NOTES...
Need help?
Do you have a question about the VF UTE 2014 and is the answer not in the manual?
Questions and answers