Table of Contents
Advertisement
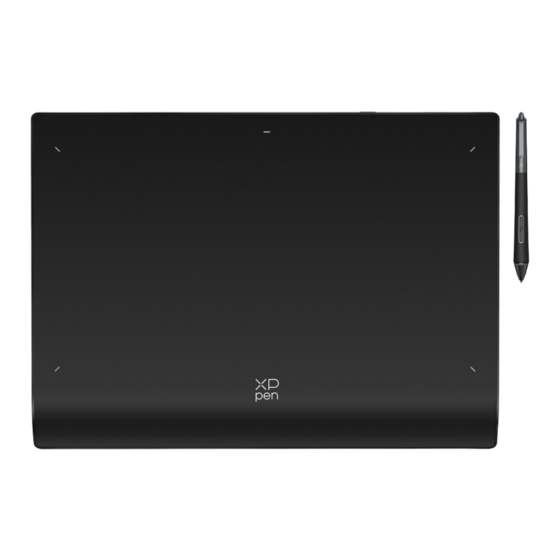
Deco Pro Series Drawing Tablet (Gen 2)
Contents
Introduction ........................................................................................................................................2
Product Overview .....................................................................................................................2
Included with your product ..................................................................................................... 4
Connection ........................................................................................................................................ 5
Wired Connection .....................................................................................................................5
Compatibility ....................................................................................................................................10
Product Settings ............................................................................................................................. 10
Driver Installation ................................................................................................................... 10
Introduction to Driver ............................................................................................................. 12
Device Settings .......................................................................................................................14
Drawing Tablet ............................................................................................................... 14
Work Area ................................................................................................................14
Pen Settings ............................................................................................................18
Wireless Shortcut Remote ............................................................................................21
Driver Settings ........................................................................................................................ 26
Driver Uninstallation .............................................................................................................. 27
FAQs .................................................................................................................................................27
................................................................................................................7
1
Advertisement
Table of Contents

Related Manuals for XP-PEN Deco Pro Series


Summary of Contents for XP-PEN Deco Pro Series
-
Page 1: Table Of Contents
Deco Pro Series Drawing Tablet (Gen 2) Contents Introduction ............................2 Product Overview ........................2 Included with your product ..................... 4 Connection ............................5 Wired Connection ........................5 Wireless Connection ........................7 Compatibility ............................10 Product Settings ..........................10 Driver Installation ........................10 Introduction to Driver ......................12 Device Settings ........................14... -
Page 2: Introduction
Introduction Thank you for choosing XPPen Deco Pro(Gen 2) Drawing Tablet. This user manual is specially designed to detail the product’s functions and features. Please read this manual before using the product to ensure safe and proper use. Due to the latest product improvements, content may differ from the final product and is subject to change without prior notice. - Page 3 Power Key a. Long press for 3 seconds:Power on or off b. Long press for 6 seconds:Bluetooth pairing mode 2. Bluetooth Switching Button 3. USB -C port 4. Indicator 1 In blue status: a. Flashing slowly: Waiting for Bluetooth connection b.
-
Page 4: Included With Your Product
Included with your product Drawing Tablet x1 Stylus x1 Pen Nibs x4 Felt Nibs x4 Pen Case x1 USB-C to USB-C Cable x1 USB-C to USB-A Cable x1 Wireless Shortcut Remote x1** Bluetooth Receiver x1 (use with Wireless Shortcut Remote)*** Glove x1 * The list is for illustrative purposes only. -
Page 5: Connection
1. Power Slide Switch 2. Indicator light In blue status: a. Flashing slowly: Waiting for Bluetooth connection b. Flashing quickly: Waiting for Bluetooth pairing c. Always on: Successfully paired (Always on for 30 seconds and then off) In red status: a. - Page 6 Drawing Tablet Please connect the USB-C to USB-C cable or the USB-C to USB-A cable to the USB port on the computer and the USB-C port on the tablet respectively. Wireless Shortcut Remote Please connect the USB-C to USB-C cable or the USB-C to USB-A cable to the USB port on the computer and the USB-C port on the Wireless Shortcut Remote respectively.
-
Page 7: Wireless Connection
3. Please disable the auto-rotate function in the Android device, and keep the screen in portrait mode. * Currently, the drawing tablet can only be used normally when the Android device is in portrait mode. It will not be used normally when in landscape mode. Wireless Connection A. - Page 8 Wireless Shortcut Remote 1. Slide the Wireless Shortcut Remote power switch and the blue indicator light flashes slowly. Then long press the K11 shortcut key for 6 seconds to enter Bluetooth pairing and the blue indicator light flashes quickly. 2. Turn on the Bluetooth on the computer, add Bluetooth device, search for device name “Shortcut Remote”...
- Page 9 30 seconds. *If the Bluetooth receiver needs to re-pair with the device, please download the wireless pairing tool from the official website of XPPen (https://www.xp-pen.com) according to the product model, and refer to the operation guide for pairing connection.
-
Page 10: Compatibility
Bluetooth Connection: Windows 10 (or later), macOS X 10.10 (or later) Product Settings Driver Installation To ensure the device works properly, please install the driver before using. Please download the driver suitable for your product model from XPPen website (https://www.xp-pen.com). - Page 11 Notes: 1. Before installing the driver, please turn off all antivirus software and graphics software. 2. Uninstall drivers (if any) for other drawing displays/tablets before the installation. 3. Restart your computer after the installation is completed. 4. For the best performance for your device, we recommend you install the latest driver.
-
Page 12: Introduction To Driver
Linux: Deb: Enter command “sudo dpkg -i”. Drag the installation file to the window and execute the command; Rpm: Enter command “sudo rpm -i”. Drag the installation file to the window and execute the command; Tag.gz: Unzip file. Enter command “sudo”. Drag “install.sh”... - Page 13 If the device is connected to your computer successfully, the device image and name will be displayed in the upper left corner of the driver. You can connect up to 3 devices via the driver at the same time. Customize a specific device's settings after switching to that device, and all changes made will only apply to that device.
-
Page 14: Device Settings
Device Settings Drawing Tablet You can set the drawing tablet functions, including: Work Area Pen Settings Work Area Go to Work Area and define the mapping between the device's work area and the screen display area. Screen... - Page 15 You can set the mapping between the display area of the current monitor and the device. If multiple monitors are used in duplicate mode, the work area of the device will be mapped to all monitors. When the pen moves in the work area, the cursor on all monitors will move at the same time.
- Page 16 1) Drag to select an area: Drag the cursor from one point to another on the Screen. 2) Use the cursor to select an area: Select "Click to set screen area", then click the upper left corner position and lower right corner position to select on the screen. 3) Coordinates: Manually enter coordinates in the corresponding input boxes for X, Y, W and H.
- Page 17 1) Drag to select an area: Drag the cursor from one point to another on the device. 2) Use the pen to select an area: Select "Click to set active area", then use stylus to click the upper left corner position and lower right corner position on your device. 3)...
-
Page 18: Pen Settings
Select an application from the list of applications at the top of the driver, tick the application, and then customize its pen keys, shortcut keys and roller/touch functions. For example, if you select an application and change its configuration in the driver, the change is valid only when you use the application. - Page 19 Click "Customize" in the drop-down menu to go to Shortcut key settings and customize pen key functions. Before setting shortcut key functions, tick to select any of the options under Keyboard, Mouse Control, Others, and Run Application. Keyboard: You can set keyboard shortcut, for example, set it as “Alt+A” in 3D MAX, so the alignment tool can be used.
- Page 20 you press the key, the shortcut key functions set will all run once. Windows (Command): You can add a combination key containing system key, for example: to enter Win(Cmd)+Shift+3, you can press Shift+3 and the driver will bring the system key automatically.
-
Page 21: Wireless Shortcut Remote
Wireless Shortcut Remote Application Customize the functions of the device under the application. For example, if you select an application and change the configuration, the changes will only be effective when using the application. When switching between different applications, the driver will automatically recognize. When the first application is selected, it will apply to other uncustomized applications. - Page 22 Customize: Select "Customize" in the drop-down menu, and enter the keys or key combinations through the keyboard to define the clockwise and counterclockwise functions of the roller. Import/Save...
- Page 23 Import: Import the configuration saved in the device into the driver under the selected application. Save: Save the configuration under the currently selected application to the device. Note: please use the "Import" and "Save" functions in the case of wired connection. The configuration of "Import"...
- Page 24 Set preview: View the key group functions in use. If you select the key group that is not enabled in the driver, Functions of the group I will be displayed by default. Click the close button on the upper right to close the window. Customize:...
- Page 25 Keyboard: Set keyboard shortcuts, for example, set to "Alt + A" in the 3D MAX application to use the alignment tool. Multiple groups of shortcut keys can be set. For example, type Ctrl+C, Ctrl+V, and when you press the key, the shortcut key functions set will all run once. Windows(Command):Add a combination key with system key.
-
Page 26: Driver Settings
Driver Settings Disable shortcut keys: Disable the functions of all keys of the device. Disable message: When you press a key, no key message will be displayed at the bottom of the screen. Disable pressure: You will not feel the pressure of the stylus when using the stylus. Disable tilt:... -
Page 27: Driver Uninstallation
This will disable the tilt effect of the stylus. Import & Export config: You can import/export configurations to read or save their settings. (When you need to import or export the changed functions, click the "Save" button on the left side of the driver interface first to save the current configuration. - Page 28 (1) this device may not cause interference, and (2) this device must accept any interference, including interference that may cause undesired operation of the device. If you need any further assistance, please contact us at: Website : www.xp-pen.com Email: service@xp-pen.com...
Need help?
Do you have a question about the Deco Pro Series and is the answer not in the manual?
Questions and answers