Table of Contents

Related Manuals for Keysight Technologies N1002A


Summary of Contents for Keysight Technologies N1002A
- Page 1 N1002A DCA-M Optimization Controller with FlexOTO and available solution bundles This document describes N1002A installation steps, environmental requirements, and safety as well as information on solution bundles. QUICK START GUIDE...
- Page 2 EULA shall document that conflict with these apply, except to the extent that terms, the warranty terms in the those terms, rights, or licenses are separate agreement shall control. N1002A Quick Start Guide...
-
Page 3: Table Of Contents
Products Instrument Markings N1002A Regulatory Information Configuring the FlexOTO Application Step 1. Configure the N1002A's LAN Connection Step 2. Install a Feature License Step 3. Enable FlexOTO's SCPI Servers Step 4. Confirm Supported Hardware Step 5. Connect DCA-M Modules and an Optical Switch Step 6. - Page 4 Contents Index N1002A Quick Start Guide...
-
Page 5: N1002A Introduction
Rear-Panel Features Accessories Contacting Keysight The N1002A DCA-M Optimization Controller and FlexOTO (Optical Test Optimizer) application optimize optical testing using DCA-M extended modules (such as the N1092A optical sampling oscilloscope and the N1078A Optical/Electrical Clock Recovery module). The FlexOTO application provides a powerful user interface on a customer-provided external display, but you can also run and configure FlexOTO entirely from remote programs over LAN. -
Page 6: Front-Panel Features
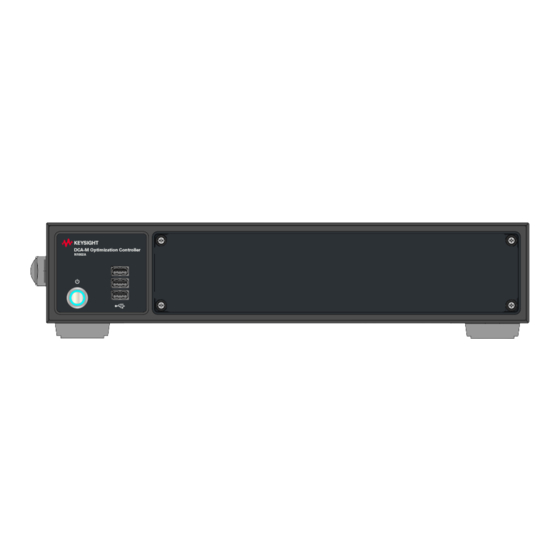
1 N1002A Introduction Front-Panel Features Figure 1. Front-Panel Features Rear-Panel Features Figure 2. Rear-Panel Features N1002A Quick Start Guide... -
Page 7: Accessories
Rack mount flange kit 88.1mm H (2U). Includes two flange brackets and four hole plugs. 1CN106A Handle kit 88.1mm H (2U). Includes two front handles. N1027A-USB USB type A to USB type B cable, 2m long. N1002A Quick Start Guide... -
Page 8: Contacting Keysight
If the N1002A is still under warranty or is covered by a maintenance contract, it will be repaired under the terms of the warranty or contract. If the N1002A is no longer under warranty or is not covered by a maintenance plan, Keysight Technologies will notify you of the cost of the repair after examining the unit. - Page 9 N1002A. Surround the equipment with approximately 7 cm (3 inches) of packing material, to protect the N1002A and prevent it from moving in the car- ton. If packing foam is not available, the best alternative is S.D-240 Air Cap from Sealed Air Corporation (Commerce, California 90001).
-
Page 10: N1002A Installation
To Declassify Instrument Memory Network Security Guidelines for the Keysight Sampling Oscilloscope Products Instrument Markings N1002A Regulatory Information Complete the steps in this chapter to install the N1002A. For important safety information, refer to Safety Information on page 11. This chapter also includes... -
Page 11: Safety Information
Safety of any system incorporating the equipment is the responsibility of the assembler of the system. This product is designed for use in INSTALLATION CATEGORY II and POLLUTION DEGREE 2 environment. N1002A Quick Start Guide... - Page 12 Is your product software up-to-date? Keysight periodically releases software updates to fix known defects and include product enhancements. To search for software updates for your product, go to www.keysight.com/find/TechSupport. N1002A Quick Start Guide...
-
Page 13: Step 1. Inspect The Shipment
Software Entitlement Certificate (for installing a license that was not installed at the factory) Keysight safety leaflet N1002A Quick Start Guide (this document) Instrument damage can result from using packaging materials other than the original materials. Never use styrene pellets as packaging material. They do not adequately cushion the instrument or prevent it from shifting in the carton. -
Page 14: Step 2. Work At A Static-Safe Workstation
Be sure all instruments are properly earth-grounded to prevent a buildup of static charge. These techniques for a static-safe workstation should not be used when working on circuitry with a voltage potential greater than 30V rms, 42.4V peak, or 60V DC volts. N1002A Quick Start Guide... - Page 15 ESD Coordinator. 9. Put on wrist strap and conductive footwear, and any special garments which are required in your job. 10. Don’t allow anyone who is not grounded closer than 1 meter to your static safe area. N1002A Quick Start Guide...
-
Page 16: Step 3. Position
The N1002A can be stored (power cord not connected) in any orientation as long as care is taken to avoid damaging the front or rear panels.. Figure 4. Required Operating or Standby Position Table 3. - Page 17 (which is readily identifiable and is easily reached by the operator) may be used as a disconnecting device. Windows registry: If the N1002A is mounted in a rack or cabinet, do not use the system power switch to disconnect power from the instrument. Instead, use the N1002A front-panel power switch.
-
Page 18: Step 4. Connect A Display, Keyboard, And Mouse
Figure 5. Front-panel operation is only required to confirm that your N1002A properly boots up if you are manually using the N1002A and for confirming that a LAN connection is made. After completing this chapter, you can remove the display, keyboard, and mouse and remotely control the N1002A. - Page 19 2 N1002A Installation Table 6. N1002A rear-panel inputs and outputs specifications Item Description GPIB Fully programmable, complies with IEEE 488.2 Display Port For connecting external displays VGA Port Analog, full color, 15 pin D-sub (female) Two Gigabit Ethernet ports Eight USB 3.0 ports...
-
Page 20: Step 5. Turn On
Table 7. Damage to the equipment could result. Protect Windows registry. If the N1002A is mounted in a rack or cabinet, do not use the system power switch to disconnect power from the instrument. Instead, use the N1002A front-panel power switch. Using the system power switch may corrupt the Windows registry requiring you to perform the recovery procedure to restore normal operation to the N1002A. -
Page 21: To Clean The N1002A
Figure 6. LINE Power Cord Connection to N1002A 2. Press the front panel ON/Standby switch to turn on the N1002A. 3. Wait while the N1002A boots up. During the process, you will be asked to accept the Windows 10 End User License Agreement (EULA). Once accep- ted the N1002A will continue to configure itself. -
Page 22: To Remove The Drive
FlexOTO and FlexDCA applications, and any data or other user files. If for whatever reason you need to remove the N1002A from a secure area, you can quickly and easily remove the drive. The drive includes both drive C (INFINIIUM) and drive D (USER). -
Page 23: To Declassify Instrument Memory
2 N1002A Installation To Declassify Instrument Memory The declassification process is simply to remove the instrument's drive. N1002A Quick Start Guide... -
Page 24: Network Security Guidelines For The Keysight Sampling Oscilloscope Products
To further reduce the risk of removable media malware, you can also dis- able AutoPlay and AutoRun in Windows. On N1000A and N1002A instruments, some antivirus products block USB devices by default, which can disable the USB device communication Key- sight instrumentation. - Page 25 5. In the dialog, locate the Users must enter a user name and password... field. Select this field and click OK. This selection forces the instrument to require a login. Contact your systems administrator for further inform- ation. N1002A Quick Start Guide...
- Page 26 PC) of all files with that user's permission. Disable SCPI access if you are not using this feature. The following Networking services can be disabled, depending on your application: Keysight Remote I/O Port Mapper Keysight Remote I/O Server N1002A Quick Start Guide...
- Page 27 2 N1002A Installation By default, the N1000A/N1002A's ethernet port is configured with the Win- dows 10 Public Network setting, which disables network discovery and file sharing services. This provides better network security than the Private set- ting. Responses to network pings (ICMP Echo Requests) are blocked by the default firewall settings in Windows 10.
- Page 28 To secure sensitive data before the instrument is transported out of your facility or shipped to Keysight for servicing, you can easily remove the hard drive via the N1000A/N1002A's rear panel. For more information, refer to the Keysight instrument declassification procedure documents available at: http://rfmw.em.keysight.com/aerospace/index.aspx...
-
Page 29: Instrument Markings
South Korean Certification (KC) mark; includes the marking's identifier code which fol- lows this format: MSIP-REM-YYY-ZZZZ. N1002A Quick Start Guide... - Page 30 GB 18455-2001 as required by the China RoHS regulations for paper/fiberboard pack- aging. UK conformity mark is a UK government owned mark. Products showing this mark comply with all applicable UK regulations. The Keysight email address is required by EU directives applicable to our product. N1002A Quick Start Guide...
-
Page 31: N1002A Regulatory Information
Cet appareil ISM est conforme a la norme NMB-001 du Canada. South Korean Class A EMC Declaration: This equipment is Class A suitable for professional use and is for use in electromagnetic environments outside of the home. N1002A Quick Start Guide... - Page 32 2 N1002A Installation Acoustic statement: (European Machinery Directive) Acoustic noise emission LpA < 70 dB Operator position Normal operation mode per ISO 7779 N1002A Quick Start Guide...
-
Page 33: Configuring The Flexoto Application
Step 8. Continue to Learn This chapter describes how to configure and setup the FlexOTO application. FlexOTO does not require the N1002A as FlexOTO can be downloaded from Keysight and installed on any PC that meets or exceeds the requirements listed... -
Page 34: Step 1. Configure The N1002A's Lan Connection
3 Configuring the FlexOTO Application Step 1. Configure the N1002A's LAN Connection You can configure the N1002A on a local area network (LAN) so that FlexOTO can be remotely controlled. This also allows for file sharing and the use of network printers. -
Page 35: Step 2. Install A Feature License
Step 2. Install a Feature License Locate any Software Entitlement Certificate that was shipped with the N1002A, and use the certificate to install any licenses. Refer to the N1002A’s help system for information on licenses. In FlexOTO click Help > User's Guide to access the help. -
Page 36: Step 4. Confirm Supported Hardware
1 Supports automatic detection via USB by FlexOTO. 2 Options CDR and 40A required. 3 An N1077A-SXT, N1077B-SXT, or N1078A-SXT requires an external optical splitter to provide an optical data to an input channel of the N109x-series DCA-M oscilloscope. N1002A Quick Start Guide... - Page 37 The N1002A, when purchased as part of a solution bundle (refer to Chapter 4 , Solution Bundles, on page 47), includes an optical switch. If the N1002A is purchased separately, not in a solution bundle, the Keysight switch, if desired, must be separately purchased. N1002A Quick Start Guide...
-
Page 38: Step 5. Connect Dca-M Modules And An Optical Switch
Configuration dialog. Confirm that the optical switch and DCA-Ms have been automatically installed as extended modules. A Switch slot tile (and DCA-M tile) should be displayed in along FlexDCA's bottom tray. Figure 10. FlexDCA's Bottom Tray Showing Switch Tile N1002A Quick Start Guide... - Page 39 DCA-M modules. b. Open the FlexDCA application, and configure your DCA-M modules set- tings so that the DCA-M oscilloscope can trigger on and view the sig- nal. c. Remove the patch cord. d. Return to FlexOTO. N1002A Quick Start Guide...
-
Page 40: Step 6. Build Flexoto Hardware Diagram
2. Click on the DUT Fixtures panel and enter the number lanes that your DUT Fixtures have. 3. Drag hardware blocks, for example the switch 4, from the Hardware Assets panel to the Hardware Diagram. N1002A Quick Start Guide... - Page 41 Switch (if this setting exists for your switch), click on the Switch block. 7. After modeling your setup and messages no longer appear above the Hard- ware Diagram 7, click Start FlexOTO Stations which is next to the Stations N1002A Quick Start Guide...
- Page 42 8. Click on each Station tab, and configure your Station Test Plans. 9. When you've completed running your Test Plan, click Job Timing Diagram 9. This displays a diagram where you can compare timing between User Sta- tions or Task Breakdown. N1002A Quick Start Guide...
-
Page 43: Step 7. Create And Run Flexoto Test Plans
3. In the Test Program panel, click Add Lines 1. This opens the Test Program Measurement Setup dialog. In the dialog, configure your Test Plan and then click Add Lines and Close to add the test lines 2. Each line defines a test of a specific DUT Fixture/Lane combination. N1002A Quick Start Guide... - Page 44 Windows clipboard. You can paste the recorded commands into your program. 11. Click Troubleshoot to enter troubleshooting mode where FlexOTO is tem- porarily disabled and the FlexDCA application is displayed. FlexDCA is FlexOTO's measurement engine. Using FlexDCA, you can change N1002A Quick Start Guide...
- Page 45 3 Configuring the FlexOTO Application measurement settings including presets to investigate how a measurement result was derived. When you want to return to FlexOTO, simply exit FlexOTO. N1002A Quick Start Guide...
-
Page 46: Step 8. Continue To Learn
Help > User's Guide… to open the user's help. On the help's home page, click on the Quick Start and Quick Facts! sidebars to learn vital information about using FlexOTO. Help > Programmer's Guide… to learn how to use SCPI commands to remotely control FlexOTO. N1002A Quick Start Guide... -
Page 47: Solution Bundles
N1002L31A Dual 1x4 Bundle (Example 2) N1002L31A Dual 1x4 Bundle (Example 3) The N1002A can be ordered by itself or in one of the following solution bundles: FlexOTO Optical Test Optimization 1x16 Bundle (N1002L33A) FlexOTO Optical Test Optimization 1x4 Bundle (N1002L31A) The N1002L33A and N1002L31A bundles provide cost-effective complete software and hardware solutions to minimize cost-of-test for 800G/1.6T and... - Page 48 4 Solution Bundles Table 13. N1002L33A Solution Bundle Contents Item Quantity N1002A-S00 DCA-M Optimization Controller N1002014A FlexOTO license (1 year subscription) N1010200A FlexDCA MFG package (1 year subscription) N7733C optical switch (1 x 16) N1092A with 40A, PLK, IRC, LOJ, JS1, and CDR options N1027A-AFC, SMF FC/APC FC/PC optical patch cord Table 14.
-
Page 49: N1002L33A 1X16 Bundle (Example 1)
This example shows a setup with two 800 GBd DUT fixtures each with two groups of four 53 GBd lanes. Each 4-lane group has its own PLL which is indicated by the four colors used to draw the fiber optic cables. Figure 12. Example 1 Equipment Setup N1002A Quick Start Guide... -
Page 50: N1002L33A 1X16 Bundle (Example 2)
This example shows a setup with two 800 GBd DUT fixtures each with eight 53 GBd lanes. Each lane has its own PLL which is indicated by the eight colors used to draw the fiber optic cables. Figure 13. Example 2 Equipment Setup N1002A Quick Start Guide... -
Page 51: N1002L33A 1X16 Bundle (Example 3)
N1002L33A 1x16 Bundle (Example 3) This example shows a setup with four 4-lane WDM DUT fixtures. Each DUT's output is demultiplexed and connected to four of the N7733A's 16 input ports. Figure 14. Example 3 Equipment Setup N1002A Quick Start Guide... -
Page 52: N1002L31A Dual 1X4 Bundle (Example 1)
PLL group has at least one lane that will be connected the N7731C's internal switch 1. This is required because switch 1 is connected to the N1092B's Channel A which includes clock recovery. The N1092B's Channel B does not have clock recovery. Figure 15. Example 1 Equipment Setup N1002A Quick Start Guide... -
Page 53: N1002L31A Dual 1X4 Bundle (Example 2)
N7731C's internal switch 1. This is required because switch 1 is connected to the N1092B's Channel A which includes clock recovery. The N1092B's Channel B does not have clock recovery. Figure 16. Example 2 Equipment Setup N1002A Quick Start Guide... -
Page 54: N1002L31A Dual 1X4 Bundle (Example 3)
N7731A's internal switch 1 to a shared DEMUX. The DEMUX's output lanes are connected as inputs to switch 2. This example shows how the N7731C's two internal switches can be cascaded. Figure 17. Example 3 Equipment Setup N1002A Quick Start Guide... - Page 55 ISM1-A inputs/outputs rear-panel LINE Power SSD hard drive Job ID numbers Stations Job Timing Diagram storage environment supplied accessories switch driver Keysight contacting Telnet interface test plans test program N1002A Quick Start Guide...
- Page 56 © Keysight Technologies 2023 Printed in USA N1002-90001 *N1002-90001*...
Need help?
Do you have a question about the N1002A and is the answer not in the manual?
Questions and answers