Brother DCP-9040CN Quick Setup Manual
Hide thumbs
Also See for DCP-9040CN:
- Service manual (450 pages) ,
- Software user's manual (217 pages) ,
- User manual (167 pages)
Table of Contents
Advertisement
Quick Links
DCP-9040CN
DCP-9042CDN
Before you can use the machine, you must set up the hardware and install the driver. Please read
this 'Quick Setup Guide' for proper set up and installation instructions.
Installing the Driver & Software
Keep this 'Quick Setup Guide' and the supplied CD-ROM in a convenient place for quick and easy
reference at all times.
STEP 1
Setting Up the Machine
STEP 2
Setup is Complete!
Version 0
UK/IRE/SAF
Advertisement
Table of Contents

Subscribe to Our Youtube Channel
Related Manuals for Brother DCP-9040CN


Summary of Contents for Brother DCP-9040CN
- Page 1 DCP-9040CN DCP-9042CDN Before you can use the machine, you must set up the hardware and install the driver. Please read this ‘Quick Setup Guide’ for proper set up and installation instructions. STEP 1 Setting Up the Machine STEP 2 Installing the Driver & Software Setup is Complete! Keep this ‘Quick Setup Guide’...
- Page 2 Symbols used in this guide Caution Hot Surface Warning Electrical Hazard Warnings tell you what to do Electrical Hazard icons alert Hot Surface icons warn you Cautions specify procedures to prevent possible personal you to a possible electrical not to touch machine parts you must follow or avoid to injury.
-
Page 3: Table Of Contents
Table of Contents Safety Precautions To Use the Machine Safely .......................... 2 Regulations ..............................4 Getting Started Carton components ............................6 Control panel..............................7 STEP 1 – Setting Up the Machine Remove the packing materials from the machine ..................8 Installing the toner cartridges ........................ -
Page 4: Safety Precautions
Safety Precautions To Use the Machine Safely Warning Before cleaning the inside of the machine, unplug the power cord from the electrical socket. DO NOT handle the plug with wet hands. Doing this might cause an electrical shock. Always make sure the plug is fully inserted. After you have just used the machine, some internal parts of the machine will be extremely hot. - Page 5 Safety Precautions To prevent injuries, DO NOT put your fingers in the area shown in the illustrations. DO NOT use a vacuum cleaner to clean up scattered toner. Doing this might cause the toner dust to ignite inside the vacuum cleaner, potentially starting a fire.
-
Page 6: Regulations
Safety Precautions Regulations EC Declaration of Conformity... - Page 7 Safety Precautions IEC 60825-1+A2:2001 Specification Radio interference This machine is a Class 1 laser product as defined in This product complies EN55022 (CISPR Publication IEC 60825-1+A2: 2001 specifications. The label 22)/Class B. When connecting the machine to a shown below is attached in countries where it is computer, ensure that you use the following interface needed.
-
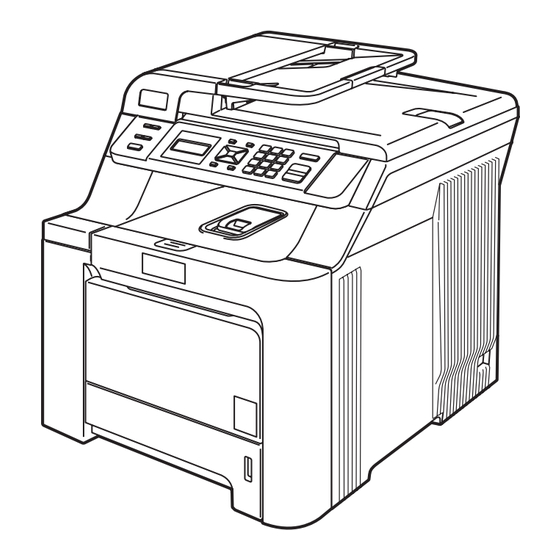
Page 8: Getting Started
Getting Started Carton components Carton components may vary from one country to another. Save all packing materials and the carton in case for any reason you must ship your printer. 1 Automatic Document Feeder (ADF) 6 Power Switch 2 Control Panel 7 ADF Document Output Support Flap 3 Front Cover Release Button 8 Document Cover... -
Page 9: Control Panel
Getting Started Control panel DCP-9040CN and DCP-9042CDN have similar control keys. 1 Copy keys 6 Stop/Exit key 2 LCD (Liquid Crystal Display) 7 Start keys 3 Data LED 8 Print keys 4 Menu keys 9 Scan key 5 Numeric keys For the details of the control panel, see Control panel overview in Chapter 1 of the User’s Guide. -
Page 10: Step 1 Setting Up The Machine
STEP 1 Setting Up the Machine Hold the green handle of the drum unit. Lift the Remove the packing drum unit up and then pull it out until it stops. materials from the machine Important Save all packing materials and the carton in case you have to ship your machine. -
Page 11: Installing The Toner Cartridges
Setting Up the Machine Repeat steps 1 through 3 for the remaining Installing the toner toner cartridges. cartridges Put the drum unit back into the machine. Unpack the toner cartridges and gently shake each toner cartridge from side to side 5 to 6 times. -
Page 12: Load Paper In The Paper Tray
STEP 1 Setting Up the Machine Put paper in the paper tray. Make sure that the Load paper in the paper tray paper is flat in the tray and below the maximum paper mark. Pull the paper tray completely out of the machine. -
Page 13: Install The Power Cord
Setting Up the Machine Install the power cord Selecting your language Make sure that the machine’s power switch is After turning the power switch on, the LCD off. Remove the label covering the AC power shows: inlet. Select Language Press OK Key Press OK. - Page 14 (eg. printing, scanning and networking details) Brother Solutions Center On-Line Registration Access the Brother Solutions Center for FAQs, User’s Register your machine on the Brother product Guide, driver updates and tips for using your Registration Page.
-
Page 15: Step 2 Installing The Driver & Software
Follow the instructions on this page for your operating system and interface. For the latest drivers, documentation, and to find the best solution for your problem, access the Brother Solutions Center directly from the CD-ROM / Driver or visit http://solutions.brother.com/. -
Page 16: Windows
Windows Service Pack before installing Explorer to run the start.exe program from the MFL-Pro Suite. root folder of the Brother CD-ROM. ® • For Windows Vista , when the User Account Turn off and unplug the machine from the AC Control screen appears, click Allow. - Page 17 Choose Local Connection, and then click Next. The installation will continue. Note If you want to install the PS driver (Brother’s BR-Script Driver), choose Custom Install and then follow the on-screen instructions. When the Select Features screen appears, check...
- Page 18 XML Paper Specification documents. Please download the latest driver by accessing the Brother Solutions Center at http://solutions.brother.com/. • After restarting the computer, the Installation Diagnostics will run automatically. If the installation is unsuccessful, the installation results window will be shown.
-
Page 19: For Network Interface Users
Note ® • If this window does not appear, use Windows Explorer to run the start.exe program from the root folder of the Brother CD-ROM. Plug the AC power cord into an AC outlet. Turn ® the power switch on. - Page 20 Note ® For Windows Vista , when this screen appears, If you want to install the PS driver (Brother’s click the check box and click Install. BR-Script Driver), choose Custom Install and then follow the on-screen instructions. When the Select Features screen appears, check PS Printer Driver, and then continue following the on-screen instructions.
Need help?
Do you have a question about the DCP-9040CN and is the answer not in the manual?
Questions and answers