Table of Contents
Advertisement
Quick Links
Advertisement
Table of Contents
Troubleshooting

Related Manuals for Vaillant VR 91f


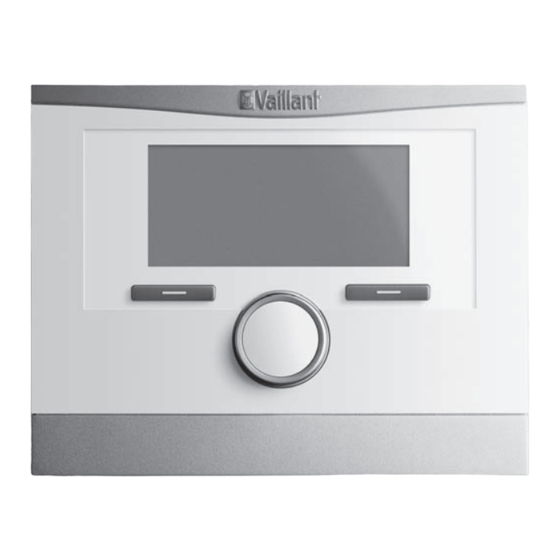
Summary of Contents for Vaillant VR 91f
- Page 1 Remote control unit VR 91f en Operating and installation instructions...
-
Page 2: Table Of Contents
Operating and For the end user......17 Operating modes ......17 installation instructions Operating levels......17 Contents Troubleshooting ......19 For the competent person ..20 Safety ..........3 Installer level........ 20 For the end user ......3 Remedy ........20 General safety information for Troubleshooting ...... -
Page 3: Safety
1 Safety and understand the hazards in- volved. Children must not play 1.1 For the end user with the product. Cleaning and 1.1.1 Intended use user maintenance work must In the event of inappropriate or not be carried out by children improper use, damage to the unless they are supervised. - Page 4 1.2.2 Batteries and not use it for an extended period. ▶ Note the battery type, as de- scribed in these instructions; 1.2.4 Risk of death caused by see section "Data plate". swallowing batteries ▶ Remove and insert batteries This product contains replace- as described in these instruc- able batteries.
-
Page 5: For The Competent Person
1.3 For the competent person improper use. Any direct com- mercial or industrial use is also 1.3.1 Intended use deemed to be improper. In the event of inappropriate or Caution. improper use, damage to the Improper use of any kind is product and other property may prohibited. -
Page 6: Regulations (Directives, Laws, Standards)
1.5 Regulations (directives, laws, standards) ▶ Observe the national regula- tions, standards, directives, ordinances and laws. Operating and installation instructions 0020253110_03... -
Page 7: For The End User
2.1.2 Storing documents ▶ Store these instructions and all other applicable documents for further use. 2.1.3 Validity of the instructions These instructions apply only to: VR 91f – article number Great Britain 0020231566 Display Battery compart- 2.1.4 Nomenclature ment... -
Page 8: Operation
VRC 700f system con- 7th to 16th digits = product article trol. number The operating instructions for the system VR 91f Product designation control will provide you with Rated voltage – Information on the operating structure. Rated current –... -
Page 9: Maintenance Message
▶ 2.4 Maintenance message Dispose of used batteries in accordance with the instruc- If maintenance is required, the text Main- tions in this manual. tenance and the symbol appear in the remote control unit display. You can read the specific maintenance messages on the system control display and find out which measures you need to take from the instructions for the system... -
Page 10: Decommissioning
Vaillant Insert the batteries, making sure that the poles are the right way round. Service Solutions. Do not short-circuit the connection 2.10.2 Customer service contacts. For contact details for our customer ser- Close the battery compartment. -
Page 11: Set-Up
– not in direct sunlight ive 2014/53/EU. The complete text for the – not affected by heat sources EU Declaration of Conformity is available Determining the reception strength at: http://www.vaillant-group.com/doc/doc- of the remote control at the chosen radio-equipment-directive/. installation site 3.3 Set-up Observe all the points listed in "Re-... - Page 12 Attaching the unit mounting Insert the batteries, making sure that the poles are the right way round. bracket to the wall ◁ The installation assistant starts. Close the battery compartment. Select the language. In ascending order, enter the ad- dresses in the Remote control address function.
-
Page 13: Start-Up
3.4.2 Configuring the settings on the system control Ø 6 If you would also like to use the room temperature sensor in the remote control unit, select the Temp. mod. or Thermost. setting in the Room temp. mod. function. Specify in which zone the remote con- trol unit has been installed. -
Page 14: Operation
▶ 3.7 Operating and display Inform the end user that all the radiator valves in the room where the product is functions installed must be fully open. The remote control has an end user level and an installer level. 3.6 Operation The setting and read-out options for the You can only operate the remote control competent person can be found via the... -
Page 15: Troubleshooting
▶ Dispose of used batteries in Every remote control unit has a unique ad- dress, starting with Address 1. Increase accordance with the instruc- the number in the address consecutively tions in this manual. for each additional remote control unit used. -
Page 16: Customer Service
Disposing of the product 3.13 Technical data 3.13.1 Remote control unit If the product is labelled with this Battery type LR06 symbol: Rated surge voltage 330 V ▶ 868.0 to In this case, do not dispose of the Frequency band 868.6 MHz product with the household waste. -
Page 17: Appendix
Appendix A For the end user A.1 Operating modes Operating mode Setting Default setting Operating mode Heating off, Auto, Day, Set-back Auto Cooling off, Auto, Day Auto Advanced functions – 1 day at home active – 1 day away from home active –... - Page 18 Setting level Values Unit Increment, select Default setting Min. Max. ℃ Day temp. cooling ℃ Set-back temp. heat. Time programmes → ZONE1: Heating → Individual days and Monday, Tues- Mo - Fr: blocks day, Wednesday, 06:00- Thursday, Friday, 22:00 Saturday, Sunday Sa: 07:30- and Monday - Fri- 23:30...
-
Page 19: Troubleshooting
Setting level Values Unit Increment, select Default setting Min. Max. Basic settings → Offset → K Room temperature -3.0 Basic settings → Enter zone name → ZONE1 A to Z, 0 to 9, space ZONE1 Installer level → Enter code A.3 Troubleshooting Symptom Possible cause... -
Page 20: B For The Competent Person
Symptom Possible cause Measure Display view: Button Button lock is active If you would like to change any of the val- lock active To un- ues, follow the instructions on the display. lock, press OK for Also read the "Activating Button lock " 3 seconds, it is not function (→... - Page 21 Symptom Possible cause Measure No changes in the Software error Take all the batteries out. display when the Insert the batteries in the battery compart- rotary knob is turned ment, making sure that the poles are the right way round. ▶...
- Page 24 Supplier Vaillant Ltd. Nottingham Road Belper Derbyshire DE56 1JT Telephone 0330 100 3143 info@vaillant.co.uk www.vaillant.co.uk 0020253110_03 Publisher/manufacturer Vaillant GmbH Berghauser Str. 40 D-42859 Remscheid Tel. +49 2191 18 0 Fax +49 2191 18 2810 info@vaillant.de www.vaillant.de © These instructions, or parts thereof, are protected by copyright and may be reproduced or distributed only with the manufacturer's written consent.
Need help?
Do you have a question about the VR 91f and is the answer not in the manual?
Questions and answers