Table of Contents
Advertisement
Quick Links
Bedienungsanleitung
Instruction manual
Notice d'utilisation
Gebruiksaanwijzing
Istruzioni per l'uso
Bruksanvisning
Instrucciones de uso
5IE64252
5IE84252
5II84251
5II94291
5IB64211
5IZ34291
Kochfeld autark, Induktion
Stand-alone hob, induction
Table de cuisson autonome à induction
Kookveld zelfstandig, inductie
Piano cottura autonomo, induzione
Fristående matlagningsyta, induktion
Placa de vitrocerámica independiente, inducción
Advertisement
Table of Contents

Related Manuals for Blaupunkt 5IE64252


Summary of Contents for Blaupunkt 5IE64252
- Page 1 Bedienungsanleitung Instruction manual Notice d’utilisation Gebruiksaanwijzing Istruzioni per l’uso Bruksanvisning Instrucciones de uso 5IE64252 5IE84252 5II84251 5II94291 5IB64211 5IZ34291 Kochfeld autark, Induktion Stand-alone hob, induction Table de cuisson autonome à induction Kookveld zelfstandig, inductie Piano cottura autonomo, induzione Fristående matlagningsyta, induktion...
-
Page 2: Table Of Contents
TABLE OF CONTENTS SAFETY Precautions before start-up Important safety instructions Protection against damage Precautions in case of appliance failure Protection against other hazards APPLIANCE DESCRIPTION Technical description Operating panel OPERATING THE HOB Display Ventilation STARTING UP THE HOB Before first use Induction principle Touch control function Smart Slider function... - Page 3 STARTING UP THE HOOD (NOT FOR 5IZ34291) Blaupunkt Multi Control – unique connection between hob and hood Switching hood lighting on/off Selecting hood management mode Setting the ventilation power Booster function Default speed setting in semi-automatic mode Ventilation timer CLEANING AND MAINTENANCE...
-
Page 4: Safety
SAFETY PRECAUTIONS BEFORE START-UP • Remove all parts of the packaging. • The appliance may only be installed and connected by a qualified electrician. The manufacturer cannot be held responsible for damage caused by errors in installation or connection. Only use the appliance when it is installed. - Page 5 GENERAL SAFETY INSTRUCTIONS • Switch off the cooking zones after each use. • Overheated fats and oils ignite quickly. If you prepare dishes in fat or oil (e.g. chips), you should observe the cooking process. • When you cook and fry, the cooking zones become hot. For this reason, protect yourself from burns while and after using the appliance.
-
Page 6: Protection Against Damage
PROTECTION AGAINST DAMAGE • Do not use any pots or pans with unpolished or damaged bases (e.g. made of cast iron). These can scratch the glass ceramic panels. • Note that grains of sand can also cause scratches. • Glass ceramic is insensitive to temperature shocks and very resistant, but it is not unbreakable. Especially pointed and hard objects that fall onto the cooking surface can damage them. -
Page 7: Precautions In Case Of Appliance Failure
PRECAUTIONS IN CASE OF APPLIANCE FAILURE • If an error is detected, the appliance must be switched off and disconnected from the mains. • If breaks, fissures or cracks occur on the glass: Immediately switch off the hob, unscrew or remove the hob fuse, and contact our customer service or your specialist retailer. -
Page 8: Appliance Description
APPLIANCE DESCRIPTION TECHNICAL DESCRIPTION Type 5IE64252 5IE84252 5II84251 5II94291 5IB64211 5IZ34291 Total power 7400W 7400 W 7400 W 7400 W 6700 W 3700 W Energy consumption of the hob EChob** 180 Wh/kg 180 Wh/kg 173.4 Wh/kg 175.3 Wh/kg 180.7 Wh/kg 177.3 Wh/kg... - Page 9 Front right cooking zone Ø 160 mm Ø 160 mm 210x190mm 210x190mm Ø 250 mm Minimum pot base diameter Ø 90 mm Ø 90 mm Ø 110 mm Ø 110 mm Ø 110 mm Nominal power* 1400 W 1400 W 2100 W 2100 W 2300 W...
-
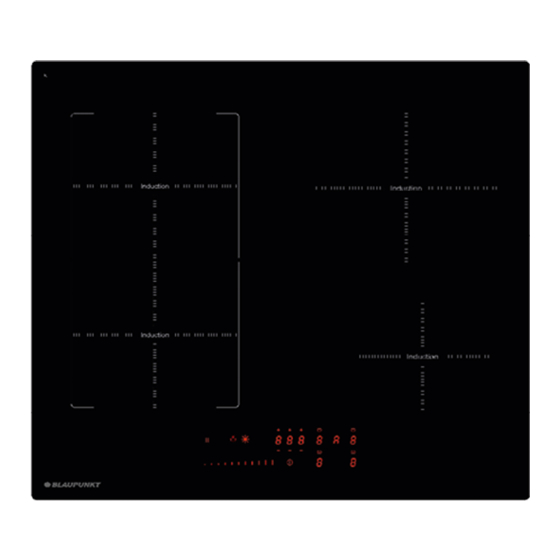
Page 10: Operating Panel
OPERATING PANEL Grill Pause Keep warm Timer Power Timer Timer function function function Selection selection function [+/-] button button Hood light function Smart Slider On/Off OPERATING THE HOB DISPLAY Display Name Description Zero The hub is activated 1…9 Power level The power setting No pot detection Pot not in place or not suitable... -
Page 11: Ventilation
VENTILATION The fan works automatically. It starts at low speed as soon as the values released by the electronics exceed a certain threshold. The higher speed is activated when the induction hob is used intensively. The fan reduces its speed and switches off automatically as soon as the electronics have cooled down sufficiently. -
Page 12: Touch Control Function
TOUCH CONTROL FUNCTION The hob is controlled by sensor buttons. These react to gentle touches of the glass with the finger. If you touch the buttons for about one second, the control commands are executed. Each reaction of the control buttons is acknowledged with an acoustic and/or visual signal. For general use, only press one button at a time. -
Page 13: Pot Detection
Switch cooking zone on/off: Operation Operating panel Display Slide your finger over the Increase power [ 1 ] to [ P ] Smart Slider Slide your finger over the Switch off [ 0 ] or [ H ] Smart Slider If no further input is made, the hob will switch off after approx. -
Page 14: Booster Function (Power Level)
BOOSTER FUNCTION (POWER LEVEL) All cooking zones are equipped with a booster function, i.e. with power amplification. The booster function is displayed with [ P ]. If they are switched on, these cooking zones operate for a period of 10 minutes. This high power is intended to enable you to do things like quickly heating large quantities of water, to boil water for pasta for example. -
Page 15: Timer
TIMER With the integrated timer, a cooking time of 1 to 999 minutes can be set on all four cooking zones. Each cooking zone can have a different setting. Activating or changing the duration: Operation Operating panel Display Press the corresponding Select cooking zone cooking zone button Slide your finger over the... -
Page 16: Automatic Preheating
Select timer Press [ 000 ] [ 000 ] Reduce time Press [ - ] for the timer [ 60 ] … Increase time Press [ + ] for the timer Time in min. will increase After a few seconds, the flashing will stop. The duration is activated and the time lapse begins. -
Page 17: Stop & Go Function
Switching off the automatic preheating feature: Operation Operating panel Display Select power Slide your finger over the Smart Slider [ 0 ] to [ 9 ] STOP & GO FUNCTION With this feature, you can temporarily interrupt the cooking process and restart with the same settings. -
Page 18: Keep Warm Function
KEEP WARM FUNCTION With this function, food is kept warm at 70 °C. This function prevents overflow and burning. Switching on and off: Operation Operating panel Display Switch on Press [ [ U ] Switch off Press [ [ 0 ] AUTOMATIC BRIDGE AND BRIDGE FUNCTION (MODELS 5II84251,5II94291) This function allows two cooking zones to be linked together for a single cooking process. -
Page 19: Child Lock / Locking The Hob
GRILL FUNCTION (MODELS 5II84251,5II94291) This function allows optimum use of the Blaupunkt griddle / Teppan Yaki plate. By bridging two cooking zones and using a suitable power level, this feature guarantees a pure indoor grilling pleasure. You can find the right accessories in our online shop at www.blaupunkt-einbaugeraete.com or from your specialist retailer. -
Page 20: Cooking Recommendations
Operating time limit: The hob has an automatic operating time limit. The continuous operating time of each cooking zone depends on the selected cooking level. A precondition is that no setting changes are made to the cooking zone during the period of use. The cooking zone is switched off once the operating time limit has responded. -
Page 21: Cookware Size
Only use pots and pans with a smooth base. Otherwise, rough pot or pan bases could scratch the glass ceramic panel. Use pans with straight edges if possible. When using pans with sloping edges, induction also acts in the edge area of the pan. This can discolour the edge of the pan. COOKWARE SIZE Up to a certain limit, the cooking zones automatically adjust to the size of the base of the pot. -
Page 22: Setting Ranges
STARTING UP THE HOOD (NOT FOR 5IZ34291) Blaupunkt Multi Control – unique connection between hob and hood Calling up the user menu Press the ON / OFF button a second time within 3 seconds after switching on. The "Pause" (||) button will flash. -
Page 23: Switching Hood Lighting On/Off
SWITCHING HOOD LIGHTING ON/OFF This function switches the hood light on or off. Operation Operating panel Display Switch on hob [ 0 ] Press [ ] for 2 sec. Switch on hood lighting Press [ ] button Switch off hood lighting Press [ ] button SELECTING HOOD MANAGEMENT MODE... -
Page 24: Setting The Ventilation Power
SETTING THE VENTILATION POWER The ventilation speed can be set in manual and semi-automatic mode. If an adjustment is made in the automatic mode, the management mode will switch to manual mode. Operation Operating panel Display Select ventilation Press ventilation display Increase power Press the right side of the illuminated “Smart Slider”... -
Page 25: Default Speed Setting In Semi-Automatic Mode
DEFAULT SPEED SETTING IN SEMI-AUTOMATIC MODE The default speed used in semi-automatic mode can be adjusted if it is changed manually on the selected cooking zone within 10 seconds after starting ventilation. Operation Operating panel Display Switch on hob Press [ ] for 2 sec. -
Page 26: Cleaning And Maintenance
CLEANING AND MAINTENANCE Before cleaning the hob after cooking, you should first allow it to cool down. Otherwise there is a risk of burns. Clean the dirty hob regularly. Use a damp cloth and a small amount of cleaning agent. Then rub it dry with a clean cloth. •... - Page 27 • The pot is empty and overheated. • Due to overheating, the electronics have automatically reduced or automatically switched off the power. The cooling fan keeps running after it has been switched off: • This is not a fault; the fan continues to run until the appliance has cooled down. •...
-
Page 28: Environmental Protection
ENVIRONMENTAL PROTECTION The packaging materials are environmentally friendly and recyclable. Electrical and electronic devices still contain valuable materials. However, they also contain harmful substances necessary for their function and safety. • For this reason, never dispose of your old appliance in the residual waste. - Page 29 Installation Insertion dimensions: 5IE64252 590 mm 520 mm 560 mm 490 mm 52 mm 5IE84252 780 mm 520 mm 750 mm 490 mm 52 mm 5II84251 780 mm 520 mm 750 mm 490 mm 52 mm 5II94291 880 mm 520 mm...
-
Page 30: Electrical Connection
Ventilation • The rear wall of the base cabinet must be open in the area of the worktop cut-out to ensure an exchange of air. • The distance between the induction hob and kitchen furniture or built-in appliances must be selected in such a way that adequate induction ventilation is ensured. - Page 31 Models 3 and 4 heating zones: 5IE64252, 5IE84252, 5II84251, 5IB64211 Mains Connection Diameter Cable Fuse H 05 VV - F 230V~50/60Hz 1 phase + N 3 x 2.5 mm² 25 A * H 05 RR - F H 05 VV - F...
- Page 32 Connecting the hob For the various connection options, use the brass terminal bridges located in the casing. Single-phase connection 230V~1P+N: Place a terminal bridge between terminals L1 and L2, then between terminals L2 and L3 and then between terminals N1 and N2. Connect the earthing to the «...
Need help?
Do you have a question about the 5IE64252 and is the answer not in the manual?
Questions and answers