Advertisement
Quick Links
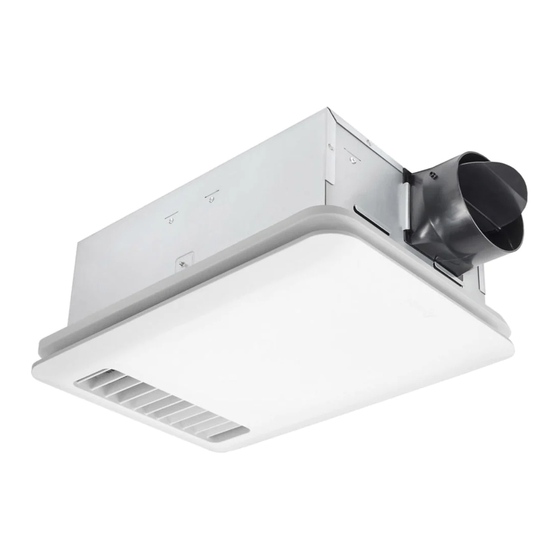
VENTILATION FAN
WITH LED LIGHT AND HEATER
MODEL RAD80-DGL / RAD80ELED
IMPORTANT INSTRUCTIONS
When using electrical appliances, basic precautions
should always be followed to reduce the risk of fire,
electric shock, and injury to persons, including the
following:
1. Read all instructions before installing or using
this heater.
2. Extreme caution is necessary when heater fan
is used by or near unattended children, and / or
persons with disabilities or limitations.
3. Do not operate heater if it malfunctions.
Disconnect power at service panel and have
heater inspected by reputable electrician before
reusing.
4. Do not use outdoors.
5. To disconnect heater, turn controls to OFF
switch. Then, turn off the power to the heater
circuit at the main disconnect panel.
6. Do not insert or allow foreign objects to enter
any ventilation or exhaust opening as this may
cause an electric shock of fire, or damage the
heater.
7. To prevent a possible fire, do not block air
intakes or exhaust in any manner.
8. A heater has hot and arcing or sparking parts
inside. Do not use it in areas where gasoline,
paint, or flammable vapors or liquids are used or
stored.
9. Use this heater only as described in this
manual. Any other use not recommended by the
manufacturer may cause fire, electric shock or
injury to persons.
SAVE THESE INSTRUCTIONS
Read carefully before attempting to assemble,
install, operate or maintain the product described.
Protect yourself and others by observing all safety
information. Failure to comply with instructions
could result in personal injury and/or property
damage.
SAFETY INFORMATION
Please read and understand this entire manual
before attempting to assemble, operate or install
the product.
1. Follow all local safety and electrical codes as
well as NEC (National Electrical Code) and OSHA
(Occupational Safety and Health Act).
2. This unit must be properly grounded.
3. Always disconnect the power supply prior to
servicing the fan, motor or junction box.
4. Do not bend or kink the power wires. Protect
from sharp edges, oil, grease, hot surfaces,
chemicals or other objects.
5. Do not install where the room air temperature
will exceed 40˚C (104˚F).
6. Do not install over a tub or mount in a shower
stall enclosure.
7. Do not use to exhaust hazardous or explosive
vapors.
8. Do not install in a cooking area.
9. Do not install this fan vertically in a wall.
10. Use this unit in the manner intended by the
manufacturer.
11. If you have any questions, please call the
manufacturer.
12. Installation work must be carried out by a
qualified person(s) in accordance with all local
and safety codes including the rules for fire-
rated construction. For use in non-fire rated
installations only.
13. Sufficient air supply is required for proper
combustion and the exhaustion of gases through
the chimney (flue) of fuel burning equipment
to prevent back-drafting. See the standards
of NFPA (National Fire Protection Association)
and ASHRAE (American Society for Heating
Refrigeration and Air Conditioning Engineers)
and the local building code authorities.
14. Exercise care to not damage existing wiring
when cutting or drilling into walls or ceilings.
15. Fans should always be vented to the exterior
and in compliance with local codes.
16. Do not use this fan with any solid state control
device such as a dimmer switch. Solid-state
controls may cause harmonic distortion, which
can cause a motor humming noise.
17. Prior to service or cleaning this unit, shut off
power supply at the panel and lock to prevent
the power from being turned on. If the panel
cannot be locked, clearly mark the panel with
a warning tag to prevent the power from being
turned on.
18. Do not install in a ceiling with insulation greater
than R40. (This is required for installations in
Canada only.)
19. Duct work should be installed in a straight line
with minimal bends.
20. Duct work size must be a minimum of the
discharge and should not be reduced. Reducing
the duct size can increase fan noise.
21. This ventilating bath fan is intended for
residential use only in 1-2 family dwellings.
22. Never place a switch where it can be reached
from a tub or shower.
23. Make sure that the electric service supply
voltage is AC 120 V, 60 Hz.
24. Always disconnect the power source before
working on or near the unit.
25. This unit is designed and tested to be a
supplemental heater for use with a timer or a
switch. It is not intended to be used as a primary
source of heat, or controlled by a thermostat.
26. To avoid motor bearing damage and noisy and/
or unbalanced impellers, keep drywall spray,
construction dust, etc., off power unit.
27. Provide a separate 15 AMP circuit.
28. This product is designed for ceiling installation
only. Do not mount this product in a wall.
29. Install in ceiling only, at least 6 in. from any wall.
30. For greatest efficiency, adjust heater grille
directly toward tub or shower area. Avoid
directing toward walls or windows.
31. Do not install less than 8 ft. (2.4 m) from the
floor.
32. Do not install the unit where ducts are
confugured as shown in Fig. A.
33. Do not open/disassemble LED light engine.
Turning angle too large
Too many elbows
Elbow near the body
Fig. A
1
Installation and Operating Instructions
PREPARATION
Tools Required for Assembly (not included):
Hammer, Flathead Screwdriver, Wire Nuts, Nails,
Duct Tape, Phillips Head Screwdriver, Utility Knife
Helpful Tools (not included): Electric Drill, Drill Bits
WARNING: Turn off electricity at breaker box
before beginning installation.
Carefully remove unit from carton.
Before installation, provide inspection and future
maintenance access at a location that will not
interfere with installation work.
Check area above installation location to be sure
that wiring can run to the planned location and
that duct work can be run. Make sure the area is
sufficient for proper ventilation.
You may need the help of a second person to
install this fan: one person on the attic side and
one on the room side.
Note: Installations may vary depending on how the
previous bath fan was installed. Supplies necessary
for the installation of your bath fan are not all
included.
However, most are available at your local home
improvement or hardware store.
Proper insulation around the fan to minimize
building heat loss and gain.
The fan will operate most efficiently when
located where the shortest possible duct run and
minimum number of elbows will be needed.
Use a roof cap or wall cap that has a built-in
damper to reduce backdrafts.
External timer/dimmer switch can be used.
Please contact Delta Breez customer service
and consult with a licensed electrician for
compatibility.
Determine the distance between your joist.
Spacing A on
center joists
Duct shrink
16.0 inches
19.2 inches
24.0 inches
Body
WARNING: Remove ceiling section using
dimensions provided below. Be careful to cut hole
exactly. If hole is too big, the fan grille will not hide
it.
Minimum 18 in.
Joist
Advertisement

Related Manuals for Delta breez RAD80-DGL


Summary of Contents for Delta breez RAD80-DGL
- Page 1 External timer/dimmer switch can be used. 30. For greatest efficiency, adjust heater grille 2. This unit must be properly grounded. Please contact Delta Breez customer service directly toward tub or shower area. Avoid and consult with a licensed electrician for 3.
- Page 2 PACKAGE CONTENTS ASSEMBLY INSTRUCTIONS Unpacking PART DESCRIPTION APPEARANCE Carefully remove unit from carton. Remove the foam in the housing. Refer to the Package Contents list on page 1 to verify that all parts are present. Installing the unit Installing the fan body in an existing building requires an accessible area (attic or crawl space) Fan Body above the planned installation location and existing...
- Page 3 CARE AND MAINTENANCE b. Plug the Light Connector into the receptacle Model: RAD80-DGL marked “Light”. (For Model RAD80ELED) See safety information before proceeding. Routine maintenance should be done at least once a year. • Never use solvents, thinner or harsh chemicals when cleaning the fan.
- Page 4 DELTA ELECTRONICS THREE YEAR LIMITED WARRANTY Delta Electronics Inc. (“Delta Electronics”) warrants to the original consumer purchaser in the USA that the Breez ventilation fan products will be free from defects in material or workmanship. This warranty is limited to three (3) years from the original date of purchase.
Need help?
Do you have a question about the breez RAD80-DGL and is the answer not in the manual?
Questions and answers