
Subscribe to Our Youtube Channel
Related Manuals for AquaLabo NEON OPTOD


Summary of Contents for AquaLabo NEON OPTOD
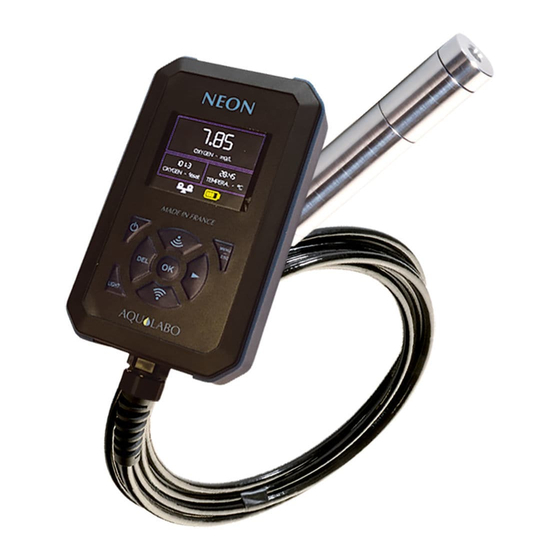
- Page 1 NEON_OPTOD Portable field Oxymeter for measuring and recording dissolved oxygen. User Manual Version 1.0...
- Page 2 NEON_OPTOD - 2 -...
- Page 3 IMPORTANT: The information contained in this document may be patented or under patent application by Aqualabo. Possession of this document does not confer any license on these patents. This manual is updated periodically. Updates are included in the new editions.
-
Page 4: Table Of Contents
4.2 General description of the product.________________________________________________________ 9 4.3 Main functions of NEON Oxymeter. _______________________________________________________ 9 5. Technical CHARACTERISTICs ____________________________________________________ 10 5.1 NEON OPTOD SPECIFICATIONS __________________________________________________________ 10 5.2 Description NEON housing ______________________________________________________________ 10 5.3 Description of stainless steel and titanium OPTOD sensor. ____________________________________ 12 6. - Page 5 NEON_OPTOD 6.3.5.4 Display ____________________________________________________________________________________ 22 6.3.5.5 Language __________________________________________________________________________________ 22 6.3.5.6 Factory configuration ________________________________________________________________________ 23 7. Data UNloading. _____________________________________________________________ 24 7.1 Activation and connection. _____________________________________________________________ 24 7.2 Home screen. ________________________________________________________________________ 24 7.3 Disconnection ________________________________________________________________________ 25 8. OPTOD sensor maintenance ___________________________________________________ 26 8.1 Cleaning _____________________________________________________________________________ 26 8.2 CHANGING THE Active membrane ________________________________________________________ 26 8.3 Storage _____________________________________________________________________________ 26...
-
Page 6: Warranty
It is legally protected by international copyright (c) law. AQUALABO affords the user a license to use its software. This may not be divulged, used or duplicated for back- up purposes without written permission from AQUALABO. The beneficiary must attach a copy of this document to any fully or partially authorized reproduction. -
Page 7: Information
If the equipment is not used immediately, it should be stored in a clean, dry place. Abide by the following storage temperatures (-10 to 60°C). AQUALABO equipment is carefully inspected before packaging. Upon receipt of your device, check the condition of the packaging and if you notice an anomaly, submit the usual reservations to the carrier within 48 hours. Then consult the packing list and check that everything is in order. -
Page 8: Safety
- Intensive exposure to light and heat - Caustic or high solvent vapours. Any work done on the inside of the instrument must be carried out by AQUALABO or by technicians authorized by 3.4 PACKAGING The NEON_OPTOD Oximeter is shipped in packaging to protect it during transport. It is essential to keep the original packaging as well as the inner packaging so as to ensure optimal protection of the device from any impacts in the event of further transport. -
Page 9: Presentation Of Neon_Optod Oxymeter
The NEON portable housing also contains an Atmospheric Pressure sensor for automatic compensation of the Oxygen parameter in mg/L. 4.3 MAIN FUNCTIONS OF NEON OXYMETER. The NEON OPTOD sensor unit, specifically designed to measure dissolved oxygen in the aquaculture field, offers the following features: - Automatic recognition of the Oxygen sensor, - Simultaneous display of the 3 parameters (Temperature, Oxygen % Sat, Oxygen mg/L);... -
Page 10: Technical Characteristics
NEON_OPTOD 5. TECHNICAL CHARACTERISTICS 5.1 NEON OPTOD SPECIFICATIONS NEON_OPTOD specifications Oxygen: 0,00 to 20,00 mg/L; 0-200% Temperature: 0,00 – 50,00 °C Range Atmospheric pressure: 450-800 mmHg (600-1065 hPa) Oxygen: 0,01 Resolution Temperature: 0.01 Oxygen: +/- 0,1mg/L ; +/- 0,1ppm ; +/- 1 % Accuracy Temperature: +/- 0.5 °C... - Page 11 NEON_OPTOD ➢ Back panel description: Waterproof battery compartment. Locking by a screw (304 stainless steel, M2.5x6) Product information label including serial number. - 11 -...
-
Page 12: Description Of Stainless Steel And Titanium Optod Sensor
NEON_OPTOD 5.3 DESCRIPTION OF STAINLESS STEEL AND TITANIUM OPTOD SENSOR. The OPTOD dissolved oxygen sensor uses luminescence-based optical measurement technology and measures reliably and accurately. Without consumables or maintenance, the OPTOD sensor provides an immediate return on investment. The only action required is the replacement of the oxygen active pellet every two years. Since it does not consume oxygen, the OPTOD sensor can be used on all types of media even when low water flow is very low. -
Page 13: Start-Up
NEON_OPTOD 6. START-UP 6.1 POWER SUPPLY 6.1.1 T YPE OF BATTERIES PERMITTED The measuring unit comes with 3 AA-size alkaline batteries. The user should never combine batteries of different types. Three AA-size NiMH batteries, 1.2 V (VARTA type) may be used. 6.1.2 C HANGING BATTERIES The 3 used alkaline batteries (AA) must be replaced in a perfectly clean and dry room so as not to stain the inside of... -
Page 14: Setting
NEON_OPTOD 6.3 SETTING 6.3.1 M AIN SCREEN The main screen displays the following in real time: - Parameters measured by the Oxygen sensor along with their units of measure: Temperature (°C), Oxygen in mg/L, Oxygen in % saturation. A ZOOM function allows you to view a parameter in a larger format. - A series of icons (at the bottom of the screen) to track the state of charge of the batteries, measurement stability, data recording activation as well as wifi activation for data transfer to a PC. -
Page 15: General Menu
NEON_OPTOD 6.3.2 G ENERAL The "GENERAL MENU" screen gives access to the Calibration, Registration and Preferences settings (date/time configuration, NEON laptop and sensor information, standby time delay configuration, language selection, RESET functionality in settings). CALIBRATION RECORDING PREFERENCES To access the desired menu, move the cursor using the up and down arrows and confirm the selection with the “OK” key. - Page 16 NEON_OPTOD To access the desired menu, move the cursor using the up and down arrows and confirm the selection with the “OK” key. To return to the previous screen press the ESC key. GAIN only calibration: For the OPTOD sensor, the gain alone can be set by adjusting to 100% the air saturated with water vapor. In theory this state can be achieved by placing the sensor in water-saturated air (for example directly above a water surface) or according to the illustration below: Fill the bottom of a vial with water and put the sensor just above the water.
-
Page 17: Barometer
NEON_OPTOD Having first cleaned the sensor (see ) it is immersed in a water-sulphite solution (concentration of Cleaning section 8.1 sulphite <2% by weight, 2 g max. in 100 ml of water) to determine the zero point (saturation 0%). Mix the solution using the sensor to decrease oxygen saturation faster (oxygen attached to the DODISK must be consumed). -
Page 18: Salinity
NEON_OPTOD BAROMETER ---- 995 hPa The atmospheric pressure can be adjusted to the 450-1200 hPa range. Adjust the atmospheric pressure measurement using the up/down arrows (the entry changes to white) and confirm with the “OK” key (the entry then changes to green). To return to the previous screen, press escape (ESC). -
Page 19: Recording Menu
NEON_OPTOD 6.3.4 R ECORDING MENU This menu allows you to view the data stored in the NEON portable device, set the recording frequency, configure the file names and erase the recorded data. RESULTS SAMPLE RATE CAMPAIGN NAME CLEAR DATABASE To select an option, use the up/down arrows and press OK. 6.3.4.1 R ESULTS This menu shows the data stored in the NEON laptop. -
Page 20: Campaign Name
NEON_OPTOD The frequency can be changed (on a 10s/30s, 1/5/10/30 min or 1 H basis) by using the up and down arrow keys (the writing changes to white). To confirm the chosen frequency, press the OK key (the writing goes green). To return to the previous menu select the Escape (ESC) key 6.3.4.3 C AMPAIGN NAME... -
Page 21: Preferences Menu
NEON_OPTOD 6.3.5 P REFERENCES The PREFERENCES menu allows you to configure the date and time of the NEON hardware (useful for time stamping stored data), to view information about the software/electronic versions of the NEON laptop and related sensor, set the standby time and then completely turn off the screen , to choose the language and return to the original hardware configuration. -
Page 22: Sensor
NEON_OPTOD 6.3.5.3 S ENSOR This window shows information about the sensor connected to NEON: its description, serial number, the version of the board and the software version. SENSOR DESCRIPTION : ODO/TemperaturePONSEL Sensor description SN-LLLLL-NNNNN Sensor serial number HARDWARE VERSION : NN.NN Hardware version FIRMWARE VERSION : NN.NN Software version... -
Page 23: Factory Configuration
NEON_OPTOD 6.3.5.6 F ACTORY CONFIGURATION This menu lets you RESET the device to restore the factory configuration. FACTORY CONFIG. OK to confirm To confirm the reset, press the OK key. This action will reset the factory configuration for: the Backlight intensity level, standby delay (2 min), default salinity value (0.00 ppt), default atmospheric pressure value (1013 hPa), measurement campaign name (LOCAL) and language in English. -
Page 24: Data Unloading
NEON_OPTOD 7. 7. DATA UNLOADING. 7.1 ACTIVATION AND CONNECTION. To enable connection to the NEON on-board web page and retrieve the stored data, scroll to the following in the menu presenting data recorded in NEON: GENERAL MENU>> RECORDING>>RESULTS. Then simultaneously press the keyboard keys with the WIFI icons (keys 4 and 8 on the picture in Section 6.2.2 Navigation keyboard.) -
Page 25: Disconnection
NEON_OPTOD - The temperature and internal humidity of the NEON handheld device. 7.3 DISCONNECTION To disconnect the NEON device from the computer, click the “EXIT” tab. The Wifi icon at the bottom of the “RESULTS” menu disappears. - 25 -... -
Page 26: Optod Sensor Maintenance
NEON_OPTOD 8. 8. OPTOD SENSOR MAINTENANCE The sensor must always be kept clean, especially in the area around the membrane and optical part. The presence of a biofilm on the membrane may result in measurement errors. A soiled membrane must be cleaned with hot soapy water. A soft sponge can be used for cleaning (do not use an abrasive sponge). -
Page 27: Accessories And Consumables
NEON_OPTOD 9. 9. ACCESSORIES AND CONSUMABLES Spare Parts/Consumables PF-CSO-C-00041 Strainer with integrated DODISK for OPTOD stainless steel sensor PF-CSO-C-00045 Strainer with integrated DODISK for OPTOD Titanium sensor PF-ACC-C-00472 OPTOD protective strainer ME-BOU-S-00021 Protective cap for OPTOD sensor 1SS012 25g of sodium sulphite for calibration - 27 -...
Need help?
Do you have a question about the NEON OPTOD and is the answer not in the manual?
Questions and answers