Table of Contents
Advertisement
Advertisement
Table of Contents

Related Manuals for Generalmusic GK 330


Summary of Contents for Generalmusic GK 330
- Page 1 Owner’s manual...
-
Page 2: Care Of Your Keyboard
Care of your keyboard Your keyboard will give you years of playing pleasure if you follow the simple rules outlined below: Do not expose the keyboard to high temperature, direct sunlight and excessively dusty places. Avoid physical shocks caused by dropping, bumping, or placing heavy objects on the key- board. -
Page 3: Table Of Contents
Contents Introduction ... 1 The GK330 offers the following features: ... 1 Power supply ... 1 Using the AC adaptor ... 1 Using batteries ... 1 To insert the batteries ... 1 Important battery information ... 1 Connections ... 2 The Phones jack ... - Page 4 Playing the Styles ... 10 Jam Track ... 11 Changing the Style Tempo ... 11 Restoring the memorized Tempo ... 11 About the Chord Recognition Modes ... 11 Using the Style Auto functions ... 12 Select the Fill In and change Style Variation ... 12 Start the Style accompaniments with Key Start ...
-
Page 5: Introduction
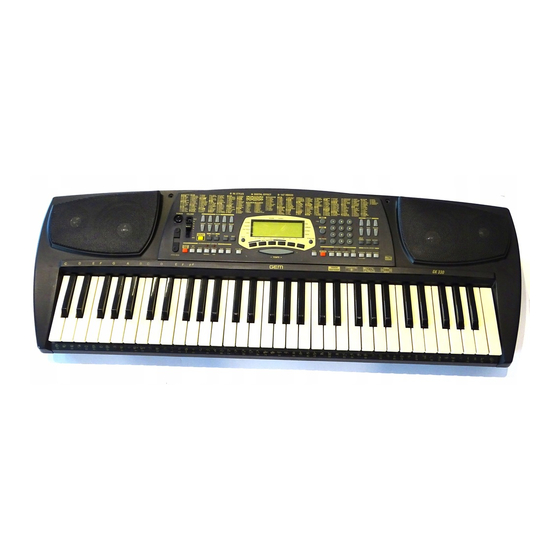
Introduction Thank you for purchasing the new GEM GK330 electronic keyboard. The GK330 offers the following features: • 61 note keyboard with Touch Response; • 147 PCM voices including 7 Drumkits; • On-board Digital multi-effects processor with 8 Reverb and 8 Chorus effects, each with independent Effect Level control;... -
Page 6: Connections
Connections The Phones jack If you prefer to play with headphones for high quality personal monitoring, plug a standard stereo headphone set into the rear panel PHONES jack. The internal speakers are automatically disconnected. Use the VOLUME slider to adjust the headphone volume. The Damper jack An optional footswitch can be plugged into the DAMPER jack for sustain control. -
Page 7: Basic Operation
The Demo display appears as shown below: Playback starts automatically. When the Song reaches the end, it loops back to the beginning and repeats continually until you stop the playback. 4. Press the [DEMO] button to stop the Song at any point of the playback. It is also possible stop the Demo with the [START/STOP] button. -
Page 8: Select A Voice With The Numeric Keypad
Select a Voice with the numeric keypad Using the numeric keypad is the quickest way to go directly to the Voice you need, but you must know the exact number of the voice. The name and corresponding number of all the Voices in memory are silkscreened above the display on the right. You’ll see that they start from number 01 through to number 147. -
Page 9: Split Keyboard
Split keyboard To play on a split keyboard with one or two voices on the right hand side (UPPER keyboard) and one voice on the left (LOWER keyboard), press the [MODE] button as many times as necessary until the left display arrowhead points to the SPLIT function. -
Page 10: The Performances
The Performances So far, you have learnt how to select single and combined Voices in Normal, Dual and Split modes using several panel interventions. If, every time you want to create a preferred sound combination, you have to take several steps to arrive at your goal, you would ask yourself if there wasn’t a quicker way of selecting what you want. -
Page 11: Muting The Sections
Muting the sections If you want to exclude a section (mute, or turn off), you can use the MIXER control buttons. Simply press both [INCREASE VOLUME] and [DECREASE VOLUME] buttons at the same time to mute the section required. For example, if you press both the top and bottom buttons of the [UPPER MIXER], the display will show UPPER OFF. -
Page 12: Play With Effects Or Bypass Them
Play with Effects or bypass them While you play, one or both effects (Reverb and/or Chorus) will be shown active by the small black indicator arrow at the top of the display. This means that the current Performance is being processed by one or both effect types. By means of the [REVERB] and [CHORUS] buttons on the extreme right hand side of the control panel, you can turn the effect on or off at will. -
Page 13: Styles - Auto-Accompaniment
Styles - Auto-Accompaniment What are the Styles? Styles are a collection of musical patterns representing many types of music, rang- ing from rock and pop to traditional and ethnic music. The GK330 contains 96 differ- ent auto-accompaniment Styles that can be used to provide fully-orchestrated ar- rangements. -
Page 14: Use The Numeric Keypad To Select A Style
Use the numeric keypad to select a Style Using the numeric keypad is the quickest way to go directly to the Style you need, but first, you must know the exact number of the Style. The name and correspond- ing number of all the Styles in memory are silkscreened above the display on the left. -
Page 15: Jam Track
Jam Track The STYLES feature the Jam Track, an automatic function which allows you to improvise a melody in real time, while the GK330 plays an accompaniment riff (a cyclic change of chords). At any time while you are playing with a Style, simply press the [JAM TRACK] button (LED on) and release the notes on the left hand. -
Page 16: Using The Style Auto Functions
Using the Style Auto functions The Styles provide a wide variety of automatic functions that make the GK330 very easy to play. The functions are found in the ACCOMPANIMENT CONTROL section. Select the Fill In and change Style Variation Each Style has two accompaniment patterns, NORMAL and VARIATION, which you can select at any time before or after starting to play the Styles by pressing the corresponding button. -
Page 17: Balancing The Style Accompaniment Tracks With The Mixer
The display will show the Harmony OFF situation for a short period. If you are playing with Styles, start the Style with [START/STOP]. 2. Press the [HARMONY] button again to select the first Harmony type, 01, shown in the display for a short period. 3. -
Page 18: Muting The Style Tracks
Muting the Style tracks If you want to exclude a section (mute, or turn off), simply press both [INCREASE VOLUME] and [DECREASE VOLUME] buttons at the same time to mute the sec- tion required. For example, to play your Upper and Lower voices with the BASS accompaniment only, mute the DRUMS and ACCOMP tracks. -
Page 19: Changing The Accompaniment Split Point
Changing the accompaniment Split Point If you want to increase or decrease the keyboard area dedicated to the Style chords, you can change the Split Point setting to any note of the keyboard and memorize the setting to a Performance. The factory setting corresponds to note F#3. 1. -
Page 20: The Performance Buttons And Store Performance
The display shows two digits relating to the effect type (in this case Reverb) shown flashing, and the corresponding level (shown fixed): Flashing Note: The display remains active for a short period to allow you to make your selection. If you fail make a selection, the display will return to the previous situation automatically. -
Page 21: Panel Reset - Restore Performance
Play on, the voices recalled for the Upper and Lower sections will be Organ 2 and Strings respectively. You only need to change one aspect of any factory setting to be able to save the new setting as a new Performance. In our example, let’s change the voice assigned to the Voice 1 section. -
Page 22: Listen To The Playback Of A Recorded Song
If you want to start the recording of the Style with an introduction, press the [INTRO] button to preset the Intro. 4. Start to record the notes you play. The Key Start function triggers the Style accompaniment patterns when you play a chord on the keyboard below the split point. -
Page 23: The Metronome
The Metronome At any time, you can activate the METRONOME for practising purposes. To play with the Metronome, press the STYLE button and insert the value 00 on the numeric keypad (press the “0” button twice). Press the [START/STOP] button to start the Metronome. The Metronome starts beating time with a ‘tick’. -
Page 24: The Gk330 Utility Functions
The GK330 Utility functions The GK330 features several utility functions which affect the keyboard globally. The functions are: TRANSPOSE, TUNE and PAN. The UTILITY functions are twin-ac- tion buttons organized in two rows: the top row are increase [INC] controls while the bottom row are decrease [DEC] controls. -
Page 25: Midi
MIDI The MIDI section consists of two functions, TX and RX, which allow you to set the Transmission (TX) and Reception (RX) channels independently for the keyboard as a whole. Both Reception and Transmission channels also feature a Control Change filter (on/off). -
Page 26: Specifications
Specifications Keys : 61 keys with Touch Response Voices : 147 PCM voices including 7 percussion keyboard kits Polyphony : 64 notes Digital Effects : 8 Reverb and 8 Chorus effects, both with Effect Level control Styles : 96 styles with 2 Variations (Normal and Var) Modes : Normal, One Finger, Fingered, Split, Dual Styles Control :... -
Page 27: Index
Index AC adaptor 1 Accompaniment Control 12 Auto-Accompaniment 9 Aux. Out jack 2 Balancing the Lower and Upper sections 6 Balancing the Style accompaniment 13 Basic Operation 3 Beat 19 Bypass 8 Cancel Split mode 5 Cancelling the Octave Transpose 8 Changing the Split point 15 Chord Recognition Modes 11 Chorus indicator 15... - Page 28 Touch Response 8 Transmission channel, Midi 21 Transpose 20 Tune 20 Using batteries 1 Utility 20 Variation 12 Voices 3 24 GK330 Owner’s manual...
-
Page 29: Appendix
Appendix GK310 A•1... -
Page 30: Appendix A - One Finger Chords Chart
Appendix A - One finger chords chart Appendice A - Tabella accordi “One Finger” A•2 GK310 #m7/ #m7/ F#m/ #m7/ G#m/ #m7/ A#m/ #m7/... -
Page 31: Appendix B - Fingered Chords Chart - Table
Appendix B - Fingered chords chart - Table 1 Appendice B - Tabella 1 - accordi “Fingered” MAJOR MINOR (Cm) DOMINANT 7th (C7) MINOR 7th (Cm7) MAJOR 7th (Cmaj7) DIMINISHED (Cdim) AUGMENTED (Caug) (C6) MINOR 6th (Cm6) GK310 A•3... - Page 32 Appendix B - Fingered chords chart - Table 2 Appendice B - Tabella 2 - accordi “Fingered” MAJOR MINOR (Cm) DOMINANT 7th (C7) MINOR 7th (Cm7) MAJOR 7th (Cmaj7) DIMINISHED (Cdim) AUGMENTED (Caug) (C6) MINOR 6th (Cm6) A•4 GK310...
- Page 33 GK330 Sound table CHOIR PIANO group VOXOOH PIANO 1 SynVOX PIANO 2 ORCHHIT PIANO 3 HONKY BRASS group El. PNO 1 TRUMPET El. PNO 2 TROMBONE HARPSI TUBA CLAVI MUTED TRP Fr HORN CHROMATIC group BRASS CELESTA SynBRASS 1 GLOCKEN SynBRASS 2 MUSIC BOX VIBES...
- Page 34 GK330 Style tables († = Via Midi Common only) † GK330 STYLES METRONOME BIG BAND 1 BIG BAND 2 8 BEAT DIXIE 8Bt STAND BROADWAY 8Bt FOLK FOXTROT 8Bt HIT 8Bt MEDIUM U.S. / TRAD BLUES 16 BEAT SL BLUES 16Bt BALLAD GOSPEL 16Bt FOLK...
Need help?
Do you have a question about the GK 330 and is the answer not in the manual?
Questions and answers