Table of Contents
Advertisement
Advertisement
Table of Contents

Related Manuals for BYD PMW20


Summary of Contents for BYD PMW20
- Page 1 PMW20 SERVICE MANUAL < SM-PMW202020001-EN >...
- Page 2 This manual is applicable to the maintenance of BYD forklift for authorized personnel.
-
Page 3: Table Of Contents
PMW20 PMW20 TABLE OF CONTENTS 5.2 REMOVE AND INSTALL THE HANDLE LEVER INTRODUCTION 5.3 REPLACE THE AIR-ACTUATED SPRING 1.1 ENTIRE FORKLIFT 5.4 REMOVE AND INSTALL THE STEERING-CONNECTED ASSEMBLY 1.2 ATTACHMENTS 5.5 REMOVE AND INSTALL DRIVE ASSEMBLY 1.3 CHASSIS 5.6 SEPARATE DRIVE MOTOR ASSEMBLY FROM REDUCTION GEARBOX 1.4 HYDRAULIC DEVICE... - Page 4 PMW20 PMW20 6.6 REMOVE AND INSTALL THE LIFT CYLINDER 8.7 T A B L E O F F A U L T C O D E S 8.8 ELECTRICAL MAINTENANCE DIAGNOSIS 6.7 COMPLETE MAINTENNACE OF THE LIFT CYLINDER 8.9 DESCRIPTION OF ELECTRICAL COMPONENT SYSTEM CONTROL...
-
Page 5: Introduction
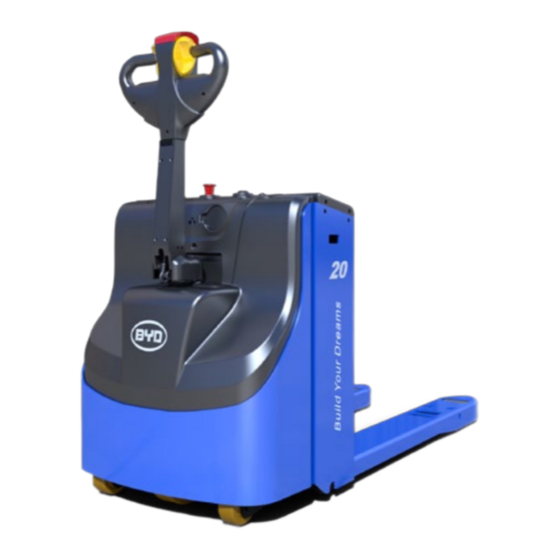
PMW20 PMW20 INTRODUCTION 1.2 ATTACHMENTS 1.1 ENTIRE FORKLIFT Cover Plate Of The Battery Box Instrument Panel Operating Guard Of Tiller Handle Fork Assembly Guard Plate Of The Rear Forklift Body Front Forklift Body Rear Forkift Body SM-PMW202020001-EN SM-PMW202020001-EN... -
Page 6: Chassis
PMW20 PMW20 1.3 CHASSIS 1.4 HYDRAULIC DEVICE Operating Handle Assembly Welding Assembly of Handle Lever Steering-Connected Assembly Drive Assembly Cylinder Balance Mechanism Cylinder Lift Mechanism Support Wheel Assembly Balance Mechanism Hydraulic Power Unit Drive Wheel Lift Mechanism Support Wheel Assembly... -
Page 7: Electric Device
PMW20 PMW20 DAILY MAINTENANCE 1.5 ELECTRIC DEVICE 2.1 TIME AND ITEMS Daily items are inspected daily (or every 8 hours) and weekly (or every 40 hours), whichever Emergency Switch comes first. For example, if the working hours are less than 8 hours per day, the forklift Safety Device shall be inspected daily. - Page 8 N o t e 7. Driving, Steering and Checking If oil leaks, please identify the position and contact after-sale personnel of BYD. (1) Swing the control handle right and left and up and down. Check whether it can rotate smoothly and make sure no abnormal sound appears in the operation process.
-
Page 9: Time And Items
PMW20 PMW20 REGULAR MAINTENANCE Warning 3.1 TIME AND ITEMS For example, if the service time within 6 weeks are less than 250 hours, the reference Disconnect power before the electric check. time will be calculated as 6 weeks. Otherwise, 250 hours are preferred. Other reference time is calculated likewise. -
Page 10: Maintain Attachments
PMW20 PMW20 MAINTAIN ATTACHMENTS 4.1 REMOVE AND INSTALL GUARD This chapter will describe how to maintain attachments. 1. REMOVE(Remove the cover plate of the battery box) 1) Remove the guard with the cross screwdriver (Codes13/15/18). 2) Remove the fastener on the battery cover plate with a 4mm Allen wrench (Code 10). -
Page 11: Maintain Chassis
PMW20 PMW20 MAINTAIN CHASSIS 2. Remove the Guard of the Motor This chapter will describe how to maintain chassis. Operating Handle Assembly Welding Assembly Of Handle Lever Steering-Connected Assembly Drive Assembly Balance Mechanism Lift Mechanism CODE PART NAME OTHER INFORMATION HEXAGON SOCKET COUNTERSUNK HEAD CAP SCREWS _M6×16 4... -
Page 12: Remove And Install The Operating Handle
PMW20 PMW20 5.1 REMOVE AND INSTALL THE OPERATING HANDLE OPERATING HANDLE PARTS 1. Remove (1) Unscrew the screw (Code 11) on the controlling handle with a 5mm Allen wrench and then open the upper and lower covers on the controlling handle. -
Page 13: Remove And Install The Handle Lever
PMW20 PMW20 5.2 REMOVE AND INSTALL THE HANDLE LEVER 5.3 REPLACE THE AIR-ACTUATED SPRING 1. Remove 1. Remove 1) Remove the guard. Refer to 4.1 REMOVE AND INSTALL GUARD for details. 1) Open the rear cover of the handle lever and remove the screw (Code 10) with a 3mm Allen wrench. -
Page 14: Remove And Install The Steering-Connected Assembly
PMW20 PMW20 5.4 REMOVE AND INSTALL THE STEERING-CONNECTED ASSEMBLY 2. Install 1. Remove 1)Install the parts of the steering-connected assembly first and then install the bushing Code 17) , handle limit cushioning pad (Code 15) and the handle limit mounting block 1) Remove the handle lever. -
Page 15: Separate Drive Motor Assembly From Reduction Gearbox
PMW20 PMW20 5.6 SEPARATE DRIVE MOTOR ASSEMBLY FROM REDUCTION GEARBOX 2.Install ASSEMBLY 1) Lift the drive axle into the mounting position. 1.Remove the motor 2) Tighten the bolt (Code 11) on the drive axle. Remove the bolt (Code 19) for the pivotal bearing of the motor and reduction gearbox with 3) Connect the power lines (U/V/W) on the drive motor. -
Page 16: Replace Drive Wheels
PMW20 PMW20 CODE PART NAME QTY OTHER INFORMATION CODE PART NAME OTHER INFORMATION MOTOR HEXAGON FLANGE NUT 90 N-m LEVEL-ONE REDUCTION PINION SPHERICAL RESILIENT CUSHION LOCK NUT ENCODER 5.8 REPLACE BALANCE WHEELS HEXAGON SOCKET HEAD CAP BOLTS M8X25 REDUCTION GEARBOX... -
Page 17: Replace The Balance Mechanism
PMW20 PMW20 5.9 REPLACE THE BALANCE MECHANISM 5.9.2 Adjustable Balance wheels 1. Remove 5.9.1 Replace the Balance Wheel (Refer to 5.9.2 for details) 1) Remove the bolt (Code 12) with a 13mm socket wrench and then remove the balance wheel assembly. - Page 18 PMW20 PMW20 CODE PART NAME OTHER INFORMATION 3. Adjustment Standard for Assisting Wheels TURNING FORK ASSEMBLY OF ASSISTING WHEELS --- ADJUSTABLE TURNING FORK ASSEMBLY OF ASSISTING WHEELS ---- ADJUSTABLE The lowest positions of the drive wheel and the assisting wheels on both sides are on the HEXAGON SOCKET FLAT ROUND HEAD SCREWS _M16×75...
-
Page 19: Remove And Install The Assisting Support Assembly
PMW20 PMW20 5.10 REMOVE AND INSTALL THE ASSISTING SUPPORT ASSEMBLY 5.11 REMOVE AND INSTALL THE ASSISTING SUPPORT ASSEMBLY 1. Remove 1) Lift the front end of the fork ,fill up a solid piece of wood,press the emergency stop switch. 1) Lift the rear of the forklift with a jack, Unscrew the bolt (Code 13) and remove the assisting support plate. -
Page 20: Remove And Install The Lift Mechanism
PMW20 PMW20 5.12 REMOVE AND INSTALL THE LIFT MECHANISM Note 1. Remove If the the pull rod has been removed or the nut is loose, adjust the height of the fork timely and then tighten the nut. 1) Tap out the pin (Code 11) and the rotation shaft (Code 10) with an appropriate tool. -
Page 21: Remove And Install Main Bearing Of Compound Rollers
PMW20 PMW20 4. Parts of the Lift Mechanism 5.13 REMOVE AND INSTALL MAIN BEARING OF COMPOUND ROLLERS 1. Remove 1) Remove cylinder fasteners and relevant wiring harness thereof (Codes 1/2/3/4/5), and separate front and rear forklift bodies. 5.Power Wire (Input End) of the Charger 4.Negative and Positive Wire... - Page 22 PMW20 PMW20 2) Remove the Circlips for shaft and use an appropriate tool to remove the main 2 Install bearing of compound rollers. Follow steps in reverse order to install the the main bearing of compound rollers. Note Main and side rollers, and dust-proof ring are mounted to the front end of compound rollers of door bracket through circlips.
-
Page 23: Maintain The Hydraulic Device
PMW20 PMW20 MAINTAIN THE HYDRAULIC DEVICE 6.1 WORKING PRINCIPLE OF THE HYDRAULIC SYSTEM This chapter will describe how to maintain the Hydraulic Device. Cylinder Cylinder The hydraulic system is consist of the hydraulic power unit, lift cylinder and some tubes. - Page 24 PMW20 PMW20 1)Lifting State 2)Lowering State When it is in the lifting state, start the motor and extract the hydraulic oil with the oil When it is in the lowering state, the motor is closed and the solenoid valve is power on pump.
-
Page 25: Parts Of The Hydraulic System
PMW20 PMW20 6.2 PARTS OF THE HYDRAULIC SYSTEM 3)Overload or Blockage The hydraulic system of the PMW20 forklift promotes the fork to move. Main parts of the hydraulic system: 1) Hydraulic Power Unit 2) Lift Cylinder 3) Hydraulic Oil Tube 2. - Page 26 PMW20 PMW20 1)Schematic Diagram of the Hydraulic System 2)Hydraulic Power Unit The hydraulic unit includes the hydraulic pump, electric motor, solenoid valve, overflow valve, the solenoid valve, oil tank, governor valve and etc. The hydraulic power unit features in its output volume (ml/r), named cc.
- Page 27 PMW20 PMW20 3)Lift System 4)Safe oil passage The lifting system consists of an oil cylinder and a power unit and allows the fork to rise The overloaded machine and blocked oil tube will make the pressure of the system over and fall.
-
Page 28: Add Hydraulic Oil
(4) Only authorized hydraulic oil can be used. Otherwise, it will damage the hydraulic CODE PART NAME OTHER INFORMATION device. If you need to use other types of hydraulic oil, please contact after-sale AIR FILTER personnel of BYD forklift. SM-PMW202020001-EN SM-PMW202020001-EN... -
Page 29: Remove And Install The Power Unit
PMW20 PMW20 6.5 REMOVE AND INSTALL THE POWER UNIT 3. Power Unit Parts 1. Remove 1) Lower the fork to the lowest position,close the switch,and press the emergency stop switch. 2) Remove the screw (Code 10) with a 4mm Allen wrench. -
Page 30: Remove And Install The Lift Cylinder
PMW20 PMW20 6.6 REMOVE AND INSTALL THE LIFT CYLINDER 2)Install the Oil Cylinder Connector (Code 14) Drive the upper and lower lift cylinders of the forklift after installation and check whether 1. Remove the oil cylinder connector leaks. 1) Lower the fork to the lowest position and then open the guard (refer to 4.1 for details). -
Page 31: Maintain Electric Device
PMW20 PMW20 MAINTAIN ELECTRIC DEVICE CODE PART NAME OTHER INFORMATION CYLINDER LINER PISTON ROD This chapter will describe how to maintain electric device. PISTON CYLINDER SLEEVE CYLINDER BASE OIL PIPE OIL PIPE JOINT O-RING D46.2×2.65 DUST-PROOF RING SEALING RING CIRCLIPS 45×35×2 Emergency Switch CIRCLIPS 45×40×1.5... -
Page 32: Electric Check
PMW20 PMW20 7.2 CHECK THE MAIN CONTROLLER 7.1 ELECTRIC CHECK a) Check whether connection terminals of the main controller are loose. If any, tighten Warning b) Check whether the safety device of the main controller works normally. If Disconnect power before the electric check. Refer to 5.13 for details. -
Page 33: Remove The Main Controller
PMW20 PMW20 7.3 REMOVE THE MAIN CONTROLLER CODE PART NAME OTHER INFORMATION HEXAGON FLANGE BOLT _M5×20 1) Before replacing the faulty controller, close the battery power of the forklift and HEXAGON FLANGE BOLT _M10×16 disconnect the output connection of the battery. -
Page 34: Remove The Horn
PMW20 PMW20 7.4 REMOVE THE HORN 7.5 REMOVE THE MAIN CONTACTOR 1) Remove the guard. Refer to 4.1 for details. 1) Remove the guard. Refer to 4.1 for details. 2) Unplug the wire connector G09. 2) Unplug the wire connector G14. -
Page 35: Remove The Limit Switch
PMW20 PMW20 4)Remove the set screw with a cross screwdriver and take out the main contactor. 2)Remove the set screw with a cross screwdriver and take out the limit switch. 7.6 REMOVE THE LIMIT SWITCH 1)Remove the wire G09A/G09B with a cross screwdriver. -
Page 36: Trouble Shooting
You can find and solve the electrical faults in accordance with must be original. the display error codes and controller alarm error codes. Please contact BYD for the 2) In the troubleshooting process, a multimeter is necessary. When solving some original spare parts. -
Page 37: Electrical Maintenance Diagnosis
PMW20 PMW20 8.1 ELECTRICAL MAINTENANCE DIAGNOSIS 8.2 COMPARISON TABLE OF THE DISPLAY ERROR CODES AND CONTROLLER ERROR CODES 1) The alarm code of the display is shown as "Exx" while the alarm error code of the PARAMETER FAULT CODES controller is displayed as “number”. - Page 38 PMW20 PMW20 PARAMETER PARAMETER FAULT CODES FAULT CODES DEFINITION DEFINITION (CONTROLLER) (CONTROLLER) (DISPLAY) (DISPLAY) DATA DOMAIN 3 DATA DOMAIN 3 0x288 02A73 WRONG RAM MEM 0x288 02A78 VACC NOT OK 0x288 02A61 THERMIC SENS. KO 0x288 02A79 INCORRECT START 0x288 02A62 TH.
-
Page 39: Program And Software
PMW20 PMW20 Steps: 8.3 PROGRAM AND SOFTWARE 1. Open the software “ZpCanFlasher”, as shown in Fig.1.1.3. 1) This section will introduce how to update the controller program (EPF file). The program is designed for the controller of the forklift. Different types of programs can match with corresponding forklifts so as to complete the control for the forklift. - Page 40 PMW20 PMW20 4.Click Config CAN → Init CAN device, as shown in Fig. 1.1.6. 3. Select the File Format of cfi The cfi file required for the main controller model COMBIACX is “adx_zp002(2560).cfi”. The default path of the file is “my computer C dish” → “Zpconfig” → “cfi”, as shown in Fig.
- Page 41 PMW20 PMW20 Click OK, as shown in Fig.1.1.9 and Fig.1.1.10. Open it and find the software required by the controller in the corresponding folder, as shown in Fig.1.1.12. Fig.1.1.9 Fig.1.1.10 5. Select the controller software and click “File” → “Load File”, as shown in Fig.1.1.11.
- Page 42 PMW20 PMW20 Fig.1.1.14 8.Then click “Flash” and wait until the burning software finishes. Select “YES” and start burning software. 9.When the software is written successfully, “Write Flash Ok” will appear in the dialogue, Fig.1.1.13 as shown in Fig.1.1.16 and Fig.1.1.15.
- Page 43 PMW20 PMW20 9. When the software is written successfully, “Write Flash Ok” will appear in the dialogue, 1.2 Remove Parameters as shown in Fig.1.1.16. 1. Open “ZpCanConsole”, select the icon, and connect CAN box, as shown in Fig.1.2.1. Fig.1.2.1 Or select the CONNECTION STATUS on the main menu, as shown in Fig.1.2.2.
- Page 44 PMW20 PMW20 Lightening icons show successful connection, as shown in Fig.1.2.8. Fig.1.2.8 Enter password of the upper computer: ZAPI, shown in Fig.1.2.11. Fig.1.2.3 Fig.1.2.4 Fig.1.2.9 Click OK respectively, as shown in Fig.1.2.5 and Fig.1.2.6. Select shortcut icon, as shown in Fig.1.2.9. Or select options of the main menu, as shown in Fig.1.2.10.
- Page 45 PMW20 PMW20 Enter password of the upper computer: ZAPI, shown in Fig.1.2.11. Fig.1.2.13 Select the corresponding site, as shown in Fig.1.2.14. Fig.1.2.11 Select the site: enter by clicking the shortcut icon. Station 2 is the drive controller (main controller), and station 6 is the steering controller, as shown in figure 1.2.12.
- Page 46 PMW20 PMW20 After entering the site, the version information thereof will be displayed, as shown in Click the button “Clear Eeprom”, as shown in Fig.1.2.17. Fig.1.2.15. Fig.1.2.17 Fig.1.2.15 Click two consecutive prompts “OK”, as shown in Fig.1.2.18 and Fig.1.2.19. Then click “Function” → “EEPROM Function”, as shown in Fig.1.2.16.6.
- Page 47 PMW20 PMW20 Fig.1.3.2 Click “File” → “Open” and select parameters to be imported, as shown in Fig.1.3.3 and Fig.1.2.19 Fig.1.3.4. After clicking “OK”, restart the key switch and click “Close” back to the main interface. If it prompts whether to reconnect the software, click “YES”. Or close the software and restart connection again.
- Page 48 PMW20 PMW20 Fig.1.3.4 Open parameters and enter the interface. Click the button “TxFile” and start to import parameters. After finished, click “Close”, as shown in Fig.1.3.5. Fig.1.3.6 Note After parameters are imported successfully, the lower right button will become clickable where you should click “Save”, as shown in Fig.1.3.6.
-
Page 49: Adjust Parameters
PMW20 PMW20 8.4 ADJUST PARAMETERS 1 . Parameter Description Select a same way to enter the parameter interface, but select different sites. As shown in Fig.2.1.1, NODE 2.0 is for drive (main controller) while NODE 6.0 is for steering controller. Other sites displayed should be neglected. - Page 50 PMW20 PMW20 MAX SPEED BACK MAXIMUM BACKWARD SPEED PARAMETER CHANGE HYD SPEED FINE PARAMETER CHANGE ADJUST PROPORTIONAL VALVE (COARSE TUNING) SO THAT PUMP MOTOR WORKS NORMAL AT AN APPROPRIATE SPEED. HYDRO COMPENS. PARAMETER CHANGE ADJUST PROPORTIONAL VALVE (FINE TUNING) SO...
- Page 51 PMW20 PMW20 EVP OPEN DELAY OPEN DELAY OF LOWERING VALVE PORT PARAMETER CHANGE EVP CLOSE DELAY CLOSE DELAY OF LOWERING VALVE PORT PARAMETER CHANGE SPEED RED 1 LOGIC SPEED REDUCTION 1 PARAMETER CHANGE SPEED RED 2 LOGIC SPEED REDUCTION 2...
- Page 52 PMW20 PMW20 Click "Acquire", as shown in Fig.2.3.3. 2.3 ACQUIRE THE VOLTAGE INFORMATION OF THE ACCELERATOR Function: When it alarms the fault VACC NOT OK or VACC OUT RANGE, acquire the voltage information of the accelerator. Operating procedures are as follows: Connect the CAN box, input the password, select the site and then click the option "FUNCTION →...
-
Page 53: Monitor Data
PMW20 PMW20 Press the handle and operate the accelerator towards the operator, as shown in the 8.5 MONITOR DATA Fig.2.3.5. 1. Monitor Menu Function: Troubleshoot faults by monitoring the current or operating state of the part in use Operating procedures: Connect the CAN box, input the password, select the site and then click the monitor menu, as shown in the Fig1.1. - Page 54 PMW20 PMW20 2 . Export Parameters COMMON MONITORING PARAMETERS TABLE Function: The parameters need to be saved or exported to the technician for STATIONARY ITEM DESCRIPTION TRIGGERING / RUNNING troubleshooting. STATE Operating procedures: Connect the CAN box, input the password, select the site and then...
- Page 55 PMW20 PMW20 Receive data, as shown in the Fig.2.3. Fig.2.4 Fig.2.3 Click the option "File——Save" and export parameters, as shown in the Fig.2.4 and Fig.2.5. Fig.2.5 SM-PMW202020001-EN SM-PMW202020001-EN...
- Page 56 PMW20 PMW20 Enter the name of the parameter table, as shown in the Fig.2.6. Parameter export is finished, as shown in the Fig.2.8. Fig.2.6 Fig.2.8 Enter comments or any letters. Enter ZAPI and click the button "OK ", as shown in the Fig.2.7.
-
Page 57: Burning Procedures Of The Serial Port
PMW20 PMW20 8.6 BURNING PROCEDURES OF THE SERIAL PORT The interface location of the controller is as shown in the Fig.1.1. 1.AC-0 Program Burning The burning way is applicable to the burning software ZpWinFlaher whose ZAPI mode is AC-0. Burning Tool Parts of the Forklift _ Serial Port Data Cable _AZ1002 Fig.1.1... - Page 58 PMW20 PMW20 2. Import the program: Click "Actions"→"Load file" and select the program. Taking the Select the drive file (its main control model is AC-0) as shown in figure 1.3. Then double- P20PS forklift as an example, the controller mode of the forklift is AC-0, as shown in the click the file.
- Page 59 PMW20 PMW20 Click the button "OK", as shown in the Fig.1.6. Fig.1.6 3. Select the option "Configuration", as shown in the Fig.1.7. Fig.1.9 Fig.1.8 4. Connect: Click "Connection"→"star" and then open the ignition key switch→"OK", as shown in Fig.1.10. Fig.1.7 Enter the following interface.
- Page 60 PMW20 PMW20 5. Erase the previous program and click "Actions"→"Erase Decice", as shown in Fig.1.11. The device is erased, as shown in the Fig.1.13. Fig.1.13 Fig.1.11 6. Write Program: Click the option "Write", as shown in the Fig.1.14. The confirm command interface pops up and then click "OK", as shown in the Fig.1.12.
- Page 61 PMW20 PMW20 7. Click "connection"→"stop" and then finish the burning, as shown in the Fig.1.17. Fig.1.15 Fig.1.17 Please pull out the device and then use ZpCanConsole and corresponding CAN box to import the connection parameters. After the writing and verification is complete, click the button "OK", as shown in the Fig.1.16.
-
Page 62: Table Of Fault Codes
PMW20 PMW20 8.7 TABLE OF FAULT CODES Cause: When the machine starts, the low-end voltage of MOS transistor is 10% higher than that of normal battery or the phase voltage is 50% higher than battery voltage. Possible causes: FAULT FAULT REMEDY 1.The wiring of the motor is incorrect or a fault is found in the circuit of the motor;... - Page 63 PMW20 PMW20 It is a fault caused by low-voltage or over-voltage protection. Under a 24V system, the controller Causes: when starting, the high-end voltage of MOS transistor is 66% lower than that of the de-tects that the voltage is over 45V or below 9V; while under a 45V system, it is over 65V or capacitance or it is lower than what is required during the operation of the motor.
- Page 64 CURRENT GAIN maximum cur-rent adjustment parameter has not been enabled. Solutions: ZAPI technicians set thecurrent gain parame-ters correctly. 02A92 CARD TILLER BYD system is unused. CANBUS KO TILLER Handle communication fault . 02A93 Check whether the battery works normally. 02A94 It is not allowed to change the set of controller parameters when the controller works.
-
Page 65: Electrical Maintenance Diagnosis
02AXX, the error code of the steering controller is shown as 06AXX and the error code of the display is shown as 17AXX. Use the BYD forklift to read the and the record information of current fault codes the historical faults. - Page 66 PMW20 PMW20 4.Error ID: 02A08 Error Description: WATCHDOG Since the error code of the display is defined variously, read the error through the host computer. Cause A Watchdog circuit will be activated before software starts. Under working or standby states, the signal of watchdog is ineffective (warning state).
- Page 67 PMW20 PMW20 7. Error ID: 02A10 9. Error ID: 02A17 Error Description: WRONG RAM Error Description: LOGIC FAILURE#3 Cause A Cause A Find errors when performing tests for main ram: the registration address is "DIRTY". The The protection function of the logic card current is faulty. Replace the controller.
- Page 68 PMW20 PMW20 12.Error ID: 02A29 Cause A Error Description: PUMP VMN HIGH 1) The internal wire of the pump motor Cause A 2) The cable connection of the pump motor When the machine starts, the low-end voltage of MOS transistor...
- Page 69 PMW20 PMW20 If the above parameters are set correctly, replace the controller. The operating method is same as that of the error code 02A00. Handling Method: Step 1: Measure the battery voltage with the multimeter and compare it with the BATTERY VOLTAGE value in the TESTER menu.
- Page 70 PMW20 PMW20 18. Error ID: 02A49 21. Error ID: 02A53 Error Description: The lifting and lowering buttons are activated at the same time. Error Description: STBY I HIGH Cause A Cause A The lifting and lowering buttons are activated at the same time.
- Page 71 PMW20 PMW20 2.Check whether the battery voltage is too low or too high. 3.Detect B+ and B, and check whether the power cable over the binding post of the master contactor is tightened well. 4.Check whether calibration parameters of controller voltage are consistent with those of actual voltage.
- Page 72 PMW20 PMW20 32. Error ID: 02A64 29. Error ID: 02A61 Error Description: The handle switch is disconnected. Error Description: THERMIC SENS. KO The sequence from the handle limit switch S3 output to the controller C6 pin input is Cause A wrong.
- Page 73 PMW20 PMW20 KTY84-130 34. Error ID: 02A69 Error Description:SENS MOT TEMP KO Cause A 1)The motor temperature sensor type is set incorrectly. 2)The motor temperature sensor is out of range. 3)The motor temperature sensor wiring fault. 4)The controller is damaged.
- Page 74 PMW20 PMW20 35. Error ID: 02A67 Use the “ZAPI CAN Console” software to check if you can connect to the site and check the program version information. Error Description: NO CAN MSG Site: NODE 2.0 means the driving controller Cause A It is a fault about CAN communication between the steering and traction.
- Page 75 1) Whether the motor wiring is normal. According to the finalized parameter table, change each one to consistent. (Get the latest parameter table from BYD technicians) 2) Whether there is electric leakage in the motor connecting to the frame or the coil of the motor disconnects.
- Page 76 PMW20 PMW20 42. Error ID: 02A14 If the motor wiring is normal, it is the problem inside the motor and replace the controller. Error Description: DRV. SHOR. EV Operation method is the same as the Error ID 02A00. Cause A 39.
- Page 77 PMW20 PMW20 Contactor Handling Method: 1) Check whether there is short circuit or low impedance pull-down output between A1/ A2/A8 and B2 of electromagnetic brake drive. 2) The driver circuit of controller logic card failure, replace the controller. Operation method of replacing the controller is the same as the Error ID 02A00.
- Page 78 PMW20 PMW20 51. Error ID: 02A78 48. Error ID: 02A04 Error Description: VACC NOT OK Error Description: COIL SHOR. EV Cause A Cause A 1)The drive circuit of the controller coil A1/A2/A8 cannot drive the load. Detection time: the standby state, the alarm displays that the voltage of the accelerator is...
- Page 79 PMW20 PMW20 53. Error ID: 02A79 55. Error ID: 02A82 The fault needs to be read by the upper computer for multiple definitions of instrument Error Description: ENCODER ERROR fault codes. Cause A Error Description: PUMP INC START The controller detects that the two consecutive speed readings of the encoder are quite Cause A different.
- Page 80 PMW20 PMW20 Handling Method: The upper and lower voltage limits of the accelerator are not collected. Enter the PROGRAM VACC menu and collect again. Accelerator voltage collection steps: 1) Open ZAPI CAN CONSOLE → FUNCTION → program VACC → click acquire 2) Rotate the handle and a value appears.
- Page 81 The technical staff will set the current gain parameters correctly. Please use ZAPIConsole software to download the controller parameters and send them to BYD technical support; CAN Console software – Connect CAN box – Start forklift – Connect controller – Enter password ZAPI - Enter the parameter page –...
- Page 82 ZAPI Controller User Manual. where delay time exceeds 400ms. The function is used to detect A/D converter fault or Use ZAPIConsole software to download the controller parameters and send them to BYD analyze conversion fault of analog signal. technical support;...
- Page 83 PMW20 PMW20 66. Error ID: 02A30 69. Error ID: 02A57 Error Description: INIT VMN HIGH Error Description: EVP DRIV. SHORT Cause A Cause A Before the contactor is opened, the software will check whether the controller drives it. The The driving circuit of the proportional valve coil cannot drive load.
-
Page 84: Description Of Electrical Component System Control
PMW20 PMW20 8.9 Description of Electrical Component System Control Part Position Function Power System of the Entire Forklift To achieve the sleep function. When the forklift is in Part Position Function a state of electric static without any operation (ie,... - Page 85 PMW20 PMW20 8.9.1.1 Warehouse Forklift with 24V Battery Power System National Standard Rechargeable Battery 1) BMS:Monitor the status of the power battery, and control the charging and discharging of the power battery according to the status of the entire forklift and the power battery.
- Page 86 PMW20 PMW20 8.9.1.2 National Standard Port Charging 8.9.1.3 On-board Charging +15V +15V -15V -15V SM-PMW202020001-EN SM-PMW202020001-EN...
- Page 87 PMW20 PMW20 8.9.1.4 CAN Handle 8.9.1.5 Mechanical Handle SM-PMW202020001-EN SM-PMW202020001-EN...
- Page 88 PMW20 PMW20 8.9.1.6 Process of Power Supply ●Turn the ignition switch S1 to the third gear, the ignition relay KA5 is energized to supply power. As shown in Figure 3, the current trend direction of ignition relay KA5 is 1——2 ●...
- Page 89 PMW20 PMW20 8.9.1.7 Sleep Process 8.9.1.8 Charging Process(National Standard Port) ●The entire forklift is powered on and is stationary without any operation. As shown in Figure 5, the current trend direction of the entire forklift is 1——2——3——7——8——9 (Ignition switch S1 second gear).
- Page 90 PMW20 PMW20 8.9.2 Control System 8.9.1.9 Charging Process (On-board charger) Entire KEY Fuse Main Contactor Forklift System Time Horn -delay Handle Relay Handle Relay Limit Controller Relay Switch Lift Motor 1.2Kw 24VDC Quick Horn Reverse Forklift Battery -mounted Positive Current Fuse 15A...
- Page 91 PMW20 PMW20 8.9.2.1 Driving Function 8.9.2.2 Instrument - Dashboard Indicator Lights and Buttons ●When the handle is pressed to the proper position, the handle limit switch is closed and hole C6 receives a high level signal. The main contactor KM3 will pull in first if it is not in the pull-in state.
- Page 92 PMW20 PMW20 8.9.2.5 Lifting System 8.9.2.3 Instrument - Dashboard Low Power Alarm Function ●When the battery power SOC is less than or equal to 10%, the master controller w send a low power alarm to the instrument, and the instrument will alarm and displa 02A66, prompting charging and the master controller will prohibiting lifting and the travel speed halved.
-
Page 93: Maintain Tuque
PMW20 PMW20 8.9.2.6 Brake System MAINTAIN TUQUE 9.1 CHECK THE TORQUE OF THE KEY FASTENERS KEY保 险 主接触器 延 喇 时 叭 继 手柄 手柄限 继 电 电 位开关 器 起升电机 器 1.2Kw 24VDC 紧 急 喇 叭 反 向... -
Page 94: Appendix
PMW20 PMW20 APPENDIX 546~653 669~801 774~801 1056~1264 1461~1749 1707~2044 M27×2 589~706 723~865 837~1002 1141~1366 1578~1890 1845~2208 10.1 TABLE OF THE TORQUE VALUE 741~887 908~1087 1052~1259 1434~1717 1984~2375 2318~2775 M30×2 820~982 1005~1203 1164~1393 1587~1900 2196~2629 2566~3072 Torque Value for Tightening Bolts... -
Page 95: Wiring Harness
PMW20 PMW20 Connect to USB 10.3 WIRING HARNESS Connect to the 24V reserved connector 1 10.3.1 LOW-VOLTAGE WIRING HARNESS ASSEMBLY Connect to the electric brake relief Connect to port A of the main controller Ln01 Connect to the emergency stop switch... - Page 96 PMW20 PMW20 10.3.2 WIRING HARNESS FOR THE BATTERY BOX 10.3.2.1 POWER MANAGER HARNESS Connect to the 8pin connector of the battery box Connect to the power manager Connect to Hall Sensor Connect to the main contactor Connect to the negative pole of the battery pack...
-
Page 97: Electrical Schematic Diagram
PMW20 PMW20 10.4 ELECTRICAL SCHEMATIC DIAGRAM 1. GB +CAN KEY Fuse Main Contactor Time -delay Relay Horn Handle Handle Relay Limit Switch Lift Motor Controller Relay 1.2Kw 24VDC Power Socket Quick Horn Reverse Battery Positive Current Fuse 15A Charging Relay... - Page 98 PMW20 PMW20 2. Forklift-mounted +CAN KEY Fuse Main Contactor Time -delay Horn Relay Relay Handle Controller Relay Handle Limit Switch Lift Motor 1.2Kw 24VDC Quick Reverse Horn Battery Positive Current Fuse 15A Charging Relay Backup Unit Hall Current Ignition Switch Fuse...
-
Page 99: Parameters Of The Controller
PMW20 PMW20 10.5 PARAMETERS OF THE CONTROLLER Current Menu Name Description Value Temperature sensor alarm Current Name Menu Description THMOT AL. CUTB. Parame ter Change Value for speed limit 50% Time (Unit:S) required when Battery level is 10% and BDI AL. CUTBACK... - Page 100 PMW20 PMW20 Current Current Name Menu Description Name Menu Description Value Value The motor declines to 0 in Deceleration smoothness in Parame te r Change quick reverse and then INV SMOOTH reverse (rarely used). The DEC DELAY BELLY accelerate to the preset speed minimum value is 1S.
- Page 101 PMW20 PMW20 Current Current Name Menu Description Name Menu Description Value Value Mode of the quick inversion INVERSION MODE Set Options THROT.0 RIGH.LFT Adjustment Unused switch THROT.X RIGH.LFT 40% Adjustment Unused Unused state. Hydraulic HYDRO FUNCTION NONE Set Options auxiliary steering function Adjustment THROT.Y RIGH.LFT 60%...
- Page 102 PMW20 PMW20 Current Current Name Menu Description Name Menu Description Value Value Adjustment Alarm for over speed 40 Hz IRAP SPEED An alarm for motor temp- Do not adjust it BRAKING BOOSTER Hardware Settings erature.The driving speed is reduced to 50% and...
-
Page 103: Other Information
Production Address : No.1, BYD Road, Zhenjiang Industrial Zone, Shaoguan, Guangdong, 512040, P.R.China Zip Code:512040 Tel:+86-751-810 8888 After-sales address: 2nd floor, A4, BYD Industrial Park, 1 Yan'an Road, Kwai Chung Street, Dapeng New District, Shenzhen, Zip Code:518119 Tel:+86-755-2386 0828 Wbesite:www.bydforklift.com... - Page 104 Build Your Dreams...
Need help?
Do you have a question about the PMW20 and is the answer not in the manual?
Questions and answers