jbc ALE250 Instruction Manual
Auto-feed soldering iron
Hide thumbs
Also See for ALE250:
- Instruction manual (17 pages) ,
- Instruction manual (13 pages) ,
- Instruction manual (16 pages)
Table of Contents
Advertisement
Quick Links
Advertisement
Table of Contents

Related Manuals for jbc ALE250


Summary of Contents for jbc ALE250
- Page 1 INSTRUCTION MANUAL ALE250 Auto-Feed Soldering Iron...
-
Page 2: Packing List
This manual corresponds to the following reference: - ALE250-A Packing List The following items are included: Auto-Feed Soldering Iron ........................1 unit Manual ................................. 1 unit Ref. 0028271... -
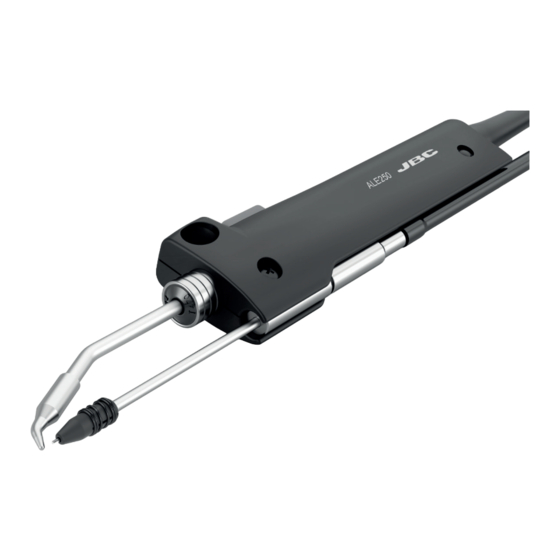
Page 3: Features And Connections
- color gris 200 mm 130 mm 130 mm Features and Connections 100 mm Auto-Feed Soldering Iron* Ref. ALE250-A 80 mm Solder Reel Stand Auto-Feed Control Unit* 60 mm Control Screen 50 mm 40 mm USB-B Connector GALE... -
Page 4: Compatible Cartridges
Compatible Cartridges ALE250 works with C250 cartridges. Find the model that best suits your soldering needs at www.jbctools.com 2,2 x 1 ø 3,8 3,2x1,5 ø 0,6 Conical Bent Chisel Chisel Bent Bevel Cartridge Assembly AL250 Loosen the cartridge fixation screw (1) and insert the cartridge up to its mark (2). -
Page 5: Tool Assembly
para manuales - color gris 200 mm Guide Tube Set Assembly 130 mm 130 mm Open the guide tube set fixation screw (1) and insert the guide tube set. Adjust the guide tube length (2). Leave a gap of 8 to 10 mm (0.31 to 0.39 in) between the tip and the outlet nozzle (3). - Page 6 Solder Reel Assembly Reel Locking Axis Reel Locking Screw Solder Reel Solder Wire Guidance Solder Wire 19:29 19:29 19:29 Mode º Con�nuous Tin reload process º Mode º ºC ºC ºC Speed 20.0mm/s Place the �n on the gears Con�nuous ff...
- Page 7 para manuales - color gris 200 mm 130 mm 130 mm To assemble the reel locking, its conical side must be pointing downwards. USE ONLY WITH A 250 V FUSE EARTH FUSE F1.25 A Align the flat side of the axis (5) with the inner flat side (the one with the screw) of the reel locking and EARTH FUSE F1.25 A reassemble it to the axis (6).
- Page 8 Inlet Nozzle Select “Tin Reloaded Process” (1) and then use to feed the solder wire and advance until it comes out of the outlet nozzle. If needed, carefully push the wire until it gets locked in between the rotating wheels for the wire to start moving forward. Keep pressed and after a while, the wire will advance faster.
- Page 9 para manuales - color gris Backward 5.0mm 200 mm 24.0 mm/s 10.0 mm/s Back Supplied: 0 mm Supplied: 12 mm mm/s Ø 1.00 mm Ø 1.00 mm Ø 1.00 mm Ø 1.00 mm Mode Discon�nuous English Program version 8886732 º º...
-
Page 10: Changing Cartridges
Important: It is essential to insert the cartridge up to the end for a good connection. Use the mark as reference (3). Align the tip of the cartridge with the guide nozzle (4) and tighten the cartridge screw (1) ALE250 Auto-Feed Soldering Iron Mark... - Page 11 - color gris 200 mm Accesories 130 mm 130 mm GALE Guide Kits for ALE250 100 mm References for GALE Guide Kits without Solder Wire Perforation 80 mm Guide Kit Guide Outlet Nozzle Traction Support Inlet Interm. Counter...
-
Page 12: Maintenance
Use a damp cloth or alcohol. - Periodically check all cables and tubes connections. - Replace any defective or damaged pieces. Use original JBC spare parts only. Repairs should only be performed by a JBC authorized technical service. - Page 13 para manuales - color gris 200 mm Safety 130 mm 130 mm It is imperative to follow safety guidelines to prevent electric shock, injury, fire or explosion. 100 mm - Do not use the tool for any purpose other than soldering or rework. - The power cord must be plugged into approved bases.
- Page 14 Notes...
- Page 15 para manuales - color gris 200 mm Notes 130 mm 130 mm 100 mm 80 mm 60 mm 50 mm 40 mm...
-
Page 16: Specifications
In order for the warranty to be valid, equipment must be returned, postage paid, to the dealer where it was purchased. Get 1 extra year JBC warranty by registering here: https://www.jbctools.com/productregistration/ within 30 days of purchase. This product should not be thrown in the garbage.
Need help?
Do you have a question about the ALE250 and is the answer not in the manual?
Questions and answers