Table of Contents
Advertisement
Available languages
Available languages
Quick Links
INSTRUCTION MANUAL
Keep this manual in a safe place for future reference
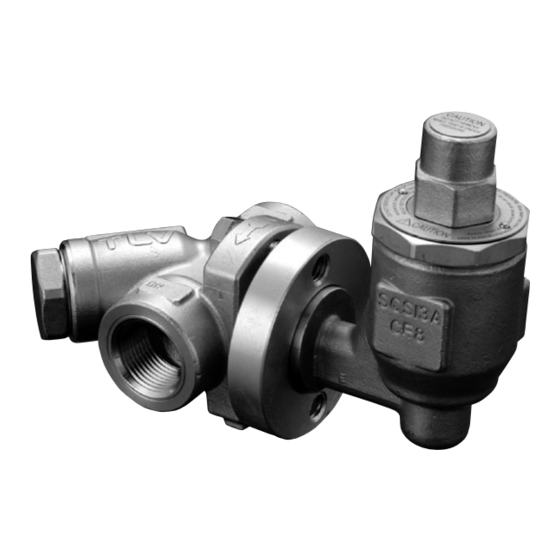
UNIVERSAL TEMPERATURE CONTROL STEAM TRAP FX1
EINBAU- UND BETRIEBSANLEITUNG
Gebrauchsanleitung leicht zugänglich aufbewahren
TEMPERATUREINSTELLBARER KONDENSATABLEITER FX1
MANUEL D UTILISATION
Conserver ce manuel dans un endroit facile d'accès
PURGEUR RÉGULATEUR DE TEMPÉRATURE FX1
QuickTrap
FX1
Trap Unit
X1
Option
(
)
BD2
Copyright (C) 2023 by TLV CO., LTD. All rights reserved.
F46+F32
Advertisement
Table of Contents

Related Manuals for TLV QuickTrap FX1


Summary of Contents for TLV QuickTrap FX1
- Page 1 EINBAU- UND BETRIEBSANLEITUNG Gebrauchsanleitung leicht zugänglich aufbewahren TEMPERATUREINSTELLBARER KONDENSATABLEITER FX1 MANUEL D UTILISATION Conserver ce manuel dans un endroit facile d'accès PURGEUR RÉGULATEUR DE TEMPÉRATURE FX1 QuickTrap Trap Unit Option Copyright (C) 2023 by TLV CO., LTD. All rights reserved. F46+F32...
- Page 2 * Configuration of F32 differs slightly from that of F46 1 MPa = 10.197 kg/cm , 1 bar = 0.1 MPa For products with special specifications or with options not included in this manual, contact TLV for instructions. The contents of this manual are subject to change without notice.
-
Page 3: Safety Considerations
• The three types of cautionary items above are very important for safety; be sure to observe all of them, as they relate to installation, use, maintenance, and repair. Furthermore, TLV accepts no responsibility for any accidents or damage occurring as a result of failure to observe these precautions. - Page 4 • Diese drei Warnzeichen sind wichtig für Ihre Sicherheit. Sie müssen unbedingt beachtet werden, um den sicheren Gebrauch des Produktes zu gewährleisten und Einbau, Wartung und Reparatur ohne Unfälle oder Schäden durchführen zu können. TLV haftet nicht für Unfälle oder Schäden, die durch Nichtbeachtung dieser Sicherheitshinweise entstehen.
-
Page 5: Règles De Sécurité
• Ces 3 indicateurs sont importants pour votre sécurité; observez les précautions de sécurité énumérées dans ce manuel pour l’installation, l’utilisation, l'entretien et la réparation du produit. TLV ne prend aucune responsabilité en cas d’accident ou de dommage survenant à la suite d'un non-respect de ces précautions. - Page 6 2. Configuration Aufbau Configuration 16 15 4 3 13 B 17 18 23 24 25 Replacement parts for F32 differ from those for F46. When you order replacement parts, please include the steam trap model name, size, connection type and also the connector unit name.
- Page 7 Anschlusssstück-Gehäuse. VORSICHT L'unité du purgeur X1 est conçu pour être utilisé DAS PRODUKT WEDER ÖFFNEN ODER avec les unités de raccord TLV F46 et F32 et les AUSBAUEN, NOCH DIE stations de purge TLV V1/V2. Il n’est pas REINIGUNGSFUNKTION BENUTZEN, compatible avec l’unité...
- Page 8 4. Specifications Technische Daten Données techniques Refer to the product nameplate on the trap unit for detailed specifications. A nameplate is also mounted on the F46 connector unit. The specifications displayed on the nameplate are the values for the connector body itself. When a trap unit is installed, the PMA/TMA and PMO/TMO are limited to the trap unit specifications.
-
Page 9: Proper Installation
5. Applications • DO NOT USE on any application except steam tracing lines, storage tank coils and instrument enclosures. • SUITABLE for steam tracing lines or storage tank coils ONLY IF the required product viscosity will be maintained when the condensate is sub-cooled at least 15 °C (27 °F), even to the point of the condensate having a lower temperature than the product temperature. -
Page 10: Operational Check
The surface temperature of the trap is higher than the set temperature. (When conducting a visual inspection, flash steam is sometimes mistaken for steam leakage. For this reason, the use of a steam trap diagnostic instrument such as TLV TrapMan is highly recommended.) 8. - Page 11 Standard Factory Setting ("0" Position): Adjuster Slot Adjusting The standard "0" position is the position where point (A), the Screw bottom of the adjusting screw slot is even with point (B), the top surface of the cap. 100 °C at 0.9 MPaG (9 barg), 212 °F at 130 psig Temperature Setting Range 15 ˚C below saturated...
-
Page 12: Cleaning Function
9. Cleaning Function Rust, scale and other buildup on the valve seat may hinder the sealing ability of the steam trap and cause steam leakage and resultant higher product temperature; or block the valve seat opening - thereby preventing condensate discharge and resultant lowered product temperature. The FX1 contains a built-in cleaning device that can be used without removing the trap from the line. - Page 13 Reassemble the bimetal elements, (5 sets of 2 discs) 5 the valve stem by lifting up and off paying special attention to the proper orientation (the TLV marks on the outside, see Exploded View, p. 6) Continued on next page ̶ 12 ̶...
- Page 14 Disassembly/Reassembly (to reassemble, follow procedures in reverse) Part & No. During Disassembly During Reassembly Spring Pin 12 Remove from the valve stem only Replace with new if damaged if damaged Screen 14 Remove without bending Reinsert without bending Spring Guide 19 Remove from the trap body Reinsert with proper orientation Remove from the trap body...
-
Page 15: Troubleshooting
Instructions for Plug / Holder Disassembly and Reassembly The seal on the threaded plugs/holders found on TLV products is formed by a flat metal gasket. There are various installation orientations for the gaskets, such as horizontal, diagonal and downward, and the gasket may be pinched in the thread recesses during assembly. - Page 16 12. Optional Blowdown Valve BD2 • Installation, inspection, maintenance, repairs, disassembly, adjustment and valve opening/closing should be carried out only by trained maintenance personnel. 12.1 Reassembly of Blowdown Valve • When disassembling or removing the product, wait until the internal CAUTION pressure equals atmospheric pressure and the surface of the product has cooled to room temperature.
- Page 17 5. Anwendungen • NICHT FÜR beliebige Zwecke einsetzen, außer für Begleitheizung und Behälterbeheizung, Schaltschrankbeheizung. • EINSETZBAR für Begleitheizung oder Behälterbeheizung NUR, FALLS die erforderliche Produkt-Viskosität erhalten bleibt, wenn das Kondensat um mindestens 15 °C untergekühlt ist, selbst wenn die Kondensat-Temperatur unter der Produkt-Temperaturliegt. •...
- Page 18 Kondensat-Ablasstemperatur. (Bei visueller Inspektion wird oft Entspannungsdampf mit Dampfverlust verwechselt. Daher wird empfohlen, im Zweifel Messgeräte, z. B. TLV TrapMan, zu verwenden.) 8. Einstellung der Kondensat-Ablasstemperatur Die Ablasstemperatur kann einfach wie folgt eingestellt werden. • Zur Vermeidung von möglichen Verletzungen immer den Druck ablassen, VORSICHT bevor der KA zwecks Temperatureinstellung geöffnet wird.
- Page 19 7. Zuerst langsam das Auslassventil aufdrehen, dann das Einlassventil. Prüfen, ob Dampfleckage auftritt. Falls Leckage beobachtet wird, sofort das Einlassventil schließen, dann das Auslassventil und die Ursache der Leckage reparieren. 8. Die Temperatureinstellung entweder mit einem eingebauten Thermometer oder durch Messung auf der flachen Oberseite am Einlass des Kondensatableiters nach Dampfeintritt mindestens 30 Minuten lang beobachten.
- Page 20 9. Reinigungsfunktion Rost, Ablagerungen und andere Verschmutzungen können die Dichtfähigkeit des Ventilsitzes beeinträchtigen und so zu Dampfverlusten und höherer Produkttemperatur führen. Eine Ver- stopfung des Ventilsitzes dagegen verringert die Produkttemperatur. FX1 hat eine eingebaute Reinigungsfunktion, die während des Betriebs benutzt werden kann. Folgen Sie den Anweisungen hier unten um den Ventilsitz von Verunreinigungen zu befreien.
- Page 21 Bimetall-Element Nach oben von der Ventilstange Bimetallelement zusammenbauen, dabei (5 Sätze zu je 2 abnehmen beachten, dass die TLV-Zeichen außen Scheiben) 5 sichtbar sind (siehe Einzelteile, Seite 6) Spreizstift 12 Von der Ventilstange nur Spreizstift erneuern, falls beschädigt abnehmen, falls beschädigt...
- Page 22 Ausbau und Einbau der Teile (Einbau erfolgt in umgekehrter Reihenfolge) Bauteil & Nr. Ausbau Einbau Federführung 19 Aus Gehäuse herausnehmen Mit richtiger Positionierung in Gehäuse einpassen Aus Gehäuse herausnehmen Überdehnsicherung 9 In Gehäuse einsetzen Ventilsitz 7 Mit Steckschlüssel herausschrau- Ventilsitz einschrauben; ben;...
- Page 23 Aus- und Einbau-Anleitung für Entwässerungsstopfen Die Gewindedichtung der Entwässerungsstopfen an TLV-Kondensatableitern besteht aus einem flachen Metallring. Stopfen und Dichtung können in verschiedenen Lagen eingebaut werden - horizontal, diagonal oder nach unten zeigend. Wird der Metallring dabei im Gewinde gequetscht, verliert er seine Funktionstüchtigkeit.
-
Page 24: Fehlersuche
11. Fehlersuche Falls der Kondensatableiter nicht zufriedenstellend arbeitet, lesen Sie nochmals Kapitel 5 und 6. Gehen Sie dann die nachfolgende Fehlerliste durch, um den Fehler zu orten und zu korrigieren. Symptome Gegenmaßnahmen Ursachen Bimetall-Element ersetzen Kondensat Ein Bimetall-Element ist gebrochen. fließt nicht ab oder Die Zusammensetzung (Reihenfolge) der Reihenfolge korrigieren... - Page 25 12. Ausblaseventil BD2 (Option) • Einbau und Ausbau, Inspektion, Wartungs- und Reparaturarbeiten, Öffnen/Schließen von Armaturen, Einstellung von Komponenten, dürfen nur von geschultem Wartungspersonal vorgenommen werden. 12.1 Zusammenbau des Ausblaseventils • Vor Öffnen des Gehäuses und Ausbau von Teilen warten, bis der VORSICHT Innendruck sich auf Atmosphärendruck gesenkt hat und das Gehäuse auf Raumtemperatur abgekühlt ist.
- Page 26 5. Applications • UTILISER UNIQUEMENT pour les lignes de traçage à la vapeur, les spires de réservoirs de stockage et le chauffage d’instruments. • CONVIENT pour les lignes de traçage à la vapeur et les spires de réservoirs de stockage UNIQUEMENT SI la viscosité...
-
Page 27: Réglage De La Température
à l’atmosphère. Utiliser du matériel de diagnostique, comme un stéthoscope, un thermomètre ou un TLV TrapMan (en respectant les limites de pression et de température indiquées pour la mesure) si le condensât n'est pas évacué dans l'atmosphère. - Page 28 7. Ouvrir d’abord complètement le clapet d’isolement en aval, puis ouvrir lentement le clapet d’isolement en amont – en vérifiant soigneusement s’il n’y a pas de fuite de vapeur. Si des fuites de vapeur sont détectées, fermer immédiatement le clapet d’isolement en amont, puis le clapet d’isolement en aval, et réparer la source de la fuite.
-
Page 29: Fonction De Nettoyage
9. Fonction de nettoyage La rouille, l’écaille ou toute autre accumulation de corps étrangers sur le siège de soupape est susceptible d’affecter l’étanchéité du purgeur, ce qui peut entraîner des fuites de vapeur et des températures de produit plus élevées, ou bloquer l’ouverture du siège de soupape, empêchant ainsi l’expulsion de condensât, ce qui cause une diminution de la température du produit. - Page 30 (5 unités à 2 disques) 5 tige de soupape en le soulevant, faisant attention de bien l’orienter puis en le détachant (marques TLV à l’extérieur, voir Pièces détachées, p. 6) Détacher de la tige si Remplacer par une nouvelle goupille si Goupille fendue 12 endommagée uniquement...
- Page 31 Retrait et remplacement des pièces (suivre l'ordre inverse pour le rassemblage.) Pièce & No. Pendant le démontage Pendant le rassemblage Crépine 14 Retirer sans la plier Replacer sans la plier Guide de ressort 19 Retirer du corps du purgeur Replacer dans la bonne direction Ressort de sur-dilatation 9 Retirer du corps du purgeur Replacer...
- Page 32 Instructions pour le démontage/rassemblage du bouchon/support Le dispositif d’étanchéité des bouchons/supports filetés compris dans les produits TLV est constitué d’un joint en métal plat. Les joints peuvent être orientés différemment (horizontalement, diagonalement, vers le bas), et ils peuvent se bloquer dans la saignée du filet au cours de l’assemblage.
- Page 33 11. Détection des problèmes Si la performance escomptée n’est pas atteinte après l’installation, relire les parties 5 et 6 et vérifier les points suivants de façon à prendre les mesures appropriées. Cause Remède Problème Remplacer par un nouvel Un élément bimétallique est endommagé Pas d’expulsion de élément bimétallique ou cassé...
- Page 34 12. Robinet de purge BD2 (optionnel) • Tout démontage, installation, inspection, entretien, réparation, ajustement et ouverture/fermeture de la vanne doit être fait par une personne formée à l’entretien. 12.1 Rassemblage du robinet de purge BD2 • En cas de démontage ou de retrait du produit, attendre que la pression ATTENTION interne soit égale à...
- Page 35 ̶ 34 ̶...
- Page 36 Subject to the limitations set forth below, TLV CO., LTD., a Japanese corporation (“TLV”), warrants that products which are sold by it, TLV International Inc. (“TII”) or one of its group companies excluding TLV Corporation (a corporation of the United States of America), (hereinafter the “Products”) are designed and manufactured by TLV, conform to the specifications published...
- Page 37 WARRANTY NOT NEGATED HEREBY, AND ANY IMPLIED WARRANTY NOT NEGATED HEREBY, INCLUDING THE IMPLIED WARRANTIES OF MERCHANTABILITY AND FITNESS FOR A PARTICULAR PURPOSE, DO NOT COVER, AND NEITHER TLV, TII NOR ITS TLV GROUP COMPANIES WILL IN ANY EVENT BE LIABLE FOR, INCIDENTAL OR CONSEQUENTIAL...
- Page 38 13. Eingeschränkte ausdrückliche Garantie der TLV Vorbehaltlich der nachfolgenden Einschränkungen versichert die TLV CO., LTD., eine Gesellschaft nach japanischem Recht („TLV“), dass die von ihr, von der TLV International Inc. („TII“) oder von einer ihrer Konzerngesellschaften mit Ausnahme der TLV Corporation (einer Gesellschaft nach dem Recht der Vereinigten Staaten von Amerika) vertriebenen Produkte (nachstehend „die...
- Page 39 nach dem verantwortlichen Ermessen des Verkäufers, dass der behauptete Mangel von der vorliegenden Garantie nicht gedeckt ist, so hat die Partei, welche den Garantieanspruch geltend macht, den Verkäufer für den Kosten- und Zeitaufwand der vor Ort getätigten Inspektion zu entschädigen. Haftungsausschluss für Folge- und Zufallsschäden Es wird ausdrücklich darauf hingewiesen, dass diese Garantie, jegliche andere ausdrückliche Garantie, die hier nicht ausgeschlossen ist, sowie jegliche implizite Garantie, die hier nicht...
- Page 40 Sous réserve des limitations mentionnées ci-dessous, TLV CO., LTD., une société japonaise (« TLV »), garantit que les produits vendus par elle-même, par TLV International Inc. (« TII ») ou par l’une des sociétés de son groupe, à l’exclusion de TLV Corporation (une société des États-Unis d’Amérique), (ci-après, les «...
- Page 41 PAR LES PRÉSENTES, Y COMPRIS LES GARANTIES TACITES DE QUALITÉ MARCHANDE ET D’ADÉQUATION À UN USAGE PARTICULIER, NE COUVRENT PAS, DE MÊME QUE NI TLV, NI TII, NI LES SOCIÉTÉS DU GROUPE TLV NE POURRONT EN AUCUN CAS ÊTRE TENUES RESPONSABLES POUR, LES DOMMAGES CONSÉCUTIFS OU INDIRECTS, Y COMPRIS, MAIS...
- Page 42 ̶ 41 ̶...
- Page 43 Contact your TLV representative or your regional TLV office. Für Reparatur und Wartung: Wenden Sie sich bitte an Ihre TLV Vertretung oder an eine der TLV Niederlassungen. Pour tout service ou assistance technique: Contactez votre agent TLV ou votre bureau régional TLV.
- Page 44 Manufacturer: Tel: [81]-(0)79-427-1800 Hersteller: 881 Nagasuna, Noguchi, Kakogawa, Fax: [81]-(0)79-422-2277 Fabricant: Hyogo 675-8511, Japan Printed on recycled paper. Auf Recycling-Papier gedruckt. Imprimé sur du papier recyclé. PAC-65502-egf Rev. 4/2023 (M)
Need help?
Do you have a question about the QuickTrap FX1 and is the answer not in the manual?
Questions and answers