
Related Manuals for Giant Leap Rocketry Liberty 2


Summary of Contents for Giant Leap Rocketry Liberty 2
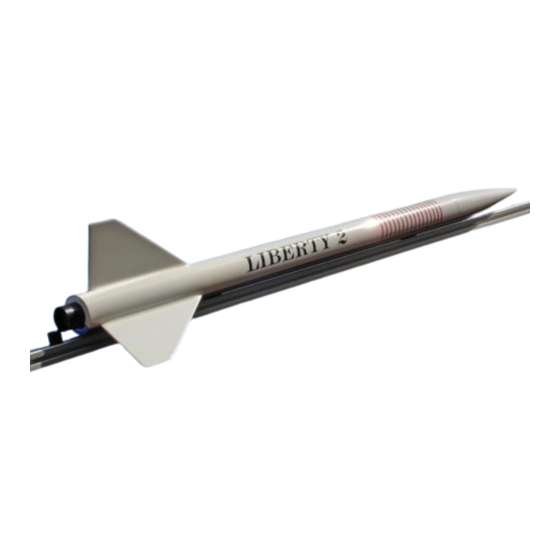
- Page 1 INSTRUCTION MANUAL Liberty 2 GIANT LEAP ROCKETRY, LLC Copyright 2006 - 2018 Giant Leap Rocketry, LLC 2831 SW Cornelius Pass Road Hillsboro, Oregon 97123...
- Page 2 THE TALON 2 IS A FANTASTIC - LEVEL 1 ROCKET BUILD!!! We at Giant Leap Rocketry, LLC hope you enjoy building the best looking and best flying rocket on the flying field. The Talon 2 is stylish and commands attention wherever you fly. It flies with 29mm motors as small as the Aerotech F50, or as large as the I200.
- Page 3 You will definitely enjoy this build. Have FUN!!! Thanks from the GLR Team! The Liberty 2™ comes with a 29mm motor mount Recommended 29mm motors: Aerotech: so that it can be flown on motors as small as the Ae- [Single use: F50-4;...
-
Page 4: Parts List
YOU ARE TOTALLY RE- statements, return the kit in resalable condition SPONSIBLE FOR THE SAFE USAGE OF to Giant Leap Rocketry for a refund. By using THIS ROCKET. FOLLOW ALL PERTI- this kit, you agree that you have read, under- NENT SAFETY CODES AND DIREC- stand and accept these conditions. - Page 5 1- 54mm 36” Phenolic Air- frame Slotted 1- 29 mm 12” Phenolic Motor Mount Tube 2- 54mm/29mm Centering Rings 3- Small 0.063” Fiberglass Pre-cut Fins 1- 29mm Original GLR Slim- line Retainer Set 1- 2” x ½” GLR Kevlar® Tube Cord 1- 54mm Original GLR Rail Guide Pair Miscellaneous Components: Recovery Mount:...
- Page 6 #120, # 180 #250 Sandpaper If the GLR Slimline Motor Retainer is seated Paper Towels completely, you will not have any of the epoxy Gloves bonding rings of the GLR Slimline Motor Re- (Can Be Ordered Separately From GLR) tainer exposed and the motor tube will rest on Rubbing Alcohol the the built-in shoulder stop of the GLR Slim- Drill with a...
- Page 7 epoxy!) and ap- Place a mark for ply it to the aft the Aft Centering Ring end of the motor onto the motor tube ½” tube, to the pen- Forward of the GLR cil mark of the S l i m l i n e M o t o r R e- m o t o r t u b e .
- Page 8 Airframe. Fillets can be created using a smoothly but snugly in and out. Sand the outer variety of materials, Giant Leap Rocketry, LLC edge of the Centering Rings as needed to create recommends using GLR Aeropoxy and GLR a snug but smooth insertion fit.
- Page 9 ing Ring will be Forward of the fin slots. On the outside of the airframe make a mark with a pencil where the For- ward Centering Ring is and where the Aft Centering Ring is. tion, insert the motor tube about half way into 4.
- Page 10 Giant Leap Rocketry, LLC out the marks for the 54mm airframe and 3 fin recommends using GLR Aeropoxy and GLR flight arrangement.
- Page 11 epoxy mixing blade smooth the fillet to a clean tubes. We have them in both sizes. We de- transition from airframe to the fin. Later you signed the toughest, strongest attachment possi- can sand any irregularities you may have. The ble.
- Page 12 opening of the airframe and allow it to rest on the forward end of the motor tube. You will need to take a measure- ment with your glue stick dowel. Place the dowel into the airframe tems. When the recovery system deploys, the and place a piece of tape where the edge of the GLR Kevlar®...
- Page 13 Protect the Rocket from Zippering. G L R p r o- vides a high qual- Zippering is when the ejection charge is too ity GLR Kevlar® great and the impact of the airframe and the Parachute Heat shock cord is so violent that the shock cord liter- Shield to protect ally rips or zips the airframe.
- Page 14 Attach the free end of GLR Kevlar® GLR Kevlar® Parachute Heat Shield is be- Shock Cord to the eye-bolt that is attached to low or is aft of the swivel. the GLR Pinnacle Nosecone. The sequence is a follows: slotted airframe con- We will now describe how to install the taining the GLR Hardpoint, GLR Kevlar®...
- Page 15 curved surface. You may want to make it a per- manent part of your rocketry toolbox. Make sure that the line is between two of the fins, oth- erwise the fins will interfere with the rail. Measuring from base of the rocket to base of GLR Rail Guide, place one GLR Rail Guide about 9”...
- Page 16 Safety Code and Waiver bit as it drys, so it must be left a little Giant Leap Rocketry, LLC (herein referred to high. When the DAP as GLR) has exercised reasonable care in the Plastic Wood is com-...
- Page 17 ment our products or information in your own motor reloading kit for a purpose other than setting, you do so at your own risk. In no event that specified by the manufacture in the rocket will GLR be liable to you for any damages aris- motor or reloading kit instructions.
- Page 18 required by the design of the rocket. 9.3 Do not launch system. If the rocket is propelled by a attempt to catch a high power rocket as it ap- cluster of rocket motors designed to be ignited proaches the ground. 9.4 Do not attempt to re- simultaneously, install an ignition scheme that trieve a high power rocket from a place that is has either been previously tested or has a dem-...
- Page 19 tor. 15.2 All spectators shall remain within an passed, and the Safety Monitor has given per- area determined by the Safety Monitor and be- mission for only a single person to approach the hind the Safety Monitor and the person launch- misfired rocket to inspect it.
Need help?
Do you have a question about the Liberty 2 and is the answer not in the manual?
Questions and answers