
Related Manuals for Giant Leap Rocketry Elipse


Summary of Contents for Giant Leap Rocketry Elipse
- Page 1 Elipse GROOVE-LOK FEATURING THE NEW FIN CANISTER SYSTEM! GIANT LEAP ROCKETRY, INC. www.giantleaprocketry.com Copyright 2006 Giant Leap Rocketry, Inc 6061 HIBISCUS DR. BATON ROUGE, LA 70808 Ph 225 054-0325...
-
Page 2: Specifications
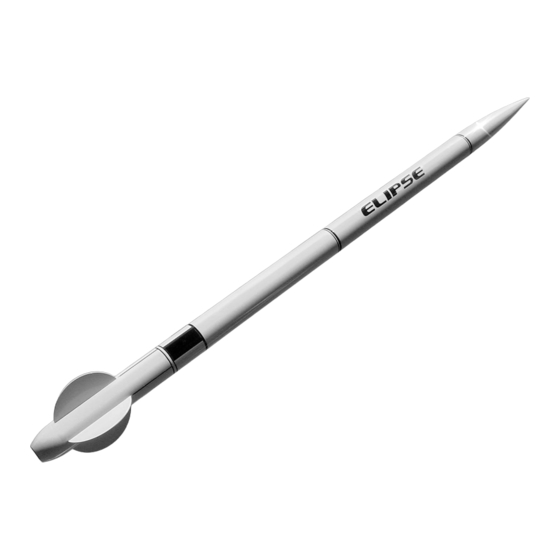
5-to-1 Pinnacle nosecone. The Elipse comes with a 38mm motor mount so that it can be flown on a variety of motors. These can propel it to extremely high altitudes. With the optional SLIMLINE 38/29mm adapter, you can fly this rocket to more moderate altitudes on lower impulse H and I motors. - Page 3 If you do not agree with these statements, return the kit in resalable condition to Giant Leap Rocketry for a refund. By using this kit, you agree that you have read, understand and accept these conditions.
- Page 4 Parts included in this kit: Bodytube 36” long (slotted booster section) Decal Bodytube 24” long (upper section) 1 5/8” nylon shockcord 15 feet Nosecone 3” 1 KEVLAR® FireBall small Slimline 75-54mm Tailcone retainer 1 !”KEVLAR® two-ended shockloop 15’ 18” long 38mm motor tube 2 KEVLAR®...
- Page 5 ASSEMBLY Assembling the Fin Canister The Tailcone: The first step is to attach the tailcone. Because the tailcone retains the motor during the violent phase of ejection, it is absolutely critical that you use an adhesive with a high heat rating like JB Weld. NEVER USE EPOXY to adhere a motor retainer.
- Page 6 Test fit the centering ring by sliding it on from the forward (front) end of the motortube all the way down until it buts up against the tailcone. Mark a line on the forward end of the ring (the side away from the tailcone).
- Page 7 Now you’re going to test fit the assembly, so NO epoxy is required yet. Lightly scuff the tabs on the fins with a medium grit sand paper. Insert each of the four fins into the appropriate channels of the Groove-Lok. Hold in place with a 1” strip of making tape on both sides of each fin.
- Page 8 epoxy cures, slide on the airframe (be sure to rotate airframe and align with your reference mark). This will align the fins. No need to slide the airframe all the way down to the tailcone. Keep it about 1” away (see figure below left). Again, you don’t want to adhere the airframe at this stage. As the epoxy on the fins cures, slide the airframe up and down once in a while to be sure that the airframe is not adhering to the fin canister assembly.
- Page 9 Scuff the Hardpoint. Then apply JB around its circumference (Do not apply adhesive to the inside of the motortube or it may drip down). Insert the hardpoint into the forward end of the motortube. Fully insert and then insert an additional !”. In other words, leave a !” space between the top of the Hardpoint and the top of the motortube.
- Page 10 Slide the airframe back onto the fin canister (rotate to align your reference mark). If the slots are slightly longer than your fins, cover the open slots with a small bit of masking tape at the forward end (see Figure above right). Now remove airframe.
-
Page 11: Recovery System
Apply epoxy to the coupler, NOT to the airframe. Keep the inside of the airframe clear of epoxy because you will be sliding the forward bulkhead freely in and out for flight prep. Clean up any epoxy that is oozing out onto the exposed surface of the coupler with rubbing alcohol if necessary. Upon completion of the Avionics Bay, attach an eyebolt into the base of the Pinnacle nosecone to attach the shockcord. - Page 12 Insert the accordion folds into the booster section. Then, on the forward side of the protector (toward the avionic bay) lay some shockcord into the KEVLAR® protector, then lay the chute in there too. booster Av bay drogue Laying cord and drogue in pad Fold as shown and insert into booster.
- Page 13 NOTE: This rocket can be used in a single-deployment mode, where the main chute deploys at apogee, and there is no drogue. In this configuration, you must install the main chute in the drogue compartment. You must also secure the nosecone for flight using our plastic rivets for a tight friction fit, or some other method so that the nosecone does not come off during ejection.
- Page 14 moved. Sight down the tube to check for good alignment. (Do not use the double-sided tape enclosed with the rail guides). Electronics and the Internal Configuration of the Avionics Bay The exact configuration of the avionics bay will depend mainly on your particular altimeter. They come in different sizes and you must follow the manufactures recommendations for installation.
- Page 15 To the extent you use or implement our products or information in your own setting, you do so at your own risk. In no event will Giant Leap Rocketry, Inc. be liable to you for any damages arising from your use or, your inability...
- Page 16 (1) Assume all of the risks, damages, injury, or even death. (2) Assume the obligation to exercise the utmost care in pursuit of my activities at this event. (3) that you must be over 18 years old (for motor purchase and use). Giant Leap Rocketry cannot be held responsible for the failure of participants to abide by safety codes, rules, regulations, etc.
Need help?
Do you have a question about the Elipse and is the answer not in the manual?
Questions and answers