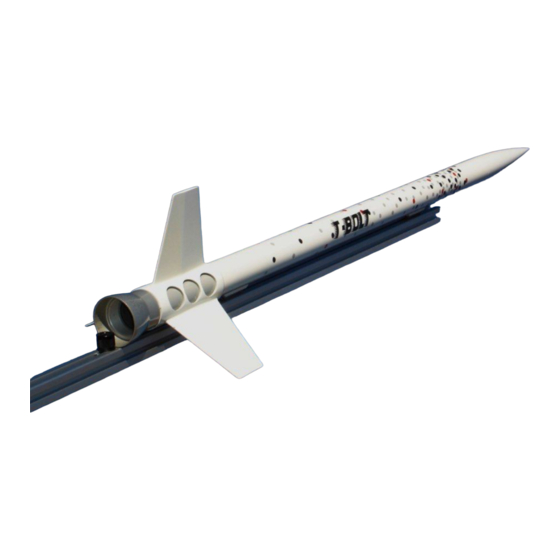
Summary of Contents for Giant Leap Rocketry T-BOLT
- Page 1 INSTRUCTION MANUAL T-BOLT GIANT LEAP ROCKETRY, LLC Copyright 2006 - 2019 Giant Leap Rocketry, LLC 2831 SE Cornelius Pass Road Hillsboro, Oregon 97123...
- Page 2 We recommend that you take your time, learn and enjoy. The T-BOLT series is another in a long line of high quality kits from Giant Leap Rocketry, LLC.
- Page 3 T-BOLT shown with the optional high performance FinCan and optional Nozzle-Shaped Motor Retainer The T-BOLT is a perfect rocket for a level 1 center of pressure (CP) when the rocket is fully launch. The T-BOLT is a 38mm minimum di- loaded and ready for flight! ameter rocket.
- Page 4 secone. As long the design remains the same as Outside Diameter O.D. 1.65” Inside Diameter I.D. 1.36” provided by GLR, the CP won’t change; but, if CP=36.7” aft from GLR Pinnacle Nosecone tip you modify the length of the rocket you will CG should be less than 33”...
-
Page 5: Parts List
sociation and the National Association of Rock- W H E R E E X C E P T AT C E RT I F I E D etry, as well as all local, State and Federal laws. LAUNCHES. By using the product, you agree that Giant IF YOU HAVE ANY QUESTIONS OR ARE Leap Rocketry, LLC, (also in this document UNCLEAR REGARDING THE ASSEM-... - Page 6 One-1.5" GLR Pinnacle Nosecone One- KEVLAR® Parachute Heat Protector Pad One- Eye Bolt For the GLR Pinnacle Nosecone One- 30” Parachute One- 38mm Slimline Retainer Set One- Hard Point shock cord attachment One- Glue stick dowel rod 18" long One- Assembly Instruction One- Swivel STYLE OPTIONS: A Slimline Nozzle retainer (Pictured on Cover)
- Page 7 NOTE: you MUST use high-quality epoxy and JB Weld with this kit. Other types of adhesives are not suitable and will make the rocket unsafe for flight. You may prefer a slower setting ep- oxy (30 min.) if you are a novice builder, as this will allow more time to assemble the rocket.
- Page 8 Slide the GLR FinCan onto the FORWARD end of the airframe, making sure that the AFT end of the GLR FinCan goes on first. words "FORWARD" and "AFT" on the air- frame and GLR FinCan should match direction when the GLR FinCan is in place on the air- frame.
- Page 9 STAND THE PROCEDURE BEFORE AT- of the airframe with the J.B. Weld. Apply the TEMPTING TO COMPLETE IT. J.B. Weld in a ring to the interior of the air- frame. The ring of epoxy should coat the inter- Once the GLR Hard-point Recovery Sys- nal circumference of the airframe from the 16”...
- Page 10 MOVING THE JUST PLACED GLR s y s t e m w h e n HARD-POINT RECOVERY SYSTEM AN- y o u r r o c k e t CHOR. reaches apogee. Slide the GLR I M P O R TA N T: Kevlar®...
- Page 11 14. Grab the swivel and tie a small loop into held with your finger. Side the shroud lines to- gether through the free end of the swivel and open the shroud lines enough to allow the para- chute to slide through and knot down onto the swivel.
- Page 12 Roll up piece of masking tape on the shoulder of the t h e p a r a- GLR Pinnacle Nosecone to snug the fit. If too chute. Then tight sand gently with 240 grit sandpaper. Re- slide up the member, the chute is deployed when HOT protector to- gases from ejection charge expand in the air-...
- Page 13 GLR Rail Guide and the GLR Rail Guide Spac- ers for good adhesion. Mix J.B. Weld and at- tach first the GLR Rail Guide to the GLR Rail Guide Spacer and then attach the GLR Rail Guide Spacer and GLR Rail Guide to the points on the airframe.
- Page 14 Recommendations With fiberglass, lightly sand the rocket with 240-400 grit paper, prime and sand. Paint with a good quality paint like Krylon or an auto engine paint that will withstand the heat created by the friction during flight. hardware store some DAP Plastic Wood.
- Page 15 POWER SAFETY CODE. The complete code can be found in the handbooks of the organiza- Giant Leap Rocketry, LLC (herein referred to tions. 1. Only a person who is a certified flyer as GLR) has exercised reasonable care in the shall operate or fly a high power rocket.
- Page 16 rocket shall determine its stability before flight, exhaust from impinging directly on flammable providing documentation of the location of the materials. 11.3 A launching device shall not be center of pressure and center of gravity of the capable of launching a rocket at an angle more high power rocket to the Safety Monitor, if re- than 20 degrees front vertical.
- Page 17 high power rocket in the opinion of the Safety is more than twenty (20) miles per hour. 16.3 Monitor. 13.2 Do not locate a launcher closer Do not operate a high power rocket in a manner to the edge of the flying field (launch site) than that is hazardous to aircraft.
- Page 18 care in pursuit of my activities at this event. (3) that you must be over 18 years old (for motor purchase and use). GLR cannot be held respon- sible for the failure of participants to abide by safety codes, rules, regulations, etc. By using the products, you agree to abide by these condi- tions.


Need help?
Do you have a question about the T-BOLT and is the answer not in the manual?
Questions and answers