
Related Manuals for Giant Leap Rocketry Talon 4


Summary of Contents for Giant Leap Rocketry Talon 4
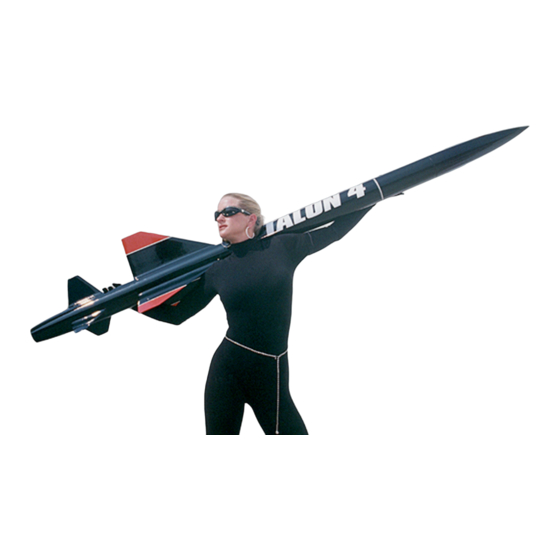
- Page 1 INSTRUCTION MANUAL Talon 4 GIANT LEAP ROCKETRY, LLC Copyright 2006 - 2017 Giant Leap Rocketry, LLC 2831 SW Cornelius Pass Road Hillsboro, Oregon 97123...
- Page 2 We recommend that you take your time, learn and enjoy. The TALON 4 series is another in a long line of high quality kits from Giant Leap Rocketry, LLC.
- Page 3 J and GLR, the CP won’t change; but, if you modify K motors. These will propel the TALON 4 to the length of the rocket you will need to deter- extremely high altitudes.
- Page 4 Specifications By using the product, you agree that Giant Leap Rocketry, LLC, (also in this document noted as GLR) it’s owners or employees will Dry Wt. Mass (no motor load) 198 oz. (Please not be held legally or financially responsible allow for slight variation in weight due to differ- for the correct or incorrect usage of this prod- ence in epoxies and paint thickness).
-
Page 5: Parts List
IS IN YOUR HANDS. 2-98mm Coupler Bulkhead (Pre-Drilled) PARTS LIST: 1- 6.75” X 3.25” Fiberglass Sled 2- 4” X ¼” Plastic Tubes TALON 4 BODY PARTS 2- 1 X ¼” Eye Bolt 1- 98mm Nose Cone 1- 98mm Tailcone -Slotted... - Page 6 2- 10” All-Thread 2- ¼” Lock Nut 6- ¼” Nut 2- ¼” Wing Nut 10- Washers Recovery Mount: 2- 98mm/54mm Centering Ring (Pre-Drilled) 1- ¼” Eye Bolt Optional Parts to Consider: 2- Washers 72” GLR TAC1 Parachute 1- Lock Nut 24”...
- Page 7 1- 1” Spacer Disposable Supplies Needed by the Builder to Assemble This Kit: Test fit the GLR Slimline Motor Retainer on the Aft end of the 54mm motor tube. Be sure that the GLR Slimline Motor Retainer 30 Minute Epoxy or GLR Aeropoxy goes onto the motor tube and seats completely.
- Page 8 at the forward end of the GLR Slimline Motor ing the GLR Slimline Motor Retainer onto the Retainer and then remove the retainer from the motor tube as this will prevent excess J.B. Weld motor tube. from seeping into the snap ring area. MAKE SURE THE GLR SLIMLINE MOTOR RE- Mix some J.B.Weld (and only J.B Weld - TAINER IS SEATED ALL THE WAY ONTO...
- Page 9 mark. Using a piece of paper wrapped around the motor tube, centered on the mark that you made at 2”, draw a line around the motor tube. Place multiple layers of masking tape on the line that was drawn. This will act as a stop when you seat your Forward Centering Ring.
- Page 10 1. Line up the airframe and the tailcone. Each to the Airframe. Fillets can be created using a airframe and tailcone are paired and cut to- variety of materials, Giant Leap Rocketry, LLC gether. You will notice as you put the tailcone recommends using GLR Aeropoxy and GLR and airframe together there is a number or letter Glass-Micro-Spheres.
- Page 11 on each piece. The number or letter should be of the airframe make a mark with a pencil the same. You will also see a large X at the in- where the Centering Rings are. Disassemble terface of the two pieces. This is the position in the motor tube from the tailcone and airframe.
- Page 12 Aeropoxy inside the air- 2. Sand the inside of the slotted airframe and frame in two locations: the the corresponding area of the tailcone. Place luting position of the For- some masking tape on the inside of the GLR ward and Middle Center- Slimline Motor Retainer or stuff it with paper ing Rings.
- Page 13 In addition you can drip some GLR C. Attaching the Fins Aeropoxy through the slot. We at Giant Leap Rocketry believe you are go- 2. Now you are ready to attach the GLR Frack- ing to love this next step. We have innovated a ets to the airframe and fin.
- Page 14 As de- scribed earlier, fillets can be created using a va- riety of materials, Giant Leap Rocketry, LLC on either side of the fin. Remove any excess JB Weld with a solvent and a paper towel and secure the GLR Fracket in place with clamps until fully cured.
- Page 15 Aeropoxy. Add to this mixture GLR Glass- Sand the two internal portions of the bulk- MicroMicro-Spheres until you obtain a thick head sets so that they go into the airframes eas- peanut buttery consistency. The ratio is typi- ily, with absolutely no resistance. They should cally 2 parts GLR Glass-Micro-Spheres to 1 practically fall through the airframe.
- Page 16 5. Apply Aeropoxy to the outer surface of the coupler. Spread the Aeropoxy up to the 4” mark on the coupler. ( It is advisable not to spread the Aeropoxy all the way to the edge of the coupler but leave the ½” to ¼” of the cou- pler free of Aeropoxy.
- Page 17 GLR Aeropoxy is setting. Let it set (upright) Now we will insert before handling it further. Using alcohol and a the bulkhead attached to the paper towel, clean up any excess GLR all-thread through the for- Aeropoxy. Do not leave any extra GLR ward opening in the forward Aeropoxy on the GLR E-Bay or on the Aft airframe.
- Page 18 Attach a ⅛” quick-link to the remaining Kevlar® Sock will reduce the risk of that hap- exposed eyebolt on the GLR E-Bay. pening. Recovery System To install the GLR Kevlar® Sock first pinch open the GLR Kevlar® Sock and push We will begin with the Drogue recovery the forward loop of the GLR Kevlar®...
- Page 19 result of the ejection charge deploying your re- same order as you did with the Aft section. covery system when your rocket reaches apo- Again, begin by sliding the GLR Kevlar® Sock gee. We also provide a second GLR Kevlar® Cord onto the GLR Kevlar®...
- Page 20 the 24” GLR TAC 1 Parachute for your drogue Shock Cord through the open end of the swivel deployment. These parachutes are made to the that is attached to the most stringent standards. They are a high qual- GLR TAC 1 parachute, ity parachute for high-end applications.
- Page 21 all at once, thus reducing the amount of force there needs to be adequate and appropriate spac- that is experienced on the rocket. This makes ing of the parts. The final two photos in this for a smooth, reduced momentum, safer deploy- manual will show how the rocket will look dur- ment of the main parachute.
- Page 22 cord about 3-4" long, then insert into the tube. Leave about 3-4 feet of cord out. 2. Roll up the parachute and place it next to the to tight for the airframe, shake some corn starch GLR Kevlar® Parachute Heat Shield. Then ac- on the “burrito”...
- Page 23 on the GLR Rail Guides lightly securing them to the airframe. The tape will prevent a “droop- ing” of the GLR Rail Guide system as the J.B. Weld sets. Vent Holes in Airframe - - IMPORTANT! a tube, it allows one to mark a straight line on a REMOVE YOUR RECOVERY SYSTEM BE- curved surface.
- Page 24 Initial event or deployment of the drogue parachute. Second event or the deployment of the Main Parachute. No parts will collide with each other depending on the motor chosen, you could send delivery of the shear pins. You will deliver and this rocket up with so much power that the no- retrieve the shear pins with a needle nose plier secone will vibrate loose or deploy when the...
- Page 25 Giant Leap Rocketry, LLC (herein referred to can be found in the handbooks of the organiza- as GLR) has exercised reasonable care in the tions. 1. Only a person who is a certified flyer design and construction of our products and shall operate or fly a high power rocket.
- Page 26 center of pressure and center of gravity of the capable of launching a rocket at an angle more high power rocket to the Safety Monitor, if re- than 20 degrees front vertical. 11.4 Place the quested. 8. Weight and Power Limits. 8.1 En- end of the launch rod or rail above eye level or sure that the rocket weighs less than the rocket cap it to prevent accidental eye injury.
- Page 27 to the edge of the flying field (launch site) than that is hazardous to aircraft. 17. Launch Con- one-half the radius of the minimum launch site trol. 17.1 Launch a high power rocket only dimension stated in Table 1. 13.3 The flying with the immediate knowledge, permission, and field (launch site) shall be at least as large for a attention of the Safety Monitor.
- Page 28 purchase and use). GLR cannot be held respon- sible for the failure of participants to abide by safety codes, rules, regulations, etc. By using the products, you agree to abide by these condi- tions.
Need help?
Do you have a question about the Talon 4 and is the answer not in the manual?
Questions and answers