Advertisement
Quick Links
lightmybricks
User Guides for Light My Bricks LED Lighting Kits for LEGO®
May 23, 2016
23 min read
·
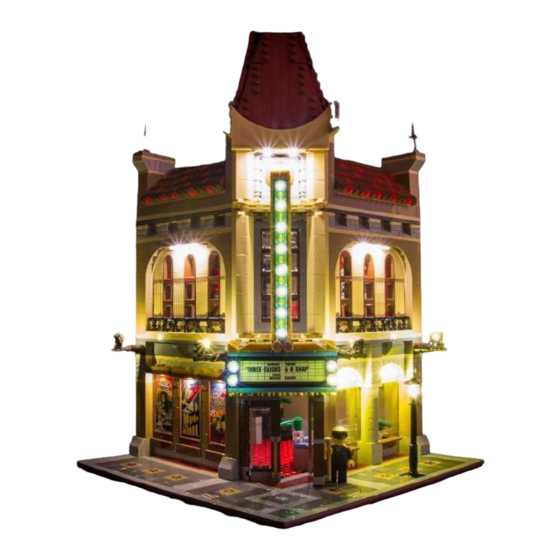
Light My Bricks : Palace Cinema LED
Lighting Kit
Here is the instruction document for the Lego Palace Cinema LED lighting
kit. Please read and follow the steps carefully to ensure this lighting kit is
installed properly.
Package contents:
5x LED Strip Lights
•
15x Standard Bit Lights (warm white)
•
12x Flashing Bit Lights (white)
•
3x 12-Port Expansion boards
•
Lamp Post with LED and cable attached
•
1x Battery Pack (3x AA batteries not included)
•
8x Adhesive squares
•
Connecting Cables
2x 5cm cables
•
3x 15cm cables
•
2x 30cm cables
•
. . .
. . .
Advertisement

Subscribe to Our Youtube Channel
Related Manuals for LIGHT MY BRICKS Palace Cinema


Summary of Contents for LIGHT MY BRICKS Palace Cinema
- Page 1 · Light My Bricks : Palace Cinema LED Lighting Kit Here is the instruction document for the Lego Palace Cinema LED lighting kit. Please read and follow the steps carefully to ensure this lighting kit is installed properly..
- Page 2 Important things to note: Laying cables in between and underneath bricks Cables can fit in between and underneath LEGO® bricks, plates, and tiles providing they are laid correctly between the LEGO® studs. Do NOT forcefully join LEGO® together around cables; instead ensure they are laying comfortably in between each stud.
- Page 3 Connecting cable connectors to Expansion Boards Take extra care when inserting connectors to ports of Expansion Boards. Connectors can be inserted only one way. With the expansion board facing up, look for the soldered “=” symbol on the left side of the port. The connector side with the wires exposed should be facing toward the soldered “=”...
- Page 4 . . . OK, Let’s Begin! . . . Instructions for installing this kit 1.) This lighting kit is installed from the bottom up. Start by removingthe 2nd and top levels of the modular building as well as the “Palace Cinema Marquee”.
- Page 5 2.) To enable us to lay the cable for the lamp post underneath thebrick tiles, remove the following tiles as per below. 3.) Replace the stock lamp post with the Light My Bricks lamp postensuring that the cable is laid in the middle of the 2 studs facing the building.
- Page 6 4.) Gently bend the base plate down and lift the building of theground floor up and thread the cable for the lamp post underneath the building wall. Ensure that the cable is laid in between the Lego studs as pictured below. 5.) Pull the cable up from underneath the wall and then reconnect thebuilding to the base plate.
- Page 7 7.) Disassemble the clear yellow pieces from the grey bricks. 8.) Start installing the lights by taking a standard bit light (nonflashing) and thread the connector end through the top of the first hole of one of the grey bricks. Thread this through and then pull the cable from the bottom of the grey brick all the way until the LED is sitting flat against the top ensuring the LED component part is facing the correct way up.
- Page 8 Ensure LED component is facing the correct way up 9.) Secure these LEDs in place by reconnecting the clear yellow Legopieces over the top of them. Repeat the same process for the other 4 lights in the second lot of ticket window lights.
- Page 9 10.) Reconnect these 2 section of lights in the original positionsensuring that the cables for the lights are laying behind and underneath them and in between Lego studs. 11.) Reconnect the other Lego pieces we removed earlier thatsurround the window frames. 12.) Turn the building toward the back so we can easily access thecabling for these lights.
- Page 10 13.) To prevent all of the cables from hanging everywhere and gettingtangled, (there will be a lot more to install) wind the excess cables from the first group of ticket window lights as well as the lamp post cable around the expansion board. 14.) Group the cables from the second lot of ticket window lightstogether the same way as we did for the first lot and then connect them to remaining ports of Expansion board#1.
- Page 11 16.) We will now move on to installing the 4 building spot lights. Wewill start with the 2 on the ticket window side. Remove them by pulling them out at the following sections. 17.) Disconnect the grey brick from each section of the 2 buildingspotlights then take a standard bit light (non flashing) and stick it to the light section of the building spotlight using one of the provided double sided adhesive squares.
- Page 12 Repeat this process for the second building spotlight. 19.) Connect the 2 building spotlights back to their original positionsensuring that the cables are laying in between Lego studs. 20.) Connect the 2 cables from the building spotlights to the nextavailable ports of Expansion board#1 and then wind the cables around the expansion board.
- Page 13 21.) Take another 12-port expansion board and then connect a 5cmconnecting cable to the first port. Connect the other end of this port into the last port on Expansion Board#1 22.) Secure Expansion board#1 to the top of the first floor using oneof the provided self adhesive squares.
- Page 14 23.) Reconnect the Lego pieces we removed earlier surrounding thebuilding spotlights on the other side of the building. 24.) Before we move onto installing the 2 building spot lights on theother side, we need to install 3 bit lights to the top of the movie posters. Start by removing the following pieces to allow us access.
- Page 15 Repeat this process to the top of the remaining 2 movie posters. 25.) Connect the 3 big light cables to the first available ports of Expansion Board #2 26.) Let’s move on to connect the 2 building spot lights on the otherside. Turn the building around and then remove the following Lego pieces to allow us to then pull out the 2 building spotlights.
- Page 16 27.) Repeat steps 17–19 to connect another 2 standard bit lights tothese 2 building spotlights. Once these 2 remaining spotlights are wired up, connect the left corner spotlight back to its original position ensuring that the cable is laid in between Lego studs. For the other building spotlight, reconnect this back to its original position however this time lay the cable over the grey 2:1 Lego brick.
- Page 17 You can test your light circuit at any time 28.) We will now move on to lighting up the Palace Cinema Marqueestarting from the base. Take the Marquee, turn it to the back...
- Page 18 29.) Remove the following Lego pieces in the below order to allow usto get to the 4 lights in the corners. 30.) Remove the 4 lights and then disassemble them.
- Page 19 31.) Take 1 flashing bit light and then using the connector end of thecable, thread it through the small hole of the black Lego piece. Thread through and then pull it all the way down from underneath the Lego piece so that the LED is sitting flat against black hole. Ensure that the LED component part is facing the correct way up, then secure it down by connecting the clear yellow piece over the top.
- Page 20 Turn the base over and lay the cables underneath the brown 2:1 pieces as per below. Ensure cables are laying in between studs. 33.) We will now begin installing lights to the main section of themarquee. There are 16 lights in total in the main section however, we will only be installing lights to every second light starting from the top down.
- Page 21 34.) We will connect 4 flashing lights to the top half first. Start byremoving the following pieces. 35.) Remove the first clear yellow Lego light piece from the right. Take1 flashing bit light (Flash#1) and place it over the Lego stud ensuring that the LED component is facing the correct way up.
- Page 22 Loop the cable around then lay it in between the blue Lego studs then secure the cable down using 2 gold Lego pieces and the 2:2 Lego plate. 36.) Take the 6:1 blue Lego piece with light pieces we removed earlier.Remove the 2nd light piece from the left and install another flashing bit light (Flash#2).
- Page 23 37.) Connect another flashing bit light (Flash#3) as per below, this time ensuring that the cable just sits underneath the blue Lego piece. Reconnect another 3 gold Lego pieces underneath to secure cabling as it runs up in between this and the blue piece above. Reconnect this section (1:6 Lego brick) back to the Marquee.
- Page 24 38.) Install the top light using another flashing bit light (Flash#4). This time rather than the cable facing up, it will face directly toward the middle of the 2:2 studs below. 39.) Group all 4 cables and lay them flat in between the blue 2:2 Legostuds below.
- Page 25 40.) Pull all 4 cables straight down the back side of the Marquee andthen reconnect the long grey section we removed previously over the top securing the cables down. The long grey section may not connect tightly back in place, note that this is OK as all will be secured more tightly when we reconnect the main section of the marquee to the base.
- Page 26 Thread the cable back up underneath the blue piece and then straight down the marquee in between the blue studs. Secure this down by reconnecting gold pieces over the top of the cable.. 43.) Install another flashing bit light (Flash#6) and thread the cable underneath the blue piece the same way we did for previous flash#5.
- Page 27 45.) Reconnect another gold piece underneath the blue piece andthen install the final flashing bit light (Flash#8), this time rather than securing the cable underneath the gold piece, secure it on top of the gold piece (in between top blue piece and gold piece). Ensure the cable is facing the same way as the others once secured down.
- Page 28 47.) Group the cables from all 12 flashing lights into 4 sections,Flash#1–#4, Left base flash, Right base flash, and Flash#5-#8. Reconnect the entire main section of the Marquee to the base with Flash#1–4 cables in the middle directly underneath the Marquee connectors.
- Page 29 49.) Connect cables from Flash#1–4 to the mini ports of Expansionboard#3 . 50.) Connect cables from Flash#5–8 to Expansion board#3 and thenwind excess cabling for the 2 groups of cables around the expansion board. Ensure that you leave around 5–6 cm for slack. 51.) Take the light cables from Left Base Flash and connect these 2 cables in the remaining ports on the expansion board.
- Page 30 52.) Now reattach the entire Marquee back to the building ensuringthe expansion board and cables are pulled over to the inside of the building. Group cables from Right flash and pull them to the side as we will connect them to Expansion board#2. Group the 2wires from Right flash and then connect them into Expansion Board#2, then wind the cables around the board to eliminate excess cable.
- Page 31 secure all expansion cables down using self adhesive squares. 54.) You can secure all the cables down by laying them down inbetween and underneath the grey Lego tiles on the top of this level. Now turn on the battery pack to test the lighting for the Marquee we just installed.
- Page 32 55.) Take the entire second floor and turn it on its side, thenconnect/stick a strip light (striplight#1) to the following position. Then attach a 30cm cable to the top port of striplight#1. Connect this to the rest of the circuit by connecting the 15cm cable from Expansion board#3 to the bottom port of striplight#1.
- Page 33 Reconnect the 2nd floor on top of the 1st floor in the original position and then pull up the 30cm cable from underneath. 57.) We will now install the arch window lights at the top front of the2nd floor . We will start with the left side of the building. Remove the fellowing parts for us to get to the top of the arch windows.
- Page 34 Remove the brown Lego 2:6 plate. We will install a light underneath. 58.) Flip the brown Lego plate over and then take a LED strip light(striplight#2) and connect/stick it in the following position underneath the Lego plate. Then connect the 30cm cable from the lower level to the left port and attach a 15cm cable to the right port.
- Page 35 59.) Reconnect the Lego plate to the building ensuring that the 2 attached cables are threaded through and secured underneath this Lego plate. 60.) Secure the 30cm cable underneath grey bricks as shown belowand then use tape to stick the cable to the wall. This is to also prevent it from being obvious from the outside looking in through the windows.
- Page 36 63.) Reconnect the Lego plate with strip light installed back to thebuilding ensuring that the cables are laid underneath and in between studs. Now reconnect all the Lego pieces we removed earlier which surround the top of the arch windows. 64.) Take the entire top section and turn it on its side.
- Page 37 66.) Connect the entire upper level back on top of the 2nd level andthen pull the 30cm cable up from the door way on the roof. 67.) We are now going to install a strip light at the very top of themiddle section.
- Page 38 68.) Take the final strip light (striplight#5) and stick it (sticking is the only option for this strip light) to the bottom of the middle section we just removed. 69.) Connect the 30cm cable that we pulled up from the doorway tothe left port and then place the battery pack and connect the battery cable to the right port.
- Page 39 71.) Secure the 30cm cable using the grey lego tiles just above thedoorway. This now finally completes the lighting kit circuit. Your LED lighting kit is now ready to be turned on. Turn ON the battery pack, turn off the lights in the room and Enjoy!
Need help?
Do you have a question about the Palace Cinema and is the answer not in the manual?
Questions and answers