Simply Automated SimplySmart Series Getting Started
Tabletop scene controller with 4- or 8-buttons
Hide thumbs
Also See for SimplySmart Series:
- Getting started (10 pages) ,
- Getting started (7 pages) ,
- Getting started (8 pages)
Advertisement
Table of Contents
- 1 Important Safety Instructions
- 2 Section 1: very Important Pre-Installation Notes
- 3 Section 3.A. Adding a Device to a Scene Button
- 4 Section 3.B. Deleting a Device from a Scene Button
- 5 Section 3.C. Adding or Editing Multiple Devices at the same Time
- 6 Section 5: in Case of a Problem
- 7 Section 6: Simply Automated Custom Expansion Series
- Download this manual
Getting Started
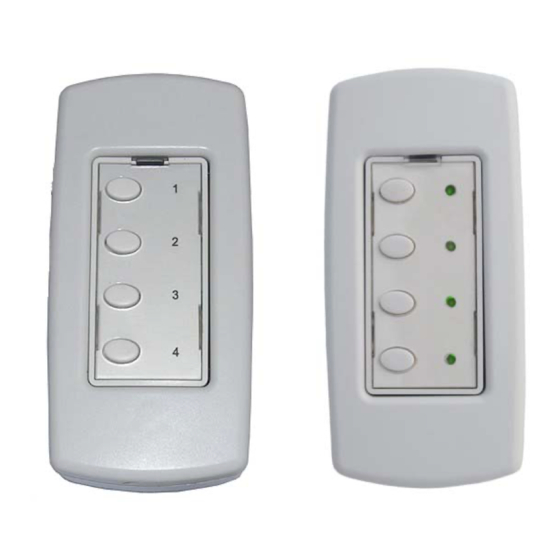
Tabletop Scene Controller
with 4- or 8-Buttons
Model US2TP11
Model USQT22
Model US28OTP23
TM
Simply Automated Pre-Configured SimplySmart
Series
TM
Utilizes SimplySmart
technology to make installation a breeze.
No computer programming required!
Simple-n-easy, ready to use lighting control.
Advertisement
Table of Contents

Subscribe to Our Youtube Channel
Related Manuals for Simply Automated SimplySmart Series


Summary of Contents for Simply Automated SimplySmart Series
- Page 1 Getting Started Tabletop Scene Controller with 4- or 8-Buttons Model US2TP11 Model USQT22 Model US28OTP23 Simply Automated Pre-Configured SimplySmart Series Utilizes SimplySmart technology to make installation a breeze. No computer programming required! Simple-n-easy, ready to use lighting control.
- Page 2 Getting Started Tabletop Scene Controllers with 4- or 8-Buttons For Models US2TP11, USQT22 & US28OTP23 Simply Automated Pre-Configured SimplySmart Series Utilizes SimplySmart technology to make installation a breeze. No computer programming required! Simple-n-easy, ready to use lighting control. IMPORTANT SAFETY INSTRUCTIONS When using electrical products, basic safety precautions should always be followed, including the following: READ AND FOLLOW ALL SAFETY INSTRUCTIONS.
- Page 3 To exit the program mode, quickly tap the rocker or program switch two times. Simply Automated, Incorporated 6108 Avenida Encinas, Suite B, Carlsbad, CA 92011 USA Technical Support: www.simply-automated.com...
- Page 4 (for 5 minutes or until programmed) to confirm the device is in the program mode. Simply Automated, Incorporated 6108 Avenida Encinas, Suite B, Carlsbad, CA 92011 USA Technical Support: www.simply-automated.com...
- Page 5 Button 4 is programmed from the factory to turn OFF all devices. These buttons can be edited using the procedures for buttons 1 and 2: add a device Section 3.a, delete a device Section 3.b, adjusting dimming levels Section 3.c. Simply Automated, Incorporated 6108 Avenida Encinas, Suite B, Carlsbad, CA 92011 USA Technical Support: www.simply-automated.com...
- Page 6 All the pre-configured kits and accessories can be edited and added to scenes as previously described – only limitation being not more than one of each model number or kit number per installation. One touch button convenience to turn ON/OFF up to ten or more Simply Automated devices – custom scenes you create!
- Page 7 Accessories (E.g. UML7, UMA25, US1W9, US2W12, etc...), the number digits at the end of the model number indicate the device ID#. For example the accessories listed above have device ID#s 7, 25, 9, and 12, respectively. Simply Automated, Incorporated 6108 Avenida Encinas, Suite B, Carlsbad, CA 92011 USA Technical Support: www.simply-automated.com...
- Page 8 Network ID #: The default Network ID # setting for the Pre-Configured Series is 250. This information is needed when using the Scheduler-Timer. Section 6: Simply Automated Custom Expansion Series Powerful Custom Expansion Capability – up to 250 devices – using your PC and UPStart software! Devices include single rocker dimmers, deluxe dimmers with different faceplates (up to 8 buttons), lamp or appliance modules, tabletop pedestal with 8 buttons, wall receptacle, fixture relay, fixture dimmer or scheduler-timer.
Need help?
Do you have a question about the SimplySmart Series and is the answer not in the manual?
Questions and answers