
Subscribe to Our Youtube Channel
Related Manuals for zapco DSP-IV Series


Summary of Contents for zapco DSP-IV Series
- Page 1 DSP-IV SERIES Quick Guide Before operating the unit, please read this manual throughly and retain it for future reference. The complete GUI user’s manual is available on zapco.com/download...
-
Page 2: Table Of Contents
The GUI does not require installation, simply download the .exe file and put it on your desktop or in a folder. We recommend that you create a folder "Zapco DSP-AT", where you can store the GUI file and also save you tuning presets. -
Page 3: The New Zapco Dsp-Iv Series
Zapco DSP-6 and the Zapco Digital Processing Network. This was the first full function DSP for the car and included a full line of amplifiers with full function digital processing build right in. In 2016 we brought out our fourth generation of processing in the Zapco MISSION STATEMENT DSP-Z8 IV. -
Page 4: Before You Start Your Installation
• Because CCA wire can not conduct DC electrical current like copper wire can, your amp ZAPCO highly recommends that a fuse or circuit breaker be placed within 18" of the will not get the current it needs to produce its rated power. That means you get less battery. -
Page 5: Wire Size
12-volt current: Battery power works only if it travels in a complete circuit from the battery Mounting your Zapco amplifier is easy. Just keep in mind a few guidelines: positive terminal to the battery negative terminal. Main power input, of course, is attached •... -
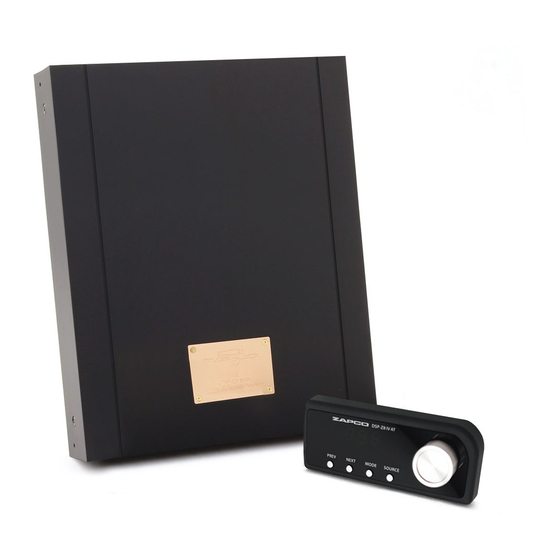
Page 6: Dsp-Z8 Iv At Panels
DSP-Z8 IV AT Panels DSP-Z16 IV Panels DSP-Z8IV AT 1. Comm Port for HD-BT module 8. Microphone Input for Auto-Tuning 1. Coaxial digital input 8. Speaker level input plug for OEM hookup 2. Coaxial digital input 9. Dash remote port 2. -
Page 7: Adsp-Z8 Iv-6At Panels
ADSP-Z8 IV-6AT Panels ADSP-Z12 IV-10A Panels 1. Power-On LED 8. Coaxial digital input 1. Coaxial digital input 9. Power LED 2. Auto-on switch for OEM integration 9. 8-Channel RCA inputs 2. Speaker level input plug for OEM 10. USB connector for PC control 3. -
Page 8: Adsp-Z16 Iv-12A Panels
ADSP-Z16 IV-12A Panels Remote Control 1. Switch to the previous song (Bluetooth) 5. Volume knob. Long press for 5 seconds 2. Switch to the next song (Bluetooth) enter the switching mode between main 3. Mode switching volume or subwoofer. Short press the mute 1. -
Page 9: The Graphical User Interface
The Graphical User Interface (GUI) DSP Technical Specifications The new Zapco Series IV AT GUI gives you all the great sound and functionality of the DSP-Z8 IV AT DSP-Z16 IV Series IV II and it adds Coaxial digital input as well as Optical digital and Bluetooth streaming. - Page 10 Max 515 cm, Step 0.68 cm Max 515 cm, Step 0.68 cm may cause permanent hearing loss. Polarity 0-180° Polarity 0-180° Polarity 0-180° ZAPCO strongly advises that you use common sense when setting Mute/Solo Yes, each channel Yes, each channel Mute/Solo Yes, each channel volume levels.
- Page 11 Modesto, California USA Since 1974 zapco.com...
Need help?
Do you have a question about the DSP-IV Series and is the answer not in the manual?
Questions and answers